As I sit here surrounded by balls of yarn and half-finished projects, I’m reminded of the joy that comes with creating something warm and beautiful from scratch. I’ve lost count of how many times I’ve been asked to share a simple cable knit hat pattern, and I’m excited to finally do so. There’s a common myth that cable knitting is complicated and only suited for experienced knitters, but I’m here to tell you that it’s actually quite accessible, even for those just starting out. With the right guidance, you can create a stunning cable knit hat that’s perfect for any occasion.
In this article, I’ll walk you through the process of creating a simple cable knit hat pattern that’s both relaxing and rewarding. You’ll learn how to choose the right yarn, cast on with confidence, and master the basic cable stitch. I’ll share my own tips and tricks for avoiding common mistakes and ensuring a professional finish. By the end of this guide, you’ll be equipped with the knowledge and skills to create a beautiful, cozy hat that you’ll treasure for years to come. So, grab your knitting needles and let’s get started on this creative journey together!
Table of Contents
Guide Overview: What You'll Need
Total Time: 2 hours 30 minutes
Estimated Cost: $10 – $20
Difficulty Level: Easy
Tools Required
- US size 8 knitting needles (or size of your choice)
- Scissors (for cutting yarn)
- Tapestry needle (for weaving in ends)
- Measuring tape (for measuring your head circumference in inches)
Supplies & Materials
- Worsted weight yarn (approx 100-150 yards)
- Stitch markers (optional, but recommended for beginners)
Step-by-Step Instructions
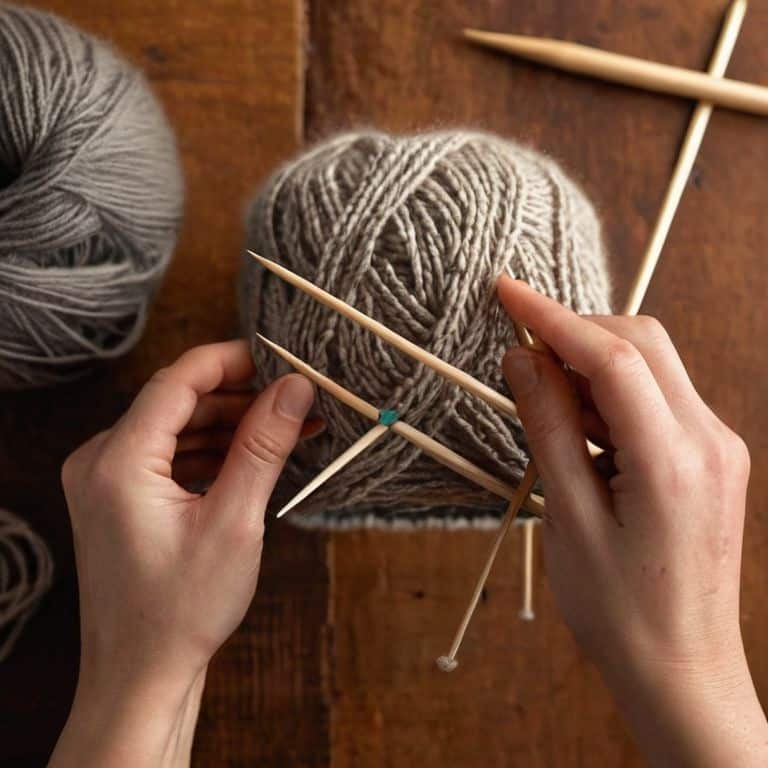
- 1. To begin, let’s start with the basics: casting on. For this simple cable knit hat pattern, you’ll want to cast on 88 stitches. I like to use the long-tail cast-on method, as it creates a neat and tidy edge that will be the foundation of our hat. Make sure to leave a long tail of yarn, about 3-4 times the width of your cast-on stitches, to ensure you have enough yarn to complete the cast-on process.
- 2. Next, we’ll move on to the _ribbing section_ of our hat. Knit 2, purl 2, repeating this pattern until your work measures about 2 inches from the cast-on edge. This ribbing will provide a comfortable fit and a bit of stretch to our hat. As you work, take your time and enjoy the rhythmic clickety-clack of your needles – it’s a great way to unwind and get into a _meditative state_.
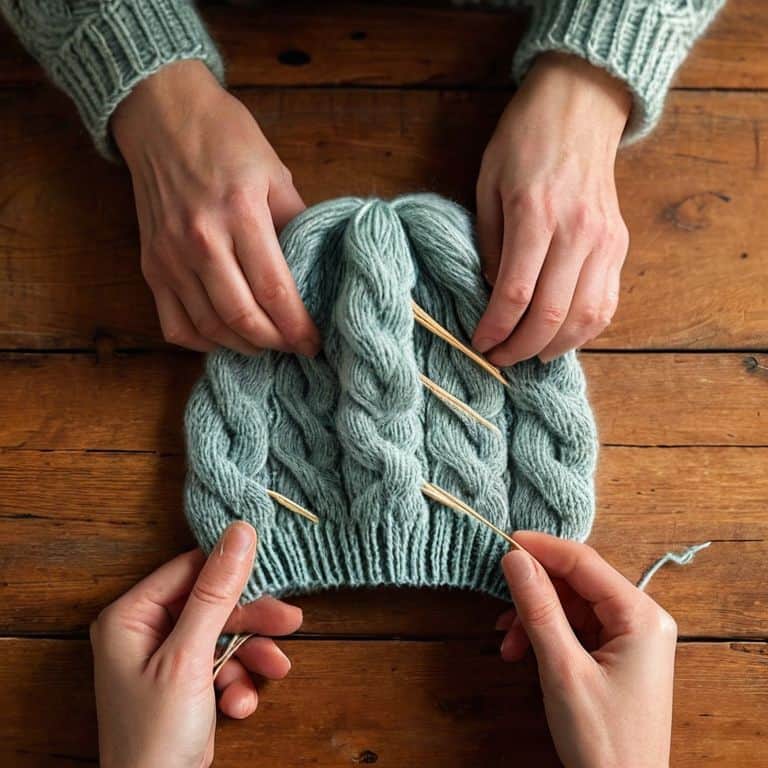
- 3. Now, let’s introduce the cable pattern. To do this, you’ll need to set up your stitches for the cable repeat. Knit 6 stitches, then purl 2, and repeat this pattern until the end of the row. This will create the foundation for our cables, which will add a touch of visual interest to our hat. Don’t worry if it seems a bit fiddly at first – with practice, you’ll get the hang of it!
- 4. To work the cables, you’ll need to use a cable needle. If you’re new to cabling, don’t worry – it’s easier than you think! Simply slip the specified stitches onto the cable needle, hold it in front or back of your work as indicated, and then knit the stitches off the needle. For this pattern, you’ll be working a _4-stitch cable_, which involves slipping 2 stitches onto the cable needle and holding it in front of your work.
- 5. As you continue working the cable pattern, be sure to keep track of your rows. You’ll want to repeat the cable repeat until your work measures about 9 inches from the cast-on edge. Don’t worry if your hat starts to take shape a bit slowly – the cables will begin to pop out as you work, and it’s a truly magical process.
- 6. Once you’ve completed the cable section, it’s time to start _shaping the crown_ of our hat. To do this, you’ll need to decrease stitches in a specific pattern. Knit 2 together, then purl 2 together, repeating this pattern until the end of the row. This will help create a smooth, rounded shape that will fit comfortably on your head.
- 7. Finally, to finish our hat, we’ll need to bind off. I like to use the basic bind-off method, as it creates a neat and tidy edge that will complement our cast-on edge nicely. Make sure to bind off in pattern, knitting the knit stitches and purling the purl stitches as you go. And that’s it – you’ve completed your simple cable knit hat! Take a step back, admire your handiwork, and enjoy the feeling of wearing something _beautifully handmade_.
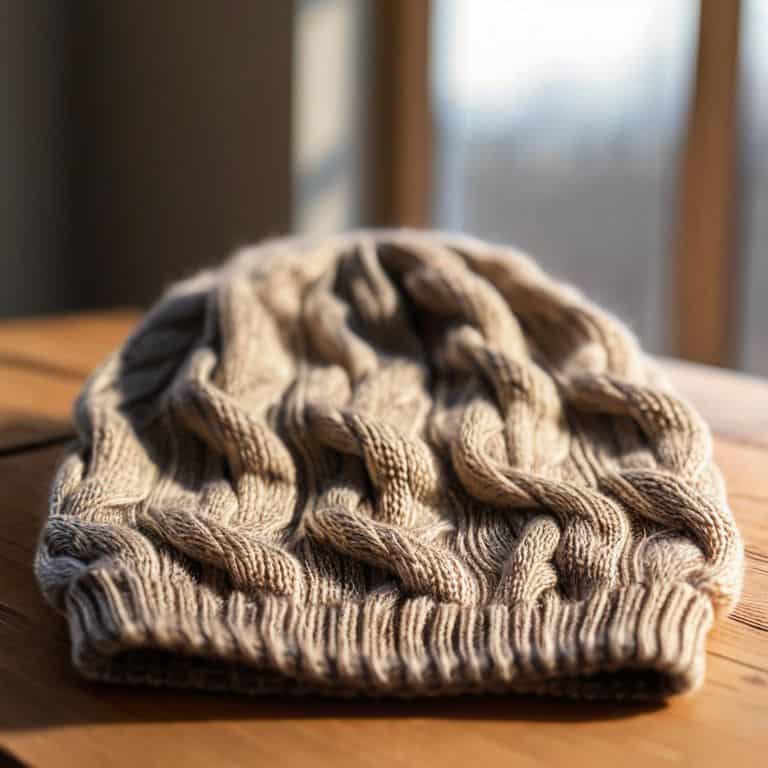
Simplistic Cable Knit Charm

As I sit here surrounded by balls of yarn and half-finished projects, I’m reminded of the quiet joy that comes with knitting. There’s something special about creating a warm and cozy hat, like the one we’ve been working on, using cable knitting for beginners techniques. The rhythmic clickety-clack of the needles, the soft whisper of the yarn as it flows through your fingers… it’s almost meditative.
When working with chunky yarn, it’s essential to keep your tension even to ensure a comfortable fit. Knitting cables with chunky yarn can be a bit tricky, but with practice, you’ll get the hang of it. To achieve a relaxed, slouchy look, try using a slightly larger needle size than recommended. This will give your hat a beautiful drape and a soft, airy texture that’s perfect for everyday wear.
For those looking for more inspiration, I recommend exploring easy aran hat patterns that incorporate cables and textures. These patterns are perfect for beginners and can help you build confidence in your knitting skills. With a little patience and practice, you’ll be creating beautiful, cozy hats in no time. And don’t forget to check out some free cable knit hat patterns online for more ideas and inspiration to keep your needles clicking.
Cable Knitting for Beginners Delight
As we delve into the world of cable knitting, I want to reassure you that it’s perfectly accessible to beginners. The charm of cable knitting lies in its simplicity, and with a few basic techniques, you can create stunning textures and patterns. I adore how cable knitting adds a touch of elegance to any garment, and it’s amazing how a simple cable can elevate a hat from ordinary to extraordinary.
For those new to cable knitting, don’t worry if it takes a little practice to get the hang of it – it’s all part of the journey. Remember, the key is to take your time and enjoy the process. With each stitch, you’ll become more comfortable, and before you know it, you’ll be hooked on the rhythmic flow of cable knitting.
Easy Aran Hat Patterns to Treasure
As I sit here, surrounded by balls of soft, natural yarn, I’m reminded of the timeless beauty of Aran knitting. There’s something special about creating a hat that not only keeps you warm but also tells a story of tradition and heritage. Easy Aran hat patterns are a treasure to behold, with their intricate cables and textured stitches that seem to dance across the fabric. Whether you’re a beginner or an experienced knitter, these patterns offer a sense of accomplishment and joy that’s hard to find elsewhere.
I adore how Aran hats can be both rustic and refined, making them perfect for everyday wear or as a special gift for a loved one. The subtle nuances of the cables and the softness of the yarn come together to create a truly unique piece that’s full of character. With each stitch, you’ll feel a sense of calm and connection to the knitting community that’s hard to replicate with other crafts.
Weaving Wisdom: 5 Essential Tips for a Simple Cable Knit Hat Pattern
- Choose the right yarn: Select a yarn that’s soft, breathable, and has a gentle texture to ensure your cable knit hat is cozy and comfortable to wear
- Swatch, swatch, swatch: Always swatch your yarn before starting your project to ensure you’re getting the right tension and stitch count for a professional finish
- Keep it relaxed: Don’t pull the yarn too tightly when crossing cables, as this can cause the fabric to pucker and lose its soft, relaxed texture
- Use the right needles: Invest in a good pair of circular needles or double-pointed needles to make knitting in the round a breeze and to prevent ladders or gaps in your fabric
- Practice makes perfect: Don’t be discouraged if your first attempts at cable knitting don’t turn out perfectly – with practice, you’ll develop the muscle memory and confidence to tackle even the most complex cable patterns with ease
Cozy Cable Knit Essentials to Remember
Cable knit patterns are perfect for creating cozy, textured accessories that exude a sense of warmth and comfort, making them ideal for beginners and experienced knitters alike
The key to mastering a simple cable knit hat pattern lies in understanding the subtle dance of knit and purl stitches, and how they intertwine to form the beautiful, twisted cables that give these hats their charm
Whether you’re looking to create a quick gift or a personal treasure, cable knit hats offer a world of creative possibilities, from rustic, earthy tones to vibrant, poppy colors, allowing your personality to shine through in every stitch
The Gentle Wisdom of Cable Knit
A simple cable knit hat pattern is more than just a design – it’s an invitation to slow down, to breathe, and to wrap yourself in the quiet magic of creation, one stitch at a time.
Clara Meadows
Wrapping Up with Warmth and Joy
As we come to the end of this journey with our simple cable knit hat pattern, let’s take a moment to reflect on the key takeaways. We’ve explored the world of cable knitting, from the basic steps to create a beautiful, textured fabric, to the charm of simplistic designs that evoke a sense of coziness and warmth. The cable knitting for beginners section was designed to be approachable and encouraging, helping you build confidence in your knitting skills. Whether you’re a seasoned knitter or just starting out, the joy of creating something with your own hands is undeniable, and the sense of accomplishment that comes with completing a project like this simple cable knit hat is truly rewarding.
As you cast off your last stitch and weave in the ends of your new hat, remember that knitting is a journey, not a destination. It’s about the process, the mindful moments you spend with yarn and needles, and the love that goes into every stitch. So, don’t be afraid to experiment, to try new things, and to make mistakes – they’re all part of the journey. And when you’re done, wrap yourself in the warmth and joy of your handmade creation, knowing that you’ve crafted something truly special, with your own two hands.
Frequently Asked Questions
What type of yarn is best suited for a simple cable knit hat pattern?
For a simple cable knit hat, I recommend a soft, worsted-spun yarn with a bit of texture, like a merino wool or a wool-blend. The subtle stitch definition will allow the cables to shine, and the warmth will make it a joy to wear. I just adore working with yarns that have a touch of natural fiber, don’t you?
How do I ensure that my cables are even and symmetrical in the finished hat?
To achieve even and symmetrical cables, I recommend counting your stitches carefully before and after each cable cross, and using a cable needle to hold those precious stitches in place. This will help you maintain a balanced, mirror-image effect in your finished hat, giving it a polished, professional look.
Can I modify the pattern to add a pom-pom or other embellishment to the top of the hat?
Absolutely, my friend! Adding a pom-pom or embellishment is a lovely way to personalize your hat. Simply complete the hat as instructed, then use a yarn needle to securely attach your chosen decoration to the top. You can also experiment with different sizes and colors to match your unique style.