As I sit at my loom, surrounded by spools of vibrant yarn and the soft glow of natural light, I’m reminded of the common misconception that a guide to weaving with roving is only for seasoned textile artists. But the truth is, weaving with roving is an accessible and expressive medium that can be mastered by anyone willing to learn. I’ve seen it time and time again – students who have never held a spindle or touched a loom, creating stunning pieces that rival those of seasoned professionals. It’s all about understanding the nuances of texture and form, and I’m excited to share my knowledge with you.
In this article, I’ll take you on a journey through the world of weaving with roving, sharing my favorite tips and tricks for coaxing beautiful textures and patterns out of this amazing material. You’ll learn how to prepare your roving, choose the right yarns, and weave stunning pieces that reflect your unique style and vision. Whether you’re a seasoned artist or a curious beginner, my goal is to provide you with practical, no-hype advice that will help you unlock the full potential of weaving with roving. So, let’s get started on this creative adventure, and discover the joy of building something with your own two hands, one thread at a time.
Table of Contents
Guide Overview: What You'll Need
Total Time: 2 hours 30 minutes
Estimated Cost: $50 – $100
Difficulty Level: Intermediate
Tools Required
- Rigid Heddle Loom (or a simple frame loom)
- Fork or a Pick-Up Stick (for separating and smoothing the roving)
- Scissors (dedicated for cutting the roving)
- Measuring Tape (for measuring the warp and weft)
- Yarn Needle (for weaving in ends)
Supplies & Materials
- Roving (in various colors and fibers)
- Warp Yarn (in a coordinating color)
- Weaving Needle (for weaving the roving)
- Shuttle or Pick-Up Stick (for passing the weft yarn)
- Tape (for securing the warp ends)
Step-by-Step Instructions
- 1. To begin our journey with roving, let’s start by preparing our workspace. This involves clearing a large, flat area where we can lay out our materials and work on our project without any distractions or interruptions. I like to think of this step as building the foundation of our weaving process, where every detail counts.
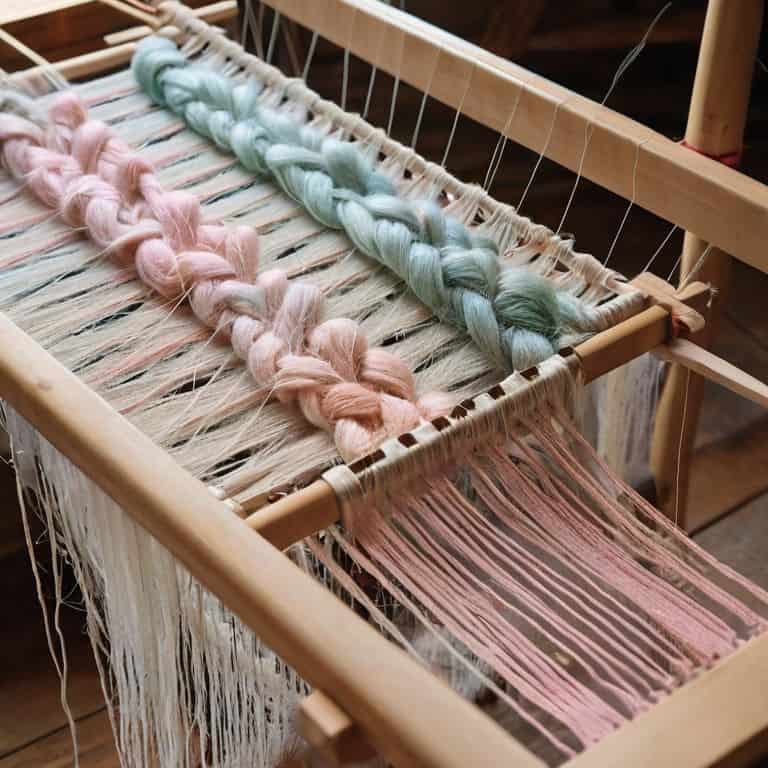
- 2. Next, we need to select our roving, choosing the colors and textures that resonate with our creative vision. I’m particularly fond of working with natural fibers like wool or alpaca, as they bring a unique character to our woven pieces. When selecting roving, consider the interplay of colors and how they will interact with each other to create the desired effect.
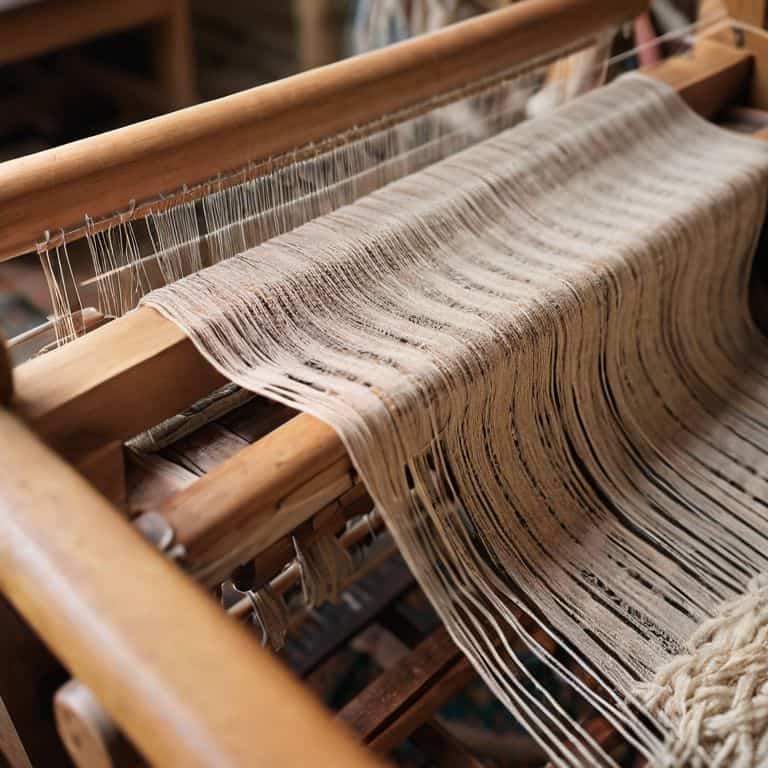
- 3. Now, let’s move on to setting up our loom. As someone who comes from an architectural background, I appreciate the importance of structural integrity in our weaving process. Ensure that your loom is securely assembled and that all parts are properly aligned to avoid any issues during the weaving process.
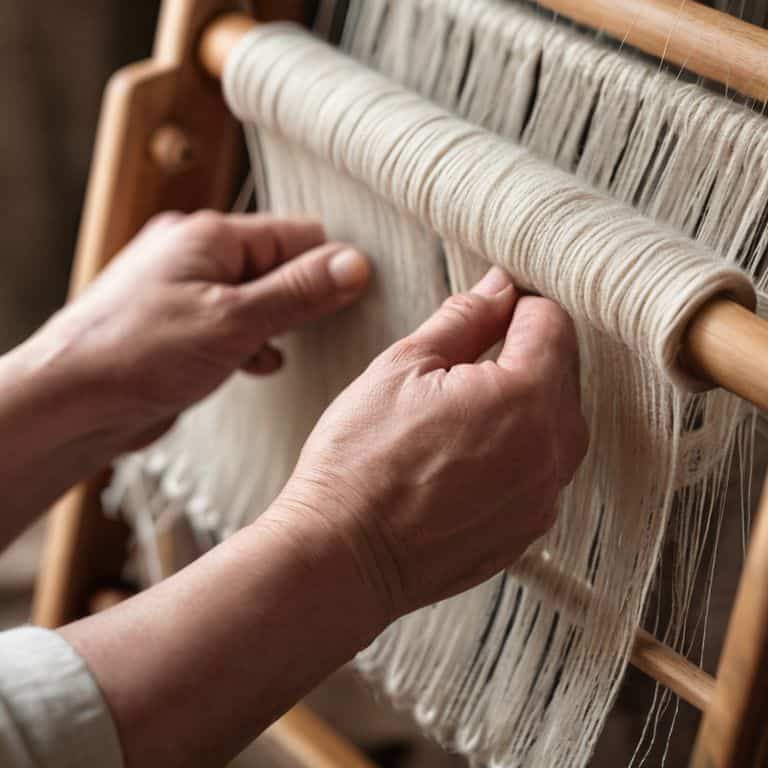
- 4. With our loom ready, it’s time to create a warp. This involves stretching and securing the warp threads, which will serve as the foundation for our weaving. I find that using a consistent tension is crucial here, as it will affect the overall texture and appearance of our finished piece.
- 5. Once our warp is in place, we can start threading the roving through the loom. This is where the magic happens, and our project begins to take shape. Remember to work in small sections, gently pulling the roving to maintain an even tension and prevent any tangles or knots.
- 6. As we start weaving with the roving, it’s essential to listen to the material, allowing its natural texture and character to guide our creative process. Don’t be afraid to experiment and try out different patterns and techniques – this is where the true artistry of weaving comes alive.
- 7. To add an extra layer of depth and visual interest to our piece, let’s incorporate some texture by introducing different yarn weights, colors, or materials. This could involve mixing in some chunky yarns or adding a few strands of metallic thread to create a unique, eye-catching effect.
- 8. As we near the end of our project, it’s time to secure the final threads and trim any excess yarn. This is a crucial step, as it will determine the overall stability and durability of our woven piece. Take your time, and make sure everything is properly secured before moving on to the final stage.
- 9. Finally, let’s finish and inspect our work, taking a step back to admire the fruits of our labor. I love this moment, as it’s a chance to appreciate the intricate details and textures that we’ve created, thread by thread. Take pride in your work, and don’t hesitate to make any adjustments or tweaks to perfect your masterpiece.
A Guide to Weaving With Roving
As I delve deeper into the world of weaving with roving, I’ve come to appreciate the unique roving yarn properties that make it an ideal material for creating textured, dimensional pieces. One of my favorite things to experiment with is merino wool blends for weaving, which offer a beautiful balance of softness and durability. When working with these blends, I love to play with different weaving patterns for beginners, using simple yet effective techniques to create intricate designs.
When it comes to adding color to my woven pieces, I’m a big fan of natural dyes for wool roving. There’s something special about using plants and other organic materials to create a range of earthy, muted tones that add depth and character to my work. I’ve also been exploring different textile art wall hanging ideas, from geometric patterns to more free-form, expressive designs. The key is to have fun and experiment with different techniques and materials to find what works best for you.
For those looking to try their hand at weaving with thicker yarns, I recommend checking out some hand weaving techniques for thick yarns. These can be a bit more challenging to work with, but the end result is well worth the extra effort. With a little practice and patience, you can create stunning, chunky pieces that add a touch of warmth and texture to any room. Whether you’re a seasoned weaver or just starting out, I encourage you to explore the possibilities of weaving with roving and see where this versatile material takes you.
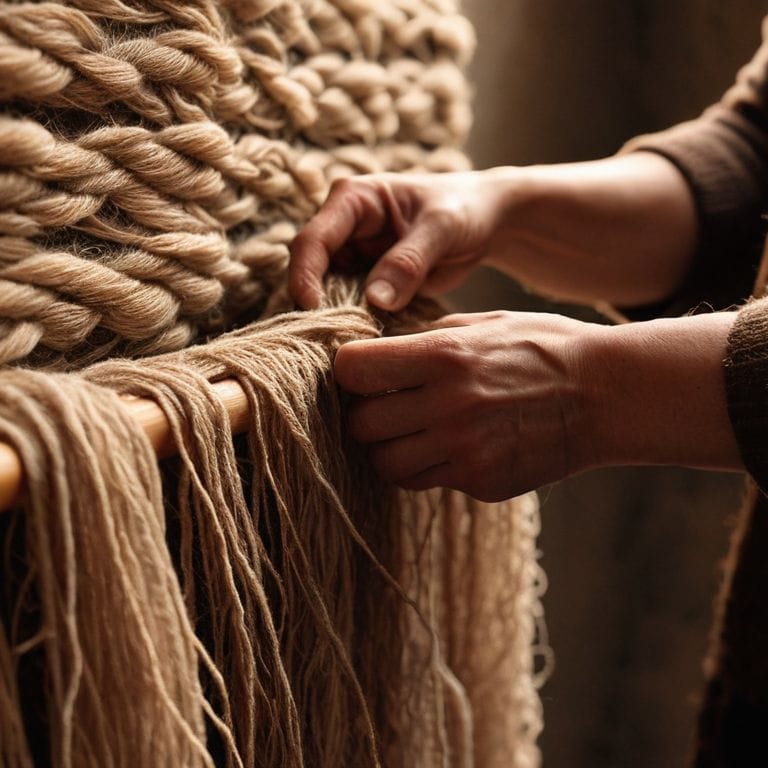
Hand Weaving Techniques for Thick Roving Yarns
When working with thick roving yarns, I find that hand weaving techniques offer a world of expressive possibilities. By manipulating the yarn with my fingers, I can create intricate textures and patterns that would be impossible to achieve with thinner yarns. One of my favorite techniques is to use a simple pick-up stick to lift and separate the warp threads, allowing me to weave in chunky, irregular patterns.
As I weave, I love to experiment with different tensions and yarn orientations, coaxing out unique visual effects and tactile sensations. The thick roving yarns seem to come alive in my hands, inviting me to play and explore their full creative potential. By embracing the organic, handmade quality of these yarns, I can create truly one-of-a-kind pieces that showcase the beauty of imperfection and human touch.
Unraveling Roving Yarn Properties for Texture
As I delve into the world of roving, I’m constantly fascinated by the unique properties of this yarn. Its ability to create complex textures and forms is unparalleled, and it’s all due to its distinctive fiber structure. When working with roving, I consider factors like fiber length, crimp, and density to predict how it will behave on the loom. This knowledge allows me to coax out the desired texture, whether it’s a soft, airy fabric or a dense, sculptural piece.
By understanding the inherent properties of roving, I can manipulate its texture to achieve the desired effect. I experiment with different weaving techniques, such as twill or plain weave, to bring out the unique characteristics of the yarn. This harmonious balance of fiber and technique is what I find most captivating about working with roving – it’s a true marriage of material and method.
Weaving Wisdom: 5 Essential Tips for Working with Roving
- Embrace the organic nature of roving by allowing for subtle inconsistencies in your weave, as these imperfections often add character to your final piece
- Experiment with different loom tensions to achieve a range of textures, from loose and airy to tight and dense
- Select roving yarns in complementary colors to create visually striking patterns and depth in your woven work
- Combine roving with other yarns or materials, like linen or wire, to introduce new textures and dimensions to your art
- Don’t be afraid to cut and rework sections of your weaving as you go – it’s all part of the process of building and refining your unique textile landscape
Key Takeaways for Weaving with Roving
Embracing the unique texture of roving yarn is crucial for creating visually striking woven pieces, as it allows for the formation of intricate patterns and depth
Mastering hand weaving techniques specifically tailored for thick roving yarns can elevate your weaving practice, enabling you to craft robust and expressive textiles
Experimenting with different colors, yarn weights, and weaving patterns can help unlock the full creative potential of roving, leading to innovative and captivating large-scale woven art installations
Weaving Wisdom
As I see it, weaving with roving is not just about threading yarn through a loom, but about crafting a tactile experience that invites the viewer to touch, to feel, and to explore the intricate dance of texture and form.
Ethan Thorne
Weaving a Legacy with Roving
As we conclude this journey through the world of weaving with roving, it’s essential to reflect on the key takeaways. We’ve explored the unique properties of roving yarns, from their textured fibers to their versatility in creating complex patterns. By mastering hand weaving techniques, such as the simple yet effective plain weave, you’ve gained the foundation to experiment with thicker roving yarns and push the boundaries of what’s possible in your woven art. Whether you’re a seasoned weaver or just starting out, remember that the true beauty of weaving lies in its expressive freedom.
As you embark on your next weaving project, remember that every thread, every yarn, and every weave is an opportunity to build something truly unique. Don’t be afraid to experiment, to try new things, and to push the limits of what you thought was possible. Weaving with roving is not just about creating a piece of fabric; it’s about crafting a story, one thread at a time. So, go ahead, get creative, and let the texture and form of your woven art inspire others to do the same.
Frequently Asked Questions
What are the best types of roving yarns for beginners to work with?
For beginners, I recommend starting with soft, medium-weight roving yarns like merino wool or alpaca. These fibers are forgiving and easy to work with, allowing you to focus on developing your weaving skills. Their gentle texture also produces beautiful, subtle patterns that will inspire you to keep creating.
How do I prevent fraying and fuzzing when working with thick roving yarns?
To tame the fray, I swear by a gentle hand and a few trusted tricks. For thick roving yarns, try using a small amount of beeswax or natural fiber conditioner to calm the fibers. You can also experiment with a loose twist or a soft felting technique to minimize fuzzing and fraying, allowing the texture to shine through.
Can I use a simple loom or do I need a specialized one for weaving with roving?
When it comes to weaving with roving, I recommend using a simple rigid heddle loom or a basic frame loom. These types of looms allow for a more organic, textured weave, which is perfect for showcasing the unique characteristics of roving yarns. You don’t need a specialized loom, just one that can handle the thickness and versatility of the roving fibers.