As I sit amidst my loom and threads, I often think about the common misconception that adding fringe to a woven wall hanging is a daunting task. Many believe it requires a level of finesse that only experienced weavers possess, but I’m here to tell you that’s not entirely true. In fact, learning how to add fringe to a woven wall hanging can be a therapeutic and creative process that enhances the overall texture and beauty of your piece. I still remember my first attempt at adding fringe to a wall hanging – it was a bit of a mess, but it sparked a fascination with the intersection of fiber and form.
In this article, I’ll guide you through the straightforward process of adding fringe to your woven wall hanging, sharing practical tips and tricks I’ve learned along the way. You’ll discover how to choose the right threads, measure and cut your fringe, and securely attach it to your piece. My goal is to empower you with the knowledge and confidence to take your weaving to the next level, and to see the beauty in the simple, textural elements that make a piece truly special. By the end of this tutorial, you’ll be well on your way to creating stunning, one-of-a-kind woven wall hangings with fringe that adds an extra layer of depth and visual interest.
Table of Contents
Guide Overview: What You'll Need
Total Time: 1 hour 15 minutes
Estimated Cost: $10 – $30
Difficulty Level: Easy
Tools Required
- Scissors (sharp, dedicated to cutting fabric)
- Tape Measure (for measuring and marking fringe length)
- Ruler (for cutting straight edges)
- Thimble (optional, for protecting fingers while sewing)
- Sewing Needle (for hand-stitching fringe in place)
Supplies & Materials
- Woven Wall Hanging (pre-made or DIY)
- Fringe Material (yarn, wool, or cotton rope, 6 inches long)
- Thread (matching the color of the wall hanging)
- Fabric Glue (optional, for securing fringe ends)
- Beige or White Sewing Thread (for blending with the wall hanging’s weave)
Step-by-Step Instructions
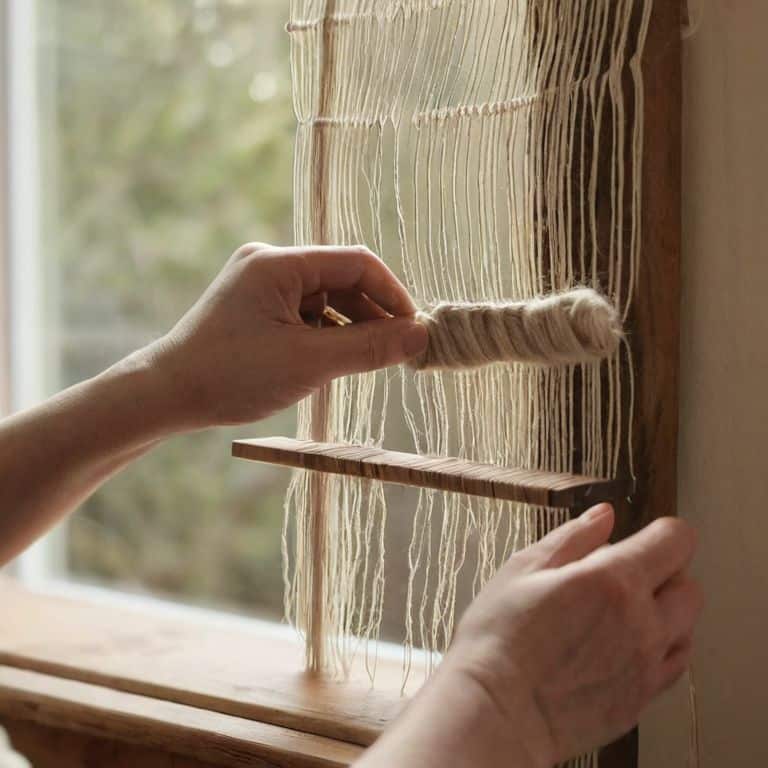
- 1. To begin adding fringe to your woven wall hanging, gather your materials – this includes the wall hanging itself, a pair of scissors, a measuring tape, and the fringe material of your choice, which could be anything from wool to silk. I personally love using natural fibers like linen or raw silk for their unique texture and durability.
- 2. Next, determine the length of your fringe, taking into consideration the overall size of your wall hanging and the space where it will be displayed. A good rule of thumb is to make the fringe about one-third to one-half the length of the hanging itself, but feel free to experiment with different lengths to find the look that works best for you.
- 3. Now, cut your fringe material into uniform lengths. This can be a bit tedious, but trust me, it’s worth the effort – uneven fringe can really detract from the overall appearance of your piece. I like to use a simple wooden cutting board and a sharp pair of scissors to get clean, precise cuts.
- 4. With your fringe cut, it’s time to attach it to your wall hanging. There are a few different methods you can use to do this, but one of the most common is to simply tie the fringe to the warp threads at the bottom of the hanging. Start by threading a length of fringe through a warp thread, then tie a secure knot to hold it in place.
- 5. Continue attaching the fringe to the wall hanging, working your way across the bottom of the piece. Be sure to space the fringe evenly, using your measuring tape to ensure that the gaps between each length of fringe are consistent. This will help create a clean, polished look that really makes your wall hanging pop.
- 6. As you work, step back periodically to evaluate the fringe and make any necessary adjustments. It’s easy to get caught up in the process and lose sight of the bigger picture, but taking a step back can help you catch any unevenness or gaps in the fringe. Don’t be afraid to make changes as needed – it’s all part of the creative process.
- 7. Once you’ve attached all of the fringe, trim the ends to create a clean, finished look. This is also a good opportunity to fluff out the fringe, working out any tangles or twists that may have developed during the attachment process. Use a soft brush or your fingers to gently tease out the fibers, and your wall hanging is complete.
Fringe Mastery Unveiled
As I delve deeper into the world of fringe, I’m reminded of the macrame fringe tutorial I once created, where I emphasized the importance of patience and attention to detail. When it comes to adding fringe to a woven wall hanging, it’s essential to consider the overall aesthetic you’re aiming for. For a boho chic home decor inspiration, you may want to opt for a more flowing, organic fringe, while a modern space might call for a cleaner, more structured look.
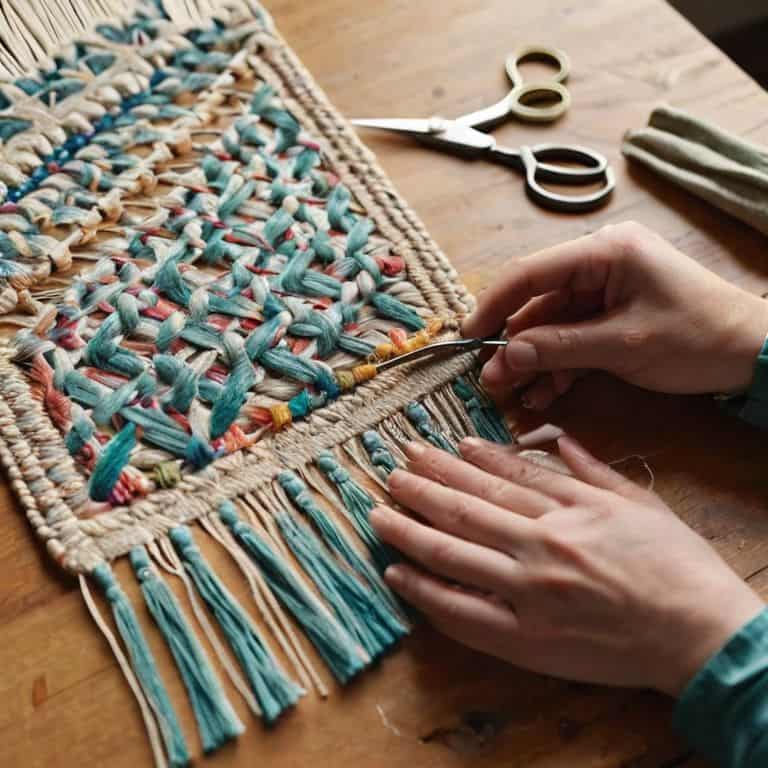
To achieve a truly unique and eye-catching fringe, I recommend experimenting with yarn tassel making. This technique allows you to add a pop of color and texture to your wall hanging, taking it from ordinary to extraordinary. By playing with different yarn weights, colors, and lengths, you can create a one-of-a-kind piece that reflects your personal style. As you work on your fringe, remember to balance texture and form to create a visually appealing arrangement.
As you master the art of fringe, you’ll begin to see the possibilities for woven fiber art techniques expand exponentially. From subtle, monochromatic fringe to bold, colorful statements, the options are endless. To take your wall hanging to the next level, consider incorporating textile fringe styling tips, such as layering different textures or playing with negative space. By doing so, you’ll create a truly show-stopping piece that showcases your creativity and skill.
Macrame Fringe Tutorial Essentials
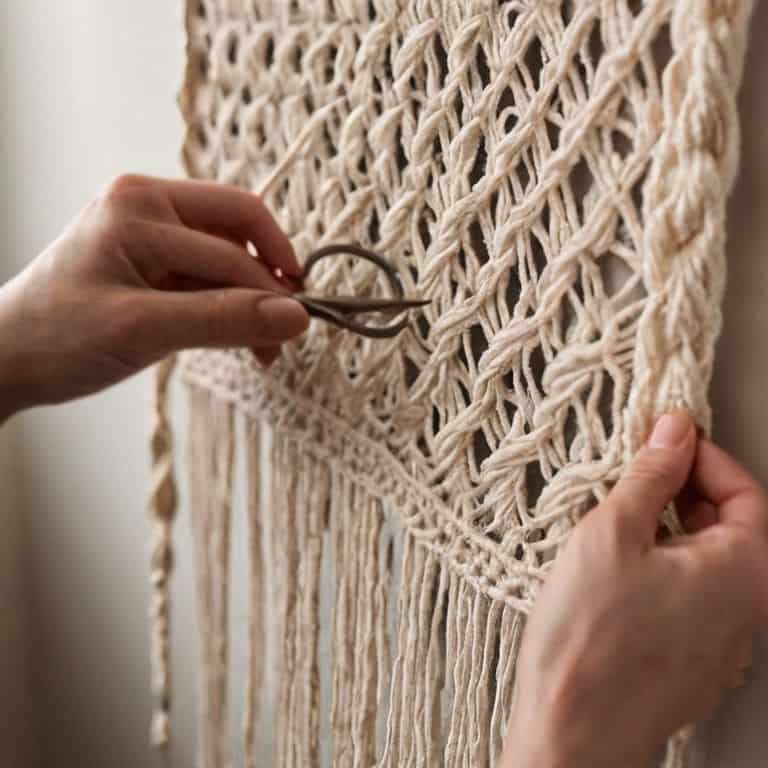
As I delve into the world of macrame fringe, I’m reminded of the intricate details that elevate a woven piece from beautiful to breathtaking. To master this technique, it’s essential to understand the fundamentals of knotting and cord management. I like to think of it as “building” with yarn, where each thread is carefully considered to create a cohesive, textured whole.
When working with macrame fringe, I always start by selecting the perfect cord – one that complements the natural fibers of my woven wall hanging. Linen, raw silk, or cotton cords are my go-tos, as they add a tactile quality that invites touch and exploration. By focusing on the intersection of texture, form, and function, we can create truly captivating pieces that showcase the art of weaving in all its glory.
Yarn Tassel Making for Boho Chic
As I delve into the world of yarn tassel making, I’m reminded of the intricate details that make a piece truly special. To create a boho chic look, I recommend using a mix of textured yarns and earthy tones. Begin by cutting several strands of yarn to the desired length, then fold them in half and tie a small knot at the top. This will form the foundation of your tassel.
Next, wrap a shorter piece of yarn around the folded strands, about an inch from the top, to create a neck. Secure with a small knot and trim the ends. This simple yet elegant technique will add a touch of handmade charm to your woven wall hanging, elevating it to a unique piece of textile art.
Weaving Wisdom: 5 Essential Tips for Adding Fringe to Your Woven Wall Hanging
- Choose the right yarn weight: Select a yarn that complements the weight and texture of your woven wall hanging to ensure a balanced look
- Measure twice, cut once: Double-check your fringe length to avoid uneven ends and ensure a polished finish
- Play with texture: Mix and match different yarn textures and colors to add depth and visual interest to your fringe
- Don’t overdo it: Balance your fringe with the rest of the wall hanging’s design, remembering that sometimes less is more
- Experiment with finishing techniques: Try different methods, such as knotting or twisting, to add a unique touch to your fringe and give it a personalized flair
Weaving Wisdom: 3 Key Takeaways
I’ve discovered that the art of adding fringe to a woven wall hanging is not just about embellishing a piece, but about elevating its texture and visual interest, much like adding a facade to a building
By mastering the techniques of macrame fringe and yarn tassel making, you’ll unlock a world of bohemian chic and sophistication in your textile creations, allowing you to ‘build’ stunning pieces that rival any work of architecture
Remember, the true beauty of weaving lies in its ability to blend ancient craft with modern design, so don’t be afraid to experiment and push the boundaries of what’s possible with fiber, just as I do in my own large-scale woven art installations
Weaving Wisdom
As I always say, adding fringe to a woven wall hanging is not just a finishing touch, but a declaration of texture and form – it’s where the threads of your creativity come together to tell a story.
Ethan Thorne
Weaving a Timeless Tale: Conclusion
As we conclude this journey of adding fringe to a woven wall hanging, let’s reflect on the key elements that have brought us to this point. From the initial steps of preparing our yarn and loom, to the macrame fringe tutorial essentials and yarn tassel making for boho chic, each stage has been a testament to the versatility and creativity of weaving. By mastering these techniques, we’ve not only adorned our wall hanging with a beautiful fringe but have also deepened our understanding of the ancient craft of weaving.
As we step back to admire our finished piece, remember that the true beauty of weaving lies not just in the end result, but in the process itself. The gentle rhythm of the loom, the soft whisper of yarn as it intertwines, and the satisfaction of creation all blend together to form an experience that is both meditative and fulfilling. So, let your weaving journey be a celebration of texture, color, and form, and may your creations inspire others to explore the timeless art of weaving.
Frequently Asked Questions
What type of yarn or thread is best suited for creating fringe on a woven wall hanging?
For fringe, I adore working with natural fibers like wool, linen, or raw silk. Their texture and gentle drape add an organic elegance to any woven wall hanging. Look for yarns with a bit of weight and a soft, earthy tone to bring warmth and depth to your piece.
How do I determine the optimal length for my fringe to achieve a balanced and visually appealing look?
To determine the optimal fringe length, I consider the scale of the wall hanging and the space where it will be displayed. A good rule of thumb is to balance the fringe length with the overall dimensions of the piece, aiming for a length that’s about one-quarter to one-third of the hanging’s height.
Can I use different materials or techniques to create a more textured or layered fringe effect on my woven wall hanging?
Absolutely, I love experimenting with diverse materials and techniques to add depth to my fringe. You can try mixing yarns, incorporating natural fibers like linen or hemp, or even adding beads for a layered, textured look. I’ve also had success with combining macrame and tassel-making techniques to create a truly unique fringe effect.