As I sit amidst my loom and threads, I often think about the common misconception that how to make a woven wall hanging is a daunting, complicated process. Many believe it requires an innate sense of artistry or a lifetime of experience, but I’m here to tell you that’s simply not true. With a clear understanding of texture, form, and a bit of patience, anyone can create a stunning woven wall hanging that adds a touch of warmth and personality to any room. I’ve seen it time and time again in my own journey from architecture to textile art – the principles of design remain the same, but the medium is what sets our creativity free.
In this guide, I promise to walk you through the honest, no-frills process of crafting your own woven wall hanging. We’ll explore the basics of building with yarn, from selecting the right materials to understanding the importance of texture and color in your design. By the end of this journey, you’ll have the confidence and skills to create a truly unique piece of art that reflects your personal style and adds a touch of elegance to your home. Whether you’re a seasoned crafter or a curious beginner, I invite you to join me in discovering the joy of weaving and the satisfaction of creating something beautiful with your own hands.
Table of Contents
Guide Overview: What You'll Need
Total Time: 2 hours 30 minutes
Estimated Cost: $30 – $50
Difficulty Level: Intermediate
Tools Required
- Loom or weaving frame can be a simple handmade frame
- Scissors sharp and dedicated to cutting yarn or thread
- Tapestry needle for weaving and sewing
- Measuring tape for measuring and cutting yarn or thread to correct lengths
- Pencil and paper for planning and designing the pattern
Supplies & Materials
- Yarn or thread various colors and textures for the design
- Wooden dowel or rod for hanging the finished piece, about 1/4 inch in diameter and 24 inches long
- Hanging hardware e.g., screws, nails, or a picture hanger
- Fabric or yarn scraps for embellishments or additional design elements
- Warp thread for setting up the loom or frame, usually a neutral color and durable material
Step-by-Step Instructions
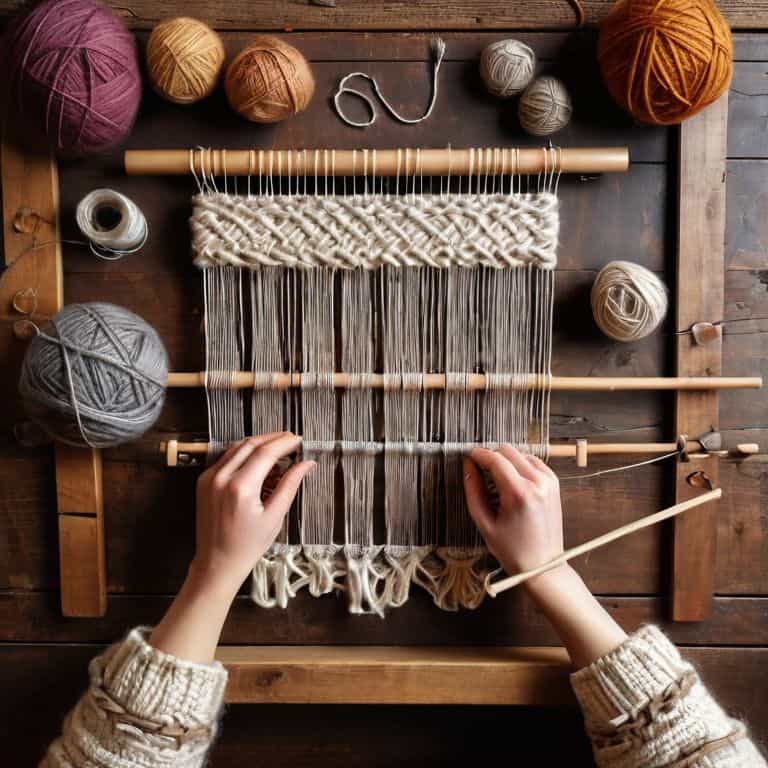
- 1. To begin crafting our woven wall hanging, let’s start by selecting the perfect yarn. I like to choose a variety of textures and colors to add depth and visual interest to my piece. Consider combining smooth, glossy yarns with more rustic, earthy options to create a unique and captivating aesthetic. Take your time, and don’t be afraid to experiment with different combinations until you find the one that resonates with you.
- 2. Next, we’ll need to set up our loom. As someone who’s passionate about minimalist woodworking, I actually built my own loom from scratch – but don’t worry, you can use a pre-made one or even a simple frame loom. The key is to ensure that your loom is sturdy and can accommodate the type of yarn you’ve chosen. Take a moment to familiarize yourself with the different parts of the loom, and make any necessary adjustments to get started.
- 3. Now it’s time to create a warp, which will serve as the foundation for our wall hanging. This is where the magic begins, and we start to see our design take shape. To create a warp, simply thread your yarn through the loom’s warp threads, leaving a small amount of slack between each thread. This will give us a smooth, even surface to work with.
- 4. With our warp in place, we can start weaving our weft. This is where the texture and pattern of our wall hanging really start to emerge. I like to use a combination of plain weave and twill techniques to add visual interest and depth to my piece. Experiment with different patterns and yarn combinations to find the one that works best for you.
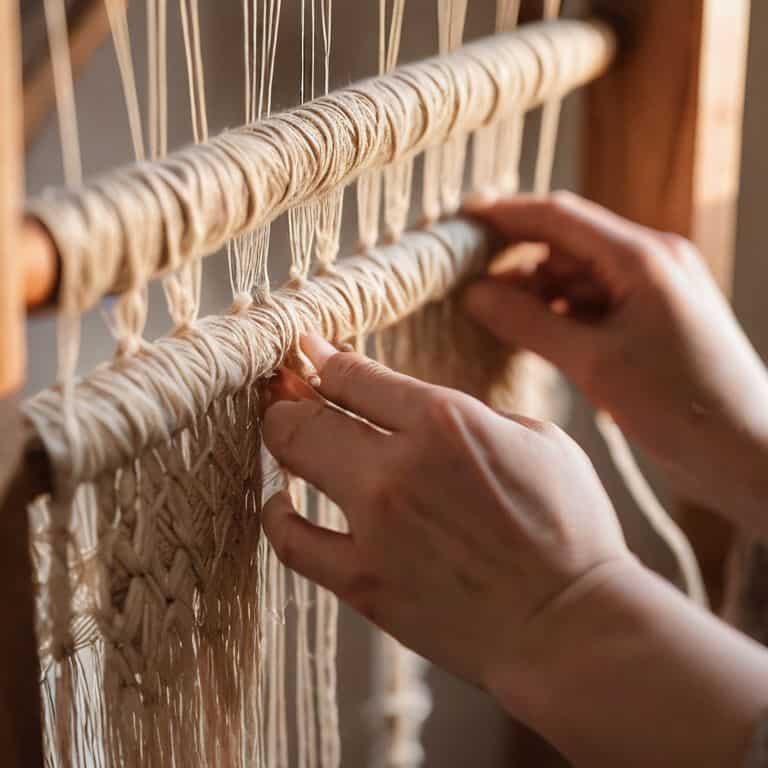
- 5. As we continue to weave, it’s essential to pay attention to tension. This can make or break the overall look and feel of our wall hanging. To achieve the perfect tension, gently pull the yarn as you weave, making sure not to pull too tightly or too loosely. You want the yarn to be snug, but still have a bit of give.
- 6. Once we’ve completed the main body of our wall hanging, it’s time to add a border. This can be a simple or complex design element, depending on your preference. I like to use a subtle border that complements the main pattern of the wall hanging, adding a touch of elegance and sophistication. Feel free to get creative and experiment with different border designs until you find the one that works best for you.
- 7. Finally, we’ll need to finish our edges and add a hanging mechanism to our wall hanging. This can be as simple as adding a few stitches to secure the edges or as complex as creating a custom hanging system. I like to use a combination of invisible stitching and a minimalist wooden dowel to add a touch of sophistication to my piece. Take your time, and make sure your edges are secure and even before hanging your wall hanging proudly on your wall.
Weaving Walls Beautifully
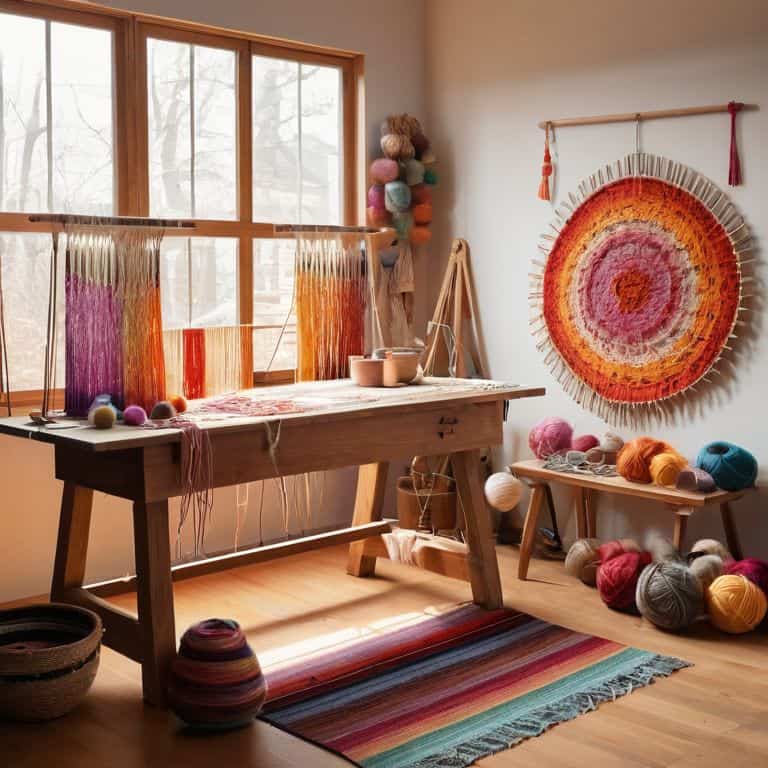
As I delve into the world of woven fiber art techniques, I’m constantly reminded of the importance of texture and form in creating a stunning piece. When it comes to designing a wall hanging, I always consider the interplay of colors and how they will interact with the surrounding space. To achieve a beautiful, intricate design, I recommend experimenting with different macrame wall hanging patterns to add depth and visual interest.
When working with a frame loom, it’s essential to understand the basics of frame loom weaving for beginners. This includes properly tensioning the warp threads and selecting the right yarns for your project. By mastering these fundamental skills, you’ll be able to create intricate patterns and designs that showcase your artistic vision. For inspiration, I often turn to wall hanging design inspiration from nature, architecture, and other forms of art.
To bring your woven wall hanging to life, don’t forget to consider the textile art supplies you’ll need, such as a variety of yarns, threads, and fibers. When it’s time to display your finished piece, make sure to follow safe guidelines for hanging woven wall art safely, ensuring that your beautiful creation remains intact and secure on the wall. By paying attention to these details, you’ll be able to showcase your unique piece of woven art with confidence and pride.
Frame Loom Techniques for Fiber Art
As I delve into the world of frame loom techniques, I’m reminded of the precision and intentionality that defines my approach to weaving. When working with a frame loom, it’s essential to consider the interplay between warp and weft, allowing each thread to inform and respond to the other. This symbiotic relationship is what gives fiber art its unique texture and visual interest. By carefully calibrating tension and pattern, I can coax intricate designs and subtle nuances from the yarn, elevating the woven piece from mere decoration to a rich, tactile experience.
In my own practice, I often combine traditional frame loom techniques with more experimental approaches, blending modern materials and colors to create innovative, large-scale installations. The result is a harmonious balance of structure and spontaneity, as if the fibers themselves were being orchestrated to produce a symphony of texture and form.
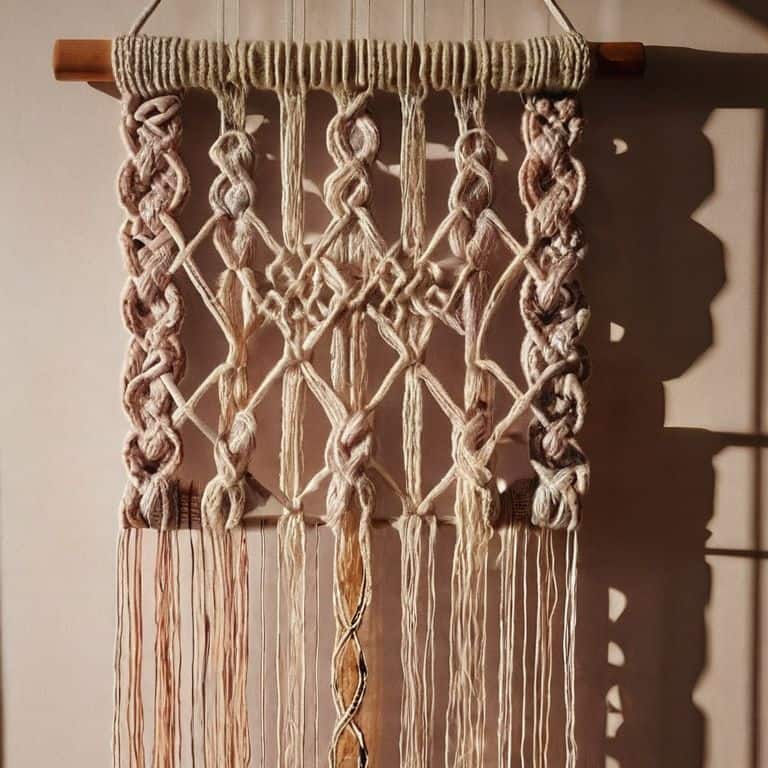
Macrame Patterns for Beginners
As I delve into the world of macrame patterns, I’m reminded of the intricate details found in architectural designs. For beginners, I recommend starting with simple knot patterns, such as the lark’s head or wrap knot. These foundational knots will help you build a strong understanding of texture and form. I often sketch out my macrame designs on graph paper, much like I would with architectural blueprints, to visualize the flow and movement of the piece.
By mastering these basic knots, you’ll be able to create stunning wall hangings that showcase your unique sense of style. Remember, the key to beautiful macrame is patience and attention to detail. As you practice, don’t be afraid to experiment with different yarns and fibers – I personally love working with natural fibers like linen and raw silk.
Elevating Your Woven Wall Hanging: 5 Essential Tips
- Allow your design to evolve organically, don’t be afraid to experiment with different yarns and textures to add depth and visual interest to your piece
- Choose a color palette that complements the space where your wall hanging will reside, considering the mood and atmosphere you want to create
- Incorporate natural fibers like linen, cotton, or raw silk to bring warmth and authenticity to your woven art
- Don’t underestimate the power of negative space – sometimes, what you leave out is just as important as what you put in, creating a sense of balance and harmony
- Play with scale and proportion by mixing thick and thin threads, or combining loose and tight weaves, to create a dynamic and engaging visual experience
Three Essential Takeaways for Crafting Stunning Woven Wall Hangings
By embracing the intersection of ancient weaving techniques and modern design principles, you can create unique and breathtaking pieces that elevate any space
Experimenting with various textures, colors, and patterns – such as macrame or frame loom techniques – allows you to add depth and visual interest to your woven wall hangings
Remember, the true beauty of weaving lies in its versatility and expressive potential, so don’t be afraid to push boundaries and try new things, treating each thread as a building block in your artistic vision
The Art of Woven Walls
A woven wall hanging is not just a decorative piece, but a testament to the human touch, where every thread and every knot tells a story of patience, creativity, and the pursuit of beauty.
Ethan Thorne
Weaving a Lasting Impression
As we conclude our journey through the world of woven wall hangings, let’s take a moment to reflect on the key elements that bring these pieces to life. From the initial selection of natural fibers to the careful consideration of texture and form, each decision plays a crucial role in the final product. By mastering techniques such as macrame patterns and frame loom methods, you’ve gained the skills to create truly unique and captivating works of art. Whether you’re a seasoned weaver or just starting out, the process of crafting a woven wall hanging offers a rewarding blend of creativity and technical challenge.
As you continue to explore the realm of weaving, remember that the true beauty of this craft lies in its ability to merge functionality with artistry. Don’t be afraid to experiment, to push boundaries, and to innovate – for it’s in these moments of creative risk-taking that we often discover our most stunning creations. With every thread and every weave, you’re not just building a wall hanging – you’re crafting a piece of yourself, a reflection of your own unique perspective and aesthetic. So keep weaving, keep creating, and watch as your spaces come alive with the beauty and texture of your handmade art.
Frequently Asked Questions
What type of yarn or fiber is best suited for a woven wall hanging to ensure durability and texture?
For a woven wall hanging, I recommend using natural fibers like linen, cotton, or raw silk. These materials offer excellent durability and texture, allowing your piece to withstand time while maintaining its visual appeal. I personally love working with linen for its subtle sheen and rugged texture, adding depth to any design.
How do I determine the optimal size and scale of my woven wall hanging to fit a specific space or room?
To determine the optimal size and scale of your woven wall hanging, consider the room’s proportions and the surrounding furniture. I like to sketch out a blueprint of the space, including the piece, to visualize how it will interact with the architecture. This helps me balance texture, form, and negative space to create a harmonious installation.
Can I use a simple frame loom or do I need a more complex weaving tool to create intricate patterns and designs in my wall hanging?
For intricate patterns, I recommend starting with a simple frame loom to get a feel for the yarn and the weaving process. As you gain confidence, you can experiment with more complex tools or techniques to add depth and texture to your design.