
I still remember the day my wife, an avid weaver, asked me to build her a simple frame loom. I had no idea where to start, but I was determined to create something that would make her weaving journey easier and more enjoyable. As I delved into the world of frame loom building, I discovered that many people believe it’s a daunting task that requires specialized skills and expensive materials. But I’m here to tell you that how to build a simple frame loom is not as complicated as it seems. With the right guidance and a willingness to get your hands dirty, you can create a beautiful and functional loom that will take your weaving to the next level.
In this article, I’ll share my personal experience and expertise on how to build a simple frame loom from scratch. I’ll guide you through the process, from selecting the right materials to assembling the final product. You can expect practical advice and step-by-step instructions that will make the process easy to follow and understand. By the end of this article, you’ll be equipped with the knowledge and confidence to build your own simple frame loom and start weaving your own magic. Whether you’re a seasoned weaver or just starting out, this guide is designed to help you create a beautiful and functional loom that will inspire you to new heights of creativity.
Table of Contents
Guide Overview: What You'll Need
Total Time: 2 hours 30 minutes
Estimated Cost: $50 – $100
Difficulty Level: Intermediate
Tools Required
- Table Saw (for cutting lumber)
- Drill Press (for precise drilling)
- Hand Saw (for cutting curves or small pieces)
- Sander (for smoothing out wood surfaces)
- Tape Measure (for accurate measurements)
- Square (for ensuring corners are square)
- Clamp (for holding pieces together while gluing)
- Hammer (for tapping pieces into place)
Supplies & Materials
- 2-in x 4-in lumber (for frame construction)
- 1-in x 2-in lumber (for shed or other details)
- Wood Glue (for bonding wood pieces together)
- 2 inches Wood Screws (for assembling the frame)
- 1 inch Nails (for attaching smaller pieces)
- Warp Yarn (for the loom’s warp threads)
- Weft Yarn (for weaving)
- Loom Pegs or Ties (for securing the warp threads)
Step-by-Step Instructions
- 1. First, let’s start by gathering our materials, which include 1″ x 2″ lumber for the frame, 1/4″ plywood for the warp and weft beams, wood glue, 1 1/4″ wood screws, and some sandpaper for smoothing out the wood. I like to use a variety of woods, but for this project, I’ll be using oak for its strength and durability.
- 2. Next, we need to cut our lumber to the right sizes. For the frame, you’ll need four pieces: two at 18″ long and two at 24″ long. The warp and weft beams will require two pieces of 1/4″ plywood, each cut to 18″ x 2″. Don’t forget to wear your safety glasses and use a miter saw for precise cuts.
- 3. Now it’s time to assemble the frame. Use your 1 1/4″ wood screws to attach the 18″ pieces to the 24″ pieces, forming a rectangular frame. Make sure it’s square by measuring the diagonals to ensure they’re equal. If you’re new to woodworking, don’t worry if it’s not perfect – it’s all part of the process.
- 4. With the frame assembled, let’s attach the warp and weft beams. Apply some wood glue to the inside of the frame and attach the plywood pieces using your 1 1/4″ wood screws. These beams will provide the foundation for your weaving, so make sure they’re securely attached.
- 5. To add some finishing touches, sand the entire frame to smooth out any rough edges or splinters. You can also apply a finish, like a natural oil or wax, to protect the wood and enhance the appearance. I like to use a natural oil to bring out the beauty of the wood grain.
- 6. Next, we need to add the tensioning system, which will allow you to adjust the tension of your warp threads. You can use a simple screw-and-nut system or get creative with a more complex mechanism. For this project, I’ll be using a basic screw-and-nut system for its simplicity and effectiveness.
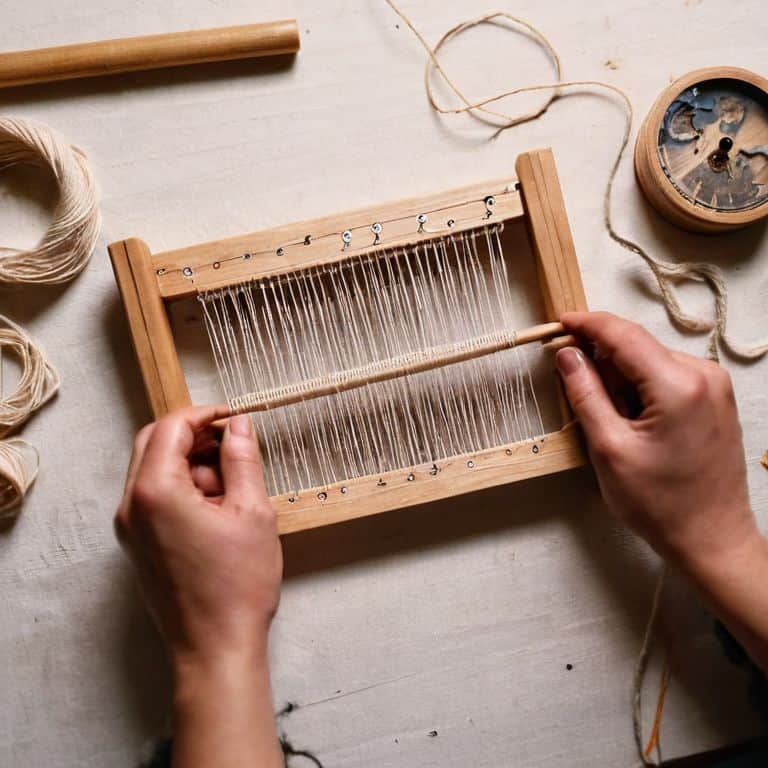
- 7. Finally, let’s add the weaving pegs, which will hold your warp threads in place. You can use small wooden dowels or even metal rods, depending on your preference. Space them evenly apart, about 1/4″ apart, to provide a solid foundation for your weaving. Now your simple frame loom is ready to use, and you can start weaving your magic.
Building Simple Frame Looms
As I reflect on my journey of building simple frame looms, I realize that the wooden frame loom design is just the beginning. The real magic happens when you start experimenting with different loom building materials. I’ve found that using high-quality woods like oak or maple can make a huge difference in the overall durability and aesthetic of the loom. When it comes to tapestry weaving for beginners, a sturdy loom is essential for creating beautiful and intricate designs.
One of the most common mistakes I see beginners make is not properly preparing the loom for warping. Frame loom warping techniques can be a bit tricky, but with practice, you’ll get the hang of it. I recommend using a diy loom kit to get started, as it usually comes with a set of pre-drilled holes and a simple warping pattern. This will help you get a feel for the process and build your confidence before moving on to more complex designs.
As you become more comfortable with the basics, you can start exploring more advanced simple loom plans and designs. I love experimenting with different types of wood and finishes to create unique and functional pieces. Remember, the key to building a great loom is to focus on the details and take your time. With a little patience and practice, you’ll be creating beautiful tapestries in no time, and you can even share your creations with others by selling them as part of a diy loom kit.
Simple Loom Plans for Beginners
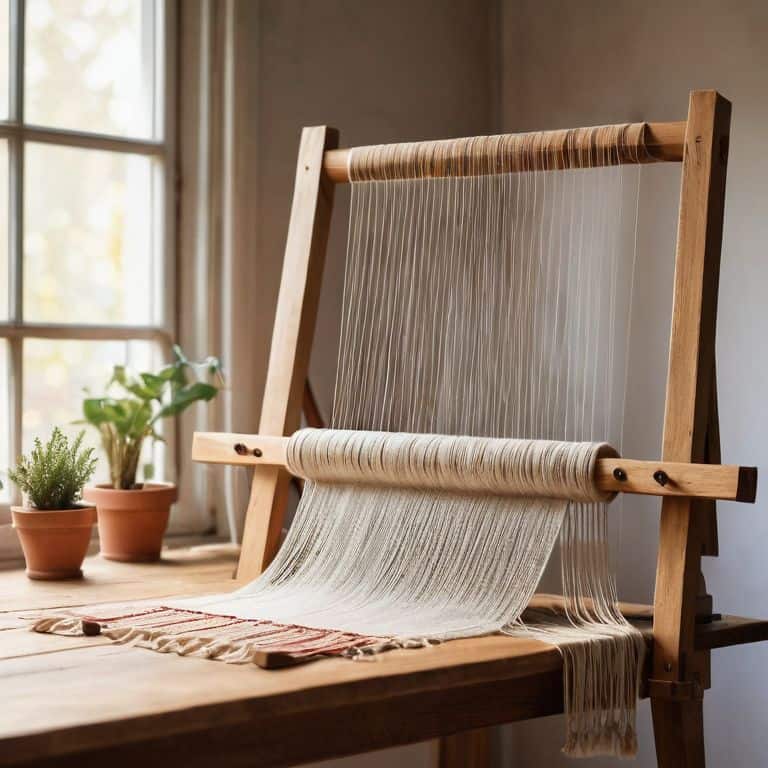
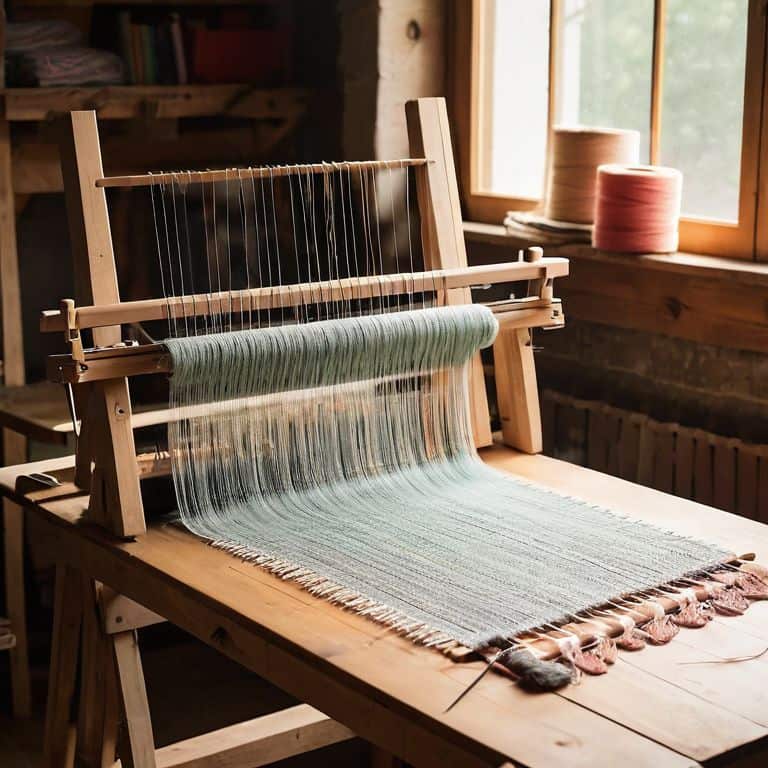
When it comes to simple loom plans for beginners, I always recommend starting with a classic frame design. This style of loom is not only easy to build, but it’s also incredibly versatile – perfect for weaving scarves, blankets, or even just experimenting with different yarns and textures. I’ve seen my wife use our homemade frame loom to create everything from intricate wall hangings to cozy throw blankets.
For a beginner-friendly design, consider using a straightforward rectangular frame with a simple tensioning system. You can use a variety of woods, but I personally love working with oak or maple – they’re sturdy, beautiful, and have a wonderful smell when sanded. With a basic loom plan, you can get started on your weaving journey in no time, and who knows, you might just discover a new passion.
Wooden Frame Loom Design Essentials
When it comes to designing a wooden frame loom, there are a few essentials to keep in mind. As a woodworker and craft tool maker, I can tell you that the type of wood you choose is crucial. I personally love working with oak or maple – they’re sturdy, durable, and have a beautiful grain that adds character to the loom. The frame’s dimensions are also important, as they’ll determine the size of your weaving projects. I recommend starting with a simple rectangular design, around 24″ x 36″, to give you plenty of room to experiment with different yarns and patterns.
The wooden slats that make up the frame should be smooth and evenly spaced, with a gentle curve to guide the yarn. I like to add a slight taper to the sides, making it easier to warp and weave. The overall design should be clean, functional, and beautiful – after all, this is a tool that’ll be a part of your creative process for years to come.
5 Essential Tips for Building a Simple Frame Loom
- Choose the right type of wood for your loom, considering factors like durability, weight, and aesthetics – I personally love working with oak or maple
- Measure twice, cut once: accuracy is key when it comes to building a functional loom, so take your time and double-check your measurements
- Don’t be afraid to add your own personal touches and customizations to make your loom truly unique – after all, it’s a reflection of your craft
- Consider the size and portability of your loom, especially if you plan on taking it to classes or workshops – a compact design can be a game-changer
- Sand, sand, sand: a smooth finish is essential for a loom that will withstand regular use and provide a comfortable weaving experience – trust me, your yarn will thank you
Key Takeaways for Building Your Simple Frame Loom
By following these steps and tips, you’ll be able to create a functional and beautiful simple frame loom that will elevate your weaving experience and provide you with a sense of accomplishment
Remember, the type of wood you choose and the attention to detail in your craftsmanship will greatly impact the overall quality and performance of your loom, so don’t be afraid to get creative and experiment with different materials
With practice and patience, you’ll not only master the art of building your own looms but also develop a deeper appreciation for the craftsmanship that goes into creating these wonderful tools, allowing you to connect with your weaving projects on a whole new level
The Heart of Frame Loom Crafting
Building a simple frame loom isn’t just about weaving yarn; it’s about crafting a tool that becomes an extension of your creativity, a bridge between your imagination and the fabric of reality.
Finnian "Finn" Burke
Wrapping Up Your Loom-Building Journey
As we conclude this guide on building a simple frame loom, let’s take a moment to reflect on the process. We’ve covered the essential steps, from planning and designing your loom to assembling the wooden frame and adding the necessary components. Remember, the key to a successful project lies in the attention to detail and the quality of the materials you use. By following these steps and tips, you’ve not only created a functional tool for your weaving journey but also gained valuable experience in woodworking and DIY craftsmanship.
Now that you’ve completed your simple frame loom, it’s time to unleash your creativity and start weaving! Don’t be afraid to experiment with different patterns, yarns, and techniques. The joy of handmade is not just about the end product, but about the process, the learning, and the sense of accomplishment that comes with creating something with your own hands. Happy weaving, and I look forward to seeing the beautiful projects you’ll create with your new loom!
Frequently Asked Questions
What type of wood is best suited for building a simple frame loom?
For a simple frame loom, I swear by hardwoods like oak or maple – they’re sturdy and have a beautiful grain. But, if you’re on a budget, pine or fir can work too, just make sure to seal them properly. I can smell the difference when I sand them, and trust me, it makes all the difference in the finished product!
How do I determine the optimal size for my frame loom based on the projects I want to make?
To determine the optimal size for your frame loom, consider the projects you want to make. Think about the width of the fabric you want to weave and the type of yarn you’ll be using. For example, if you’re making scarves, a narrower loom will suffice, while a wider loom is better for blankets. I like to think about the type of wood I’ll use for the frame too – it’s all about balance and functionality.
What are some essential tools I'll need to have in my workshop to build a simple frame loom from scratch?
To get started, you’ll need some basic woodworking tools like a table saw, drill press, and sander. I also swear by my trusty tape measure, square, and marking gauge. Don’t forget a good set of chisels and a mallet – they’ll come in handy when assembling the frame. And, of course, a well-sharpened pencil is essential for marking your cuts!