
As I sit at my loom, surrounded by spools of yarn and half-finished projects, I’m reminded of the common misconception that creating texture with rya knots is a tedious, time-consuming process. But the truth is, it’s quite the opposite – with the right techniques and a bit of patience, you can how to create texture with rya knots that add depth and visual interest to any woven piece. I’ve spent years perfecting my craft, and I’m excited to share my knowledge with you, so you can start building your own tactile tapestries.
In this article, I’ll take you through the step-by-step process of weaving with rya knots, from preparing your yarn to finishing your piece. You’ll learn how to create a variety of textures and patterns, and how to build texture that tells a story. My goal is to empower you with the skills and confidence to experiment with this ancient craft, and to show you that creating texture with rya knots is not only achievable, but also incredibly rewarding. By the end of this guide, you’ll be well on your way to how to create texture with rya knots like a pro, and unlocking the full potential of this versatile and expressive technique.
Table of Contents
Guide Overview: What You'll Need
Total Time: 3 hours 15 minutes
Estimated Cost: $15 – $30
Difficulty Level: Intermediate
Tools Required
- Tapestry Needle (or a large blunt-tipped needle)
- Scissors (sharp and dedicated to cutting yarn or thread)
- Measuring Tape (for measuring 6 inches by 6 inches sections)
- Ruler (for maintaining even spacing of 1 inch between knots)
Supplies & Materials
- Wool or Thick Yarn (in desired colors and textures)
- Canvas or Cotton Fabric (at least 12 inches by 12 inches square)
- Thread or Yarn Needle (for weaving in ends and securing knots)
Step-by-Step Instructions
- 1. To start creating texture with rya knots, begin by preparing your yarns. This involves selecting the right fibers and colors that will bring your design to life. I like to think of this step as building a palette, where every thread has a purpose and contributes to the overall narrative of the piece.
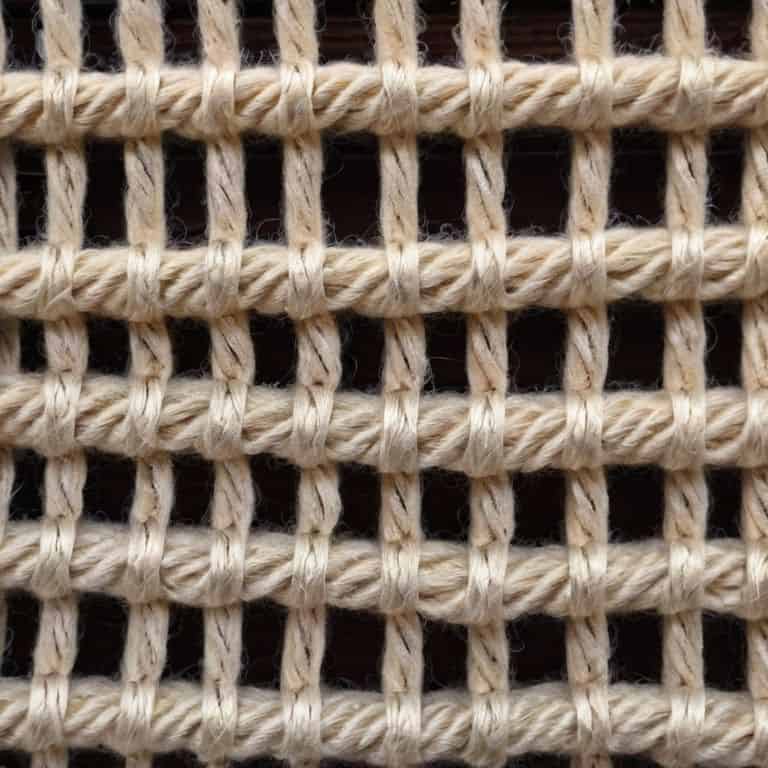
- 2. Next, set up your loom or weaving tool. As someone who enjoys minimalist woodworking, I’ve built my own looms to suit my needs, but you can use any standard equipment. The key is to ensure that your warp threads are evenly spaced and taut, providing a solid foundation for your rya knots. This is where the architecture of weaving begins to take shape.
- 3. Now, it’s time to start weaving your background or base layer. This layer should be simple and provide a neutral backdrop for your rya knots. I often use a basic tabby weave for this step, as it allows the texture of the knots to take center stage later on. Keep your tension even and your stitches consistent to avoid any puckering or distortion.
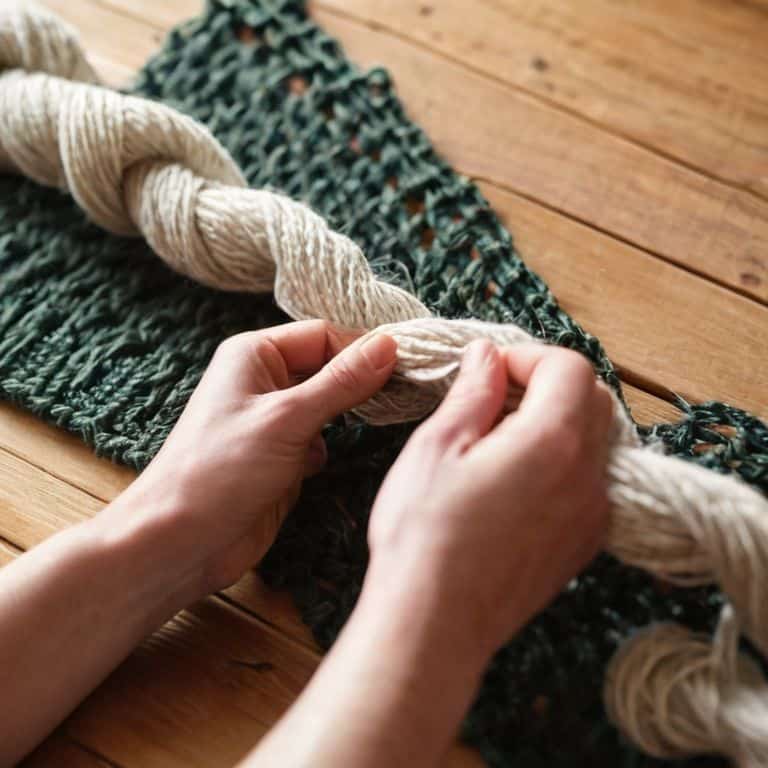
- 4. With your base layer in place, you can begin to introduce your rya knots. To do this, cut a length of yarn that’s about twice as long as you want your knot to be. Thread one end of the yarn through a warp thread, then use a needle or a small tool to pull the yarn back through, creating a loop. This loop will form the basis of your rya knot.
- 5. To secure your rya knot, pass the yarn through the loop you just created, then pull it gently to tighten. You should start to see the knot take shape. Repeat this process, moving along the warp threads and spacing your knots evenly. As you work, think about the story you’re telling with every thread, and how each knot contributes to the overall texture and visual interest of the piece.
- 6. As you add more knots, you’ll start to see the texture of your weaving come alive. To add depth and visual interest, experiment with varying the size and spacing of your knots. You can also try using different yarn weights or colors to create contrast and emphasis. Remember, the key to successful rya knotting is to be patient and take your time, as each knot builds on the last to create a cohesive and engaging design.
- 7. Once you’ve completed your rya knotting, it’s time to finish your weaving. This involves securing the final threads and trimming any excess yarn. To add a professional touch, consider whipping or binding the edges of your weaving to prevent fraying and give it a clean, finished look. With your piece complete, step back and admire the texture and beauty you’ve created, thread by thread.
Weaving Texture With Rya Knots
As I delve deeper into the world of rya knots, I’m reminded of the textural nuances that can be achieved with this ancient craft. When weaving texture with rya knots, it’s essential to consider the type of fiber you’re working with, as it will greatly impact the overall dimension of your piece. For instance, using a thicker yarn will result in a more pronounced texture, while a thinner yarn will produce a more subtle effect.
To add an extra layer of depth to your rya knot project, you can experiment with different knotting techniques for fiber art. This can include varying the tension of your knots or incorporating other stitches, such as the macrame knot, to create a unique fiber texture and dimension. For those interested in exploring more intricate designs, Scandinavian rya rug making is a great source of inspiration, offering a wealth of patterns and techniques to draw from.
When it comes to incorporating rya knots into your home decor, the possibilities are endless. Consider creating a bohemian-inspired wall hanging using macrame wall hanging patterns, or consider the simple, understated elegance of a handmade rya rug. As a textile artist, I’m constantly drawn to the world of bohemian home decor inspiration, where natural fibers and organic textures reign supreme. By embracing the art of rya knotting, you’ll be well on your way to creating stunning pieces of textile art for beginners and seasoned artists alike.
Macrame Patterns for Deep Dimension
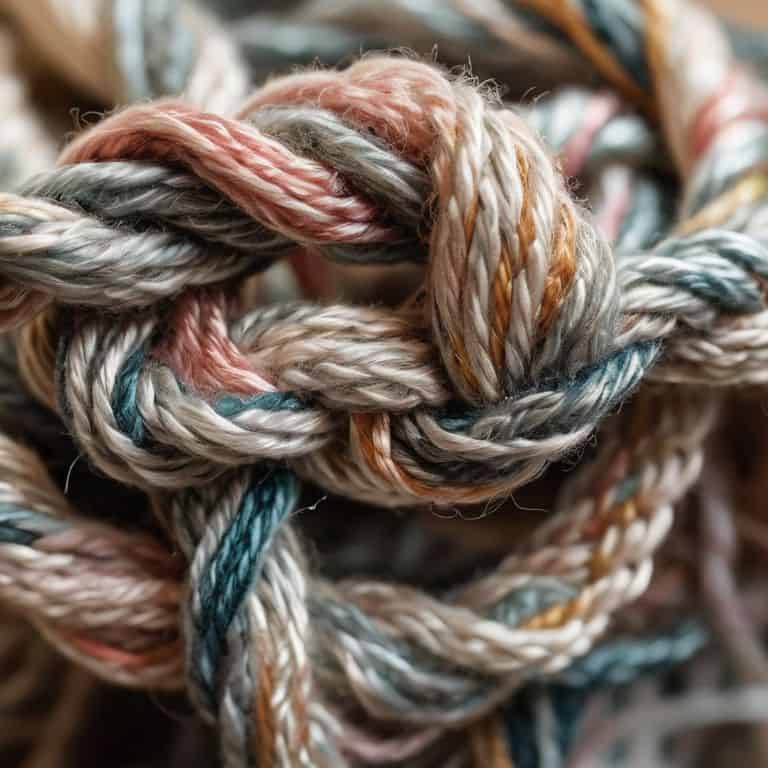
As I delve deeper into the world of rya knots, I find myself drawn to the intricate dance of macrame patterns. These deliberate knots and twists add a profound depth to my woven pieces, inviting the viewer to touch and explore. By combining rya knots with macrame, I can create layers of texture that seem to shift and evolve as one moves around the piece.
In my own work, I’ve found that macrame patterns can be used to create pockets of dense, three-dimensional texture that contrast beautifully with the more open, airy sections of the weaving. This interplay between light and shadow, smooth and rough, is what gives my pieces a sense of tension and visual interest. By experimenting with different macrame patterns, you can add a new level of sophistication and nuance to your rya knot weavings.
Scandinavian Rya Rug Inspiration
As I delve into the world of Scandinavian rya rugs, I’m struck by the elegant simplicity of these textured masterpieces. The traditional Scandinavian approach to rya knotting emphasizes a muted color palette, often featuring earthy tones that evoke the rugged landscapes of Norway and Sweden. I find inspiration in the way these rugs seem to embody the essence of their surroundings, as if the land itself has been woven into every thread. The result is a sense of depth and dimension that draws the viewer in, inviting them to touch and explore the intricate patterns.
In my own weaving practice, I’ve experimented with incorporating Scandinavian design elements into my rya knot pieces, combining natural fibers like wool and linen to create a tactile experience that’s both rustic and refined. The subtle play of light on the textured surface is a reminder that, just as in architecture, the interplay of form and material can elevate a piece from mere decoration to a work of art.
Tangling Up in Texture: 5 Essential Tips for Weaving with Rya Knots
- Let the yarn speak: choose materials that whisper stories of their own, like the gentle rustle of linen or the soft murmur of raw silk
- Map your terrain: before you start weaving, sketch out your design on graph paper, considering the topography of texture and the landscape of your loom
- Knots are just the beginning: experiment with different types of knots, from the humble reef knot to the majestic Josephine knot, to add depth and visual interest to your weave
- Play with tension: don’t be afraid to tug and tease your threads, coaxing out the perfect balance of give and take to create a fabric that’s both sturdy and supple
- Step back and surrender: remember that texture is a journey, not a destination – let your weave evolve organically, and don’t be afraid to make mistakes, for it’s in the imperfections that true beauty lies
Key Takeaways for Weaving Texture with Rya Knots
I’ve learned that the art of weaving with rya knots is all about embracing the tactile nature of fiber, allowing every thread to tell a story and contribute to a deeper, richer texture
By experimenting with different macrame patterns and Scandinavian rya rug inspirations, I’ve discovered that the possibilities for creating unique, three-dimensional textures are endless, and it’s this creativity that makes weaving so compelling
Through this journey of exploring rya knots, I’ve come to realize that the true beauty of weaving lies not just in the technical skill, but in the ability to craft a narrative with every strand, turning a simple weave into a work of art that invites touch and exploration
Weaving Wisdom
As I see it, creating texture with rya knots is not just about tying threads together, it’s about crafting a narrative that unfolds with every loop and every twist, where the tactile becomes the tangible and the ordinary becomes extraordinary.
Ethan Thorne
Weaving a Legacy with Rya Knots
As we conclude our journey into the world of rya knots, it’s essential to recap the key elements that make this ancient craft so captivating. From the initial steps of preparing your yarns and loom, to the intricate process of weaving macrame patterns for deep dimension, and drawing inspiration from Scandinavian rya rug designs, every step is a testament to the versatility and beauty of rya knots. The ability to create texture that not only pleases the eye but also invites the touch is a unique aspect of this craft, making each piece a tactile tapestry that tells a story with every thread.
As you embark on your own weaving journey, remember that the true magic of rya knots lies not just in the technical skill, but in the creative freedom they offer. Don’t be afraid to experiment, to push the boundaries of what is possible with yarn and thread. For in the world of weaving, it’s not just about creating something beautiful, but about crafting a piece of yourself, a piece that will stand the test of time and tell your story to generations to come.
Frequently Asked Questions
What are the best types of yarn to use for creating deep texture with rya knots?
For deep texture with rya knots, I recommend using chunky, wool-rich yarns or thick, plush fibers like raw silk or linen. These yarns will give you the most pronounced texture and visual interest. Look for yarns with a bit of heft and a soft, organic feel to really make your rya knots pop.
How do I balance the density of rya knots to achieve a visually appealing texture?
To balance density, I experiment with knot spacing and yarn weight. For a visually appealing texture, I aim for a mix of loose and tight knots, creating a rhythmic flow. I also consider the surrounding fibers, allowing them to breathe and blend with the knots, much like the negative space in architectural design.
Can I combine rya knots with other weaving techniques to create a unique, multi-dimensional texture?
I love experimenting with mixed techniques – combining rya knots with other methods like twill or herringbone can add incredible depth to your weavings. Try pairing rya knots with a simple tabby weave or incorporating them into a larger tapestry for a show-stopping, multi-dimensional effect that’s all about playing with texture and visual interest.