I still remember the first time I tried to learn how to do the plain weave (tabby) stitch. As an architect turned weaver, I was fascinated by the idea of building with yarn, but I found most tutorials to be overly complicated and focused on the end product rather than the process. It wasn’t until I simplified my approach and focused on the rhythm of the weave that I began to truly understand the beauty of this fundamental technique. The plain weave, or tabby stitch, is often overlooked as a simple or boring stitch, but I believe it’s the perfect foundation for any weaving project.
In this article, I’ll share my straightforward approach to how to do the plain weave (tabby) stitch, breaking it down into manageable steps that will have you weaving like a pro in no time. I’ll provide you with practical tips and tricks for setting up your loom, choosing the right yarn, and creating a beautiful, textured fabric. My goal is to inspire you to see weaving as a form of artistic expression, rather than just a technical skill. By the end of this guide, you’ll be equipped with the knowledge and confidence to start building your own unique woven creations, one thread at a time.
Table of Contents
Guide Overview: What You'll Need
Total Time: 30 minutes to 1 hour
Estimated Cost: $10 – $20
Difficulty Level: Easy
Tools Required
- Loom (or a simple frame loom)
- Shuttle (or a fork or a piece of cardboard)
- Scissors (for cutting yarn)
- Measuring tape (for measuring yarn lengths)
Supplies & Materials
- Yarn (of choice, in 2 or more colors)
- Warp threads (in a neutral color, approximately 6 inches long)
Step-by-Step Instructions
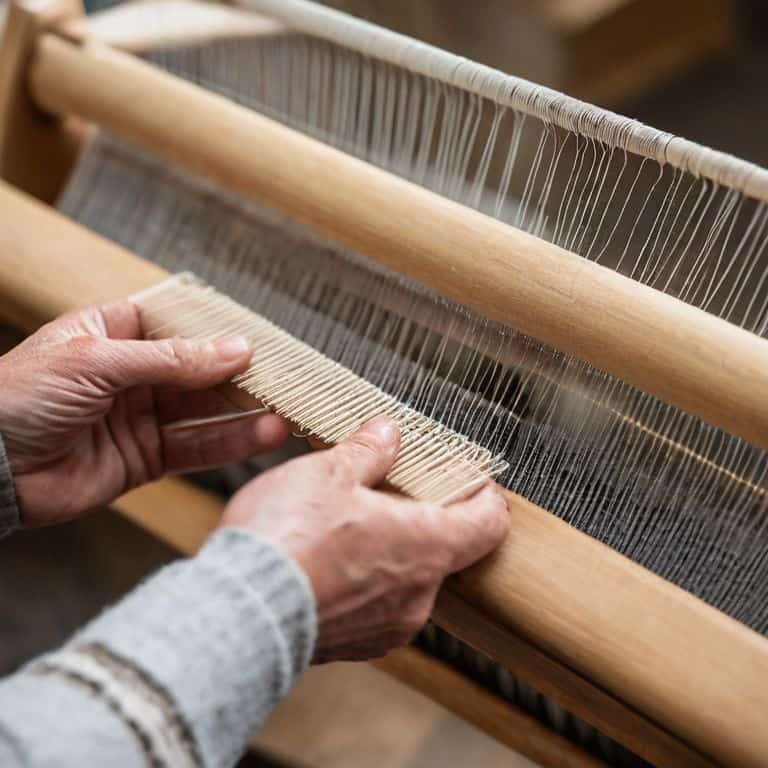
- 1. To begin with the plain weave, or tabby stitch, start by preparing your loom. This involves setting up the warp threads, which will serve as the foundation for your weave. I like to think of this step as laying the groundwork for the entire piece, as it will determine the overall texture and stability of the fabric.
- 2. Next, thread your weft yarn through the shed, which is the opening between the warp threads. This is where the magic happens, and the plain weave begins to take shape. As you work, pay attention to the tension of the yarn, making sure it’s not too tight or too loose, as this can affect the overall quality of the weave.
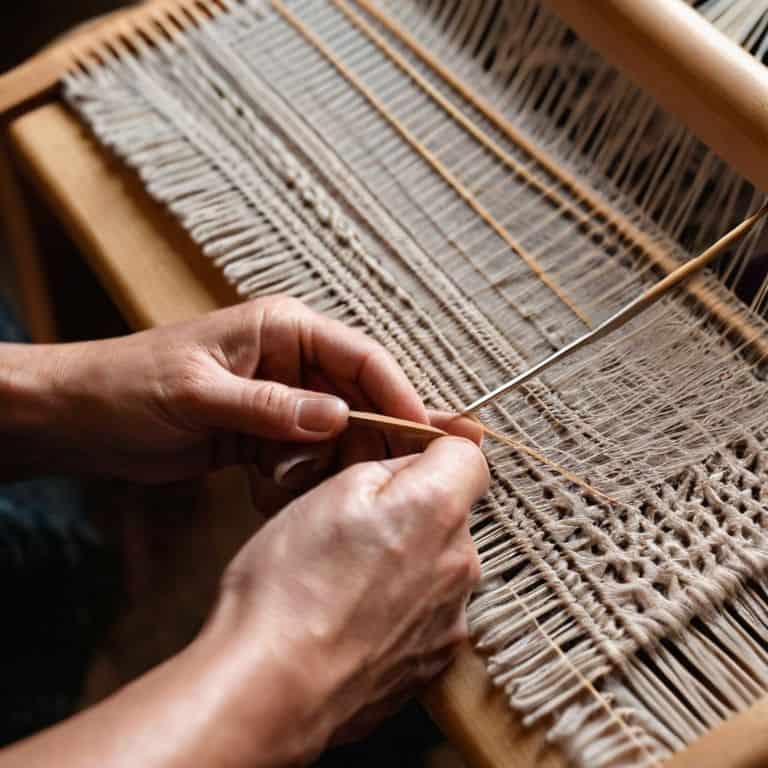
- 3. Now, it’s time to start weaving. Begin by passing the weft yarn over one warp thread, then under the next, creating a simple over-and-under pattern. This rhythm is at the heart of the plain weave, and it’s what gives the fabric its unique texture and visual interest. As you work, try to maintain a consistent rhythm, as this will help you achieve a more even weave.
- 4. Continue weaving, following the over-and-under pattern, until you reach the end of the row. When you get to the last warp thread, turn the yarn around and start a new row, working in the opposite direction. This is where the plain weave really starts to come together, and you’ll begin to see the fabric take shape.
- 5. As you work on subsequent rows, make sure to alternate the pattern, so that the yarn goes over the threads it went under in the previous row, and vice versa. This is what creates the plain weave’s signature texture, and it’s essential for achieving a balanced and visually appealing fabric.
- 6. To add more complexity to your weave, you can experiment with different yarn weights and colors. This will allow you to create a wide range of textures and patterns, from subtle and understated to bold and vibrant. Just remember to balance your colors and textures carefully, as too much contrast can be overwhelming.
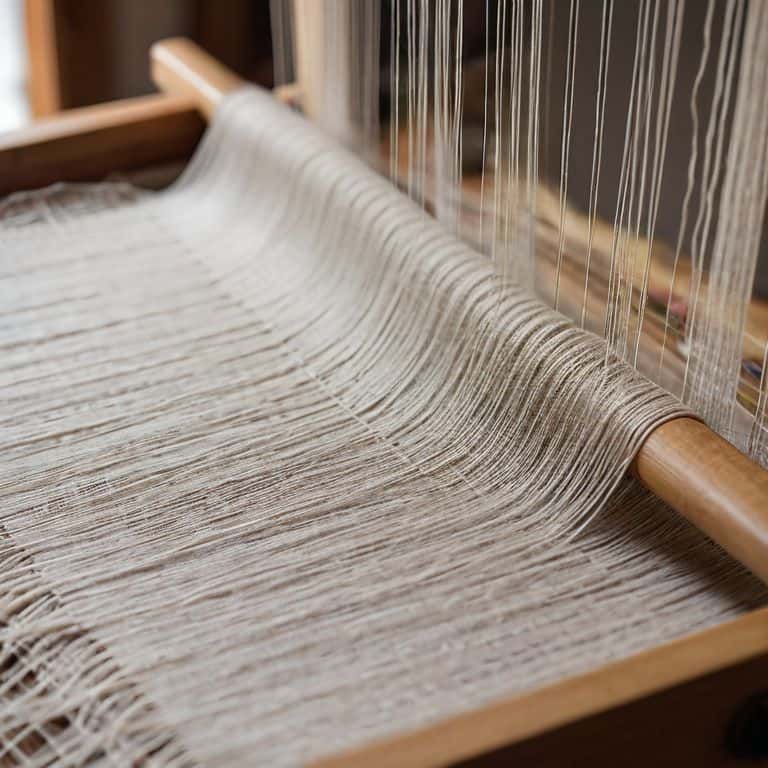
- 7. Finally, when you’ve completed your weave, remove it from the loom and trim the excess yarn. This is the moment of truth, when you get to see your finished piece in all its glory. Take a step back and admire your handiwork, paying attention to the texture and drape of the fabric, and thinking about how you can use it in your next project.
Mastering Plain Weave Basics
As I delve deeper into the world of plain weave, I’ve come to realize that mastering the basics is crucial for creating beautiful, textured pieces. One of the key factors to consider is the type of yarn you use for the tabby stitch. I’ve found that natural fibers like linen and raw silk work wonderfully, as they add a unique tactile quality to the fabric. When setting up your weaving loom for plain weave, it’s essential to ensure that the tension is even, as this will affect the overall texture and drape of the fabric.
Understanding weaving notation is also vital, as it allows you to read and create patterns with ease. I like to think of it as building with yarn, where each thread is a carefully considered element in the overall design. By following a simple weaving pattern, beginners can create stunning pieces that showcase the beauty of plain weave. Common mistakes in plain weave stitching often occur when the tension is off, so it’s crucial to keep an eye on this as you work.
To maintain tension in weaving, I recommend using a consistent beat and keeping your yarn at a comfortable length. This will help you achieve a smooth, even weave that showcases the beauty of the plain weave pattern. By following these tips and practicing regularly, you’ll be well on your way to creating stunning woven pieces that showcase the simplicity and elegance of the plain weave technique.
Foundations in Simple Weaving Patterns
As I delve deeper into the world of simple weaving patterns, I find myself drawn to the subtle nuances of the plain weave. It’s amazing how this fundamental technique can be used to create a wide range of textures and effects. By varying the thickness and color of the yarn, you can add depth and visual interest to your weave. I often experiment with different combinations to see how they interact and influence the overall piece.
For me, the key to mastering simple weaving patterns is to understand how the plain weave can be used as a foundation for more complex designs. By building on this basic structure, you can begin to introduce new elements and techniques, slowly adding layers of complexity and interest to your work. This approach allows you to develop a sense of harmony and balance in your weaving, which is essential for creating beautiful and cohesive pieces.
Setting Up Your Loom for Tabby Stitch
As I prepare to weave, I think of setting up my loom as the groundwork for a new architectural project. The tabby stitch, with its straightforward over-and-under pattern, requires a solid foundation to truly shine. I begin by carefully selecting my yarns, considering not just color and texture, but how they’ll interact with the loom’s tension. With my materials in hand, I then focus on threading the loom, taking my time to ensure each strand is properly aligned and evenly spaced.
This attention to detail may seem meticulous, but it’s essential for creating a cohesive, visually appealing piece. I find that the process of setting up my loom is almost meditative, allowing me to clear my mind and focus on the creative journey ahead. With my loom properly set up, I’m ready to start weaving, and the tabby stitch can begin to take shape, its simple rhythm building into something beautiful and textured.
Weaving Wisdom: 5 Essential Tips for Mastering the Plain Weave
- Let the yarn guide your hands: don’t pull the threads too tight, as this can create a stiff and uninviting fabric
- Experiment with different yarn weights and textures to add depth and visual interest to your woven piece
- Pay attention to your shuttle’s rhythm: a smooth, consistent motion is key to creating a beautiful, even plain weave
- Don’t be afraid to mix and match colors: the plain weave is a versatile canvas for exploring subtle hue shifts and bold contrasts
- Take your time and trust the process: the plain weave may seem simple, but its beauty lies in the patience and attention required to craft it with intention and care
Key Takeaways for Mastering the Plain Weave
Understand that the plain weave, or tabby stitch, is the foundation of most weaving patterns, and mastering it will allow you to experiment with more complex designs and textures
Setting up your loom correctly is crucial for achieving the desired tension and texture in your plain weave project, so take the time to ensure your warp threads are evenly spaced and your weft yarn is the right weight
Practice and patience are key to mastering the plain weave – don’t be discouraged if your early attempts are uneven or loose, as the rhythm of over and under will become second nature with time and dedication to your craft
Weaving Wisdom
The plain weave is not just a stitch, it’s a rhythm – a deliberate dance of over and under that sets the stage for a symphony of texture and form, reminding us that even in simplicity lies the power to create something profoundly beautiful.
Ethan Thorne
Weaving a Lasting Foundation

As we conclude our journey through the plain weave, it’s essential to remember that mastering this fundamental technique is just the beginning. We’ve covered the basics of setting up your loom, understanding the rhythm of the tabby stitch, and laying the groundwork for more complex patterns. By now, you should feel confident in your ability to create a solid foundation for your woven pieces, and I encourage you to experiment with different yarns, colors, and textures to make each project truly unique.
As you continue to explore the world of weaving, I hope you’ll remember that the true beauty of this craft lies in its ability to blend art and function. Don’t be afraid to push the boundaries of what’s possible with yarn and thread, and always keep in mind that the simplest patterns can often be the most elegant and profound. With the plain weave as your foundation, the possibilities are endless, and I have no doubt that you’ll create something truly remarkable.
Frequently Asked Questions
What are some common mistakes to avoid when setting up the warp threads for a plain weave project?
When setting up warp threads, I’ve found that common mistakes include uneven tension, inconsistent thread spacing, and neglecting to secure the warp ends. To avoid these, take your time, use a measuring guide, and gently tug on each thread to ensure even tension – it’s all about building a solid foundation, just like in architecture.
How do I achieve a consistent tension when weaving a plain weave fabric?
To achieve consistent tension, I always check my warp threads for even spacing and gently tug on the yarn as I weave, listening for a soft ‘hum’ that signals the perfect balance of give and take – it’s almost like plucking a guitar string, where harmony is key.
Can I use the plain weave stitch to create complex patterns or is it limited to simple designs?
While the plain weave stitch is often associated with simple designs, I believe it’s a versatile foundation for complex patterns. By varying thread colors, textures, and densities, you can create intricate, layered designs that elevate this basic stitch into something truly stunning. Experimentation is key to unlocking its full potential.