I still remember the first time my wife, a talented weaver, showed me her latest knitting project. She had spent hours pouring her heart into it, but when she held it up, it looked more like a crumpled mess than a work of art. That’s when she introduced me to the world of a guide to blocking knits. As a carpenter, I was fascinated by the process of transforming a raw, unfinished piece into something beautiful and functional. My wife would often say that blocking is what brings a knit to life, and I couldn’t agree more.
In this article, I’ll share my honest, no-hype advice on how to block your knits like a pro. You’ll learn the essential steps to take your knitting from a sloppy, unfinished state to a stunning, professional-looking piece. I’ll walk you through the process, from preparation to finishing touches, and provide you with practical tips and tricks to make the journey smoother. Whether you’re a seasoned knitter or just starting out, this guide will help you unlock the full potential of your handmade creations and make them truly special.
Table of Contents
Guide Overview: What You'll Need
Total Time: 1 hour 15 minutes
Estimated Cost: $10 – $20
Difficulty Level: Easy
Tools Required
- Tape measure (for measuring knit pieces)
- Ruler (for ensuring straight edges)
- Pins (for securing knits in place)
- Blocking pins (specifically designed for blocking knits)
- Iron (with steam function)
- Ironing board (or other heat-resistant surface)
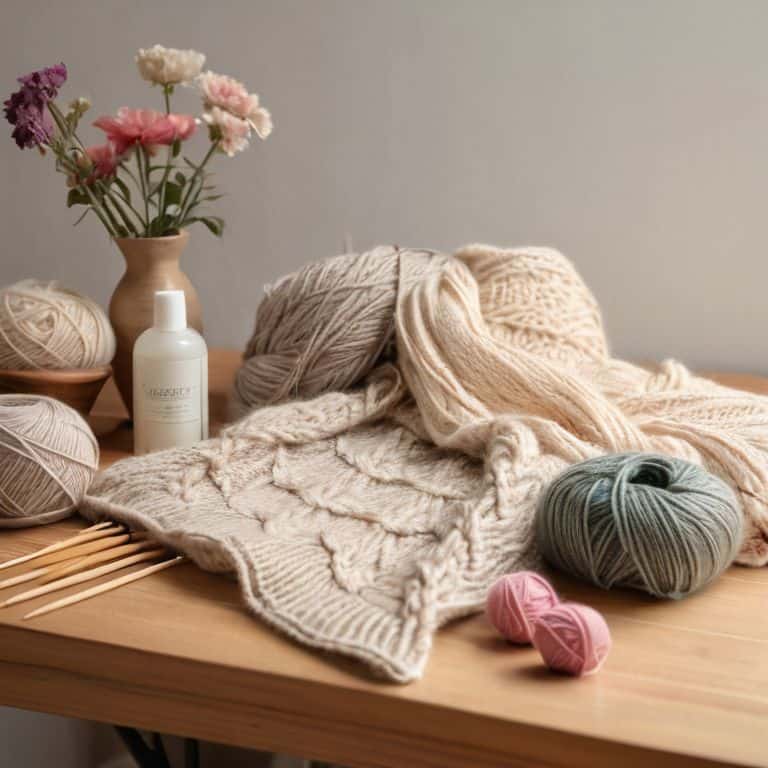
Supplies & Materials
- Blocking mat (optional but recommended)
- Measuring tape (6 feet or longer)
- Yarn needle (for weaving in ends)
- Stitch markers (for marking important points on the knit piece)
Step-by-Step Instructions
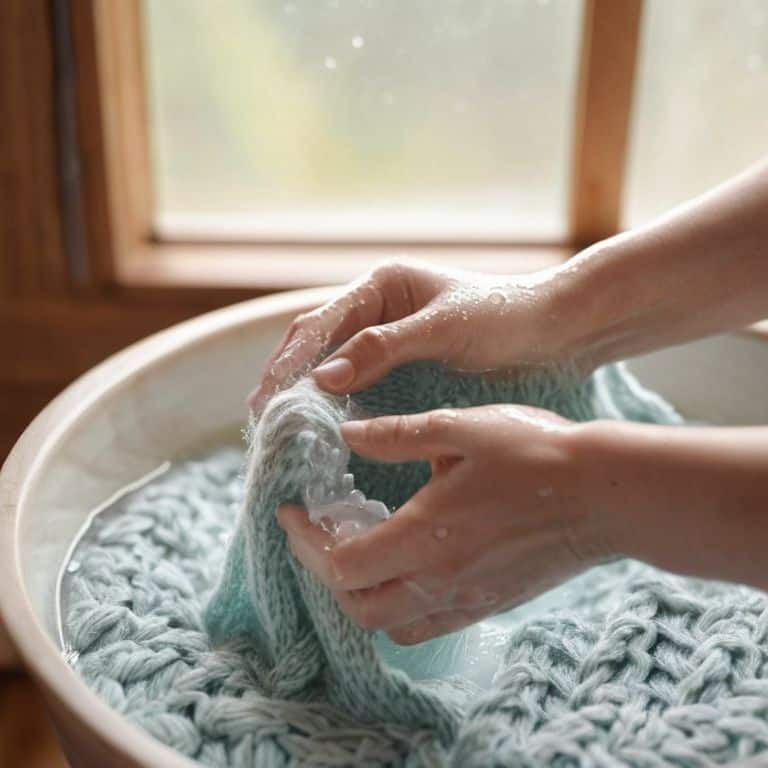
- 1. First, let’s start by preparing our knitting for the blocking process. This involves washing and drying our handmade knit to remove any finishes that might affect the blocking process. I like to use a mild detergent and cold water to gently wash my knits, then lay them flat to air dry.
- 2. Next, we need to gather our blocking tools. This includes a blocking mat, which provides a soft, padded surface for our knit to lie on, and a set of T-pins, which will help us shape our knit into the desired form. I also like to have a measuring tape and a ruler on hand to ensure my knit is evenly spaced and properly aligned.
- 3. Now it’s time to start pinning out our knit. Begin by finding the center of your knit and pinning it to the mat, then work your way outwards, using your measuring tape and ruler to guide you. It’s essential to be gentle but firm when pinning, as we don’t want to stretch or distort our knit.
- 4. As we continue to pin out our knit, we need to make sure it’s evenly tensioned. This means that the fabric should be smooth and flat, with no wrinkles or puckers. If necessary, we can use our hands to gently stretch and shape the knit, working from the center outwards.
- 5. With our knit fully pinned out, it’s time to let it dry. This can take anywhere from a few hours to several days, depending on the type of yarn and the humidity of our environment. I like to keep an eye on my knit as it dries, making sure it’s not developing any wrinkles or creases.
- 6. Once our knit is dry, we can remove the pins and admire our handiwork. Our knit should now be beautifully shaped and evenly textured, with a professional finish that’s sure to impress. To add a extra touch, I like to use a lint roller or a piece of tape to remove any excess fibers or debris.
- 7. Finally, our blocked knit is now ready to wear or display. We can store it in a cool, dry place, or wear it proudly, knowing that we’ve taken the time to give it the special care it deserves. As a woodworker and tool maker, I appreciate the attention to detail that blocking requires, and I’m always excited to see the finished result.
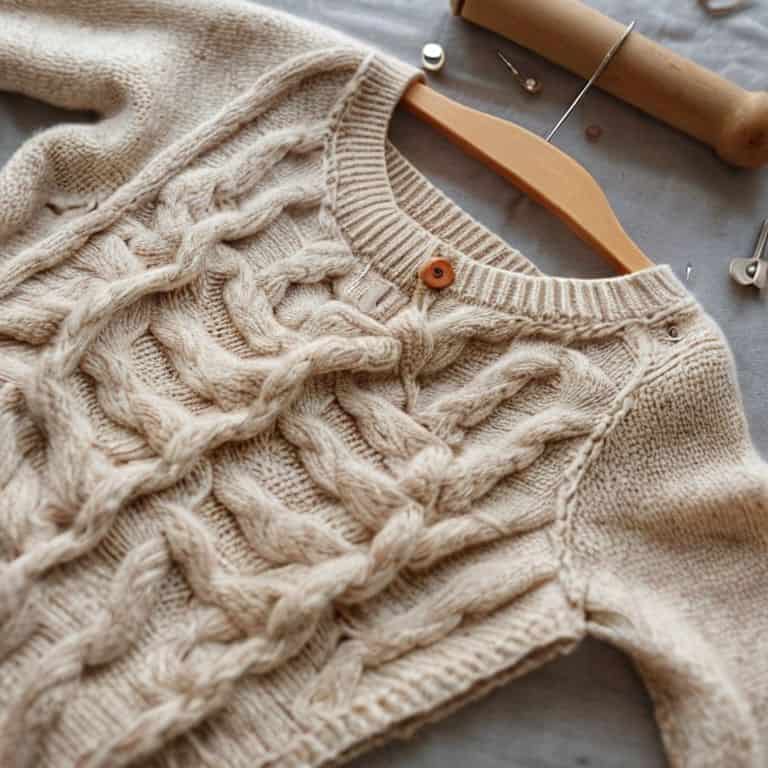
A Guide to Blocking Knits
As I work on a new project, I always consider the type of yarn types for knitting I’m using, as it can affect the overall look and feel of the finished piece. For instance, if I’m working with a delicate fiber, I’ll make sure to use a gentler blocking method to prevent damage. My wife, an avid knitter, always says that hand knit garment finishing is just as important as the knitting process itself. I’ve seen her spend hours perfecting the finish of a garment, and it really makes a difference in the end result.
When it comes to blocking knitting tools, I’m a big fan of using homemade or custom tools. There’s something special about using a tool that you’ve made yourself, and it can really add to the satisfaction of completing a project. I’ve made my own blocking pins and mats, and they’ve been a game-changer for my wife’s knitting projects. Whether you’re working with woven vs knitted fabric, having the right tools can make all the difference in achieving a professional-looking finish.
In addition to using the right tools, it’s also important to follow knitwear care instructions to ensure your finished garments last for years to come. This includes not only blocking, but also washing and storing your knits properly. By taking the time to properly care for your knits, you can enjoy them for years to come, and they’ll remain a testament to your skill and craftsmanship as a maker.
Hand Knit Garment Finishing With Ease
To finish your hand knit garments with ease, it’s essential to understand the importance of blocking in the overall process. I’ve seen my wife spend hours perfecting her knits, and it all comes down to this final step. By blocking your knits, you’re not only evenizing the stitches, but also enhancing the texture and drape of the fabric. This is where the magic happens, and your handmade garment transforms into a professional-looking piece.
I recommend using a mix of traditional and modern tools to make the blocking process smoother. Invest in a good blocking mat, some sturdy pins, and a measuring tape. These tools will become your best friends as you work on finishing your hand knit garments. With practice, you’ll develop a keen eye for detail and a sense of satisfaction that comes from knowing you’ve created something truly special.
Unraveling Yarn Types for Perfect Blocks
When it comes to blocking knits, the type of yarn you’re working with can make all the difference. I’ve seen my wife struggle with blocking a delicate lace shawl made from merino wool, only to have it turn out perfectly after adjusting her technique. On the other hand, a sturdy cotton yarn might require a bit more aggression to get the desired shape. Understanding the unique characteristics of your yarn – whether it’s wool, cotton, or a blend – is key to achieving a perfect block.
I’ve found that different yarns respond better to different blocking methods. For example, wool yarns tend to bloom beautifully when wet blocked, while cotton yarns might be better suited to steam blocking. By taking the time to understand your yarn, you can tailor your blocking technique to bring out the best in your handmade knit.
Blocking Like a Pro: 5 Essential Tips to Elevate Your Handmade Knits
- Choose the right blocking tools, such as sturdy blocking pins and a high-quality blocking mat, to ensure your handmade knits dry evenly and retain their shape
- Understand the unique characteristics of your yarn, including its fiber content and weight, to determine the best blocking method for your project
- Pay attention to the water temperature and avoid over-soaking your knits, as this can cause them to felt or lose their texture
- Use a measuring tape or blocking wires to achieve precise dimensions and symmetry in your blocked knits, especially for garments like sweaters and hats
- Don’t rush the blocking process – allow your knits to air dry completely, which can take anywhere from a few hours to several days, depending on the thickness and complexity of the project
Key Takeaways for Blocking Knits
Choose the right blocking tools and materials, such as a good quality blocking board, pins, and measuring tape, to ensure professional-looking results
Understand the properties of different yarn types to determine the best blocking method, whether it’s wet blocking, steam blocking, or dry blocking
Pay attention to the finishing touches, including weaving in ends, sewing seams, and adding any embellishments, to give your handmade knit a polished and finished look
Bringing Your Handmade Knits to Life

As we conclude this guide to blocking knits, let’s recap the essentials: understanding your yarn type, preparing your knitting, and using the right techniques to achieve professional-looking results. We’ve also explored how to choose the perfect blocking tools, from homemade to store-bought, to make the process easier and more enjoyable. By mastering these skills, you’ll be able to take your handmade knits to the next level, giving them a polished finish that showcases your hard work and dedication. Remember, the key to successful blocking is patience and attention to detail, so don’t be afraid to take your time and experiment with different methods until you find what works best for you.
Now that you’ve learned the art of blocking knits, it’s time to unleash your creativity and bring your handmade projects to life. Whether you’re a seasoned knitter or just starting out, the process of blocking can be a truly transformative experience, allowing you to see your finished garments in a whole new light. So go ahead, get creative, and don’t be afraid to try new things – with practice and patience, you’ll be creating stunning, professional-looking knits that will make you proud to show them off. Happy knitting, and happy blocking – I look forward to seeing the amazing things you’ll create!
Frequently Asked Questions
What are the best methods for blocking different types of yarns, such as wool, cotton, or blends?
When it comes to blocking different yarns, I’ve found that wool loves a good soak and gentle stretch, while cotton benefits from a lighter touch and a bit of steam. Blends, on the other hand, often require a mix of both approaches – I like to experiment with small swatches to find the perfect balance.
How do I determine the optimal blocking temperature and moisture level for my handmade knit to prevent felting or over-relaxation?
For me, it’s all about feeling the yarn – my wife always says I can smell the difference between wool types when I’m sanding wood for a new loom. To determine the optimal blocking temp and moisture, consider your yarn type: protein fibers like wool and silk prefer cooler temps and lower moisture, while plant-based fibers like cotton and linen can handle a bit more heat and humidity.
Can I block a knit garment that has already been worn or used, or is it best to block it immediately after completion?
While it’s best to block a knit garment immediately after completion, you can still block a worn or used one. Just be aware that any pilling or wear may affect the blocking process. Give it a good wash, and then block it as you would a new garment.