
I still remember the day my wife, an avid knitter, complained about the flimsy stitch markers she was using. She had tried to make her own, but they kept falling apart. That’s when I decided to take matters into my own hands and learn how to make stitch markers that would withstand her furious knitting sessions. As a carpenter, I was convinced that with the right materials and a bit of creativity, I could create something better. And that’s exactly what I did. My wife was thrilled, and soon, her friends were asking for their own custom stitch markers.
In this article, I’ll share my no-nonsense approach to making stitch markers from scratch. You’ll learn how to choose the right materials, design your markers, and bring them to life with simple, step-by-step instructions. Whether you’re a seasoned knitter or a beginner, you’ll appreciate the practical advice and tips I’ll be sharing. By the end of this guide, you’ll be equipped with the knowledge to create your own sturdy, functional, and beautiful stitch markers that will make your knitting projects a breeze. So, let’s get started and explore the world of handmade stitch markers together!
Table of Contents
Guide Overview: What You'll Need
Total Time: 30 minutes to 1 hour
Estimated Cost: $5 – $10
Difficulty Level: Easy
Tools Required
- Wire Cutters (for cutting wire or string)
- Pliers (for shaping wire)
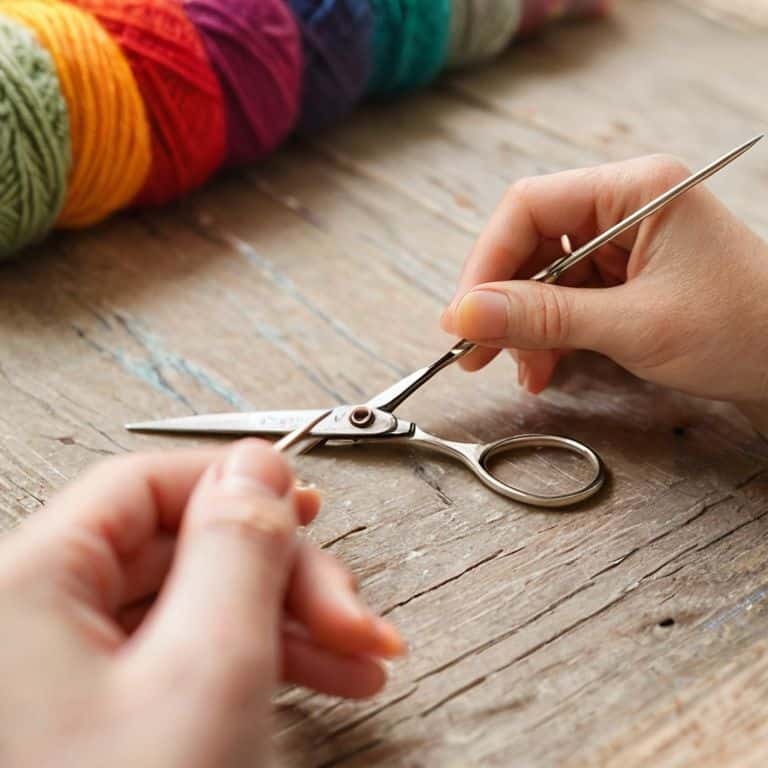
- Scissors (for cutting string or yarn)
Supplies & Materials
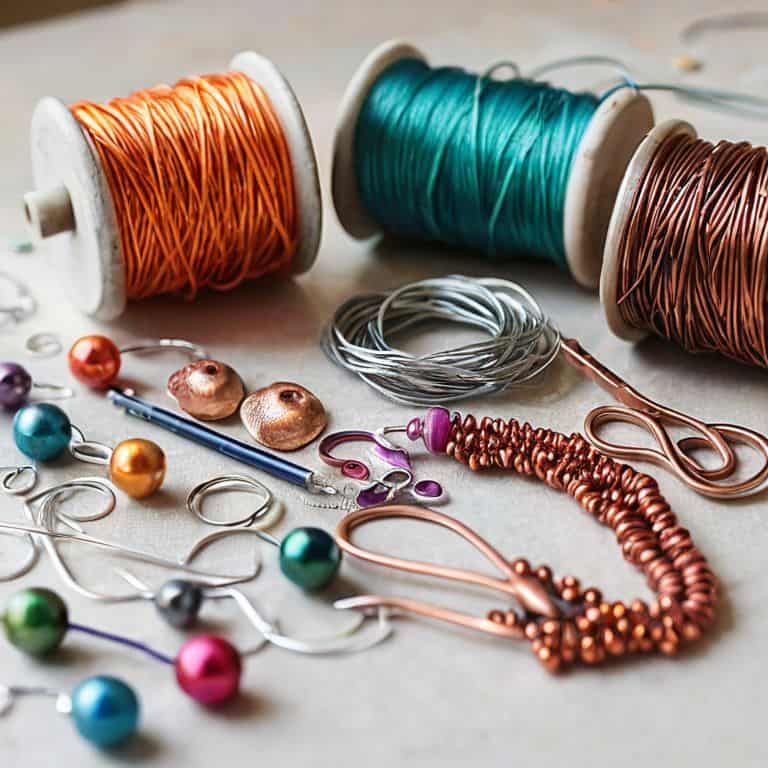
- Wire (copper or aluminum) 22-gauge or 24-gauge
- Small beads plastic, metal, or glass
- String or yarn for creating stitch markers with a loop
- Jump rings optional, for attaching charms
Step-by-Step Instructions
- 1. First, let’s gather our materials, which include copper wire, wooden or plastic beads, and a few basic tools like wire cutters and pliers. I like to use a variety of materials to give my stitch markers some personality, and I’ve found that copper wire is not only durable but also develops a beautiful patina over time.
- 2. Next, we need to cut the copper wire into manageable pieces. I usually cut them into 2-3 inch lengths, depending on the design I have in mind for my stitch markers. It’s essential to have a clear idea of what you want your markers to look like, as this will help you determine the right size and shape for your wire pieces.
- 3. Now, let’s shape our wire pieces into the desired forms. For simple stitch markers, you can just bend the wire into a loop or a coil, but if you’re feeling more adventurous, you can try creating more intricate designs. I’ve found that using a mandrel or a small dowel can help you achieve more precise shapes and curves.
- 4. With our wire shapes ready, it’s time to add the beads. This is where you can get really creative, using different colors, textures, and patterns to make your stitch markers truly unique. I like to use a combination of wooden and plastic beads to add some visual interest and variety to my markers.
- 5. Once you’ve threaded your beads onto the wire, it’s time to secure them in place. You can do this by bending the wire into a small loop or by using a tiny amount of glue to hold the beads in position. I prefer the loop method, as it allows me to easily remove and reposition the beads if needed.
- 6. Now that our stitch markers are taking shape, let’s add a finish to protect the copper wire from tarnishing. You can use a clear coat of varnish or a specialized metal sealant to achieve this. I’ve found that a light coating of wax can also help to preserve the wire and give it a nice sheen.
- 7. Finally, let’s assemble and test our stitch markers. Simply thread them onto your knitting or crochet project, and make sure they’re functioning as intended. I like to test my markers with a few different yarn types and needle sizes to ensure they’re working smoothly and consistently.
Crafting Stitch Markers
As I work on crafting stitch markers, I always think about the versatility of materials you can use. From beaded stitch marker patterns to simple wire wraps, the options are endless. I love experimenting with different designs, like polymer clay stitch marker designs, to create unique and functional markers.
When it comes to customizable stitch markers for knitting, I believe that attention to detail is key. You can use various materials like wood, metal, or even handmade ceramic beads to create one-of-a-kind markers. I also enjoy sharing handmade stitch marker ideas with my fellow crafters, as it’s a great way to inspire and be inspired by new designs.
In my workshop, I’ve developed a few tricks for keeping my stitch markers organized, including clever stitch marker storage solutions. By using small containers or pouches, you can easily store and transport your markers, making it easier to focus on your knitting or crochet project. Whether you’re a seasoned crafter or just starting out, I encourage you to explore the world of wire wrapped stitch marker tutorials and discover the joy of creating your own handmade stitch markers.
Handmade Marker Ideas Unleashed
Now that we’ve covered the basics, let’s unleash our creativity with some handmade marker ideas. I love experimenting with different materials and designs in my workshop. For instance, you can use wooden beads, shell buttons, or even small pieces of hand-painted ceramic to create unique stitch markers. The key is to have fun and play with various textures and colors.
I’ve also found that adding a personal touch, like a small charm or a handmade leather strap, can make your stitch markers truly special. Remember, the tools and accessories you create are an extension of your craft, so don’t be afraid to get creative and try new things. With a little imagination, you can create stitch markers that not only serve a purpose but also reflect your personality and style.
Wire Wrapped Beaded Designs
Now that we’ve explored some fantastic handmade marker ideas, let’s dive into the world of wire wrapped beaded designs. I just love how a simple wire wrap can elevate a stitch marker from functional to fashionable. To get started, you’ll need some wire – I prefer copper or bronze for their warmth and character – and your chosen beads. Don’t be afraid to experiment with different shapes, sizes, and colors to create unique markers that reflect your personal style.
As you wrap the wire around the bead, remember to leave a small loop at the top for attaching the marker to your project. You can also add a few decorative twists or turns to give your marker some extra flair. With a little practice, you’ll be whipping up wire wrapped beaded stitch markers like a pro, and they make great gifts for your fiber-loving friends, too.
Hammering Out the Details: 5 Key Tips for Crafting Your Own Stitch Markers

- Choose materials that resonate with you, like copper, wood, or bamboo, to add a personal touch to your stitch markers
- Keep it simple for your first projects, and don’t be afraid to experiment with different shapes and sizes as you gain confidence
- Pay attention to the weight and texture of your markers – you want them to be easy to handle and not get lost in your work
- Consider adding a personal flair with beads, wire wrapping, or other embellishments to make your stitch markers truly one-of-a-kind
- Most importantly, don’t overthink it – the beauty of handmade stitch markers lies in their uniqueness, so embrace any imperfections and have fun with the process
Key Takeaways for Handcrafting Your Own Stitch Markers
By using simple materials like wood, metal, or plastic, and a bit of creativity, you can craft unique stitch markers that reflect your personal style and add a touch of handmade charm to your knitting or crochet projects
With a few basic tools and some practice, you can master various techniques such as wire wrapping, beading, and woodworking to create custom stitch markers that are both functional and beautiful
Making your own stitch markers is not only a fun and rewarding DIY project, but it also allows you to experiment with different materials, designs, and ideas, helping to bridge the gap between woodworking and fiber arts, and empowering you to take your crafting to the next level
Wrapping Up Your Stitch Marker Journey
We’ve covered a lot of ground in this guide, from the basics of stitch marker materials to more advanced techniques like wire wrapped beaded designs. By now, you should have a solid understanding of how to craft your own unique stitch markers that reflect your personal style and complement your knitting or crochet projects. Whether you’re a seasoned maker or just starting out, the process of creating something with your own hands can be incredibly rewarding. Don’t be afraid to experiment with different materials and techniques – it’s all part of the fun of making your own stitch markers.
As you move forward with your stitch marker making journey, remember that the beauty of handmade lies not just in the end result, but in the process itself. The time and effort you invest in crafting your own tools and accessories can be a powerful way to connect with your creativity and slow down in a world that often values speed and efficiency above all else. So, take your time, enjoy the process, and don’t hesitate to reach out if you have any questions or need further guidance – happy making!
Frequently Asked Questions
What type of materials can I use to make stitch markers if I don't have any beads or wire?
No beads or wire, no problem. I’ve used all sorts of materials in my workshop – try repurposing old buttons, seashells, or even small pieces of wood. You can also experiment with leather, felt, or clay to create unique markers that add a personal touch to your projects.
How do I determine the right size for my stitch markers so they don't get lost in my knitting or crochet project?
When choosing a size for your stitch markers, consider the weight and type of yarn you’re using. For bulky yarns, I like to use markers around 1-2 inches in diameter, while finer yarns can handle smaller markers, around 0.5-1 inch. You want them to be noticeable, but not so big they get in the way.
Can I use natural materials like wood or bone to create unique and rustic-looking stitch markers?
Absolutely, I love experimenting with natural materials like wood or bone for a rustic touch. You can shape and sand wooden beads or use antler slices for a unique look. Just be sure to seal them with a natural oil to protect the material and prevent splintering.