
I still remember the day my wife, a passionate weaver, came to me frustrated with her yarn storage. She had tried every method under the sun, from yarn bowls to storage bins, but nothing seemed to keep her fibers organized and tangle-free. That’s when I realized that a good a guide to yarn storage is not just about throwing your yarn in a box, but about creating a system that respects the craft. As a carpenter and custom tool maker, I’ve learned that the right tools and storage can make all the difference in your work.
In this article, I’ll share my practical advice on how to create a yarn storage system that works for you, not against you. I’ll walk you through my favorite tips and tricks for keeping your stash organized, from using reclaimed wood to build custom storage crates to implementing a yarn categorization system. My goal is to empower you to take control of your yarn collection and make the most of your crafting time. By the end of this guide, you’ll have a clear understanding of how to design and implement a functional yarn storage system that will keep your fibers tidy and your creativity flowing.
Table of Contents
Guide Overview: What You'll Need
Total Time: 1 hour 15 minutes
Estimated Cost: $20 – $40
Difficulty Level: Easy
Tools Required
- Measuring Tape (for measuring storage space)
- Label Maker (for organizing yarn labels)
- Scissors (for cutting yarn or storage materials)
Supplies & Materials
- Plastic Storage Bins (various sizes)
- Wooden Crates (for larger yarn storage)
- Yarn Ball Winder (for organizing yarn skeins)
- Shelves (for storing yarn in a closet or room)
- 2-in x 4-in lumber (for building custom shelves)
- Fabric Storage Bags (for storing small yarn projects)
Step-by-Step Instructions
- 1. First, let’s start by assessing our yarn stash and figuring out what kind of storage solution we need. Take a good look at your yarn collection and think about how you want to access it. Do you have a lot of small balls of yarn, or are they mostly large skeins? This will help us determine the best way to store them.
- 2. Next, we need to choose a storage location that’s convenient and out of the way. Consider a spot that’s close to your crafting area, but not so close that it gets in the way. I like to store my yarn in a dedicated room, but if you don’t have that luxury, a closet or shelf will do. Just make sure it’s _easily accessible_ so you can grab what you need quickly.
- 3. Now it’s time to think about the type of storage containers we’ll use. I’m a big fan of repurposed wood crates, but you can use plastic bins or baskets if that’s what you have on hand. The key is to find containers that are _durable_ and can hold a decent amount of yarn. Make sure they’re also easy to clean and maintain.
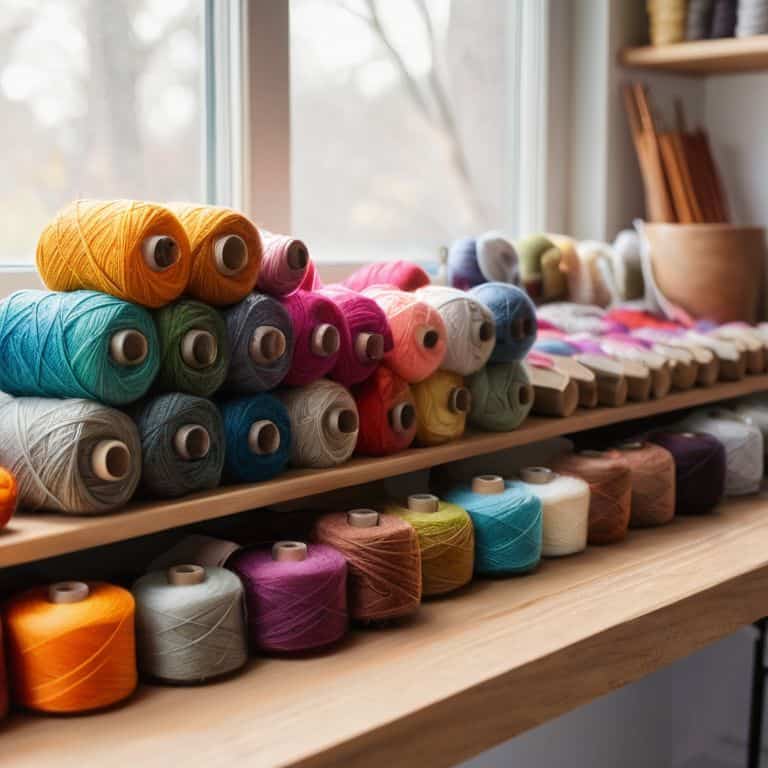
- 4. Once we have our containers, it’s time to start organizing our yarn. I like to sort mine by color, but you can also organize by fiber type, weight, or project. The important thing is to find a system that works for you and stick to it. Consider using _labels_ or tags to identify what’s inside each container.
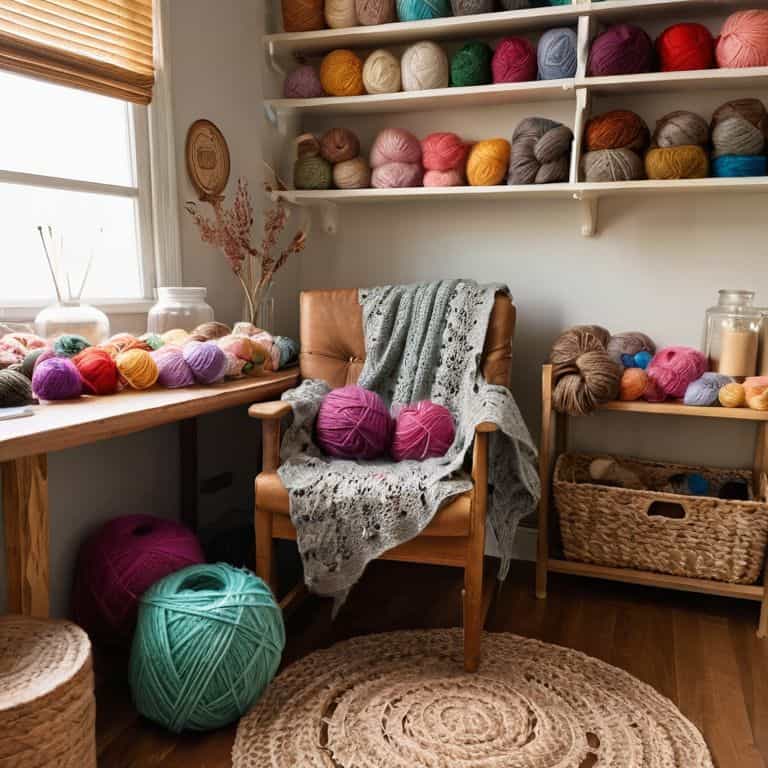
- 5. With our yarn organized, it’s time to think about maximizing our storage space. One of my favorite tricks is to use _vertical storage_ to make the most of our space. Consider using stackable shelves or storage units to keep your yarn off the floor and out of the way. This will also help keep it _dust-free_ and protected from pests.
- 6. Now that we have our storage system in place, let’s talk about maintaining our yarn stash. This means regularly cleaning and dusting our containers, as well as checking for any signs of damage or wear. It’s also a good idea to _rotate your yarn_ every few months to ensure that older skeins get used before they become too old.
- 7. Finally, let’s not forget about security and stability. If you have a large yarn stash, you’ll want to make sure it’s secure and won’t topple over. Consider using _anti-tip brackets_ or other stabilizing devices to keep your storage units in place. This will give you peace of mind and prevent any accidents.
A Guide to Yarn Storage
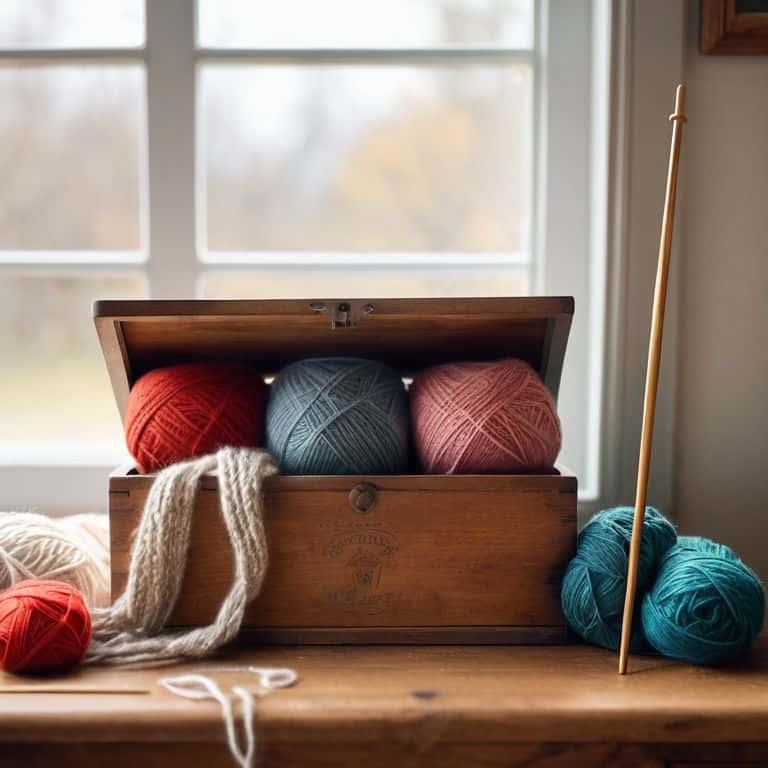
As I work on my latest woodworking project, a custom yarn storage chest, I’m reminded of the importance of yarn organization ideas. A well-organized yarn storage system can make all the difference in your crafting experience. It’s not just about keeping your yarn tidy, but also about making it easily accessible and protected from dust. I’ve found that using yarn storage baskets with labels can be a great way to keep your yarn organized and within reach.
When it comes to keeping your yarn dust-free, there are a few things to consider. One of the benefits of using a yarn ball winder is that it helps to keep your yarn clean and free from tangles. Additionally, storing your yarn in a dry, cool place can help to prevent moisture from building up and damaging your yarn. I also like to use craft room storage solutions that are designed specifically for yarn, such as shelves with built-in yarn holders.
By implementing these tips, you can create a yarn storage system that is both functional and beautiful. Whether you’re a seasoned crafter or just starting out, having a well-organized yarn storage system can help you to stay focused on your projects and enjoy the process of creating something with your own hands. With a little creativity and some labeling yarn for easy access, you can turn your yarn storage area into a yarn paradise.
Yarn Ball Winder Benefits Explained
As a woodworker and craft tool maker, I’ve come to appreciate the humble yarn ball winder. It’s a simple tool, but one that can make a huge difference in keeping your yarn organized and ready to use. By winding your yarn into neat balls, you can prevent tangles and knots, making it easier to work with. Plus, it’s a great way to store yarn in a compact, space-efficient way.
I’ve seen my wife, an avid weaver, use yarn ball winders to keep her stash in check. It’s amazing how much of a difference it can make in her workflow. With a yarn ball winder, she can quickly and easily switch between projects, without worrying about tangled yarn holding her back. It’s a small investment that can pay big dividends in terms of productivity and reduced frustration.
Yarn Organization Ideas for Crafters
As a woodworker and craft tool maker, I’ve learned that a well-organized yarn storage system is just as important as the tools you use. For my wife, a passionate weaver, having her yarns neatly arranged by color, fiber, and weight makes all the difference in her creative process. I’ve seen her spend hours searching for a specific skein, only to have it buried under a pile of other yarns. To avoid this, we use a combination of wooden crates, baskets, and shelves to keep her stash tidy and accessible.
I’ve also found that adding a few simple labels and tags can make a huge difference in keeping track of different yarns and projects. By implementing these yarn organization ideas, you’ll be able to quickly find the perfect yarn for your next project, and make the most of your crafting time.
Taming the Yarn Beast: 5 Key Tips for a Happy Stash
- Store your yarn in a cool, dry place to prevent moisture from seeping in and making a mess
- Use wooden crates or bins to store your yarn, the natural material will help regulate humidity and keep your stash fresh
- Invest in a good yarn ball winder, it’s a game changer for keeping your skeins tidy and preventing tangles
- Label your yarn storage containers so you can easily find the color or type of yarn you need, it’s a small touch that makes a big difference
- Consider storing your yarn in a room with plenty of natural light, it’ll make it easier to see the colors and textures of your stash, and might just inspire your next project
Key Takeaways for a Tidy Yarn Sanctuary
By implementing a few simple storage solutions, such as shelves, baskets, or a yarn cart, you can keep your yarn organized and easily accessible, saving you time and frustration in the long run
Investing in a yarn ball winder can be a game-changer for crafters, allowing you to quickly and efficiently wind yarn into manageable balls that are less prone to tangling and knotting
Remember, the key to maintaining a peaceful and productive crafting space is to create a system that works for you and your unique needs, whether that involves a color-coded storage system or a designated ‘yarn zone’ in your workshop or craft room
Taming the Yarn Beast: A Carpenter's Takeaway
As we’ve explored the world of yarn storage together, I hope you’ve picked up some valuable tips and tricks to keep your stash organized and your creative space clutter-free. From yarn ball winder benefits to clever ways to repurpose everyday items for yarn storage, it’s all about finding a system that works for you and your unique crafting style. Whether you’re a seasoned knitter or a beginner crocheter, having a well-organized yarn collection can make all the difference in your projects and overall enjoyment of the craft.
As you put these yarn storage ideas into practice, remember that the tools you use are just as important as the yarn itself. Don’t be afraid to get creative, experiment with different storage solutions, and make it your own. With a little bit of sawdust and a lot of heart, you can turn your crafting space into a haven of productivity and inspiration. Happy making, and I’ll see you in the next project!
Frequently Asked Questions
How can I effectively store yarn in a small crafting space?
In my workshop, space is precious, so I’ve learned to get creative with yarn storage. I recommend using vertical space with wall-mounted shelves or pegboards to keep skeins organized and within reach. You can also repurpose old crates or baskets to store yarn, keeping your floor clear for projects.
What are the best materials to use for building custom yarn storage solutions?
For custom yarn storage, I swear by solid woods like oak or maple – they’re durable and add a touch of warmth. You can also repurpose old pallets or crates for a more rustic feel. Just be sure to sand them smooth to prevent snagging your precious yarn.
How can I keep my yarn organized and prevent it from getting tangled or lost?
For me, it’s all about creating a system that works with my workshop flow. I use a combo of wooden crates, baskets, and handmade yarn balls to keep my wife’s stash organized and visible. It’s amazing how a little planning can save hours of untangling frustration!