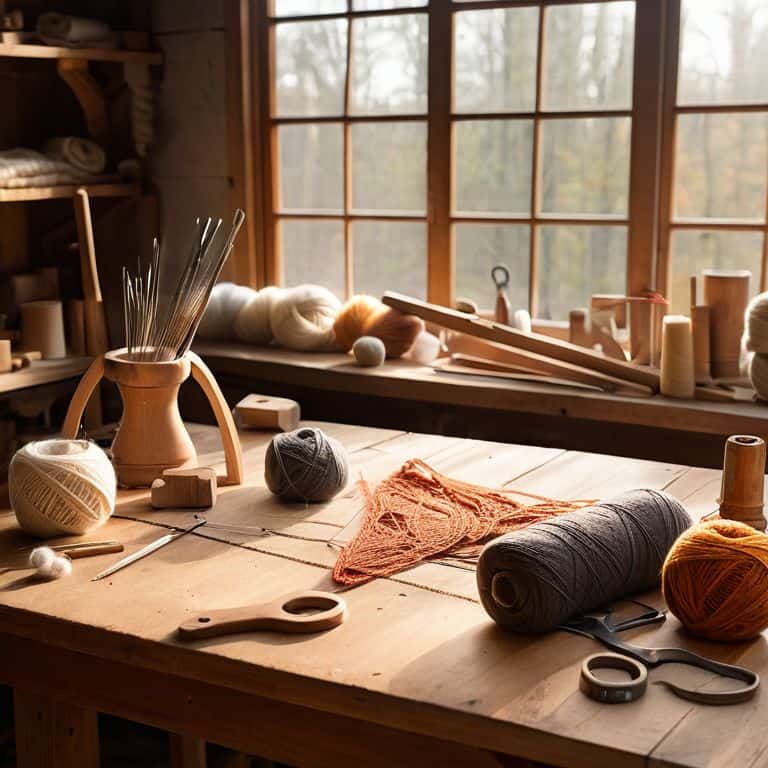
I still remember the day my wife, an avid weaver, came to me frustrated with her old yarn swift. She needed a new one, and I figured, how hard could it be to learn how to build a yarn swift? I mean, it’s just a few pieces of wood and some hardware, right? But as I delved into the project, I realized that a good yarn swift is not just about functionality, but also about the craftsmanship that goes into it. The smell of freshly sanded wood, the feel of the grain beneath my fingers, it was exhilarating. And that’s when it hit me – the tool you use is just as important as the yarn itself.
In this article, I’ll share my personal experience and guide you through the process of how to build a yarn swift from scratch. You’ll get honest, no-hype advice on selecting the right materials, designing the perfect swift for your needs, and bringing it all together with some basic woodworking skills. I’ll walk you through each step, from planning to completion, and provide you with the confidence to create your own beautiful, functional yarn swift. By the end of this journey, you’ll be equipped with the knowledge to create a yarn swift that will make your fiber projects a whole lot easier, and you’ll have the satisfaction of knowing you built it with your own two hands.
Table of Contents
Guide Overview: What You'll Need
Total Time: 2 hours 30 minutes
Estimated Cost: $20 – $40
Difficulty Level: Intermediate
Tools Required
- Table Saw (for cutting lumber)
- Drill Press (for precise drilling)
- Hand Drill (for screwing parts together)
- Sander (for smoothing out wood)
- Tape Measure (for accurate measurements)
- Square (for ensuring corners are square)
- Clamp (for holding parts in place)
- Utility Knife (with extra blades)
Supplies & Materials
- 1-in x 4-in lumber (for the base and arms)
- 1/4-in plywood (for the table top)
- Wood Screws (1 inch and 2 inches long)
- Wood Glue
- Sandpaper (for smoothing out wood)
- Finishing Nails (for attaching the table top)
- Hinges (for the arms)
- Screws for Hinges
Step-by-Step Instructions
- 1. To start building our yarn swift, we need to gather our materials. This includes 1/2″ plywood or MDF for the base and arms, 1×2 lumber for the uprights, a drill press, a jigsaw or bandsaw, and some sandpaper. I like to use a variety of woods for my projects, and for this one, I’ve chosen reclaimed oak for the base and maple for the arms.
- 2. Next, we’ll cut out the base and arms of our yarn swift. Using our jigsaw or bandsaw, cut two identical circular shapes from the 1/2″ plywood or MDF. These will serve as the base and the top of our swift. For the arms, cut four long, thin rectangles from the 1×2 lumber. We’ll use these to connect the base and top, creating the swift’s framework.
- 3. Now it’s time to assemble the frame. Using our drill press, create holes in the center of the base and top circular pieces. Then, insert the 1×2 lumber arms into these holes, securing them with wood glue and screws. Make sure the arms are evenly spaced and the frame is sturdy.
- 4. With our frame assembled, we can move on to adding the yarn guides. Cut small notches in the top and bottom of each arm, about 1/4″ from the top and bottom. These notches will guide the yarn as it wraps around the swift. I like to use a dremel to make these notches, as it gives me more control over the size and shape.
- 5. To make our yarn swift more functional and smooth, we’ll add a rotating axle. Cut a small hole in the center of the top circular piece, just big enough for a metal axle to fit through. Insert the axle, securing it with wood glue and screws. This will allow our yarn swift to rotate smoothly, making it easier to wind and unwind our yarn.
- 6. Next, we’ll sand and finish our yarn swift. Using our sandpaper, smooth out any rough edges or surfaces. I like to use a progressive sanding technique, starting with coarse grit and moving to finer grit for a smooth finish. Once sanded, apply a wood finish of your choice, such as stain or polyurethane.
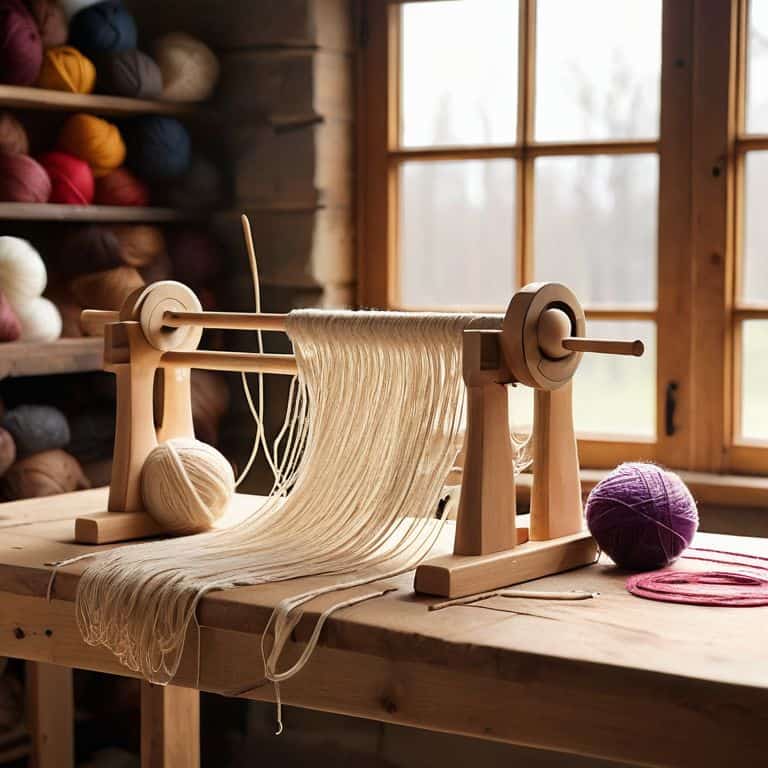
- 7. Finally, we can assemble and test our yarn swift. Attach the top and bottom pieces to the frame, making sure they’re secure and even. Then, thread some yarn through the guides and give it a spin. If everything is working smoothly, you should be able to easily wind and unwind your yarn. I like to test my tools with a variety of yarn types and weights to ensure they’re functional and reliable.
Building a Yarn Swift
As I work on my latest yarn ball winder plans, I’m reminded of the importance of having a reliable yarn swift by my side. A well-crafted swift can make all the difference in managing your yarn, and it’s a project that can be tackled with some basic woodworking skills. When it comes to diy yarn organizer ideas, a yarn swift is an essential tool that can help keep your workspace tidy and your yarn organized.
In my workshop, I’ve experimented with various materials, including pvc pipe craft projects, to create unique and functional yarn storage solutions. However, when it comes to building a yarn swift, I prefer to stick with traditional woodworking techniques. There’s something special about working with wood, and the end result is always worth the extra effort. By incorporating woodworking for yarn enthusiasts into your practice, you can create beautiful and functional tools that will elevate your fiber arts projects.
As you work on your yarn swift, consider the handmade yarn swift designs that inspire you. Think about the types of yarn you’ll be working with and the size of the swift you’ll need. With a little creativity and some basic woodworking skills, you can create a custom yarn swift that meets your specific needs and complements your existing yarn storage solutions.
Pvc Pipe Yarn Organizer Ideas
Now that we’ve got our yarn swift up and running, let’s talk about keeping our yarn collection organized. I’ve seen some clever uses for PVC pipes in the workshop, and they can be a great way to store your yarn. You can create a custom rack to hold your yarn balls, keeping them tidy and within reach.
I like to use PVC pipes to make a modular storage system – it’s easy to add or remove sections as your yarn collection grows. Simply cut the pipes to size, assemble the frame, and you’ve got a handy organizer that’ll keep your yarns from getting tangled or lost. My wife loves it, and it’s been a game-changer for her fiber projects.
Sawdust and Yarn Ball Winders
As I work on my yarn swift, I often think about the other tools that make my wife’s fiber projects easier. One of my favorites is the yarn ball winder – it’s amazing how much of a difference it can make in keeping her yarn organized. I’ve made a few of these winders in my workshop, and I love seeing how they bring a sense of calm to her crafting space. The smell of sawdust and wood stain is still present, even when I’m working with yarn.
I’ve found that the same attention to detail I bring to building a yarn swift also applies to crafting yarn ball winders. The feel of the wood, the smoothness of the finish – it all matters when you’re working with yarn. My wife loves the way the wood grain shows through on her winder, and I have to say, I’m pretty fond of it myself.
5 Essential Tips for Crafting the Perfect Yarn Swift
- Choose the Right Wood: Select a durable, smooth wood like maple or cherry to ensure your yarn swift glides effortlessly and withstands repeated use
- Measure Twice, Cut Once: Double-check your measurements to avoid costly mistakes and ensure your yarn swift assembles smoothly
- Add a Personal Touch: Consider adding a custom touch, like a leather strap or a handmade wooden knob, to make your yarn swift truly unique
- Sand with Care: Sand all surfaces to a high finish to prevent splinters and ensure a smooth yarn-winding experience
- Test and Refine: Assemble your yarn swift and test it with different yarn weights and types to refine its performance and make any necessary adjustments
Key Takeaways for Your Handmade Yarn Swift
By following these steps and using the right materials, you can create a functional yarn swift that will make your fiber projects more efficient and enjoyable
Remember, the type of wood you choose can affect the overall aesthetic and durability of your yarn swift, so consider options like maple or walnut for a beautiful and long-lasting finish
With a little creativity and some basic woodworking skills, you can customize your yarn swift to fit your specific needs and add a personal touch to your fiber arts projects
Wrapping Up Your Yarn Swift Project
As we’ve seen throughout this guide, building a yarn swift from scratch can be a fun and rewarding experience. We’ve covered the main steps to create a functional and beautiful tool that will make your fiber projects easier and more enjoyable. From choosing the right materials to assembling the swift, we’ve gone through each process in detail. I hope you’ve found the instructions clear and helpful, and that you’re now the proud owner of a handmade yarn swift that will serve you well in your crafting journey. Remember, the key to a successful project is to take your time and pay attention to the details, as this will ensure that your yarn swift is both durable and functional.
As you put your new yarn swift to use, I hope you’ll feel a sense of pride and accomplishment in knowing that you created something with your own hands. Building a yarn swift is not just about making a tool, it’s about embracing the process of creating something from scratch and enjoying the journey. Whether you’re a seasoned crafter or just starting out, I encourage you to keep exploring, learning, and pushing the boundaries of what you can create. Happy crafting, and don’t forget to get a little sawdust in your hair along the way!
Frequently Asked Questions
What type of wood is best suited for building a yarn swift?
For a yarn swift, I recommend using a durable, smooth wood like maple or cherry. These hardwoods can withstand repeated use and won’t splinter, ensuring your yarn flows smoothly. I personally love working with maple – its light color and fine grain make it a joy to sand and finish.
Can I use a yarn swift for other types of fiber projects, like spinning or crochet?
Absolutely, a yarn swift is a versatile tool that can be used for spinning, crochet, and other fiber projects. I’ve seen my wife use ours to manage flax and wool roving, making it a breeze to spin or crochet with. The key is to adjust the swift’s tension to suit your fiber type, and you’re good to go!
How do I determine the optimal size of my yarn swift for different yarn weights and lengths?
For optimal sizing, consider the yarn’s weight and length. As a rule of thumb, I use a swift with an arm span of at least 2-3 times the yarn’s length. For heavier yarns, I opt for a sturdier swift with a larger diameter to prevent tangling. My wife’s favorite swift, which I made for her, has adjustable arms to accommodate different yarn weights and lengths – it’s been a game-changer for her projects.