I still remember the day my wife, an avid knitter, asked me to make her a set of custom locking stitch markers. She was frustrated with the flimsy, store-bought ones that always seemed to get lost or damaged. I took on the challenge and discovered that making these small tools from scratch was not only rewarding but also surprisingly easy. As I delved into the world of woodworking and fiber arts, I realized that learning how to make locking stitch markers was just the beginning of a fascinating journey. With the right materials and a bit of patience, anyone can create their own durable and functional stitch markers.
In this article, I’ll guide you through the process of crafting your own locking stitch markers from scratch. You’ll learn the importance of choosing the right wood and how to shape it into perfect, tiny markers. I’ll share my own tips and tricks for adding a personal touch to your creations, making them truly unique and special. By the end of this tutorial, you’ll be equipped with the knowledge and confidence to make your own custom locking stitch markers, and maybe even discover a new passion for woodworking and DIY crafts. So, let’s get started and explore the world of handmade stitch markers together!
Table of Contents
Guide Overview: What You'll Need
Total Time: 30 minutes to 1 hour
Estimated Cost: $5 – $10
Difficulty Level: Easy
Tools Required
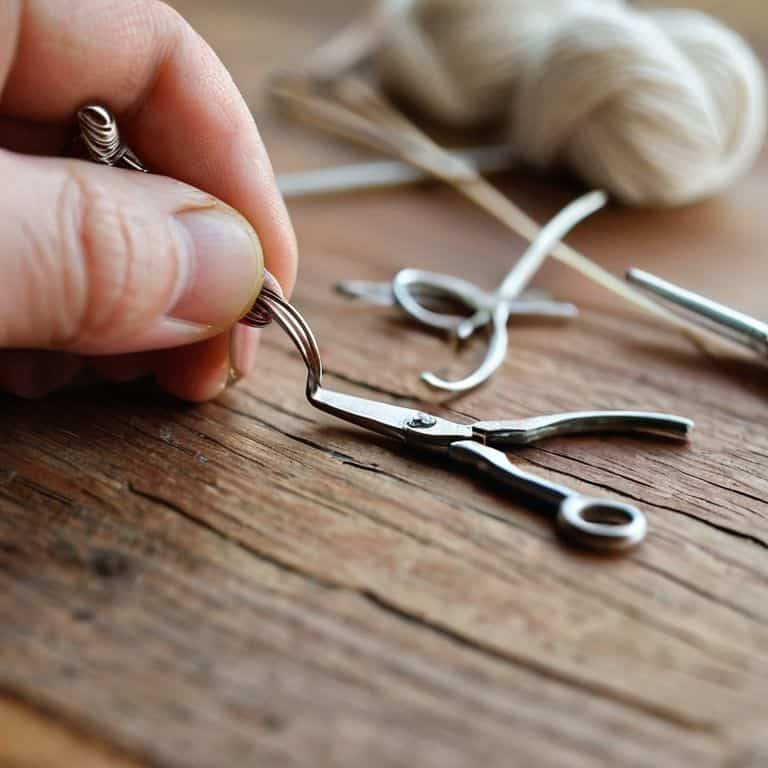
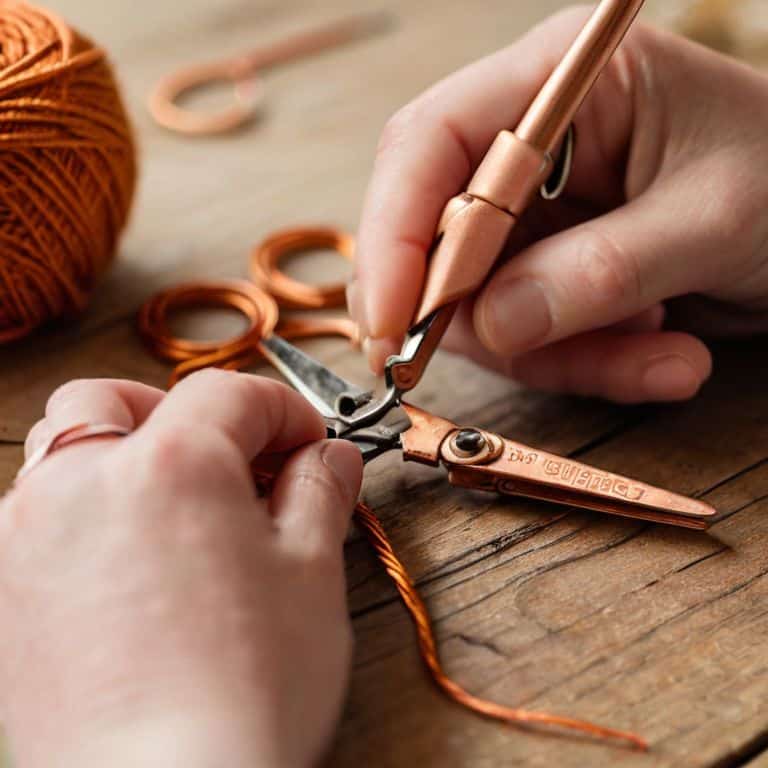
- Wire Cutters (for cutting metal wire)
- Round Nose Pliers (for shaping wire)
- Flat Nose Pliers (for gripping small objects)
Supplies & Materials
- Copper or Aluminum Wire 20 gauge, 6 inches long
- Small Metal Rings for locking mechanism
- Beading Supplies optional, for decorative purposes
Step-by-Step Instructions
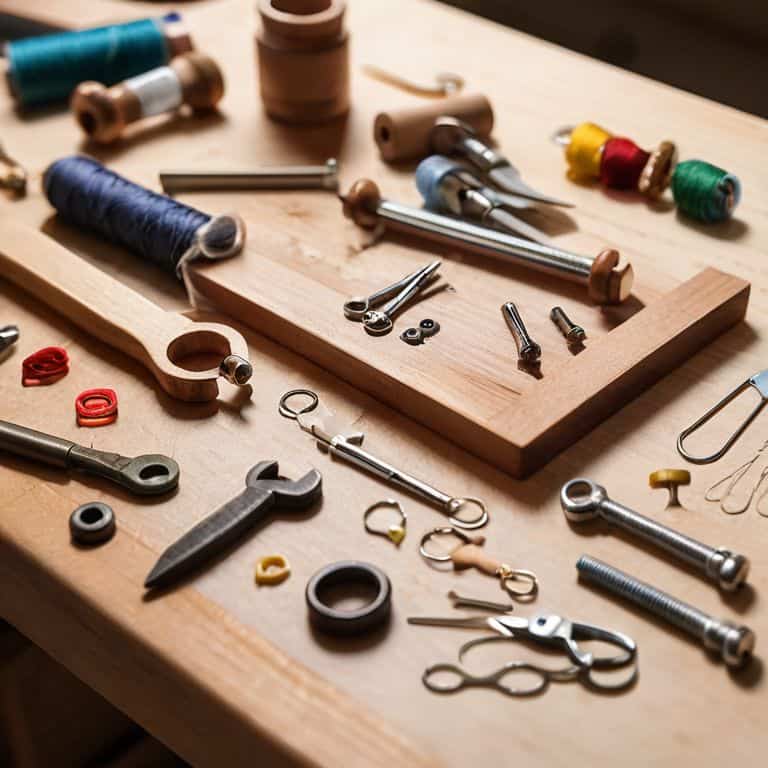
- 1. First, let’s start by gathering our materials – we’ll need some wooden dowels, a drill press, a few small metal rings, and some sandpaper. I like to use dowels made from hardwoods like oak or maple, as they provide a nice weight and texture to the finished stitch markers.
- 2. Next, we need to cut our dowels into smaller pieces – about 1-2 inches long should do the trick. I use a miter saw for this step, but a simple hand saw will also work. Just be sure to wear some protective gear, like safety glasses and a dust mask, to avoid any accidents.
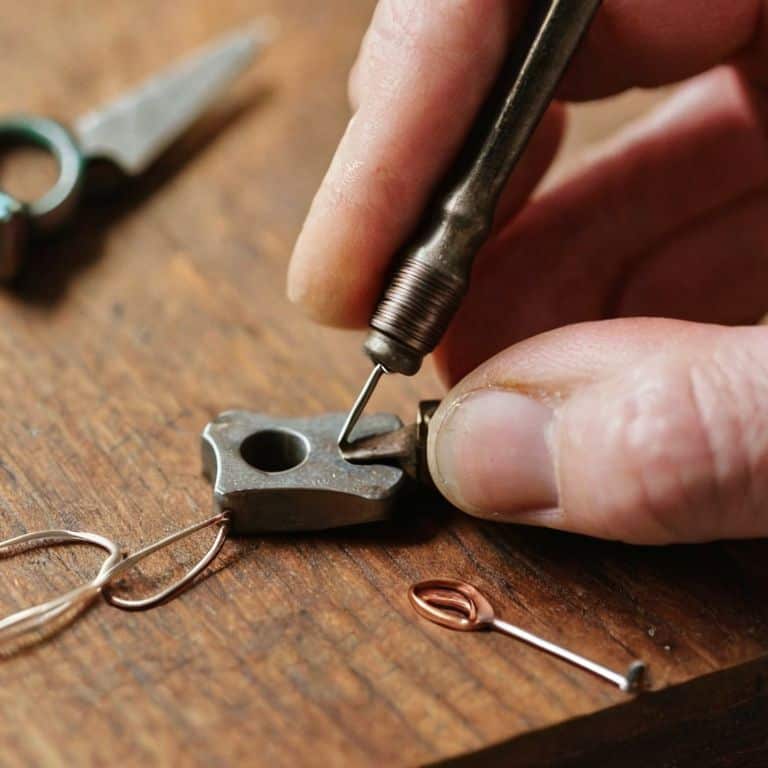
- 3. Now that we have our dowel pieces, it’s time to drill a small hole in each one – this is where the metal ring will go. I recommend using a drill press for this step, as it provides a lot of control and precision. Start with a small pilot hole and then widen it out to fit your metal ring.
- 4. With our holes drilled, it’s time to sand down the dowel pieces to smooth out any rough edges. I like to use a progression of sandpaper grits, starting with a coarse 80-grit and working my way up to a fine 220-grit. This will give our stitch markers a nice, smooth finish.
- 5. Now it’s time to assemble our stitch markers – simply slide the metal ring into the hole we drilled earlier, and then use a small amount of wood glue to secure it in place. Make sure the ring is seated properly and the glue is fully dry before moving on to the next step.
- 6. Once the glue is dry, we can add a small amount of wood finish to protect the dowel and give it a nice sheen. I like to use a simple oil-based finish, like tung oil or linseed oil, as it brings out the natural beauty of the wood.
- 7. Finally, let’s add a small leather strap or loop to the top of each stitch marker – this will make it easy to attach them to our knitting or crochet project. I like to use a simple leather thong, which can be cut to size and attached using a small dot of glue. And that’s it – our handmade locking stitch markers are now complete!
Sawdust to Stitch
As I work on my latest diy stitch marker materials project, I’m reminded of the importance of choosing the right wood for the job. The type of wood can greatly impact the overall look and feel of your locking stitch markers. I personally prefer working with hardwoods like maple or walnut, as they provide a nice weight and texture to the finished markers. When selecting your materials, consider the color and grain pattern of the wood, as well as its durability and resistance to wear.
When it comes to designing your own customizable stitch markers, the possibilities are endless. You can experiment with different shapes, sizes, and materials to create unique and functional markers that reflect your personal style. For example, you could use a combination of wood and metal to create a distinctive look, or add a touch of handmade charm with a small wooden bead or charm. Whatever design you choose, make sure it’s practical and easy to use, as the last thing you want is for your stitch markers to get in the way of your knitting or crochet flow.
In my workshop, I like to keep all my stitch markers organized and within reach using a simple stitch marker storage idea: a small wooden box with separate compartments for each type of marker. This keeps me from losing track of my markers and makes it easy to grab the ones I need for a particular project. Whether you’re a knitter or a crocheter, having a system for storing your stitch markers can be a huge time-saver and help you stay focused on your craft.
Diy Materials for Customizable Markers
When it comes to customizing your locking stitch markers, the right materials can make all the difference. I’m a big fan of using natural woods like birch or beech, as they add a warm, organic touch to your markers. You can also experiment with different types of metal, such as copper or bronze, for a more industrial look. For the cord or string, I recommend using a durable leather or waxed linen – it’s easy to work with and adds a nice texture to the finished product.
By choosing your own materials, you can create markers that reflect your personal style and complement your favorite yarns. Plus, using high-quality materials ensures that your markers will withstand the test of time and frequent use.
Handcrafting Locking Stitch Markers
As I sand down the wooden pieces for our locking stitch markers, the scent of freshly cut wood fills the air, transporting me to my workshop. There’s something special about crafting with natural materials – the texture, the smell, the feel of creating something from scratch. I love how the wood grain pattern emerges as I sand, each one unique, just like the stitches my wife creates with her loom. This process, from sawdust to stitch, is what drives my passion for making handmade tools.
The connection between the woodshop and the craft room is tangible, and I feel grateful to be a part of it. By handcrafting our own locking stitch markers, we’re not only creating a functional tool, but also a piece of art that tells a story. The wood, the metal, the leather – each component comes together to form a beautiful, functional whole. As I work, I imagine the stitches that will be made with these markers, the fabric that will be woven, and the joy that will come from creating something with our own hands.
5 Key Tips for Handcrafting Locking Stitch Markers
- Choose the right wood: I always say, the tool you use is as important as the yarn, so pick a wood that’s both durable and comfortable to work with, like birch or beech
- Sand with care: smoothing out those edges and surfaces is crucial, not just for looks, but for functionality – trust me, you don’t want any splinters in your stitch markers
- Add a personal touch: whether it’s a custom design or a simple engraving, making your locking stitch markers unique can make all the difference in your knitting or crochet project
- Use the right metal: for the locking mechanism, you’ll want a metal that’s strong, yet easy to shape – I recommend using a thin gauge copper or brass wire
- Test and refine: don’t be afraid to try out your locking stitch markers and make adjustments as needed – after all, the best tools are the ones that have been tweaked and perfected by their maker
Three Key Takeaways for Handcrafting Locking Stitch Markers
By creating your own locking stitch markers from scratch, you can add a personal touch to your knitting or crochet projects and ensure a perfect fit for your specific needs
Using natural materials like wood and leather can bring a unique charm to your handmade markers, and with the right tools and techniques, you can craft them to last for years to come
With a little practice and patience, you can develop the skills to make not just locking stitch markers, but a wide range of custom craft tools that reflect your personality and style, bridging the gap between woodworking and fiber arts
The Maker's Mindset
The true beauty of a handmade tool lies not just in its functionality, but in the story it tells of the maker’s hands that shaped it, and the maker’s heart that guided it.
Finnian "Finn" Burke
Conclusion: Creating with Passion
As we wrap up this journey of creating our own locking stitch markers, let’s take a moment to appreciate the satisfaction of handmade craftsmanship. We’ve covered the essential steps, from selecting the right materials to assembling our markers, and even explored the world of DIY materials for customizable markers. By choosing to handcraft our tools, we’re not only adding a personal touch to our knitting and crochet projects but also celebrating the beauty of functional objects. This process allows us to connect with our crafts on a deeper level, understanding the value of each stitch and the tool that helps guide it.
As you put your new skills to the test and start creating your own locking stitch markers, remember that the true magic happens in the process of making. It’s about the sawdust in your hair, the smell of freshly sanded wood, and the joy of seeing your project come to life. So, don’t be afraid to experiment, to try new materials, and to push the boundaries of what’s possible. With every handmade tool, you’re weaving a story of love and dedication into the fabric of your craft, and that’s something to be truly proud of.
Frequently Asked Questions
What types of wood are best suited for making locking stitch markers and why?
For locking stitch markers, I recommend using hardwoods like maple, cherry, or walnut. These woods are dense, durable, and have a smooth texture that works well with yarn. I personally love the smell of sanded cherry wood – it’s a bonus when working with it! The tight grain ensures a snug fit and prevents marker failure.
Can I customize the size and shape of my locking stitch markers to fit specific knitting or crochet projects?
Absolutely, you can customize the size and shape of your locking stitch markers to fit specific projects. I love experimenting with different woods and designs to match my wife’s various yarns and patterns. For example, smaller markers for lace knitting or larger ones for chunky crochet – the possibilities are endless, and I’ll show you how to make them fit your unique needs.
How do I ensure that my handmade locking stitch markers are durable and long-lasting, even with frequent use?
To ensure durability, I recommend using high-quality materials like hardwood or metal, and applying a protective finish to seal the wood. A simple wax or oil coat can work wonders. I also suggest testing your markers with different yarn types to guarantee they can withstand various fibers and tensions.