I still remember the day my wife, a passionate weaver, asked me to help her find the perfect shade of indigo for her latest project. We tried how to dye yarn with natural dyes using various methods, but the results were always inconsistent. It wasn’t until we experimented with different plants and techniques that we stumbled upon the secret to achieving those rich, vibrant colors. The journey was frustrating at times, but it taught me that natural dyeing is not just about following a recipe, but about understanding the nuances of the materials and the process.
In this article, I’ll share my hands-on experience and practical tips on how to dye yarn with natural dyes, so you can avoid the common pitfalls and achieve the desired colors for your projects. You’ll learn how to prepare your yarn, choose the right plants, and create a safe and efficient dyeing process. My goal is to empower you with the knowledge and confidence to experiment with natural dyes and take your weaving or knitting projects to the next level. By the end of this guide, you’ll be equipped with the skills to create unique, hand-dyed yarns that reflect your personal style and creativity.
Table of Contents
Guide Overview: What You'll Need
Total Time: 2 hours 30 minutes
Estimated Cost: $20 – $40
Difficulty Level: Intermediate
Tools Required
- Large Pot (at least 3 quart capacity)
- Colander or Strainer (for rinsing)
- Measuring Cups and Spoons (accurate measurements are crucial)
- Wooden or Plastic Spoon (for stirring)
- Gloves (protective, as natural dyes can stain skin)
Supplies & Materials
- Yarn (made of natural fibers like wool, cotton, or silk)
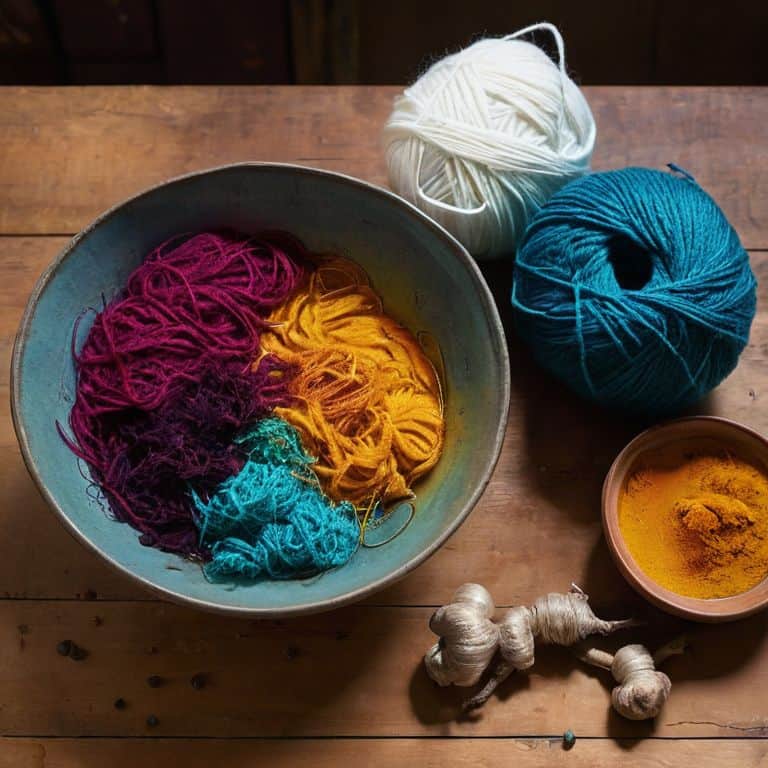
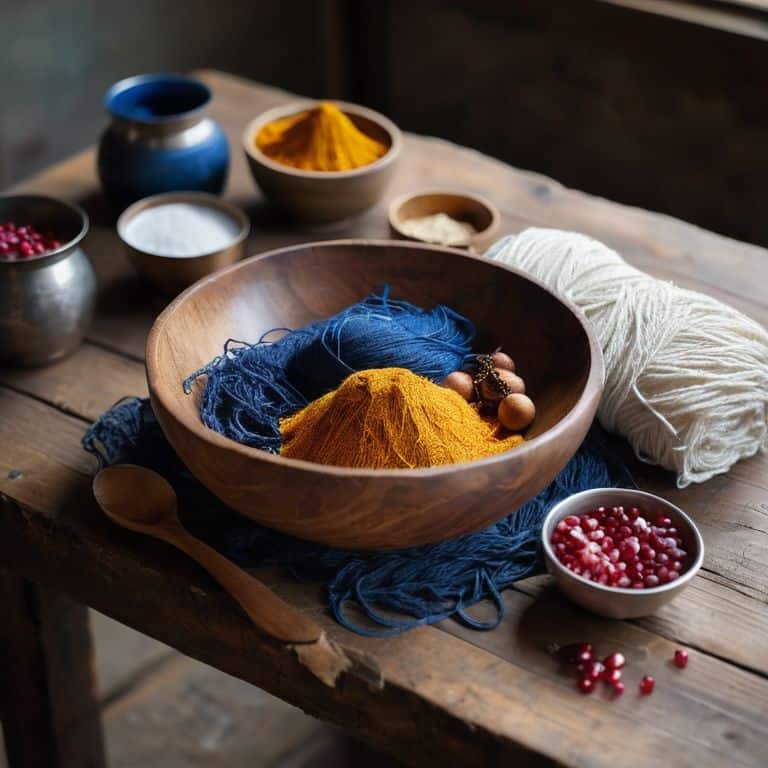
- Natural Dye Materials (e.g., turmeric, indigo, pomegranate rinds, onion skins)
- Mordant (e.g., alum, cream of tartar, vinegar)
- Water (enough to cover the yarn and dye materials, approximately 1 gallon)
- Salt (optional, for enhancing color depth)
Step-by-Step Instructions
- 1. First, let’s start by preparing our yarn for the dyeing process. This involves washing and drying the yarn to remove any impurities or finishes that might affect the dye. I like to use a mild detergent and warm water to give my yarn a good cleanse. After washing, gently squeeze out excess water without wringing or twisting the yarn, and let it air dry.
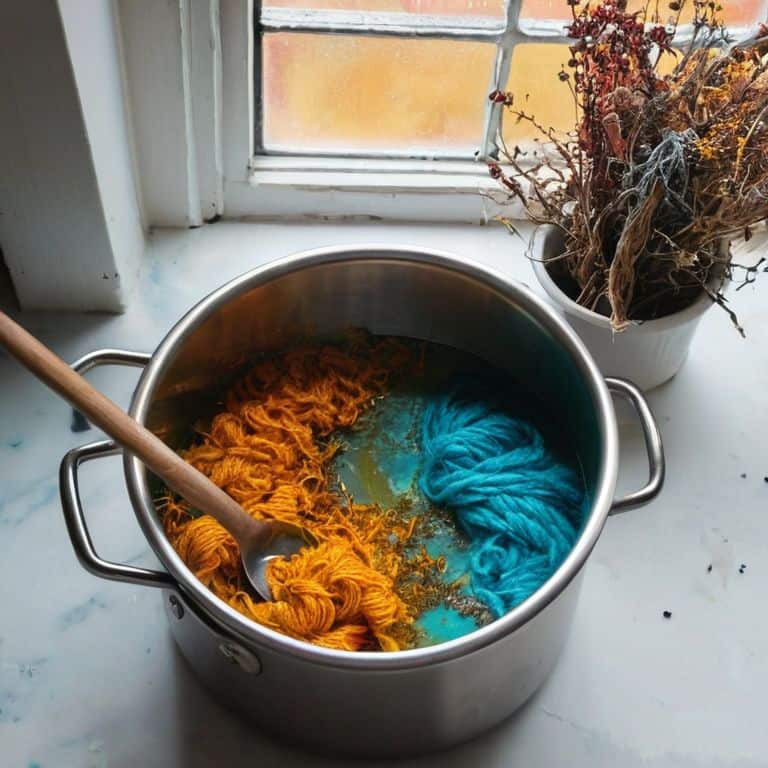
- 2. Next, we need to create our natural dye bath. For this, we’ll be using plants like indigo, madder, and pomegranate rinds to create a range of colors. Start by gathering your chosen plants and measuring out the right quantities. A general rule of thumb is to use 1 part plant material to 2 parts water. Combine the plant material and water in a large pot and bring to a boil, then reduce the heat and let it simmer for about an hour to release the colors.
- 3. While our dye bath is simmering, let’s prepare our yarn for immersion. This involves measuring out the right amount of yarn for the project and tying it in a way that will create interesting textures and patterns. I like to use a simple running stitch or a more intricate resist technique to create unique effects. Make sure your yarn is securely tied to prevent it from tangling or felting during the dyeing process.
- 4. Now it’s time to add our yarn to the dye bath. Carefully submerge the yarn into the pot, making sure it’s fully covered by the dye. If necessary, weigh down the yarn with a plate or a stone to keep it under the surface. Let the yarn simmer in the dye bath for about an hour, or until it reaches the desired color. Keep an eye on the color as it can deepen quickly, and you don’t want to over-dye your yarn.
- 5. After the yarn has finished dyeing, remove it from the pot and gently rinse it with warm water to remove excess dye. Be careful not to wring or twist the yarn, as this can cause it to felt or become misshapen. Instead, let it drip dry or use a clean towel to gently blot out excess moisture.
- 6. To fix the color and prevent it from fading, we’ll need to add a mordant to the yarn. A mordant is a substance that helps the dye bind to the yarn, and it can be something as simple as vinegar or cream of tartar. Mix 1 tablespoon of mordant with 1 gallon of warm water, and soak the yarn in this solution for about 30 minutes. This will help lock in the color and create a more vibrant, long-lasting finish.
- 7. Finally, let’s dry and finish our yarn. Gently squeeze out excess water and lay the yarn out to dry, either on a towel or a drying rack. Avoid direct sunlight or high heat, as this can cause the colors to fade. Once the yarn is dry, you can use it for your project, or wind it into a ball and store it for later use. I like to wind my yarn into a ball and store it in a cool, dry place to keep it fresh and ready for my next project.
Dyeing Yarn Naturally
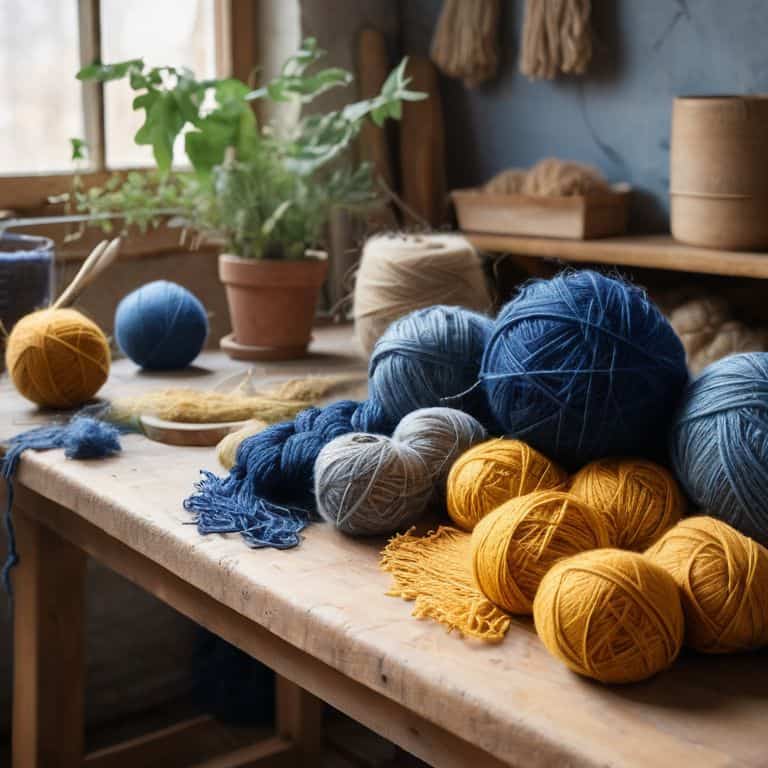
As I delve into the world of natural dyeing techniques for wool, I’m constantly amazed by the array of colors that can be achieved using plant-based ingredients. From the deep blues of indigo to the vibrant yellows of turmeric, each dye lot is a unique reflection of the materials used. When experimenting with new recipes, I always make sure to note the type of wood I’m working with in my workshop, as the smell of freshly sanded wood seems to inspire my creativity.
One of the most important aspects of natural dyeing is understanding how to fix natural dyes with mordants. This process ensures that the colors remain vibrant and don’t fade quickly over time. I’ve found that using spices for natural dyeing can add an extra layer of complexity to the colors achieved, and with the right mordant, the results can be truly stunning. Whether I’m working with wool or other natural fibers, I always prioritize sustainable textile dyeing methods to minimize my impact on the environment.
In my experience, the key to successful natural dyeing lies in attention to detail and a willingness to experiment. By following a few simple natural dyeing safety precautions, such as wearing protective gloves and working in a well-ventilated area, you can ensure a fun and rewarding experience. As I look around my workshop, filled with the tools of my trade, including my trusty spinning wheel and an assortment of handmade wooden spindles, I’m reminded of the joy that comes from creating something truly unique and functional.
Natural Dyes for Wool
When it comes to natural dyes for wool, I get excited. There’s something special about combining the natural fibers with plant-based colors. My wife’s favorite wool yarns are the ones we dye together using pomegranate rinds, indigo, and turmeric. The earthy tones they produce are just incredible. I love how the wool absorbs the dye, creating a depth of color that’s hard to replicate with synthetic dyes.
For our wool projects, we often use a combination of natural dyes to achieve unique shades. Madder root, for instance, gives a beautiful pinkish-red hue, while chamomile adds a soft, sunny yellow. The key is to experiment and have fun with the process. Don’t be afraid to mix and match different plants to create your own signature colors.
Spice Up Your Colors
Now that we’ve explored the wonderful world of natural dyes for wool, let’s talk about adding some extra depth to your colors. I love experimenting with different spices and plants to create unique shades. For instance, a hint of cinnamon can add a warm, golden tone to your yarn, while a sprinkle of turmeric can produce a beautiful, sunny yellow. My wife’s favorite combination is a mix of indigo and a pinch of nutmeg, which gives her handspun yarn a rich, earthy hue.
By playing around with these natural additives, you can create a wide range of colors that are both subtle and striking. I’ve found that the key is to start with small amounts and gradually build up to achieve the desired shade. And don’t be afraid to get creative and try out new combinations – it’s all part of the fun of natural dyeing!
5 Tips to Unleash the Magic of Natural Yarn Dyeing
- Start by selecting the right type of yarn for natural dyeing, as some fibers like wool and silk take colors more evenly than others
- Experiment with different mordants to enhance color fastness and create unique shades, from alum to cream of tartar
- Resist the temptation to over-dye, as this can lead to uneven colors and felted fibers – instead, aim for subtle, layered hues
- Don’t be afraid to get creative with your natural dye materials, from onion skins to turmeric, and remember that the smell of the dye stuff can be just as exciting as the color
- Keep a record of your natural dye experiments, including the type of dye, mordant, and yarn used, to refine your technique and reproduce your favorite colors
Key Takeaways for Natural Yarn Dyeing
Always remember to experiment with small batches before dyeing larger quantities of yarn to ensure the desired color is achieved
Natural dyes can be as simple as using spices, plants, and vegetables to create unique and vibrant colors for your handmade projects
By embracing the unpredictability of natural dyes, you’ll not only create one-of-a-kind colors but also develop a deeper connection to the handmade process and the materials you work with
The Art of Natural Dyeing
There’s magic in watching a handful of leaves and roots transform into a kaleidoscope of colors on your yarn – it’s not just about dyeing yarn, it’s about telling a story of nature, craft, and patience.
Finnian "Finn" Burke
Conclusion: Unleashing the Beauty of Natural Dyes
As we’ve explored the world of natural yarn dyeing, it’s clear that this process is not just about creating unique colors, but also about understanding the journey from plant to yarn. We’ve covered the basics of preparing your yarn, choosing the right natural dyes, and troubleshooting common issues. By following these steps and experimenting with different natural dye combinations, you’ll be well on your way to creating a palette of earthy tones that reflect your personal style. Whether you’re a seasoned crafter or just starting out, the art of natural dyeing offers a sense of connection to the natural world and the joy of watching your creations come to life.
As you continue to explore the world of natural yarn dyeing, remember that it’s a journey, not a destination. Don’t be afraid to get your hands dirty and try new things – it’s often the unexpected results that lead to the most beautiful and interesting colors. With patience, practice, and a willingness to experiment, you’ll unlock the full potential of natural dyes and create truly one-of-a-kind handmade projects that tell a story of their own. So go ahead, grab some plants, and start dyeing – your next favorite color might just be waiting for you in the garden!
Frequently Asked Questions
What are some common mistakes to avoid when dyeing yarn with natural dyes?
When working with natural dyes, I’ve found that common mistakes include using too much dye material, not accounting for the yarn’s fiber type, and not testing the color on a small sample first. These oversights can lead to uneven colors or even damage to the yarn. Trust me, I’ve been there – my wife still teases me about the time I turned a beautiful skein of wool into a murky brown mess!
How can I achieve consistent colors when using natural dyes on different types of yarn?
To achieve consistent colors with natural dyes, I recommend testing small samples of each yarn type first. This will help you understand how different fibers take to the dye. Keep a record of your tests, noting the dye ratio, temperature, and time. It’s also crucial to use a consistent mordant and dyeing method for each type of yarn.
Are there any safety precautions I should take when working with natural dyes, such as wearing gloves or working in a well-ventilated area?
When working with natural dyes, safety first. I always wear gloves to prevent skin staining and work in a well-ventilated area to avoid inhaling any fumes. My wife also reminds me to wear old clothes and an apron to protect against spills. Trust me, you don’t want indigo hands for a week.