
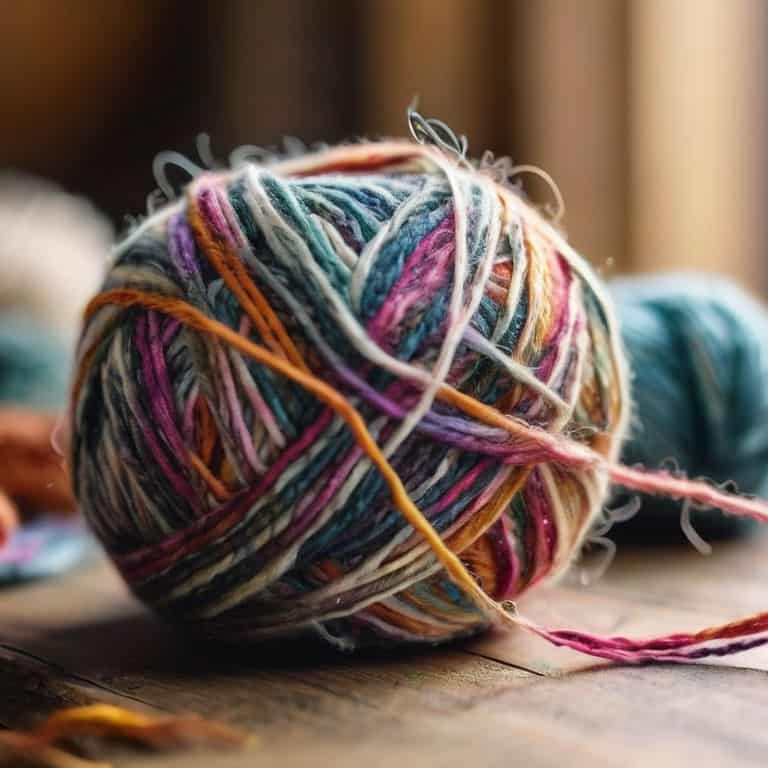
I still remember the day my wife, a talented weaver, asked me to help her achieve a speckled yarn effect for her latest project. She had tried various methods, but nothing seemed to work as expected. As a carpenter and custom tool maker, I was determined to help her crack the code. We spent hours experimenting, and I learned that how to create a speckled yarn effect is not just about following a recipe, but about understanding the nuances of fiber and color. Our journey was filled with trial and error, but ultimately, we discovered a few simple yet powerful techniques that made all the difference.
In this article, I’ll share our hard-won knowledge with you, and guide you through the process of creating your own stunning speckled yarn effects. You’ll learn how to select the right materials, prepare your fibers, and use simple tools to achieve professional-looking results. I’ll cut through the confusion and provide you with practical, no-nonsense advice on how to create a speckled yarn effect that will elevate your weaving or knitting projects to the next level. Whether you’re a seasoned maker or just starting out, this guide will give you the confidence to experiment and create unique, eye-catching textiles that reflect your personal style.
Table of Contents
Guide Overview: What You'll Need
Total Time: 1 hour 15 minutes
Estimated Cost: $10 – $20
Difficulty Level: Easy
Tools Required
- Yarn Choose a base color
- Contrasting yarn For speckle effect
- Scissors For cutting yarn
- Tapestry needle For weaving yarn
Supplies & Materials
- Cardboard For wrapping yarn
- Measuring tape For measuring yarn length
- Ruler For guiding yarn wrapping, approximately 6 inches long
- Pencil For marking yarn
Step-by-Step Instructions
- 1. First, let’s start by preparing our materials, which include a few essential tools like a spinning wheel, a ball winder, and some yarn of our choice. I like to use a mix of solid colors to create a unique speckled effect. When selecting yarns, consider the fiber content and how it will affect the overall texture and appearance of your finished product.
- 2. Next, we need to create a yarn wrapping station. This can be as simple as a piece of cardboard with some notches cut into it, or as complex as a custom-built wooden tool. The idea is to have a way to wrap your yarn around a core, creating the speckled pattern. I’ve found that using a drum carder can also help in blending colors and creating a more uniform effect.
- 3. Now, let’s talk about the actual wrapping process. Start by taking a length of your base yarn and wrapping it around the core. Then, take small pieces of your contrasting yarns and begin to wrap them around the base yarn in a random, organic pattern. This is where the magic happens, and your speckled yarn effect starts to take shape. Remember, the key to a great speckled effect is in the randomness and variability of your wrapping pattern.
- 4. As you continue wrapping, you’ll start to see your yarn take on a life of its own. To add some extra texture and interest, try incorporating different yarn weights and textures into your wrapping pattern. This can include everything from smooth, worsted-spun yarns to more rustic, woolen-spun options. Don’t be afraid to experiment and try out new combinations – it’s all part of the creative process.
- 5. Once you’ve finished wrapping your yarn, it’s time to start spinning. This is where your spinning wheel comes in handy. Take your wrapped yarn and start to draft it out, using a gentle touch to preserve the integrity of your speckled pattern. As you spin, you’ll start to see your yarn come together, with the speckles distributed evenly throughout the fiber.
- 6. To add an extra layer of depth and visual interest to your yarn, try plying it with a complementary color. This can help to accentuate the speckles and create a more dynamic, multi-dimensional effect. When plying, be sure to keep a steady tension and use a consistent twist to avoid unevenness in your finished yarn.
- 7. Finally, once you’ve spun and plied your yarn, it’s time to set the twist and finish your project. This can be as simple as soaking your yarn in warm water and then letting it dry, or as complex as using a steamer or other specialized equipment. Regardless of the method you choose, be sure to handle your yarn with care, as it can be prone to felting or other damage if not treated gently.
Speckling Yarn Like a Pro

As I delve deeper into the world of speckled yarn, I’ve come to realize that mastering the art of resist dyeing techniques is crucial for achieving those beautiful, unique patterns. It’s all about experimenting with different yarn wrapping methods to create the desired effect. I recall a project where I used a combination of natural dye speckling and hand-painted yarn effects to create a stunning multi-color yarn. The result was breathtaking, and it’s a technique I still use to this day.
When it comes to yarn dyeing safety precautions, I always stress the importance of wearing protective gear and working in a well-ventilated area. It’s also essential to follow the instructions carefully and take necessary precautions to avoid any accidents. As a woodworker and craft tool maker, I appreciate the value of attention to detail and patience in the creative process. By taking the time to understand the materials and techniques involved, you’ll be able to achieve professional-looking results with your speckled yarn projects.
To take your speckled yarn to the next level, consider exploring different natural dye sources, such as plants and minerals. This will not only add a unique touch to your projects but also provide an opportunity to experiment with new colors and techniques. By combining these natural dyes with various yarn dyeing methods, you’ll be able to create one-of-a-kind speckled yarn effects that showcase your creativity and skill.
Natural Dye Speckling Safety First
When working with natural dyes for speckling, safety should always be my top priority. I make sure to wear protective gloves and work in a well-ventilated area to avoid inhaling any harsh fumes. It’s also crucial to choose dyes that are non-toxic and safe for use on skin and clothing. I’ve had my fair share of accidental stains, but with the right precautions, you can minimize the risks and enjoy the process of creating unique, speckled yarns.
I always read the labels carefully and follow the instructions to the letter. Some natural dyes, like indigo or pomegranate, can be quite potent, so it’s essential to handle them with care. By taking the necessary precautions, you can ensure a fun and safe experience while achieving those beautiful, one-of-a-kind speckles that will make your handmade projects truly special.
Resist Dyeing for Unique Speckles
To take your speckled yarn to the next level, try resist dyeing. This technique involves applying a resist, like wax or starch, to specific areas of the yarn before dyeing. The resist prevents the dye from penetrating, creating unique, high-contrast speckles. I love experimenting with different resists and folding techniques to achieve one-of-a-kind patterns.
When I’m resist dyeing, I feel like a mad scientist – it’s all about trial and error. I’ve had my fair share of surprises, from unexpected color combinations to intriguing texture variations. The key is to have fun and be open to happy accidents. With resist dyeing, you can create truly distinctive speckles that add an extra layer of character to your handmade projects.
Speckling Like a Pro: 5 Essential Tips
- Choose the Right Yarn: Not all yarns are created equal when it comes to speckling, so select a yarn with a high wool or fiber content for the best results
- Experiment with Dye Combinations: Don’t be afraid to mix and match different dye colors to create unique, one-of-a-kind speckles
- Resist Dyeing for Unique Speckles: Using resist dyeing techniques, such as tying or folding your yarn, can create beautiful, intricate speckles
- Natural Dye Safety First: When using natural dyes, always prioritize safety by wearing protective gloves and working in a well-ventilated area
- Practice Makes Perfect: Don’t be discouraged if your first attempts at speckling yarn don’t turn out as expected – keep experimenting and practicing until you achieve the look you want
Key Takeaways for Mastering the Speckled Yarn Effect
Always consider the type of fiber and dye you’re working with, as they can greatly impact the final speckled effect and the safety of the dyeing process
Experimenting with different resist dyeing techniques and natural dyes can help you achieve unique, professional-looking speckles in your yarn
Remember, the tool you use is just as important as the yarn itself – investing in a good loom and the right equipment can make all the difference in creating beautiful, speckled yarns
Bringing It All Together: The Beauty of Speckled Yarn
We’ve covered a lot of ground in this journey to create a speckled yarn effect, from the initial steps of preparation to the more advanced techniques like resist dyeing and natural dye speckling. It’s been a hands-on, get-your-hands-dirty kind of journey, and I hope you’ve enjoyed the process as much as I have. Remember, the key to achieving those unique, speckled patterns is patience and a willingness to experiment. Don’t be afraid to try out different methods and see what works best for you and your project.
As you finish up your speckled yarn project, I want to leave you with a final thought: the beauty of handmade, functional objects lies not just in their aesthetic appeal, but in the story behind them. Every speckle, every variation in color, is a testament to the human touch, to the time and effort you’ve invested in creating something truly one-of-a-kind. So, go ahead, unravel the magic of your speckled yarn, and let the joy of creation shine through in every stitch, every weave. Happy making!
Frequently Asked Questions
What are the best types of yarn to use for creating a speckled effect?
For a gorgeous speckled effect, I recommend using yarns with a bit of texture and natural fiber like merino wool, alpaca, or even a wool-silk blend. These yarns take dye beautifully and their subtle texture variations will add depth to your speckles. My wife loves working with Malabrigo or Madelinetosh yarns for their rich colors and softness.
Can I achieve a speckled yarn effect using natural dyes, and if so, what plants or materials would you recommend?
Absolutely, you can achieve a speckled yarn effect with natural dyes. I recommend experimenting with plants like indigo, pomegranate rinds, or turmeric. These will give you a range of blues, pinks, and yellows. Just be sure to follow safe dyeing practices, as we discussed earlier, to get the best results and ensure your yarn is colorfast.
How do I ensure that my speckled yarn effect is consistent and evenly distributed throughout the yarn, rather than having clumps of color?
To achieve a consistent speckled yarn effect, I recommend using a controlled dyeing process. Try folding your yarn into smaller sections and binding them with thread or wire, then dyeing. This will help you achieve evenly spaced speckles. For natural dyes, make sure to test the color intensity and adjust the soaking time to get the desired effect.