
I still remember the day my wife, a passionate weaver, asked me to help her organize her yarn stash. She had tried every method under the sun, but nothing seemed to stick. As a carpenter, I’ve always believed that the right tools and a bit of creativity can solve any problem. So, I rolled up my sleeves and dove into the world of yarn organization. That’s when I discovered the joy of how to organize your yarn stash by color. It’s not just about aesthetics; it’s about creating a system that makes sense for the maker.
In this article, I’ll share my no-nonsense approach to organizing your yarn stash by color. You won’t find any fancy storage solutions or expensive gadgets here. Just practical advice from a maker who’s been in your shoes. I’ll walk you through a simple, step-by-step process to create a beautiful and functional yarn storage system that will make your crafting life easier. Whether you’re a seasoned knitter or a beginner weaver, you’ll learn how to create a rainbow from your yarn stash and make the most of your crafting time. So, let’s get started and turn your yarn chaos into a colorful oasis!
Table of Contents
Guide Overview: What You'll Need
Total Time: 2 hours 30 minutes
Estimated Cost: $20 – $40
Difficulty Level: Easy
Tools Required
- Shelving Units to store yarn
- Baskets or Containers for categorizing yarn by color
- Label Maker to identify each section
Supplies & Materials
- Cardboard Boxes for temporary storage during organization
- Measuring Tape to measure shelving units and baskets
- 6 inches by 6 inches Cardboard Sheets for dividing baskets or containers into smaller sections
Step-by-Step Instructions
- 1. First, let’s start by gathering all our yarn from around the house, including those hidden away in closets, under beds, or in our favorite knitting baskets. This is the fun part – you get to rediscover all the beautiful colors and textures you’ve accumulated over time. Take everything out and lay it out on a large table, floor, or even a makeshift workspace outside if the weather permits.
- 2. Next, we need to categorize our yarn by color. This might seem like a daunting task, but trust me, it’s worth it. Start by grouping similar hues together – all the blues, greens, yellows, etc. Don’t worry too much about the shades at this point, just focus on the primary color. You’ll be surprised at how quickly your yarn stash starts to look like a rainbow explosion.
- 3. Now that we have our color groups, it’s time to create a system for organizing them. I like to use wooden crates or baskets, which I’ve made myself in my workshop. You can also use plastic bins or any other containers you have on hand. Label each container with its corresponding color, and start filling them up with your yarn. Make sure to leave some space for new additions – because let’s be real, our yarn stashes are always growing and evolving.
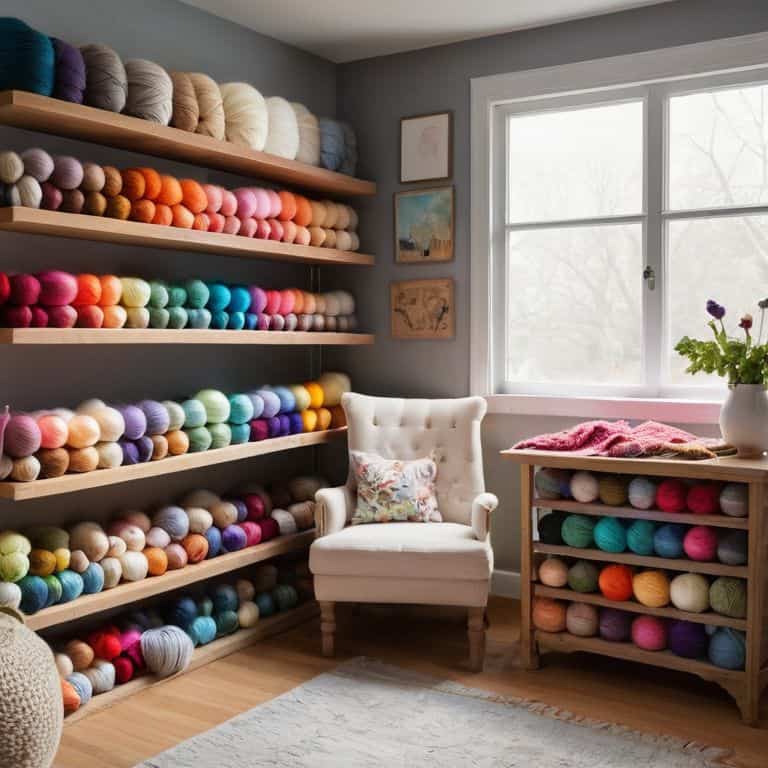
- 4. With our containers filled and labeled, it’s time to think about storage and display. If you have a dedicated crafting room or space, consider installing shelves or a storage unit specifically designed for your yarn. If not, don’t worry – you can still find a beautiful way to display your colorful stash. I’ve used old wooden ladders, crates, and even a vintage spinning wheel to showcase my wife’s yarn collection.
- 5. As we’re putting everything back together, take a moment to evaluate your yarn stash. Are there any colors or textures you’re missing? Are there any yarns that are no longer inspiring you? This is a great opportunity to purge and refresh your collection, making space for new and exciting projects. Consider swapping or giving away yarns that no longer spark joy, and make a mental note to pick up some new favorites on your next craft supply run.
- 6. Once you’ve finalized your yarn organization system, it’s time to add some personal touches. You could add a few decorative items, like a handmade wooden sign or a vase with fresh flowers, to make your crafting space feel more inviting. I also like to keep a few of my favorite handmade tools, like my wooden spindle or a set of hand-carved knitting needles, on display to inspire my next project.
- 7. Finally, take a step back and admire your handiwork. Your newly organized yarn stash should be a thing of beauty, with each color group neatly stored and easily accessible. Take a moment to appreciate the process, and the fact that you’ve created a space that inspires creativity and productivity. Now, go forth and create something amazing with your beautifully organized yarn stash!
Coloring Outside Lines
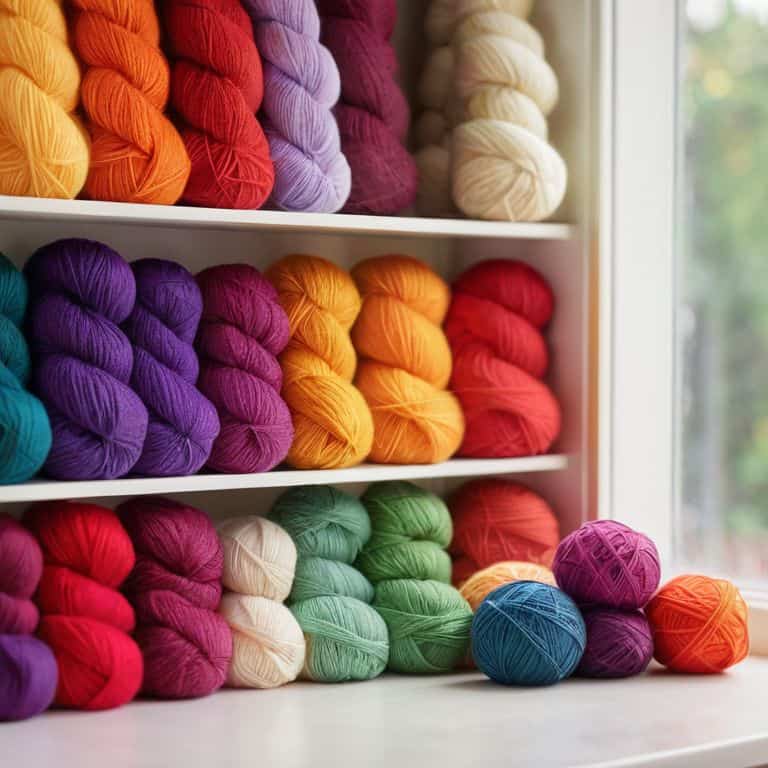
As I delve into the world of yarn organization, I’ve found that yarn storage solutions can make or break the overall aesthetic of my craft room. To add a pop of color and personality, I like to incorporate color coded yarn organization into my decor. This not only helps me quickly find the perfect shade for my project, but it also creates a beautiful rainbow yarn display that inspires my creativity.
When it comes to managing my yarn stash, I’ve learned a few tricks to keep my collection tidy and organized. One of my favorite techniques is to use yarn ball winding techniques to keep my yarns from getting tangled and knotted. This simple trick has saved me hours of frustration and makes it easier to see the true beauty of my yarns. By implementing these small changes, I’ve been able to transform my craft room into a haven of creativity and productivity.
To take my yarn organization to the next level, I’ve started to explore different craft room decor ideas that incorporate my love of yarn and woodworking. I’ve found that adding wooden shelves and baskets to my space not only provides ample storage for my yarns, but it also adds a touch of warmth and character to the room. By combining my passion for woodworking with my love of yarn, I’ve created a space that is truly unique and inspiring, and I’m excited to see where this journey takes me.
Rainbow Yarn Storage Solutions
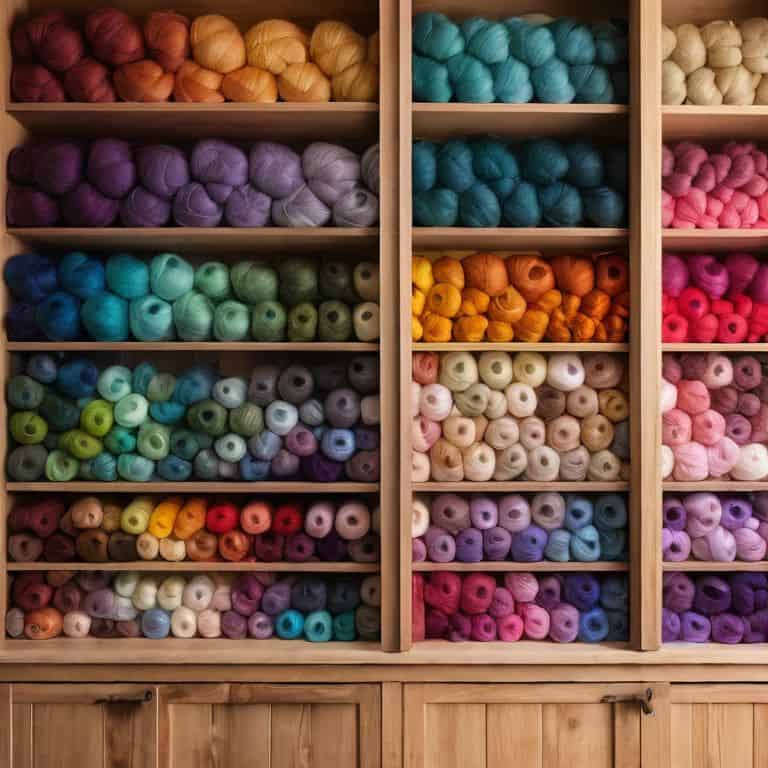
Now that we’ve colored outside the lines, let’s talk about taking our yarn storage to the next level. I’m obsessed with finding creative ways to showcase my wife’s yarn collection, and I’ve discovered that a little woodworking magic can make all the difference. I’ve built custom shelves with built-in cubbies, perfect for storing skeins of yarn in a rainbow gradient. It’s amazing how a beautifully crafted storage solution can inspire your next project.
I’ve also experimented with repurposing old furniture, like turning an antique dresser into a yarn storage unit. With a little sanding and staining, it’s now a one-of-a-kind piece that adds warmth and character to our crafting room. The best part? It’s totally customizable to fit your unique yarn collection and personal style.
Winding Yarn Balls With Flair
Now that we’ve explored some creative ways to store our yarn, let’s talk about adding a touch of flair to our winding process. I love using a beautifully crafted wooden yarn ball winder to add a personal touch to my yarn balls. Not only does it make the process more enjoyable, but it also allows me to appreciate the texture and color of the yarn as I wind it into perfectly rounded balls.
As I wind, I find myself lost in the rhythm of the yarn flowing through my fingers, the soft creak of the winder, and the satisfying click of the yarn ball taking shape. It’s meditative, really. And when I’m done, I have a stunning yarn ball that’s almost too pretty to use – almost.
Sorting Skeins with Finesse: 5 Tips to Tame Your Yarn Stash
- Start by gathering all your yarn and dumping it into a big pile – yes, it’s scary, but trust me, it’s the first step to yarn nirvana!
- Use cardboard boxes or wooden crates to create a rainbow on your shelf, assigning a color range to each container, like a treasure chest for your blues and greens
- Invest in some yarn balls or spools to keep your strands from getting tangled, and label them so you can find that perfect shade of purple in a snap
- Consider implementing a ‘one in, one out’ policy to keep your stash from growing out of control, and make sure to weave or knit something with the old yarn before bringing in the new
- Take it to the next level by adding some decorative touches, like a mini loom or a spinning wheel, to turn your yarn storage area into a cozy little maker’s nook that inspires creativity
Key Takeaways for a Colorful Yarn Stash
By organizing your yarn stash by color, you’ll not only create a visually stunning display, but also make it easier to find the perfect shade for your next project
Thinking outside the box with rainbow yarn storage solutions and creative winding techniques can add a touch of personality to your crafting space
With a little creativity and some DIY spirit, you can turn your yarn stash into a beautiful, functional, and inspiring part of your crafting journey
Wrapping Up Your Rainbow
As we’ve explored the world of yarn organization, we’ve covered the basics of sorting by color, and dived into some creative solutions for storing your stash. From rainbow-order systems to winding yarn balls with flair, the goal has been to make your workspace a haven of inspiration. By implementing these strategies, you’ll not only find what you need faster, but you’ll also be surrounded by a visually appealing display that sparks joy and motivates your next project. Whether you’re a seasoned crafter or just starting out, organizing your yarn stash by color is a simple yet powerful step towards a more efficient and enjoyable crafting experience.
As you put these tips into practice, remember that the true beauty of handmade crafts lies not just in the end result, but in the process itself. So, don’t be afraid to get a little sawdust in your hair as you build, create, and bring your unique vision to life. With a well-organized yarn stash and a passion for making, the possibilities are endless, and I’m excited to see what you’ll create next.
Frequently Asked Questions
How do I decide which shades of yarn to group together when they're similar but not exactly the same color?
Ah, the age-old dilemma! When deciding which similar shades to group together, I say trust your instincts. Ask yourself, ‘Would these hues play nice in a project?’ If the answer’s yes, cluster them together. Think of it as creating a yarn family – they don’t have to be identical twins, just cousins with a similar vibe.
What's the best way to store small leftover yarn scraps when organizing by color?
For small leftover yarn scraps, I swear by mini baskets or wooden compartments – I even make my own from reclaimed wood. They keep each color group tidy and prevent those pesky scraps from getting lost. Plus, they’re a great excuse to get creative with some small woodworking projects!
Can I use this color-organizing method for other craft supplies, like threads or embroidery floss?
Absolutely, my friend! This color-organizing method isn’t just for yarn. I use it for my threads, embroidery floss, and even my leather strips for project bags. It’s all about creating a visual flow that sparks creativity. Give it a try and see how it transforms your craft space!