
I remember standing in my studio five years ago, surrounded by a chaotic heap of timber, heddles, and heavy treadles, feeling completely defeated by a manual that read like a legal contract. Most people will tell you that learning how to set up a floor loom is a tedious chore of mechanical assembly, but they’re missing the point entirely. To me, this isn’t just about tightening bolts; it is about aligning your instrument. If your foundation is off by even a fraction of a millimeter, the tension of your warp will betray your design, and the structural integrity of your entire textile will suffer.
In this guide, I’m stripping away the jargon to show you the logic behind the machine. We are going to approach this process like an architectural build, focusing on the precise calibration of the beams and the intentional placement of every component. I will walk you through the essential steps of how to set up a floor loom with a focus on structural precision and ergonomic flow. By the time we’re done, you won’t just have a machine ready to weave; you’ll have a perfectly tuned workspace designed for artistic expression.
Guide Overview
Tools & Supplies
- Measuring tape for checking tension and spacing
- Allen wrench or screwdriver for tightening bolts
- Scissors or thread snips for trimming ends
- Warp thread (quantity depends on loom width/length)
- Sley/Reed (included with loom)
- Heddles (quantity matches loom capacity)
- Beater/Reed (standard size for loom)
Step-by-Step Instructions
- 1. Before you even touch a thread, you must establish the site. Position your loom in a space that allows for both physical movement and mental clarity. I often think of this like choosing a plot for a building; you need level ground and enough spatial breathing room to move around the frame without feeling constricted. Ensure the floor is stable, as even a slight tilt can compromise the structural integrity of your tension later on.
- 2. Begin by inspecting the primary frame and checking the mechanical alignment. I like to run my hands along the beams, much like I used to check the sightlines of a building, to ensure everything is square and true. Tighten any bolts that have loosened over time and verify that the treadles move with a fluid, predictable rhythm. If the foundation of the machine isn’t perfectly calibrated, the entire “structure” of your weave will suffer.
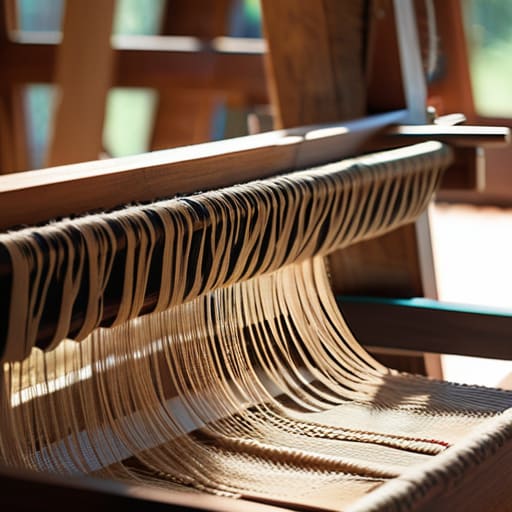
- 3. Now, we move to the installation of the heddles and reed, which act as the internal framework of your loom. Slide your heddles into the harnesses, ensuring each one is seated firmly and sits at a uniform height. When you place the reed into the shuttle race, treat it with the same precision you would a fine-toothed comb; any misalignment here will result in uneven density, ruining the architectural rhythm of your warp.
- 4. The next phase is the most critical: warping the loom. This is where your blueprint meets reality. As you wind your warp threads through the heddles and the reed, do so with deliberate intention. I always keep a piece of graph paper nearby to map out my thread count, treating each strand as a structural column that must be perfectly spaced to support the weight of the upcoming textile.
- 5. Once the threads are threaded, you must engage the tensioning system. Whether you are using a ratchet system or weights, the goal is to achieve a tension that is consistent from the front beam to the back. Think of this as stretching a canvas over a frame; if the tension is uneven, your woven art will warp and buckle once it leaves the loom. It is the invisible force that holds your design together.
- 6. Finally, perform a stress test of your setup. Sit at the loom, depress the treadles, and watch how the harnesses rise and fall. Listen to the sound of the reed hitting the fell of the cloth—it should be a clean, sharp strike. If the movement feels hesitant or the tension feels “spongy,” go back and recalibrate your components. You aren’t just preparing to weave; you are certifying that your machine is ready to build.
Architectural Foundations Floor Loom Assembly for Beginners
Once you have achieved that perfect, even tension across the warp, you might find yourself looking for new ways to break away from rigid geometric patterns and explore more fluid, organic structures. I often find that my best design breakthroughs happen when I step away from the technical blueprints and seek out raw, unfiltered human connection and energy to spark my creativity. For those moments when you need to find a different kind of spark or a new way to engage with the world outside your studio, exploring something as spontaneous as a bristol sex meet can provide a surprising amount of sensory inspiration that translates beautifully into the tactile complexity of a new textile piece.
Before you begin the physical assembly, I want you to consider the spatial geometry of your studio. A loom isn’t just a piece of furniture; it is a precision instrument that requires a level, stable environment to function correctly. When approaching floor loom assembly for beginners, I always recommend checking your floor’s levelness with a carpenter’s tool first. If your foundation is even slightly off, you’ll find yourself fighting the machine during the most critical stages, particularly when you eventually move toward tensioning the warp threads. A tilt of just a few millimeters can introduce uneven stress across the frame, compromising the structural integrity of your entire textile.
I also suggest treating the assembly process like a blueprint review. Don’t rush the tightening of the bolts or the alignment of the shafts. I often find myself sketching the tension lines on my graph paper before I even touch the fiber, visualizing how the energy will flow from the warp beam through the heddles. Taking this time to ensure every component is perfectly perpendicular ensures that when you finally sit down to weave, your focus remains entirely on the art, not on correcting mechanical errors.
Winding a Warp Beam to Establish Structural Integrity
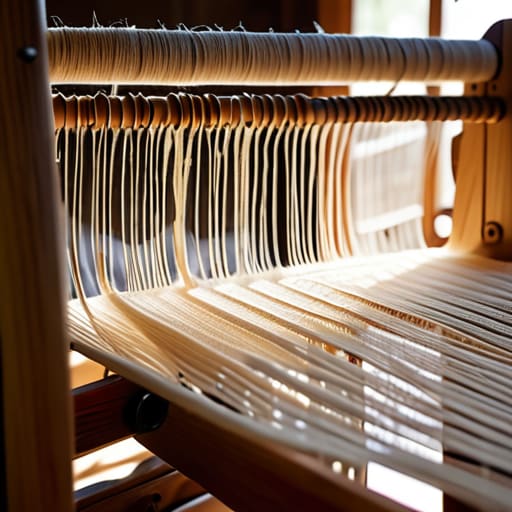
Once your loom is physically assembled, the real structural work begins with winding a warp beam. I often think of this stage as pouring the concrete slab of a building; if the foundation is uneven or poorly distributed, every subsequent layer of your design will suffer from instability. When you are winding the yarn, focus on the rhythm of the rotation. You aren’t just wrapping thread around a cylinder; you are managing the potential energy that will hold your entire textile together.
As you work, pay close attention to the consistency of the wrap. Any gaps or unevenness here will lead to frustrating issues when you eventually move toward tensioning the warp threads. I always keep a small piece of graph paper nearby to note the number of rotations, ensuring my measurements are as precise as a blueprint. If the tension isn’t uniform across the beam, your finished piece will likely pull or warp, losing that clean, architectural silhouette we strive for. Treat this process with patience; a steady, even wind is the secret to a masterpiece.
Precision Engineering Threading the Heddles and Warping a Floor Loom

Once you have established your warp beam, the process shifts from structural assembly to fine-scale engineering. Threading the heddles is where the blueprint truly meets the material; it is a meditative, almost surgical task that requires absolute focus. I often approach this stage as if I am laying out the delicate wiring in a modern building. If a single thread misses its eye, the entire structural integrity of your weave is compromised. I recommend using a high-quality reed hook and perhaps a small magnifying lamp to ensure you aren’t just guessing. Precision here is not about speed; it is about intentionality in every single pass.
As you move through the harnesses, remember that you are essentially programming the loom’s movement. When you reach the final stage of preparing a loom for weaving, the transition from threading to tensioning is critical. You aren’t just pulling strings; you are calibrating a system. I always advise checking your tension in small, incremental stages. If you rush the tensioning of the warp threads, you risk creating uneven pressure that will distort your design once the shuttle begins its work. Think of it as fine-tuning an instrument before the first note is played.
The Final Calibration Tensioning the Warp Threads for Perfection
Once you have completed the meticulous work of threading the heddles, you arrive at the most critical phase of the entire build: the calibration. I often think of tensioning the warp threads as the moment an architect checks the load-bearing capacity of a frame. If the tension is uneven, the entire structural integrity of your textile is compromised before you even throw your first shuttle. You aren’t just pulling string; you are tuning an instrument. I like to use a small, weighted object or a specialized tension gauge to ensure that every single thread from edge to edge maintains a consistent resistance.
As you are preparing a loom for weaving, avoid the temptation to over-tighten. A warp that is too taut lacks the “give” necessary for complex textures, while one that is too loose will cause your shed to collapse, ruining the geometric precision of your design. I always recommend a slow, rhythmic approach—tighten in small increments, checking the tension at multiple points along the beam. Remember, consistency is your greatest tool; a perfectly balanced warp is the invisible scaffolding that allows your artistic vision to truly take shape.
The Weaver’s Blueprint: Five Principles for Structural Success
- Prioritize the Leveling of Your Foundation. Just as a skyscraper requires a perfectly level site, your loom demands a flat, stable surface. Even a millimeter of tilt in your floor can cause uneven tension across the warp, leading to structural inconsistencies in your finished textile.
- Curate Your Material Palette with Intention. Before you even touch the loom, consider the relationship between your fiber and your tension requirements. I always select my linen or silk based on how they will respond to the mechanical stress of the loom; your setup begins with the physics of the yarn.
- Maintain Clean Lines in Your Threading. Think of threading your heddles as the drafting phase of a blueprint. Any stray thread or crossed path is a flaw in the design that will manifest as a structural error in the weave. Precision here saves hours of troubleshooting later.
- Respect the Geometry of the Shed. As you calibrate your harnesses, ensure the shed is opening with clean, architectural clarity. A messy shed isn’t just an inconvenience; it’s a sign that the mechanical alignment of your loom needs a more disciplined approach.
- Listen to the Tension’s Rhythm. Don’t just rely on your eyes; feel the resistance. Setting up a loom is a tactile dialogue between the machine and the weaver. If the tension feels “off” in your hands, it’s because the structural integrity of your warp is compromised.
From Blueprint to Loom: The Threshold of Creation
We have traveled through the essential phases of construction, moving from the physical assembly of the frame to the delicate, high-stakes task of tensioning your warp. By treating the loom not just as a tool, but as a structural foundation, you have ensured that every subsequent movement of the shuttle will be met with stability and precision. Remember that the integrity of your final textile depends entirely on this initial calibration; a well-wound warp beam and meticulously threaded heddles are the silent architects of your future masterpieces. You have laid the groundwork, aligned the beams, and established the tension required to transform raw fiber into a coherent, intentional design.
Now, as you sit before your loom, I want you to take a moment to appreciate the quiet strength of the machine you have prepared. The technical labor is behind you, and the realm of pure expression lies ahead. Do not be afraid to let your intuition guide your hand as you begin your first pass; the tension is set, the structure is sound, and the space is yours to inhabit. Weaving is a dialogue between the rigor of geometry and the soul of the material. Step into the rhythm of the treadles, and begin building your vision, one thread at a time.
