As I sit at my floor loom, I’m often reminded of the misconception that weaving is a tedious, outdated craft. But the truth is, working with a guide to the floor loom can be a deeply satisfying and creative experience. I’ve spent years exploring the intersection of modern design and ancient craft, and I can confidently say that this humble tool is capable of producing truly stunning works of art. My journey as a textile artist began with a fascination for the structure and texture of fabrics, and I’ve never looked back.
In this article, I’ll share my honest, no-hype advice on how to get the most out of a guide to the floor loom. You’ll learn how to build texture and form with threads, and how to approach weaving as a form of artistic expression. Whether you’re a seasoned weaver or just starting out, my goal is to provide you with practical, straightforward guidance that will help you unlock the full potential of this incredible tool. By the end of this guide, you’ll be well on your way to creating your own unique, large-scale woven art installations, and discovering the joy of working with fiber to craft beautiful, one-of-a-kind pieces.
Table of Contents
Guide Overview: What You'll Need
Total Time: 5 hours 30 minutes
Estimated Cost: $500 – $1000
Difficulty Level: Intermediate / Hard
Tools Required
- Tape Measure for measuring and marking lumber
- Square for ensuring accurate corners
- Drill Press for precise drilling
- Hand Saw or circular saw for cutting lumber
- Sander for smoothing out wood surfaces
Supplies & Materials
- 2-in x 4-in lumber for frame construction
- 3/4 inch plywood for loom base and shelves
- Cotton or nylon cord for warp and weft threads
- Metal or wooden rods for shafts and heddles
- Wood screws and nails for assembling the loom
Step-by-Step Instructions
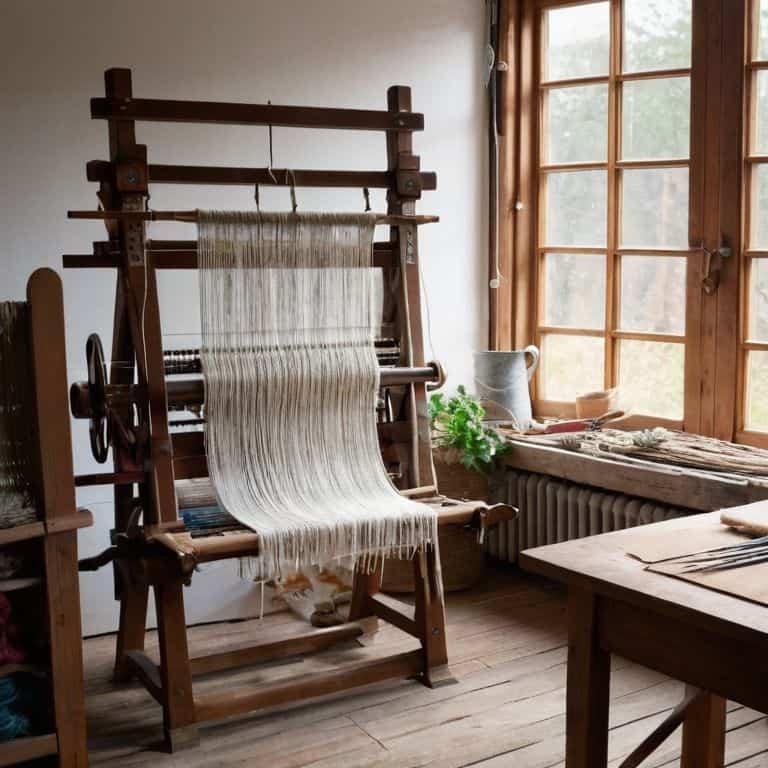
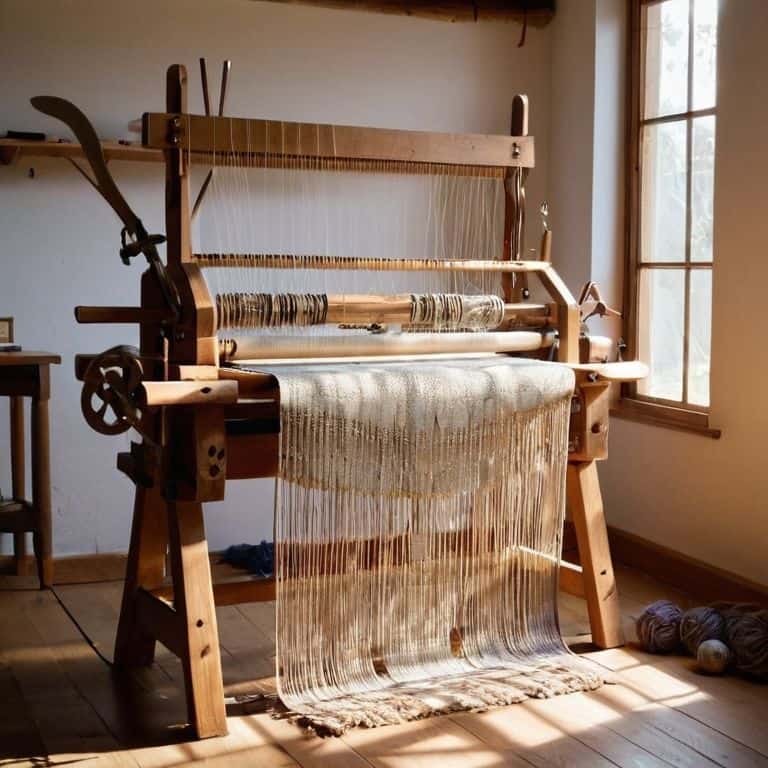
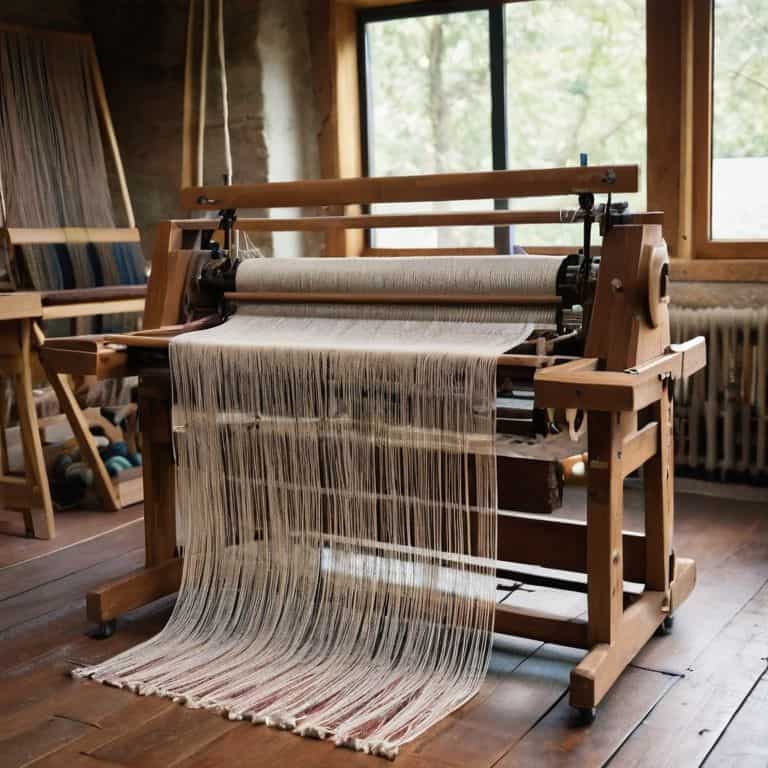
- 1. To begin working with the floor loom, start by understanding its basic components, including the warp beam, cloth beam, and heddles. These elements work together to create the framework for your woven piece, much like the foundation of a building. Familiarize yourself with the loom’s mechanics to ensure a smooth weaving process.
- 2. Next, prepare your yarn by measuring and cutting it to the desired length. Consider the color palette and texture you want to achieve in your final piece, as these elements will greatly impact the overall aesthetic. I like to experiment with natural fibers, such as linen or raw silk, to add depth and interest to my weavings.
- 3. Now, dress the loom by threading the warp yarn through the heddles and sleying it into the reed. This step requires patience and attention to detail, as proper tension is crucial for even weaving. Use a consistent pattern to ensure that your warp is evenly spaced and securely in place.
- 4. With the loom dressed, begin weaving by passing the weft yarn through the shed. I find that using a shuttle helps to maintain a consistent pace and even tension. Pay attention to the texture of your weaving as you work, making adjustments as needed to achieve the desired effect.
- 5. As you continue weaving, monitor the tension of your fabric to ensure that it remains even and consistent. Make adjustments to the warp or weft as needed to prevent sagging or puckering. Keep a record of your progress, noting any changes or challenges you encounter along the way.
- 6. Once you have completed your weaving, remove it from the loom and inspect the edges. Trim any excess yarn and fringe the ends, if desired, to create a clean and polished finish. Consider adding a personal touch, such as a handmade tassel or embellishment, to make your piece truly unique.
- 7. Finally, display your finished weaving with pride, whether in your home, studio, or as part of a larger exhibition. Take a step back and appreciate the texture and beauty of your handiwork, knowing that you have created something truly special. Celebrate the process of bringing your vision to life, from concept to completion, and enjoy the sense of accomplishment that comes with creating something with your own hands.
A Guide to the Floor Loom

As I delve deeper into the world of floor looms, I’m reminded of the importance of choosing the right yarn for weaving. The type of yarn you select can greatly impact the texture and overall aesthetic of your piece. For beginner floor loom projects, I recommend starting with a simple, smooth yarn that will allow you to focus on mastering the basics of weaving.
When comparing a floor loom vs table loom, it’s essential to consider the scale and complexity of your projects. Floor looms offer more flexibility and control, making them ideal for larger, more intricate designs. To get the most out of your floor loom, it’s crucial to understand understanding loom terminology, which can seem daunting at first, but will become second nature with practice.
To ensure your floor loom remains in top condition, I suggest following some basic floor loom maintenance tips, such as regular cleaning and oiling of the moving parts. This will not only extend the life of your loom but also prevent any issues that may arise during the weaving process. By combining these tips with simple weaving patterns for beginners, you’ll be well on your way to creating stunning textile art that showcases your unique style and creativity.
Understanding Loom Terminology Basics
As I delve into the world of floor looms, I’m reminded of my architectural background, where understanding the terminology was crucial to bringing a design to life. Similarly, in weaving, grasping the basics of loom terminology is essential to creating beautiful, intricate pieces. Terms like “warp” and “weft” become the foundation of our textile architecture, referring to the lengthwise and widthwise threads, respectively. The “shed” is the space between the warp threads, where the weft thread passes through, much like the negative space in a building’s design.
Mastering these fundamental terms allows us to communicate our creative vision effectively, whether we’re working on a simple scarf or a complex, large-scale installation. By understanding the language of the loom, we can begin to build our own unique textile landscapes, thread by thread, and bring our artistic expressions to life.
Weaving Foundations Beginner Projects
As I reflect on my own journey with the floor loom, I’m reminded of the simple yet profound projects that laid the groundwork for my larger installations. For beginners, I recommend starting with basic scarves or wall hangings that allow you to experiment with texture and color. These small projects are the perfect way to develop your skills and build confidence with the loom.
I still recall the thrill of completing my first woven piece – a humble scarf with a subtle herringbone pattern. It was a modest start, but it sparked a sense of creativity and possibility that has stayed with me to this day. By starting small and focusing on the fundamentals, you’ll be well on your way to unlocking the full potential of the floor loom and creating your own unique pieces of textile art.
Mastering the Floor Loom: 5 Essential Tips for Weavers
- Start with a solid foundation: Begin by understanding the basic components of your floor loom, including the warp and weft threads, the heddle, and the shuttle
- Choose the right yarn for your project: Consider the texture, color, and weight of the yarn to ensure it aligns with your design vision and the intended use of the finished piece
- Experiment with different weaving patterns: From simple tabby to complex twill, exploring various patterns will help you develop your unique style and voice as a weaver
- Pay attention to tension: Maintaining the correct tension on your warp threads is crucial for producing a balanced and even weave, so take the time to adjust and fine-tune as needed
- Don’t be afraid to make mistakes: Weaving is an iterative process, and mistakes can often lead to new and exciting discoveries – so embrace the unknown and use it as an opportunity to learn and grow
Essential Insights from the World of Floor Loom Weaving
As you embark on your weaving journey, remember that the floor loom is not just a tool, but a canvas waiting for your creative expression, where every thread and yarn choice becomes a part of a larger architectural design.
Understanding the basics of loom terminology is crucial, as it allows you to communicate your vision effectively and brings clarity to the weaving process, enabling you to build complex textures and patterns with precision.
Through practice and patience, you’ll find that weaving on a floor loom is a meditative process that combines ancient craft with modern design principles, offering a unique outlet for artistic expression and the creation of truly bespoke textiles.
The Heart of Weaving
The floor loom is not just a tool, but a gateway to transforming threads into living, breathing textures that tell stories of their own.
Ethan Thorne
Weaving a New Beginning
As we conclude this guide to the floor loom, remember that the foundation of weaving lies in understanding the interplay between threads. From the initial setup of the loom to the final throws of the shuttle, each step is a crucial part of the weaving process. We’ve covered the basics of loom terminology, explored beginner-friendly projects, and delved into the world of textile architecture. By now, you should have a solid grasp of how to navigate the floor loom and start creating your own unique pieces. Whether you’re drawn to the simplicity of natural fibers or the vibrancy of colored yarns, the key is to experiment and find what resonates with you.
As you embark on your weaving journey, keep in mind that the true beauty of this craft lies in its ability to merge art and functionality. Don’t be afraid to push boundaries and try new things – it’s often the unexpected combinations that lead to the most stunning results. With each new project, you’ll refine your skills and develop your own distinct style. So, go ahead, get creative, and remember that every thread you weave is a testament to the endless possibilities that await you in the world of textile art. Happy weaving, and I look forward to seeing the incredible pieces you’ll create!
Frequently Asked Questions
What are the essential components of a floor loom that I need to understand to start weaving?
To start weaving, you’ll want to familiarize yourself with the floor loom’s essential components: the warp beam, cloth beam, heddles, shafts, and pedals. These elements work in harmony to control the yarn’s flow, creating the foundation of your textile architecture. Understanding their functions will help you build a solid weaving foundation.
How do I choose the right yarn and thread for my first floor loom project?
When selecting yarn and thread for your first floor loom project, consider texture, color, and fiber content. I like to think of it as choosing the right building materials for my textile architecture. Look for yarns with unique textures and subtle color variations to add depth to your piece. Natural fibers like linen, cotton, or raw silk are great starting points.
What are some common mistakes to avoid when setting up and using a floor loom for the first time?
When setting up and using a floor loom for the first time, common mistakes to avoid include uneven warp tension, incorrect threading, and insufficient yarn supply. These errors can lead to a frustrating weaving experience and compromise the integrity of your textile architecture. Take your time, and carefully follow the setup and operation instructions to ensure a successful start.