I still remember the first time I tried to learn how to knit stockinette stitch. I was frustrated by the confusing patterns and unclear instructions that seemed to assume I already knew what I was doing. But I didn’t give up, and after years of practice and teaching others, I’ve learned that the key to mastering this stitch is to break it down into simple, manageable steps. The myth that you need to be an experienced knitter to tackle stockinette stitch is just that – a myth. With the right guidance, anyone can learn how to knit stockinette stitch and create beautiful, cohesive fabrics.
In this article, I’ll share my no-nonsense approach to teaching how to knit stockinette stitch, walking you through each step with clarity and precision. You’ll learn how to create a sturdy foundation, work the stitch pattern with ease, and troubleshoot common mistakes. My goal is to provide you with practical advice that you can apply immediately, so you can focus on enjoying the process of creating something beautiful with your own hands. By the end of this guide, you’ll be well on your way to mastering the stockinette stitch and unlocking a world of creative possibilities.
Table of Contents
Guide Overview: What You'll Need
Total Time: 2 hours 30 minutes
Estimated Cost: $20 – $50
Difficulty Level: Intermediate
Tools Required
- Knitting Needles US size 8 or preferred size
- Scissors for cutting yarn
- Tapestry Needle for weaving in ends
- Measuring Tape for measuring work in inches
Supplies & Materials
- Yarn medium weight, approximately 300-400 yards
- Stitch Markers optional, for marking beginning of round or pattern
Step-by-Step Instructions
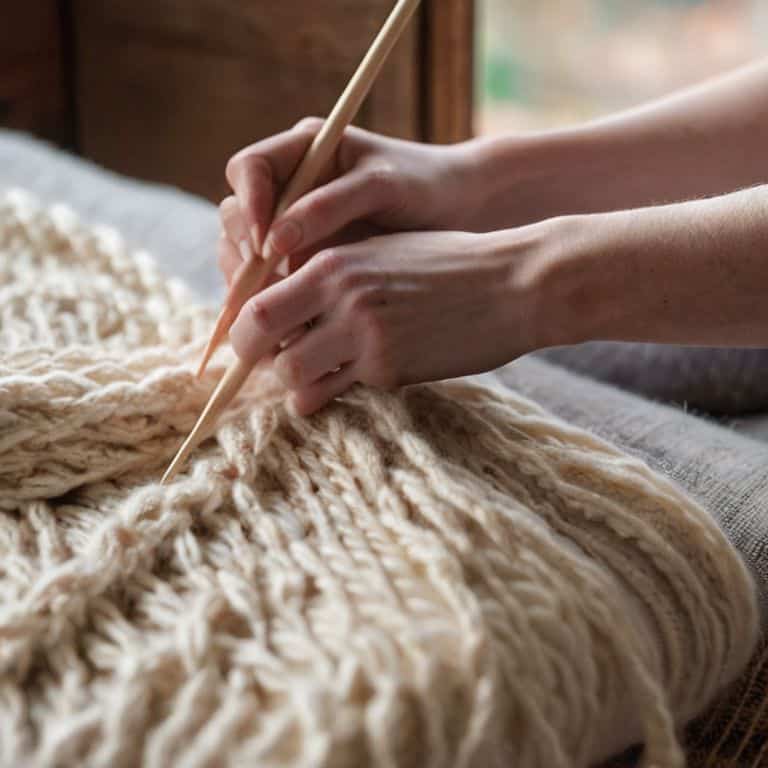
- 1. First, let’s start with the basics: to knit stockinette stitch, you’ll need a few simple tools – a pair of knitting needles and some yarn. I like to use merino wool for its softness and warmth, but feel free to choose any yarn that suits your project. Make sure to select a yarn that’s not too slippery, as it can be frustrating to work with.
- 2. Next, cast on the number of stitches you desire for your project. I recommend starting with a small swatch to get a feel for the stitch pattern. To cast on, create a slipknot on one of your needles, then use your other needle to pull up loops and place them on the first needle. Remember to keep your tension even, as this will affect the overall fabric of your knitted piece. You can use the long-tail cast-on method for a neat and tidy edge.
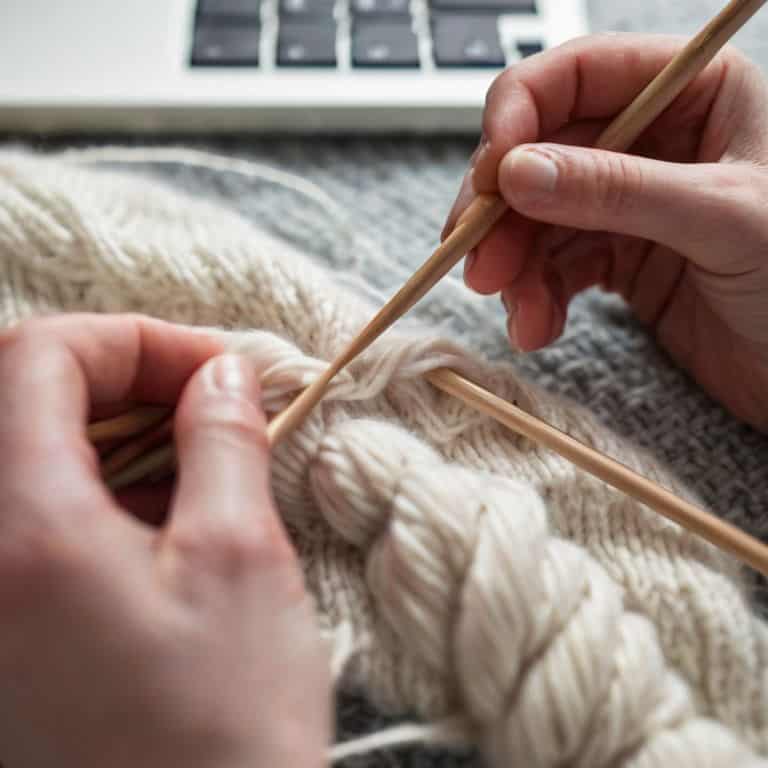
- 3. Now, let’s move on to the actual knitting. To knit a row, insert the right needle into the first stitch on the left needle, and wrap the yarn around it in a counterclockwise motion. Pull the yarn through, and you’ll have completed one knit stitch. Repeat this process for each stitch on the left needle, moving them to the right needle as you go. Be sure to keep your stitch count even, as stockinette stitch relies on a consistent number of stitches.
- 4. As you complete each row, you’ll notice that the fabric of your knitted piece starts to take shape. To knit the next row, simply repeat the process, making sure to maintain the same tension throughout. If you find that your stitches are becoming too tight or too loose, don’t worry – it’s easy to adjust your tension as you go. Just be sure to keep an eye on your stitch gauge, as this can affect the overall size of your project.
- 5. One of the key things to remember when knitting stockinette stitch is to always knit one row, then purl one row. This will create the characteristic smooth, flat fabric that stockinette stitch is known for. To purl a row, simply insert the right needle into the first stitch on the left needle, and wrap the yarn around it in a clockwise motion. Pull the yarn through, and you’ll have completed one purl stitch. Repeat this process for each stitch on the left needle.
- 6. As you continue knitting and purling rows, you’ll start to see the stockinette stitch pattern emerge. Remember to keep your edges even, as this will help maintain the overall shape of your project. If you find that your edges are becoming uneven, don’t worry – it’s easy to fix this by adjusting your stitch count or tension.
- 7. Finally, when you’re ready to bind off your project, use a basic bind-off method such as the k2tog bind-off. This will create a neat and tidy edge that complements the stockinette stitch fabric. To bind off, knit the first two stitches on the left needle together, then pass the second stitch over the first. Repeat this process until you have one stitch remaining, then cut the yarn and pull it through the last loop. And that’s it – you’ve successfully knitted a stockinette stitch project!
Knit Stockinette Stitch
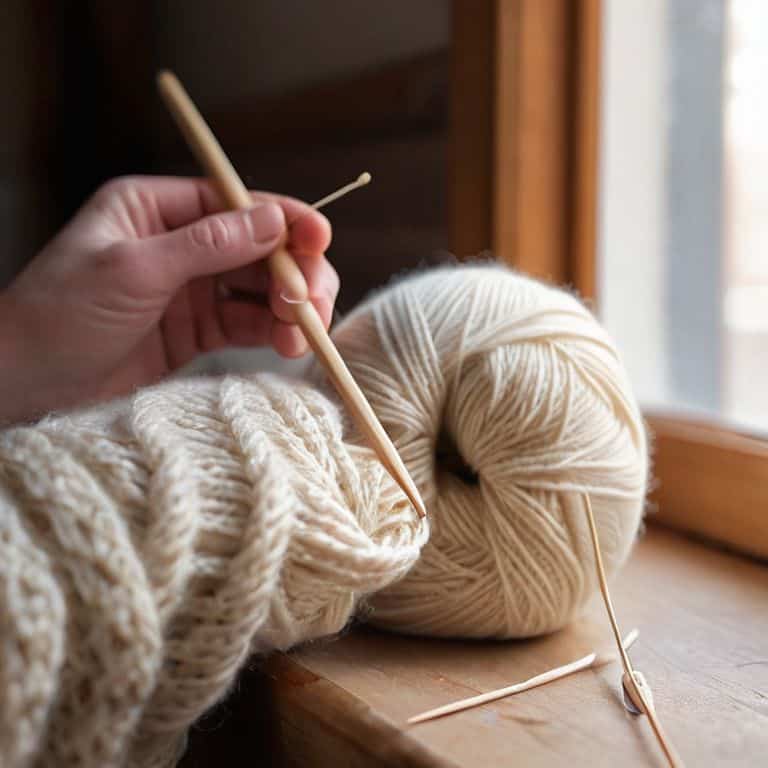
As you work on your stockinette stitch project, keep in mind that preventing curling is key to achieving a professional finish. One way to do this is to make sure you’re not pulling the yarn too tightly, as this can cause the fabric to pucker and curl. Instead, try to maintain a consistent tension, and use blocking to even out the fabric once you’ve completed your project.
When working with stockinette stitch patterns, it’s also important to pay attention to the type of yarn you’re using. Some yarns, especially those with a high wool content, can be prone to felting, which can affect the texture and appearance of your finished project. To avoid this, be sure to swatch your yarn before starting your project, and take note of any special care instructions.
By following these tips and practicing regularly, you’ll be well on your way to creating smooth, even fabric with your stockinette stitch. Remember to take your time and don’t be afraid to try new things, as this is all part of the learning process. With patience and practice, you’ll become more comfortable with the stockinette stitch, and be able to create a wide range of beautiful projects.
Preventing Curling in Fabric
When working with stockinette stitch, one common issue you might encounter is curling at the edges of your fabric. To prevent this, I recommend adding a border of garter stitch or ribbing around your project. This will help to weigh down the edges and keep them lying flat. You can also try blocking your finished project, which involves wetting it, stretching it out to the desired shape, and allowing it to dry. This can help to even out the stitches and prevent curling.
By taking these simple steps, you can ensure that your stockinette stitch project lies flat and looks its best. Remember, it’s all about attention to detail and taking the time to do things right – with a little practice, you’ll be a pro at preventing curling in no time!
Smooth Fabric Tips Revealed
To achieve a smooth fabric, it’s essential to maintain a consistent tension while knitting. I like to think of it as finding my “knitting rhythm.” As you work on your project, take a moment to pause and assess your stitches. Are they evenly spaced? Is the fabric lying flat? If not, don’t worry! A simple adjustment to your stitch tension can make all the difference. Try knitting a few rows with a slightly looser or tighter hold to see what works best for you.
By paying attention to your tension and making adjustments as needed, you’ll be able to create a beautiful, smooth fabric that showcases your stockinette stitch skills. Remember, practice makes perfect, so don’t be discouraged if it takes a little time to find your groove. With patience and practice, you’ll be knitting like a pro in no time, and your finished projects will be truly stunning.
Weaving Wisdom: 5 Essential Tips for Mastering the Stockinette Stitch
- Start with the right tools: invest in a good quality yarn and a pair of sharp, straight knitting needles to ensure smooth, even stitches
- Swatch, swatch, swatch: before diving into your main project, create a test swatch to get a feel for the yarn and needles, and to ensure you’re achieving the right tension
- Pay attention to your row counts: keeping track of your rows will help you maintain a consistent fabric and prevent mistakes that can be tricky to fix
- Don’t pull the yarn too tight: stockinette stitch can be prone to curling, so make sure to keep your stitches relaxed and even to achieve a smooth, flat fabric
- Practice, practice, practice: like any new skill, knitting stockinette stitch takes time and practice to master, so be patient and don’t be afraid to make mistakes – they’re all part of the learning process
Key Takeaways for Knitting Stockinette Stitch
Mastering the stockinette stitch requires patience and practice, but with a clear step-by-step guide, you can achieve professional-looking results
Preventing curling in fabric is crucial for a polished finish, and using techniques such as blocking or adding a border can make all the difference
By following these simple tips and tricks, you’ll be well on your way to creating beautiful, smooth fabrics that will elevate your knitting projects to the next level
The Heart of Stockinette Stitch
As you wrap your yarn around the needles, remember that the beauty of stockinette stitch lies not just in its simplicity, but in the meditative rhythm it brings to your fingertips – with each row, you’re not just knitting fabric, you’re weaving a moment of peace.
Beatrice "Bea" Quinn
Wrapping Up Your Knitting Journey
As we conclude our step-by-step guide on how to knit stockinette stitch, let’s recap the essentials: we’ve covered the fundamental steps to create this timeless stitch, from casting on to binding off. We’ve also explored valuable tips on preventing curling in fabric and achieving smooth fabric results. By following these detailed instructions, you’ve gained the confidence to tackle your first stockinette stitch project and lay the foundation for more complex knitting adventures.
As you put down your knitting needles, remember that the true beauty of knitting lies not just in the finished product, but in the journey itself. So, take a moment to appreciate the meditative rhythm of your needles, the softness of the yarn, and the sense of accomplishment that comes with creating something with your own hands. Happy knitting, and I look forward to guiding you through your next creative endeavor!
Frequently Asked Questions
What if my stockinette stitch fabric is curling at the edges, how can I prevent this from happening?
Don’t worry, my friend, curling edges are quite common in stockinette stitch. To prevent this, try adding a border of garter stitch or ribbing around your fabric. This will help weigh down the edges and keep them flat. You can also try blocking your finished project to even out the stitches and relax the fabric.
How do I know if I'm tensioning my yarn correctly while knitting stockinette stitch?
To check your yarn tension, gently tug on the working yarn while knitting. It should have a smooth, even flow. If it’s too tight, your stitches will pucker; if it’s too loose, they’ll be sloppy. Aim for a gentle, consistent pull – like a soothing whisper, not a tight tug.
Can I use any type of yarn to knit stockinette stitch, or are there specific weights or fibers that work best?
When it comes to choosing yarn for stockinette stitch, not all fibers are created equal. I recommend using medium-weight yarns with a bit of structure, like wool or cotton blends, to prevent excessive curling. Avoid super chunky or too-slender yarns, as they can be tricky to work with. Let’s explore some fabulous fiber options that will make your stockinette stitch project a joy to create.