If you’ve ever heard that the Hydroponic nutrient film technique (NFT) is a high‑tech, $2,000‑plus laboratory set‑up, you’ve been sold a myth. I spent a rainy Tuesday in the school’s basement, watching a “professional” demo that required a stainless‑steel trough, a digital flowmeter, and a budget that could fund a small greenhouse. The whole thing felt less like gardening and more like a physics lab. I walked away wondering why anyone would think a simple, no‑frills water film can’t be assembled with a few everyday items and a pinch of careful planning.
What I’m promising you today is a straightforward, step‑by‑step blueprint that anyone with a modest shelf and a screwdriver can follow. I’ll list every component, from the 1‑inch PVC pipe to the inexpensive aquarium pump, and provide a printable checklist that mirrors the way I catalog books—clear, numbered, and cross‑referenced. You’ll also get a short video walk‑through and a troubleshooting cheat sheet I compiled from a decade of answering students’ “why isn’t my water moving?” questions. By the time you finish, you’ll have a functional NFT garden that proves the hype was just that—hype—while you enjoy a tidy, thriving lettuce runway.
Table of Contents
- Glide Into Hydroponic Nutrient Film Technique Nft Blueprint
- Find the Sweet Spot Optimal Flow Rate for Nft Channels
- Master Nutrient Solution Management for Nft Success
- Design Your Dream Nft Hydroponic System With Ease
- Brighten Scale Led Lighting for Scalable Nft Farms
- Stay Cool Stay Safe Temperature Control Common Nft Failures
- Five Fresh‑Air Tips to Keep Your NFT Flowing Smoothly
- Quick‑Reference Takeaways for Your NFT Adventure
- The Flow of Fresh Possibilities
- Wrapping It All Up
- Frequently Asked Questions
Glide Into Hydroponic Nutrient Film Technique Nft Blueprint
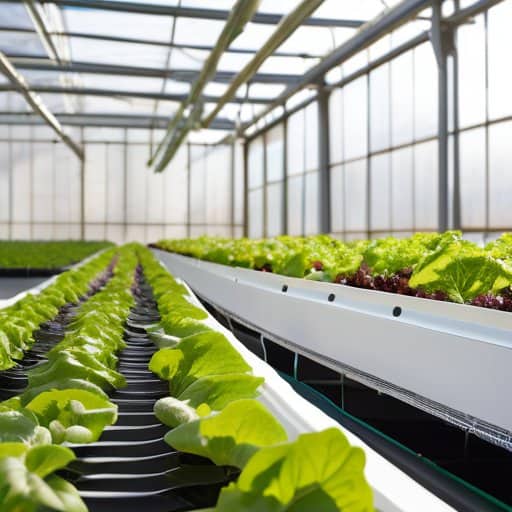
Before you even lay a channel on the floor, think of your NFT hydroponic system design as a simple floor plan for a miniature waterway. Start with a sloped PVC or food‑grade trough, giving the water a gentle downhill glide. The secret to steady growth is the optimal flow rate for NFT channels: typically 1–2 gallons per minute for a 4‑foot run, but you’ll fine‑tune it by watching how quickly a small piece of tubing empties. A pump, a check valve, and a level‑reading ruler are all you need to keep the film moving without splashing.
Once the flow is set, the art begins with troubleshooting and lighting. The most frequent hiccup is a clogged inlet, so keep a spare filter and schedule a weekly flush—this is a classic common NFT system failures and solutions moment. Pair your setup with LED lighting for NFT hydroponics, choosing a full‑spectrum strip that sits 12 inches above the channel to avoid heat buildup. Finally, monitor temperature control in NFT hydroponics and practice diligent nutrient solution management for NFT; a thermometer and an EC meter will keep lettuce happy and mind at ease.
Find the Sweet Spot Optimal Flow Rate for Nft Channels
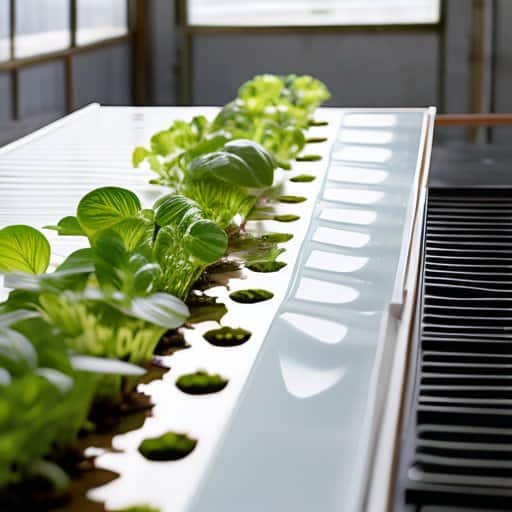
Remember the sweet spot for an NFT channel isn’t a mysterious number—it’s a steady, gentle stream that keeps roots moist without drowning them. Aim for a flow of roughly 0.5 – 1.5 gallons per minute per foot of channel. A quick test: fill the channel, start the pump, and time how long a cup of water takes to travel the length. If it’s about 30 seconds, you’re in the right ballpark.
With a baseline set, the trick is to listen to the whisper of the water. After 24 hours, pause and feel the roots: they should be moist but not soggy, and the channel just full enough that a thin film clings to the bottom. If the film looks dry, raise the pump a notch; if water pools, lower it a shade. Jot down date, pump setting, and root condition to fine‑tune without guesswork.
Master Nutrient Solution Management for Nft Success
Start by mixing your nutrient concentrate in a container, then dilute it with reverse‑osmosis water to the exact strength your EC meter recommends. Aim for an EC and pH balance that matches the crop you’re growing—usually a reading around 1.8–2.2 mS cm⁻¹ and a pH of 5.8–6.2 for leafy greens. Once mixed, label the batch with the date, temperature, and target EC, then store it in a cool, dark place to keep the formula stable.
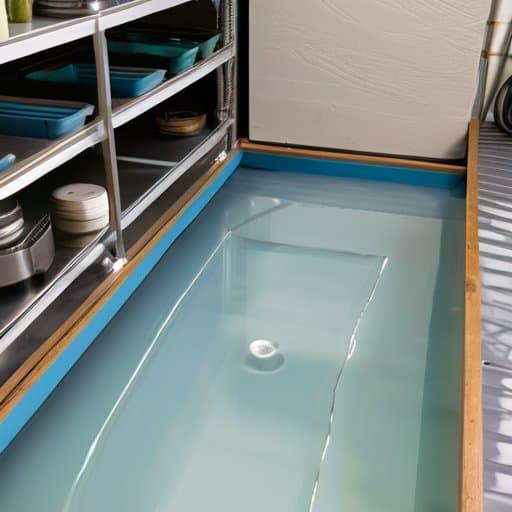
Next, set a check‑list: record the EC and pH, top up the reservoir with fresh water when the level falls 10 % below the mark, and replace the entire solution every two weeks to prevent nutrient lockout. Regular top‑ups keep the flow steady, while a visual inspection of the channels catches any clogs before they become a problem. Keep a notebook to note temperature swings and any adjustments you make.
Design Your Dream Nft Hydroponic System With Ease
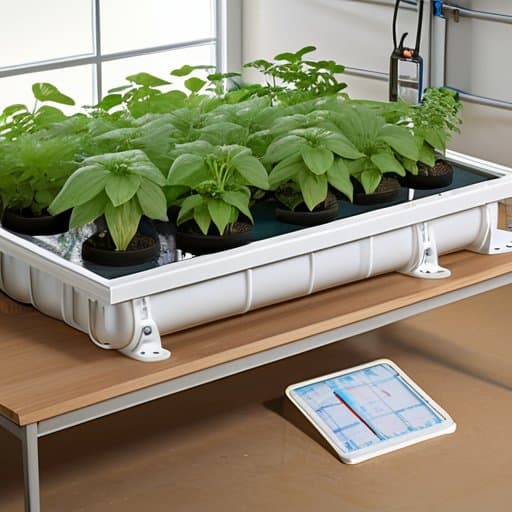
Your NFT hydroponic system design begins with a one‑page floor plan that marks channel length, pump location, and where the temperature control in NFT hydroponics will sit. Size the channel so the water film stays between 2‑3 mm—this is the sweet spot for the optimal flow rate for NFT channels. A 2‑inch PVC pipe and a quiet submersible pump give a steady, laminar stream without splashing.
Next, consider scalability. By arranging identical 4‑foot sections side by side, you create a scalable NFT setup for commercial farms that can be expanded later without rewiring. I label each inlet and outlet with a color‑coded tag, which saves time when addressing the common NFT system failures and solutions—for example, a clogged emitter is instantly spotted by a drop in flow. Keep the reservoir a few inches below the highest channel; gravity does the rest.
Finally, a checklist keeps you confident: verify pump priming, confirm that the LED lighting for NFT hydroponics provides 12‑14 hours of white light, and double‑check that the EC of nutrient solution stays within range. With these habits, your system will thrive, and you’ll spend time enjoying fresh harvests rather than chasing leaks.
Brighten Scale Led Lighting for Scalable Nft Farms
First, pick an LED panel that mimics daylight—about 400–700 nm—to give your lettuce the light it craves. Hang the fixture 12–18 inches above the channel, ensuring the beam evenly blankets the trough without hot spots. Use a simple rule: a 30‑W panel per 4‑ft length works well for most leafy greens. This arrangement guarantees optimal light spectrum for vigorous growth while keeping the canopy cool.
If you’re craving a ready‑made layout template to sketch out your NFT channels before you cut any PVC, I’ve bookmarked a surprisingly detailed PDF that walks you through measuring, spacing, and even a quick checklist for slope‑adjusted flow—just the kind of cheat‑sheet a busy gardener loves. Feel free to download it, print it on a single sheet, and tape it to your workbench for a at‑a‑glance reference; the extra confidence of having the numbers in front of you can turn a daunting design session into a smooth, enjoyable planning ritual. (You can grab the file from the aussie swingers resource I keep on my personal drive.)
When expanding, treat each LED panel as a plug‑and‑play module. Connect them in parallel to a single 12‑V, 5‑A power supply, then add a basic dimmer switch so you can fine‑tune intensity as the canopy thickens. Because LEDs generate little heat, you can stack rows vertically without worrying about overheating—just leave a two‑inch clearance for airflow. This modular approach delivers energy‑efficient scaling, letting you double your production area with only a modest increase in electricity.
Stay Cool Stay Safe Temperature Control Common Nft Failures
First, keep your solution cool. I always aim for an optimal temperature range of 68–72 °F (20–22 °C) because lettuce loves cool water, while warmer temps invite disease. A small aquarium chiller, a digital thermostat, and an insulated cover are all you need. Set the thermostat to shut off the chiller at 70 °F, and check it daily with a quick dip‑in thermometer.
Next, watch for the usual culprits that turn a smooth film into a soggy nightmare. The most common failure is a pump outage—when the pump stops, the film halts, roots starve and algae blooms. Keep a spare submersible pump, run a 5‑minute weekly “pump‑test” with a timer, and clear debris from the channel before each planting cycle. Also, avoid letting the nutrient solution sit stagnant for more than 48 hours; a quick water‑change keeps pathogens at bay and your plants thriving.
Five Fresh‑Air Tips to Keep Your NFT Flowing Smoothly
- Keep the water temperature between 65–70 °F (18–21 °C) – a cool, steady stream prevents root stress and algae blooms.
- Install a silent, submersible pump with a flow‑meter; aim for 1–2 gpm per 4‑foot channel to ensure a gentle “ribbon” of nutrient solution.
- Use a fine‑mesh, UV‑stabilized tubing that resists kinking; a smooth interior keeps the film uninterrupted and easy to clean.
- Add a small, inline air‑stone near the reservoir outlet to oxygenate the solution without creating turbulence in the channel.
- Schedule a weekly 10‑minute system flush with fresh, de‑chlorinated water to sweep out mineral buildup and keep the film crystal‑clear.
Quick‑Reference Takeaways for Your NFT Adventure
Keep the water flowing at 1–2 gpm per 100 ft of channel to ensure roots stay oxygenated without drowning.
Monitor EC (1.2–1.8 dS/m) and pH (5.8–6.2) weekly, adjusting with a calibrated meter and gentle nutrient tweaks to maintain a happy, nutrient‑rich solution.
Prioritize temperature control—keep water between 65‑70 °F and provide shade or a small chiller to prevent algae growth and protect delicate seedlings.
The Flow of Fresh Possibilities
“When water glides like a quiet river over a garden’s roots, every leaf becomes a page in a story you write yourself—NFT turns the ordinary tray into a living manuscript of green possibilities.”
Beatrice "Bea" Quinn
Wrapping It All Up
We’ve walked through every essential piece of the NFT puzzle: from setting a steady, whisper‑quiet flow rate that keeps roots oxygenated, to mixing a balanced nutrient solution that feeds lettuce, herbs, or strawberries exactly what they crave. We mapped out the geometry of a channel—choosing the right slope, material, and spacing—so water slides like a gentle river. Then we lit the path with energy‑efficient LEDs, tailoring spectrum and intensity to each growth stage. Finally, we tucked in temperature tips and a quick‑reference checklist for spotting common failures before they become setbacks. With these tools in hand, your NFT system is primed for success. You now have a clear roadmap that any beginner can follow with confidence.
The real magic of NFT lies not just in the numbers, but in the quiet satisfaction of watching a seedling rise on a thin film of water you’ve choreographed. Imagine opening your greenhouse each morning to a curtain of emerald leaves, knowing you calibrated every variable yourself. This is your invitation to turn a modest countertop setup into a year‑round harvest, whether you’re feeding a family table or sharing surplus with neighbors. Embrace the learning curve, keep a journal of your observations, and remember that each small adjustment is a step toward mastery. Your hydroponic adventure awaits—let it begin today, and watch your garden flourish.
Frequently Asked Questions
How can I keep my NFT channels free of algae and maintain a clean nutrient film?
First, I start with a tidy, dark channel—cover any exposed water‑filled sections with opaque tubing or blackout film. Next, set the pump to a flow so the film never stagnates; a trickle keeps algae from settling. Add a dose of hydrogen peroxide (1 ml per 10 L) weekly, and rinse the channel with fresh water every two weeks. Finally, keep the temperature below 75 °F and limit stray light. Follow these steps, and your NFT film stays clear!
What safety measures should I implement to protect my system from pump failures or power outages?
Plan for Pump‑Failure & Power‑Outage Safety
Which plant varieties thrive best in a nutrient film technique setup, and how do I adjust nutrient concentrations for them?
Great question! In NFT, fast‑growing, shallow‑rooted veggies shine—think lettuce, spinach, arugula, basil, and even dwarf tomatoes or strawberries if you keep the channel short. For leafy greens, aim for an EC of 1.2–1.6 mS cm⁻¹ and a pH of 5.8–6.2. Herbs love a slightly richer mix (EC 1.6–2.0). If you’re experimenting with fruiting plants, bump the EC up to 2.0–2.4 while keeping the pH steady at 5.5–6.0. Adjust gradually, test daily, and you’ll keep those roots happy!