I still remember the first time I tried to add fringe to a handmade bag – it was a disaster! I had heard that learning how to add fringe or tassels to your project was all about eyeballing it and hoping for the best, but I soon discovered that wasn’t true. In fact, with a few simple steps and the right tools, you can achieve a beautiful, professional-looking finish. I’ve spent years perfecting my craft, and I’m excited to share my knowledge with you, so you can avoid the frustrations I faced and create something truly special.
In this article, I’ll walk you through the process of adding fringe or tassels to your project, step by step. You’ll learn how to choose the right materials, measure and cut your fringe, and attach it securely to your project. I’ll share my favorite tips and tricks for achieving a polished look, and provide you with a foolproof checklist to ensure your fringe or tassels turn out perfectly every time. By the end of this guide, you’ll be confident in your ability to add a beautiful, professional-looking fringe or tassels to any project, and you’ll be ready to take your crafting skills to the next level.
Table of Contents
Guide Overview: What You'll Need
Total Time: 1 hour 15 minutes
Estimated Cost: $10 – $30
Difficulty Level: Easy
Tools Required
- Scissors (sharp)
- Hot Glue Gun (with extra glue sticks)
- Tape Measure (for accurate measurements)
- Ruler (for straight cuts)
Supplies & Materials
- Fringe or Tassels (choose your desired type and length)
- Thread or Yarn (for sewing or tying fringe)
- Glue (for attaching tassels)
- Fabric or Material (for your project, e.g., 6 inches wide)
Step-by-Step Instructions
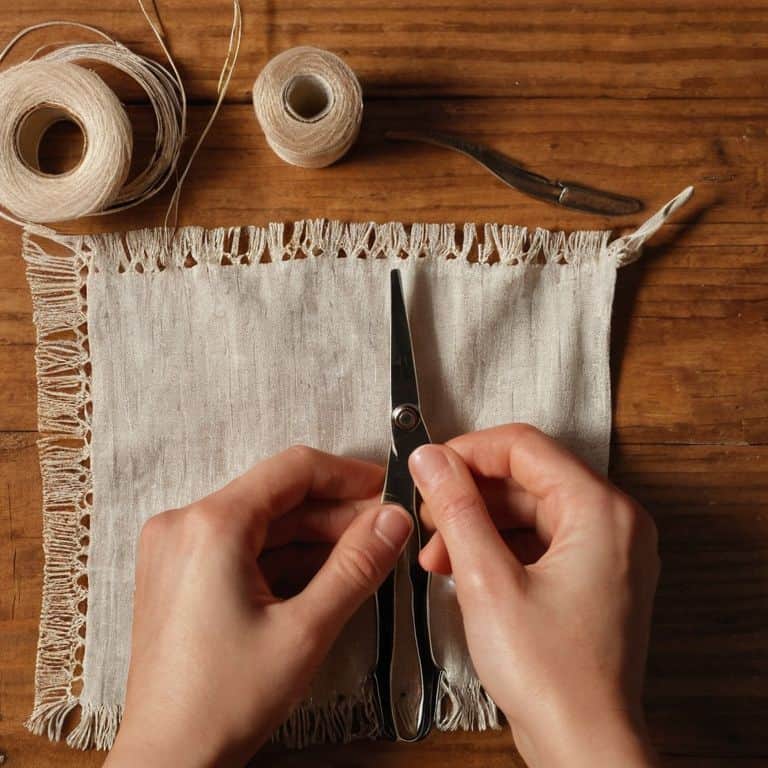
- 1. First, let’s start by preparing our materials, which will include the project you want to add fringe or tassels to, a pair of scissors, a needle, some thread or yarn, and the fringe or tassels themselves. Take a moment to _lay everything out_ in front of you, so you can see what you’re working with.
- 2. Next, we need to _measure and mark_ the area where we want to add the fringe or tassels. This is an important step, as it will help us determine how much fringe or how many tassels we’ll need, and where to place them. Use a ruler or measuring tape to get an accurate measurement, and mark the spot with a small pin or a piece of chalk.
- 3. Now it’s time to cut our fringe, if we’re using a piece of yarn or string to create our own. Cut several pieces to the same length, using a pair of sharp scissors to get a clean edge. If you’re using pre-made fringe, you can skip this step and move on to the next one.
- 4. With our fringe or tassels cut, we can start to _attach them to our project_. Thread your needle with a length of thread or yarn, and tie a knot at the end to prevent it from coming loose. Bring the needle up through the project from the underside, and then insert the fringe or tassel into the needle.
- 5. Pull the needle all the way through, leaving a small loop on the underside of the project. This loop will help to secure the fringe in place, so make sure it’s not too tight or too loose. Repeat this process for each piece of fringe or tassel, spacing them out evenly along the marked area.
- 6. As we work, it’s a good idea to _stop and fluff_ our fringe or tassels every now and then, to make sure they’re lying smoothly and evenly. Use your fingers or a soft brush to gently tease out any tangles or knots, and adjust the spacing as needed.
- 7. Finally, once we’ve attached all of our fringe or tassels, we can tie off the thread and trim the excess. Make sure the knot is secure, and won’t come undone over time. Take a step back and admire your handiwork – you should now have a beautiful, fringed or tasseled project that’s all your own.
Mastering Fringe and Tassels
As you become more comfortable with adding fringe or tassels to your projects, you may want to explore hand weaving techniques for fringe to create unique and intricate designs. This can add an extra layer of texture and visual interest to your finished product. I find that using a simple loom or even a fork can help you achieve a beautiful, handmade fringe that sets your project apart.
When it comes to tassels, the type of material you choose can greatly impact the overall look and feel of your project. Types of tassel materials can range from luxurious silks and velvets to more rustic options like wool or cotton. For a homemade scarf, consider adding a fringe trim to give it a polished finish. This can be especially effective when paired with a decorative tassel that adds a pop of color and texture.
To take your tassel game to the next level, try experimenting with decorative tassel ideas for shawls, such as using beads, sequins, or other embellishments to create a one-of-a-kind design. If you’re new to working with tassels, don’t be intimidated – there are many easy DIY tassel tutorials available that can walk you through the process step-by-step. With a little practice, you’ll be adding beautiful fringe and tassels to all your projects in no time, even when working with knitted items, like adding fringe to knitted projects.
Easy Diy Tassel Tutorial
To create a beautiful tassel, start by wrapping your yarn or thread around a sturdy piece of cardboard. I like to use a old bookboard or a sturdy file folder – something that will hold its shape and provide a stable base for my tassel. Wrap the yarn in a consistent pattern, overlapping the strands slightly as you go, until you’ve achieved the desired thickness.
Next, slide the wrapped yarn off the cardboard and use a length of wire or a strong thread to tie a secure knot at the top of the tassel. Trim the ends of the yarn to create a neat, even fringe, and your tassel is ready to use. I find that using a simple knot like a lark’s head or a cow hitch works beautifully for securing the tassel.
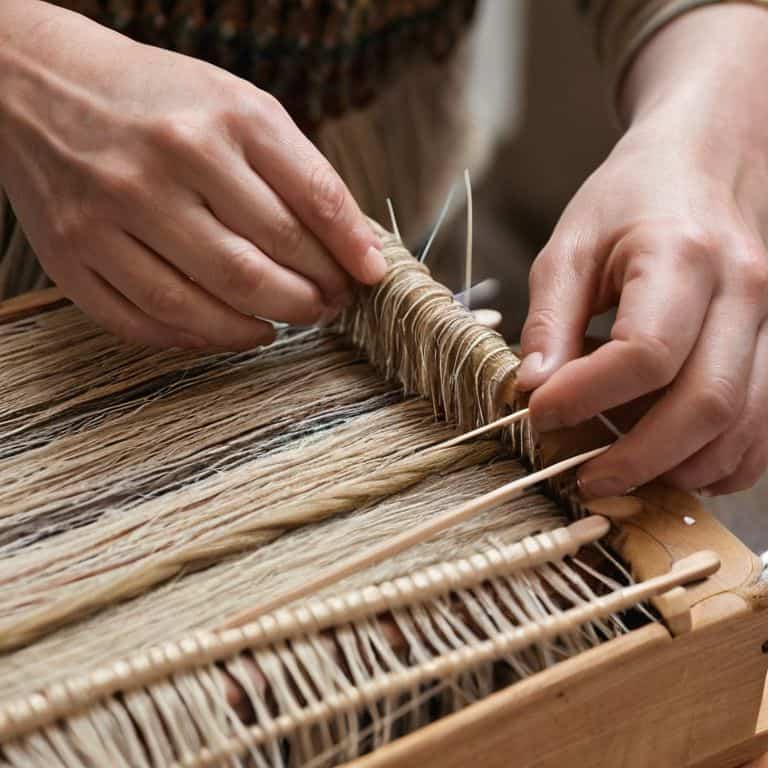
Hand Weaving Fringe Techniques
Now that we’ve explored the basics of fringe and tassels, let’s dive into the world of hand weaving fringe techniques. This is where things can get really creative and fun! Hand weaving allows you to add a personal touch to your fringe, experimenting with different yarns, colors, and textures. I just love the tactile nature of hand weaving – it’s almost meditative.
To get started, you’ll need a few basic tools: a simple loom or a piece of cardboard, some yarn or thread, and a pair of scissors. Don’t worry if you’re new to hand weaving; I’ll walk you through each step, and before you know it, you’ll be creating your own unique fringe patterns. Remember, the key is to take your time and enjoy the process – it’s all about the journey, not just the end result.
Fringing Like a Pro: 5 Essential Tips to Elevate Your Project

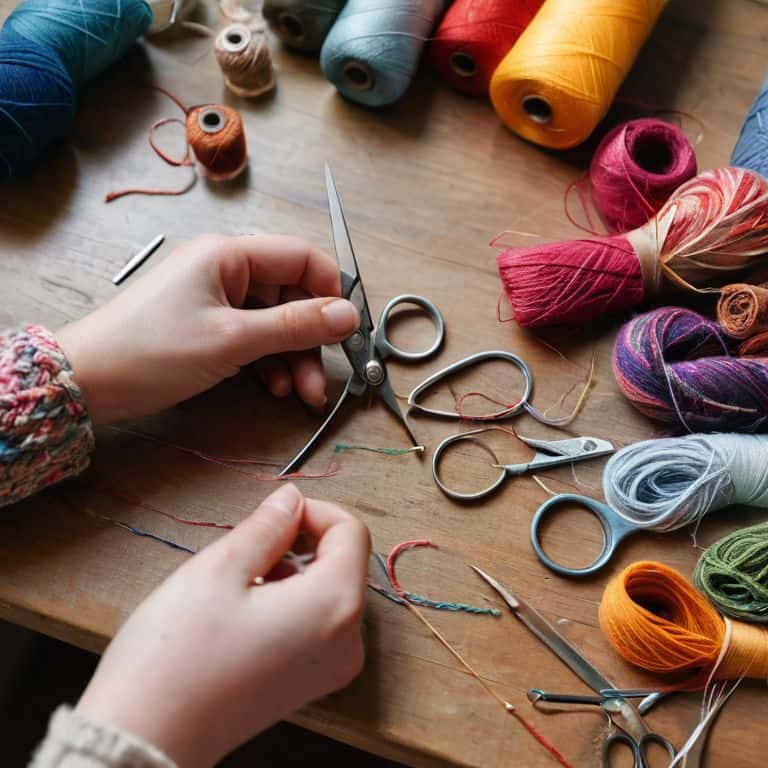
- Choose the right thread or yarn for your fringe, considering factors like color, texture, and durability to ensure it complements your project
- Measure and cut your fringe threads to a uniform length to maintain a polished look, using a ruler or measuring tape for accuracy
- Use a sturdy base or foundation for your fringe, such as a piece of cardboard or a fringe loom, to help you achieve even spacing and tension
- Experiment with different knotting or braiding techniques to add visual interest to your fringe, from simple overhand knots to intricate braids
- Don’t be afraid to trim and adjust your fringe as you work, using scissors or a yarn needle to tidy up stray ends and achieve a professional finish
Key Takeaways for Adding Fringe or Tassels
By following a simple, step-by-step approach, you can easily add fringe or tassels to your project and give it a unique, personalized touch
Mastering hand weaving fringe techniques and creating your own DIY tassels can open up a world of creative possibilities for your crafts, from home decor to fashion accessories
With patience, practice, and the right guidance, you can overcome any intimidation and develop the skills needed to confidently add beautiful fringe or tassels to any project you desire
Conclusion: Embracing the Beauty of Fringe and Tassels
As we conclude our journey through the world of fringe and tassels, let’s take a moment to reflect on the key techniques we’ve covered. From the basic steps of adding fringe or tassels to a project, to the more advanced methods of hand weaving and creating your own DIY tassels, we’ve explored a range of skills to help you enhance your creations. Whether you’re a seasoned crafter or just starting out, remember that the art of adding fringe or tassels is all about experimentation and having fun with different materials and textures.
As you move forward with your own projects, I encourage you to keep pushing the boundaries of what’s possible with fringe and tassels. Don’t be afraid to try new things and make mistakes – they’re an essential part of the learning process, and you never know what beautiful unexpected effects you might discover. With patience, practice, and a willingness to take risks, you’ll be well on your way to creating truly unique and stunning pieces that showcase your personality and style.
Frequently Asked Questions
What type of thread or yarn is best suited for creating fringe or tassels?
When it comes to choosing the perfect thread or yarn for fringe or tassels, I always recommend opting for something with a bit of texture and visual interest. Consider using a cotton, wool, or silk blend yarn, or a sturdy embroidery floss – these will give your fringe or tassels a lovely depth and dimension.
How do I determine the right length for my fringe or tassels to ensure they're proportionate to my project?
To determine the perfect length, measure your project’s dimensions and consider its style. For a balanced look, fringe or tassels should be about 1/4 to 1/2 the length of the project’s shortest side. You can also experiment with different lengths to find the one that feels just right to you.
Can I use a sewing machine to attach fringe or tassels, or is it better to do it by hand?
While it’s possible to attach fringe or tassels with a sewing machine, I recommend doing it by hand for more control and a neater finish. Hand-stitching allows you to securely attach each strand or tassel, ensuring a professional-looking result. Trust me, the extra time is worth it for a beautifully finished project!