I still remember the first time I tried to sew a zipper into a project bag for my wife, a avid weaver. I thought it would be a simple task, but it ended up being a frustrating experience. The zipper just didn’t want to cooperate, and I found myself wondering if I had wasted my time trying to make something from scratch. But, as I delved deeper into the world of woodworking and fiber arts, I discovered that it’s all about the details. Learning how to sew a zipper into a project bag is not just about following a set of instructions, but about understanding the nuances of working with different materials and tools.
In this article, I’ll share my personal approach to sew a zipper into a project bag, gained from years of trial and error in my own workshop. You’ll get honest, no-hype advice on how to choose the right zipper, prepare your project bag pieces, and sew the zipper in place with ease. I’ll walk you through my favorite techniques, including a simple trick for sewing the zipper by hand, and provide you with practical tips to ensure your project bag turns out both functional and beautiful. By the end of this guide, you’ll be confident in your ability to add a professional-looking zipper to your handmade project bag, and you’ll be ready to take on more complex projects with ease.
Table of Contents
Guide Overview: What You'll Need
Total Time: 1 hour 15 minutes
Estimated Cost: $10 – $20
Difficulty Level: Intermediate
Tools Required
- Sewing Machine (with zipper foot)
- Sharp Scissors (for cutting fabric)
- Seam Ripper (for correcting mistakes)
- Measuring Tape (for measuring fabric and zipper)
- Pins (for holding fabric in place)
Supplies & Materials
- Fabric (for project bag, approximately 12 inches x 15 inches)
- Zipper (approximately 10 inches long)
- Thread (matching fabric color)
- Interfacing (optional, for added stability)
- Zipper Foot (if not already included with sewing machine)
Step-by-Step Instructions
- 1. First, let’s get our materials ready – we’ll need the project bag pieces we cut out earlier, a zipper that’s the right size for our bag, some sharp scissors, and a sewing needle. I like to use a heavy-duty needle for this kind of work, as it makes navigating the thicker fabric and zipper a breeze.
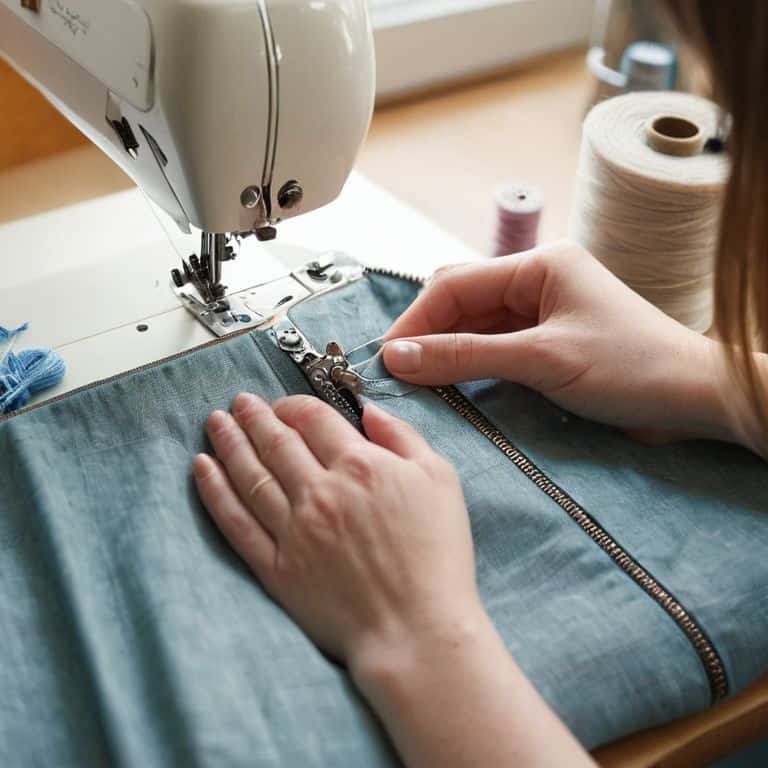
- 2. Next, we need to prepare our zipper for sewing. This involves pinning the zipper in place between the two pieces of fabric that will make up the bag’s opening. Make sure the zipper is centered and the edges are aligned properly – we don’t want any wonky zippers in our beautifully handmade project bags.
- 3. Now, let’s talk thread. For sewing a zipper into a project bag, I recommend using a strong, contrasting thread that will make our stitches visible. This is not only aesthetically pleasing but also helps us keep track of our work as we sew. Choose a color that complements your project bag’s fabric, and thread your needle.
- 4. With our needle threaded, it’s time to start sewing. Begin at one end of the zipper and work your way down, using a simple running stitch to secure the zipper in place. Make sure to keep your stitches small and even, as this will affect the overall appearance of your project bag.
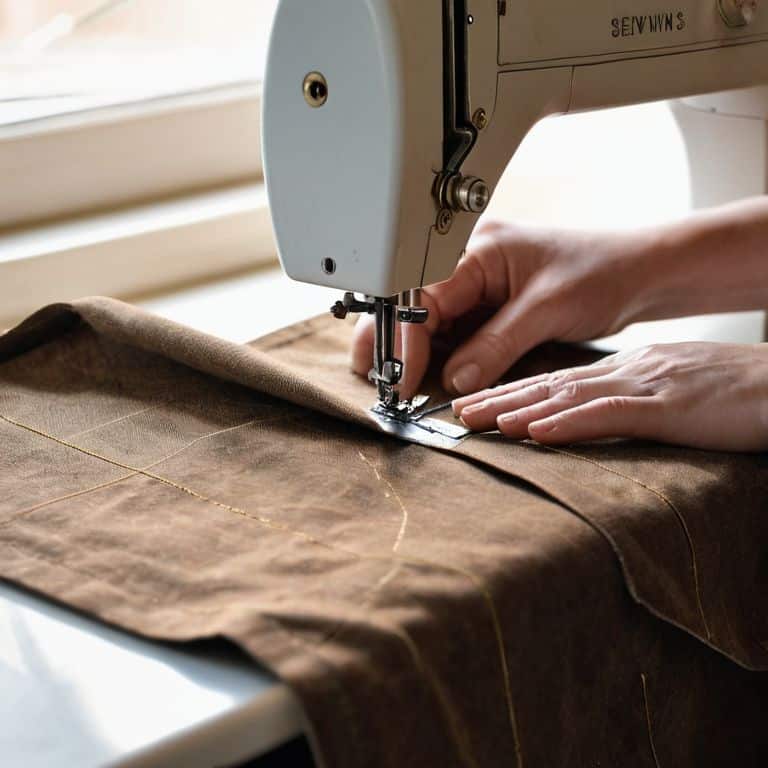
- 5. As we sew, it’s essential to keep the fabric taut to avoid puckering or gathering. Use one hand to gently pull the fabric tight while the other hand guides the needle. This might take a bit of practice, but trust me, the end result is worth it – a smooth, even seam that will make your project bag look professional.
- 6. Once we’ve sewn along the entire length of the zipper, it’s time to reinforce our stitches. Go back and add a few extra stitches at each end of the zipper to ensure it’s securely attached. This is especially important if you plan on using your project bag to carry heavy or bulky items.
- 7. Finally, let’s add a finishing touch to our zipper. Cut a small piece of fabric and fold it over the end of the zipper to create a zipper tab. Sew this in place using a few quick stitches, and you’ll have a neat, tidy end to your zipper that adds a touch of professionalism to your project bag.
Sewing Zippers With Finesse
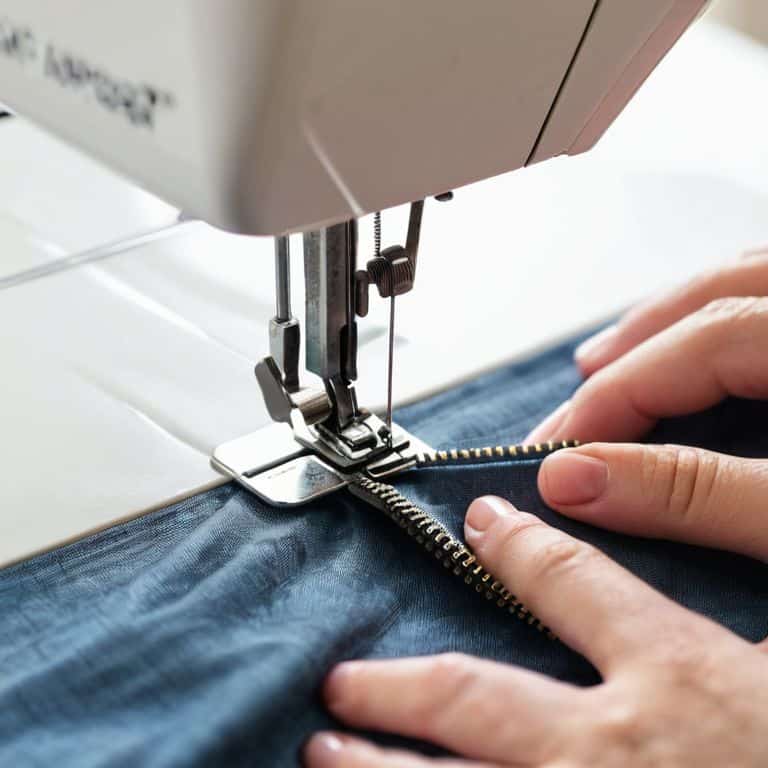
When it comes to sewing zipper pouches, I’ve found that the key to a professional finish lies in the details. One of my favorite tricks is to use a _zipper foot_ on my sewing machine, which allows for a much closer seam and prevents the fabric from getting stuck. This is especially important when working with thicker materials or multiple layers, like when sewing bags for knitting projects.
To achieve a seamless look, it’s essential to focus on sewing zipper ends neatly. I like to fold the ends of the zipper tape under before sewing, creating a clean and tucked-in finish. This might take a bit of practice to get right, but trust me, it’s worth the extra effort. By doing so, you’ll avoid any bulky or uneven edges that can detract from the overall appearance of your project bag.
In addition to these techniques, I also recommend paying attention to the type of fabric you’re using for your bag lining. A smooth, lightweight material can make all the difference when it comes to zipper installation techniques. By choosing the right fabric and using the right tools, like a zipper foot, you’ll be able to create a beautiful and functional project bag that will make your knitting projects a joy to work on.
Mastering Zipper Installation Techniques
Now that we’ve covered the basics of sewing zippers with finesse, let’s dive deeper into the techniques that’ll take your project bag game to the next level. I’ve found that mastering zipper installation is all about feel and practice – it’s one of those skills that clicks after you’ve done it a few times. To get that perfect, smooth motion, try practicing on a scrap piece of fabric before committing to your actual project bag.
As you get more comfortable, you can start experimenting with different zipper sizes and types, like metal or plastic. I personally love working with metal zippers – there’s something satisfying about the weight and sound of them. With a bit of patience and practice, you’ll be sewing in zippers like a pro, and your handmade project bags will have that extra touch of professionalism.
Sewing Zipper Ends Neatly Matters
To really elevate your project bag, pay attention to the zipper ends. A neat finish here can make all the difference. I like to use a simple whipstitch to secure the ends, making sure the thread is matched to the bag’s fabric for a seamless look. It’s a small detail, but it shows you’ve put thought into every aspect of your handmade project.
When I’m sewing zipper ends, I always think about how they’ll look when the bag is in use. A tidy finish ensures the zipper glides smoothly and doesn’t catch on anything. Take your time and make a few extra stitches to secure the ends firmly. The result is well worth the extra minute or two – your project bag will look polished and professional, a true reflection of your crafting skills.
Nailing the Zipper: 5 Essential Tips for a Pro Finish
- Choose the right needle: I always opt for a sharp, heavy-duty needle to pierce through the zipper’s thick fabric and my project bag’s sturdy material with ease
- Press, don’t iron: Give your zipper a good press before sewing to remove any wrinkles, making it easier to work with and ensuring a crisp, smooth finish
- Pin it like you mean it: Use plenty of pins to secure the zipper in place, especially at the ends, to prevent it from shifting while you sew and to achieve a professional-looking result
- Sew in small bites: Break up the sewing process into smaller sections, focusing on one side of the zipper at a time, to maintain control and avoid puckering or distortion
- Finish with a flourish: Topstitch around the zipper for a polished look, using a contrasting thread color to make the stitching pop and add a touch of handmade charm to your project bag
Key Takeaways for a Professional Finish
To achieve a polished look, it’s essential to choose the right zipper for your project bag, considering factors like size, color, and material to ensure it complements your handmade piece
Sewing zipper ends neatly is crucial for both aesthetics and durability, and using a few simple techniques can make a significant difference in the overall appearance of your project bag
With practice and patience, mastering zipper installation techniques can elevate your sewing skills, allowing you to create beautiful, functional project bags that showcase your attention to detail and craftsmanship
Sewing Wisdom
A zipper is not just a closure, it’s a gateway to a world of possibilities – and with every stitch, you’re not just sewing a bag, you’re sewing a story.
Finnian "Finn" Burke
Closing the Loop: A Satisfying Zipper Installation
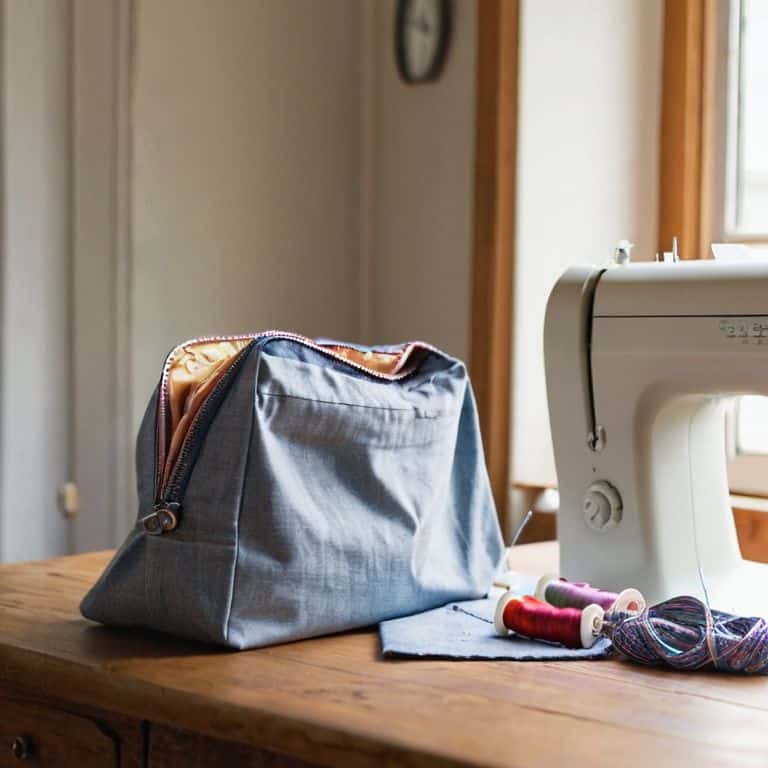
As we conclude this journey of sewing a zipper into a project bag, let’s take a moment to reflect on the key takeaways. We’ve covered the essential steps, from preparing our fabric to mastering the art of sewing zipper ends neatly. It’s all about the details, and paying attention to these small aspects can make a significant difference in the overall quality of our handmade project bags. By following these steps and practicing the techniques outlined, you’ll be well on your way to creating beautiful, functional bags with professional-looking zippers.
Now that you’ve got the skills to sew a zipper into a project bag like a pro, I encourage you to keep pushing your creative boundaries. Don’t be afraid to experiment with different fabrics, zipper colors, and designs. Remember, the tool you use is just as important as the yarn, and in this case, your sewing machine and zipper foot are your best friends. As you continue to create and make, always keep in mind that it’s the little details that make a big difference in the end, and never stop inspiring yourself to create something truly unique and special.
Frequently Asked Questions
What type of zipper is best suited for a project bag, and where can I find one?
For a project bag, I swear by a good quality nylon or metal zipper – they’re durable and easy to sew. You can find them at most craft stores or online at places like Joann Fabric and Craft Stores or Amazon. I like to shop for zippers at my local sewing shop, too – the owners always have great recommendations.
How do I prevent the zipper from getting stuck or catching on the fabric of my project bag?
To prevent the zipper from getting stuck or catching, I always make sure to leave a tiny gap between the zipper teeth and the fabric, and use a thin layer of interfacing to stabilize the area – it’s a trick I learned from my wife, who’s a talented weaver.
Can I use a sewing machine to sew a zipper into a project bag, or is it better to do it by hand?
Absolutely, you can use a sewing machine to sew a zipper into a project bag, but I’m a fan of doing it by hand – it gives me more control and a cleaner finish. That being said, if you’re comfortable with your machine, go for it! Just be sure to use a zipper foot or a walking foot to help guide that zipper smoothly.