As I sit amidst my loom and yarn, I’m reminded of the common misconception that warping a frame loom is a tedious, intimidating process. However, I’m here to tell you that it’s quite the opposite – with the right guidance, you can unlock the doors to a world of creative expression. I still recall my early days as an architect, where I’d spend hours pouring over blueprints, only to discover that the true beauty lay not in the structures themselves, but in the intricate patterns and textures that comprised them. This fascination with texture and form eventually led me to trade in my drafting table for a loom, and I’ve never looked back. Now, I’m excited to share my knowledge with you on how to warp a frame loom, and explore the endless possibilities that this ancient craft has to offer.
In this article, I’ll walk you through the step-by-step process of warping a frame loom, from preparing your materials to creating a sturdy foundation for your woven masterpiece. You’ll learn how to build texture and form with ease, and discover the beauty of handwoven art. My goal is to empower you with the skills and confidence to create stunning, large-scale woven pieces that reflect your unique style and vision. Whether you’re a seasoned weaver or just starting out, I invite you to join me on this journey into the world of textile art, where the boundaries of modern design meet the timeless craft of weaving.
Table of Contents
Guide Overview: What You'll Need
Total Time: 2 hours 30 minutes
Estimated Cost: $50 – $100
Difficulty Level: Intermediate
Tools Required
- Tape Measure for accurate measurements
- Square for ensuring corners are square
- Drill Press for precise drilling
- Hand Saw or Circular Saw for cutting lumber to size
- Sander for smoothing out wood surfaces
- Clamp for holding frame pieces together
Supplies & Materials
- 2-in x 4-in lumber for frame construction
- 1-in x 2-in lumber for warp stick and other supports
- Wood Screws 1 1/2 inches long
- Wood Glue
- Warp Yarn or String for the loom’s warp threads
- Nails or Tacks for securing warp yarn in place
Step-by-Step Instructions
- 1. To begin warping your frame loom, start by preparing your workspace. Clear a large, flat area where you can lay out your yarn and loom without any obstacles. I like to think of this process as building a foundation, where every thread counts, and a cluttered space can lead to a cluttered mind.
- 2. Next, measure and cut your warp threads to the desired length. This is where precision is key, as uneven threads can affect the entire piece. I use a simple formula to calculate the length, taking into account the width of the loom, the type of yarn, and the intended design. It’s almost like designing a blueprint for a building, where every measurement is crucial.
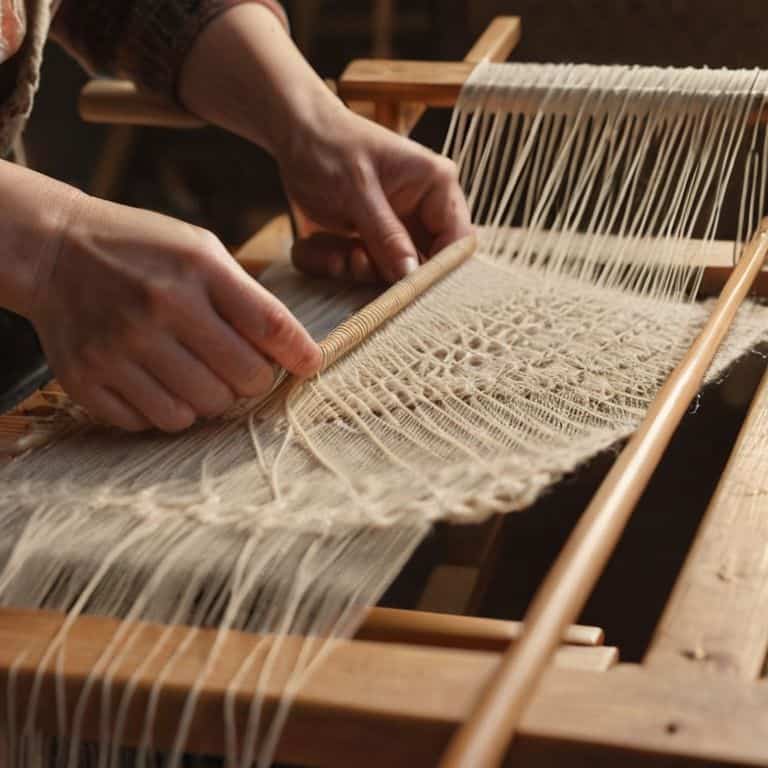
- 3. Now, it’s time to dress the loom. This involves attaching the warp threads to the loom’s frame, making sure they are evenly spaced and not twisted. I find it helpful to use a warping peg to keep the threads organized and prevent tangles. As an architect-turned-weaver, I appreciate the similarity between this process and constructing a skeletal framework for a building.
- 4. With your loom dressed, you can start to create the warp. This is the most time-consuming part of the process, but also the most meditative. As you thread each yarn through the loom’s slots, imagine you’re building a textured landscape, one thread at a time. I often listen to music or podcasts during this stage, as it helps me get into a flow state.
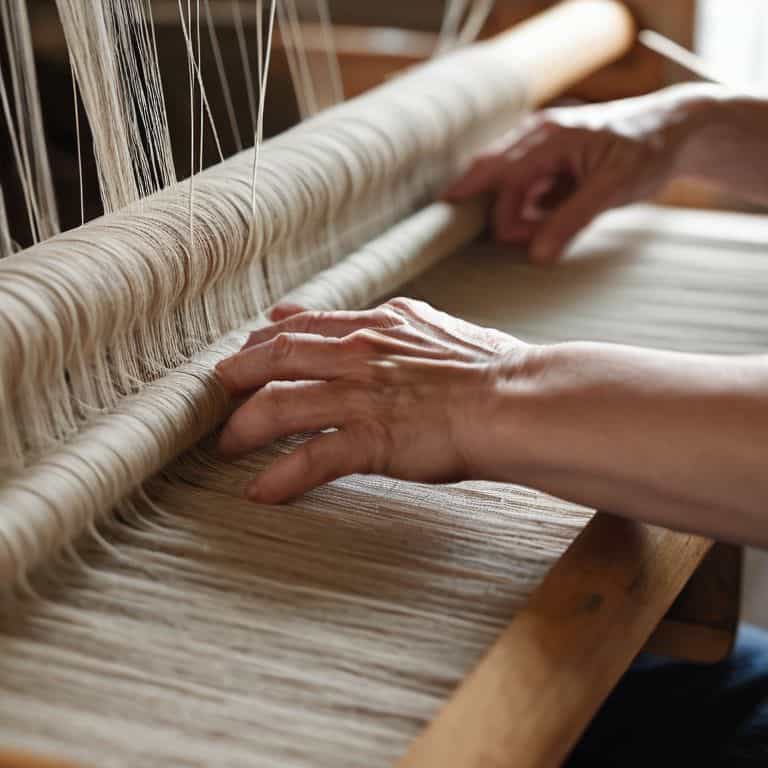
- 5. Once you’ve completed the warp, it’s essential to tension the threads. This ensures that your fabric will be even and stable. I use a simple technique involving a bit of math and some careful adjustment to get the tension just right. It’s a bit like fine-tuning a musical instrument, where every string needs to be in harmony with the others.
- 6. Now that your loom is warped and tensioned, you can start to think about the weft. This is where you’ll begin to see your design take shape, as you interweave the yarns to create patterns and textures. I love this stage, as it’s where art meets architecture, and the possibilities become endless.
- 7. Finally, take a step back and admire your handiwork. Your loom is now ready to use, and you can start creating your own unique pieces of woven art. Remember, the key to successful weaving is attention to detail, so don’t be afraid to experiment and try new things. As I always say, “every thread tells a story,” and I’m excited to see what stories you’ll tell with your own weaving.
Warping the Frame Loom
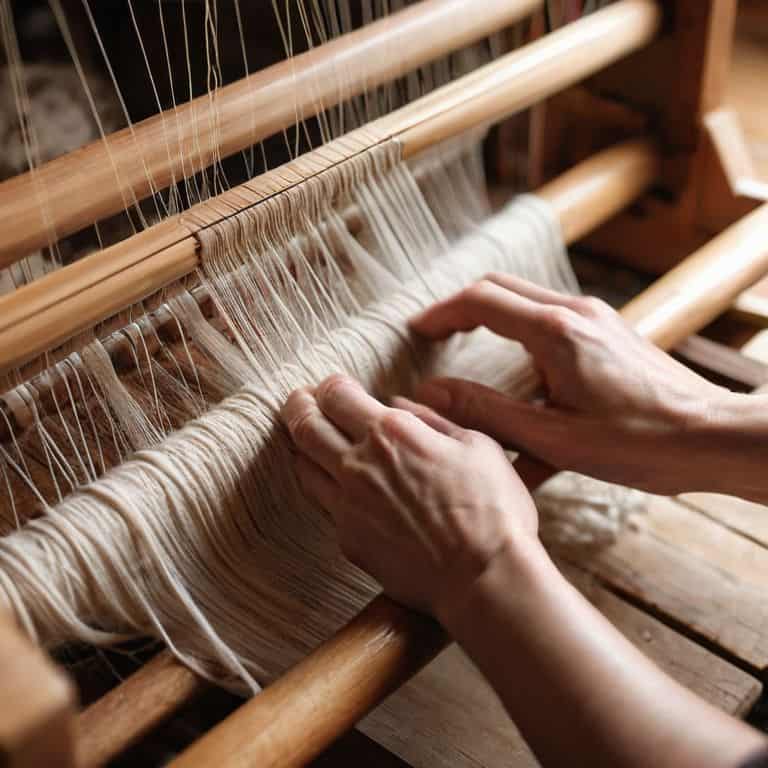
As I sit at my loom, surrounded by spools of linen and raw silk, I’m reminded of the importance of even tension in creating a beautiful woven piece. When warping a frame loom, it’s essential to maintain a consistent tension to ensure that your fabric lies flat and even. I’ve found that using a simple loom tension control method, such as a tension gauge or a consistent wrapping pattern, can make all the difference in achieving professional-looking results.
One of the most common mistakes I see in beginner-friendly weaving projects is uneven warping, which can lead to a distorted or misshapen fabric. To avoid this, I recommend taking your time when setting up a frame loom for success, and double-checking your tension as you go. It’s also a good idea to use a frame loom warping technique that suits your project, such as a simple over-under pattern or a more complex twill weave.
By following these tips and practicing patience, you’ll be well on your way to creating stunning woven art installations that showcase your unique style and flair. Remember, the key to success lies in attention to detail and a willingness to experiment with different techniques and materials. With time and practice, you’ll develop the skills and confidence to tackle even the most complex weaving projects, and unlock the full creative potential of your frame loom.
Frame Loom Warping Techniques Revealed
As I delve into the nuances of warping, I’m reminded of the parallels between textile design and architectural planning. The deliberate placement of each thread is akin to positioning beams in a structure, establishing the foundation for a sturdy and aesthetically pleasing piece. To achieve this, I employ two primary techniques: the straightforward “straight warp” method, which offers a clean and minimalist approach, and the more intricate “pick-up pattern” technique, allowing for complex and dynamic designs.
By mastering these techniques, you’ll unlock the full potential of your frame loom, enabling you to craft intricate patterns and textures that elevate your woven art to new heights. Whether you’re aiming for subtle simplicity or bold statement pieces, the key lies in the thoughtful application of these warping methods.
Mastering Loom Tension Control Methods
To truly master the art of warping a frame loom, one must develop a keen sense of loom tension control. I like to think of it as the foundation of a well-crafted building – without a sturdy base, the entire structure falters. As I adjust the tension, I’m reminded of my architectural background, where precision and balance were paramount. By carefully calibrating the warp threads, you’ll create a harmonious relationship between the yarn and the loom, allowing your woven piece to flourish.
Through practice, you’ll develop a sensitivity to the subtle nuances of tension, learning to tweak and refine your technique until it becomes second nature. I encourage you to experiment, to feel the texture of the yarn beneath your fingers, and to listen to the gentle hum of the loom as it comes alive with each passing thread.
Warping Wisdom: 5 Essential Tips for Frame Loom Mastery
- Start with a solid foundation: Ensure your frame loom is securely assembled and on a stable surface to prevent any wobbling or movement during the warping process
- Measure twice, warp once: Double-check your calculations and measurements to guarantee accurate tension and spacing of your warp threads
- Choose the right yarn for the job: Select a yarn that suits your project’s requirements, considering factors like texture, color, and durability to achieve the desired visual and tactile effect
- Maintain consistent tension: Pay close attention to the tension of your warp threads as you work, making adjustments as needed to prevent unevenness or sagging
- Don’t over-tighten: Leave a little slack in your warp threads to allow for the natural give and take of the weaving process, ensuring a smooth and even weave
Key Takeaways for Mastering Frame Loom Warping
Warping a frame loom is not just about technical precision, but also about understanding the artistic potential of texture and tension in your woven pieces
By controlling the loom’s tension and carefully selecting your yarns, you can create complex, modern designs that blur the line between ancient craft and contemporary art
Through practice and patience, anyone can develop the skills to warp a frame loom and unlock the creative possibilities of weaving as a form of architectural art
The Essence of Warping
Warping a frame loom is not just about threading yarn through a frame, it’s about laying the foundation for a work of art that will evolve with each passing thread, a testament to the harmony between ancient craft and modern design.
Ethan Thorne
Weaving a Foundation for Creativity

As we conclude this journey on how to warp a frame loom, let’s revisit the essential steps that have brought us to this point. We’ve explored the fundamentals of warping, delved into frame loom warping techniques, and discussed the importance of mastering loom tension control methods. These skills, much like the principles of architecture, provide a sturdy foundation upon which to build your woven creations. By understanding and applying these techniques, you’ll be well on your way to crafting pieces that are not only beautiful but also reflective of your unique vision and artistic expression.
Now, as you stand before your loom, yarn in hand, remember that the true beauty of weaving lies in its intersection of art and craft. It’s a medium that invites experimentation, creativity, and patience. Don’t be afraid to push boundaries, to try new textures, colors, and patterns. For in the world of weaving, every thread is an opportunity to tell a story, to evoke emotion, and to create something that is truly yours. So, let your imagination soar, and let the gentle rhythm of the loom guide you as you weave your dreams into reality.
Frequently Asked Questions
What is the ideal yarn tension for warping a frame loom to achieve a stable and even weave?
For a stable and even weave, I aim for a yarn tension that’s neither too taut nor too slack. I find that a gentle, consistent tension, similar to the feel of a guitar string, works best. This allows for a smooth, even flow of yarn, and helps prevent unevenness or sagging in the finished piece.
How do I determine the correct number of warp threads for my project, considering factors like fiber type and desired texture?
To determine the correct number of warp threads, I consider the fiber type, desired texture, and project size. For example, a dense linen weave might require more threads than a loose, raw silk weave. I sketch out my design on graph paper, taking into account the sett and pick-up, to visualize the perfect balance of texture and form.
Can I use different colors or materials for the warp and weft, and if so, how do I ensure a cohesive and visually appealing design?
Absolutely, mixing colors and materials can add depth to your weave. I love combining natural fibers like linen and silk in contrasting hues. To ensure cohesion, I sketch my designs on graph paper first, considering texture and tone. This helps me balance disparate elements and create a visually stunning piece that’s both modern and timeless.