I still remember the first time I tried how to weave for beginners. I was excited to create something beautiful, but I was also intimidated by the unfamiliar loom and the seemingly complex instructions. As a former librarian and now a full-time craft instructor, I’ve seen many beginners struggle with the same feelings of frustration and confusion. But I’m here to tell you that weaving is not as difficult as it seems. With a clear, step-by-step approach, you can master the basics of weaving and start creating your own unique pieces.
In this article, I’ll share my no-nonsense knowledge with you, and guide you through every step of the process. You’ll learn how to set up your loom, choose the right yarn, and create a beautiful weave. I’ll provide you with practical advice and easy-to-follow instructions, so you can relax and enjoy the journey of creating something beautiful. By the end of this article, you’ll be confident in your ability to weave, and you’ll be ready to start your own projects. So, let’s get started on this weaving adventure together, and discover the joy of creating something with your own two hands.
Table of Contents
Guide Overview: What You'll Need
Total Time: 2 hours 30 minutes
Estimated Cost: $20 – $50
Difficulty Level: Easy
Tools Required
- Loom (simple frame loom or rigid heddle loom)
- Shuttle (for passing weft yarn)
- Scissors (sharp and dedicated to cutting yarn)
- Tape measure (for measuring warp and weft lengths)
- Yarn needle (for weaving in ends)
Supplies & Materials
- Warp yarn (choose a smooth, strong yarn for the foundation)
- Weft yarn (select a yarn that complements the warp yarn)
- Thread or string (for tying knots or creating a simple heddle)
- Measuring tape (6 feet long)
- Ruler (12 inches long)
Step-by-Step Instructions
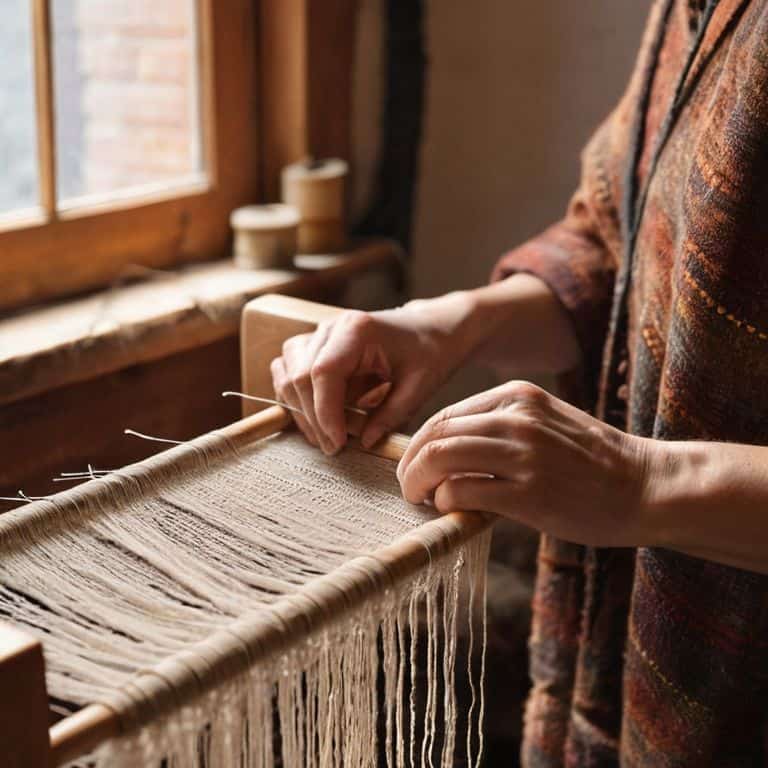
- 1. First, let’s start with the basics: setting up your loom. This is an essential step, as it will determine the overall quality of your weave. Begin by assembling your loom, if it’s not already put together, and make sure all the parts are securely attached. I like to double-check my loom’s manual to ensure I haven’t missed any crucial steps.
- 2. Next, we need to prepare our yarn. This involves winding your yarn into balls or spools, depending on the type of yarn you’re using. It’s essential to work with a yarn that’s suitable for beginners, as it will make the weaving process much more manageable. Look for yarns with a smooth texture and a medium weight, as they tend to be easier to work with.
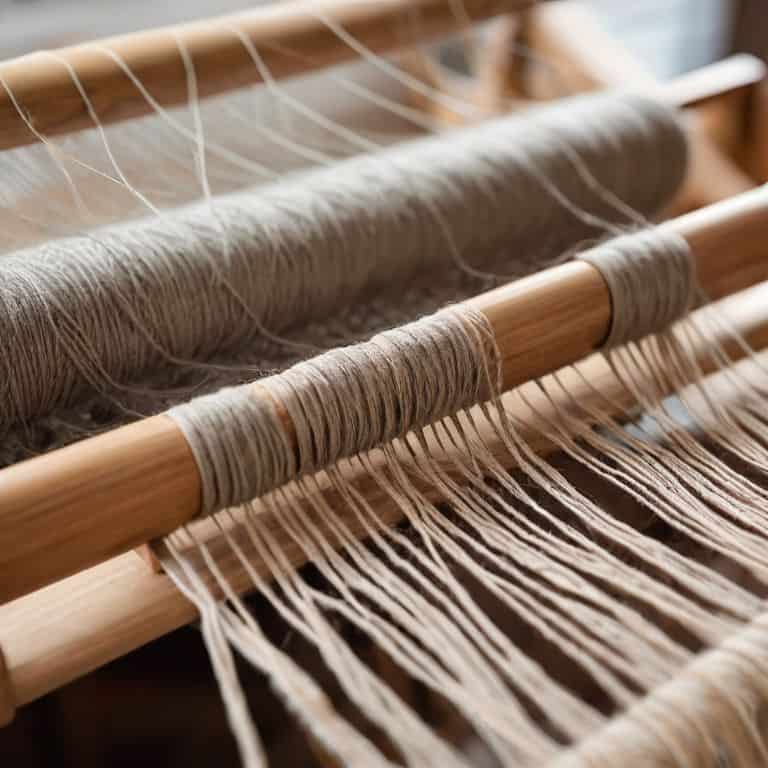
- 3. Now, let’s move on to measuring and cutting our warp threads. This is a critical step, as the length and tension of your warp threads will affect the entire weaving process. To measure your warp threads, simply wrap your yarn around a measuring tool or a ruler, and then cut it to the desired length. Make sure to leave some extra yarn for tying knots and adjusting the tension.
- 4. With our warp threads ready, it’s time to thread the loom. This involves passing each warp thread through the loom’s slots and leaving a small loop at the end. Be careful not to pull the threads too tight, as this can cause them to pucker or become uneven. Take your time, and work methodically, as this step can be a bit tedious.
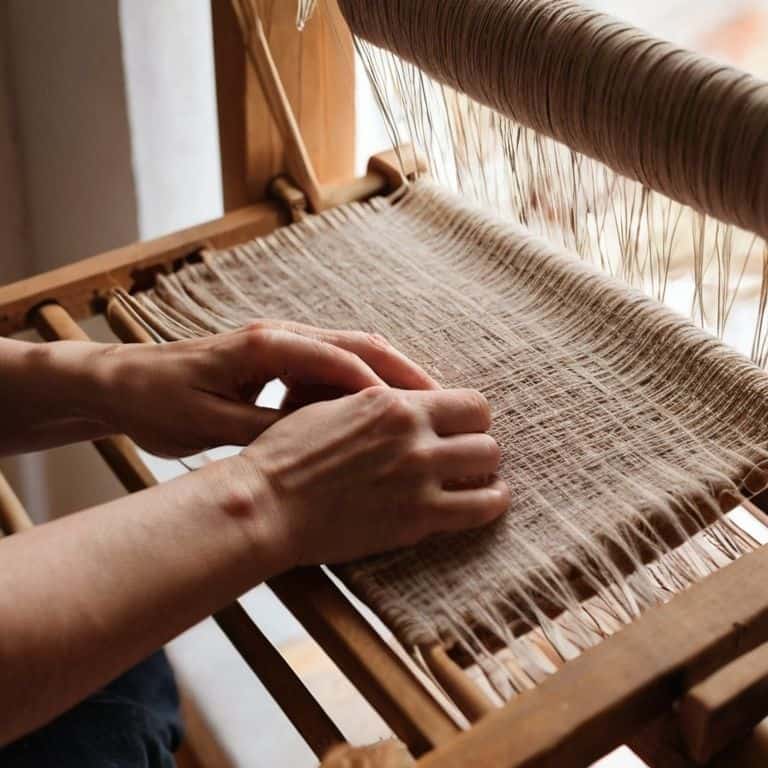
- 5. Once our loom is threaded, we can start weaving our first row. This is an exciting moment, as you’ll finally start to see your project take shape. To weave your first row, simply pass the weft yarn over and under the warp threads, using a gentle, rhythmic motion. Don’t worry too much about the tension at this stage, as we can adjust it later.
- 6. As we continue weaving, it’s essential to maintain an even tension. This will ensure that our weave lies flat and even, without any puckering or sagging. To achieve this, gently pull the weft yarn as you pass it over and under the warp threads, and make adjustments as needed. Remember, it’s better to err on the side of caution and keep the tension slightly loose, rather than too tight.
- 7. Finally, let’s talk about adding a selvedge to our weave. A selvedge is the self-edge of the fabric, and it helps to prevent the weave from fraying or unraveling. To add a selvedge, simply pass the weft yarn over two or three warp threads at the edge of the loom, and then back under, creating a small loop. This will give your weave a neat, finished edge, and add a professional touch to your project.
How to Weave for Beginners
As we dive deeper into the world of weaving, it’s essential to understand the importance of simple weaving patterns. These patterns are the foundation of any weaving project, and mastering them will help you build confidence in your skills. When choosing a pattern, consider the type of yarn you’re using and the desired texture of your finished project. For example, a tight weave is perfect for creating a sturdy fabric, while a loose weave can add a beautiful, airy texture to your project.
When it comes to selecting the right yarn, there are a few things to keep in mind. Choosing the right yarn can make all the difference in the success of your project. Consider the fiber content, weight, and color of the yarn, as well as its texture and drape. For beginners, it’s best to start with a smooth, medium-weight yarn that’s easy to work with. As you become more comfortable with the weaving process, you can experiment with different yarns and textures to add depth and interest to your projects.
In addition to understanding simple weaving patterns and choosing the right yarn, it’s also important to familiarize yourself with basic weaving tools for beginners. These tools, such as a loom or weaving needle, will help you to create a sturdy and even fabric. By taking the time to understand these fundamental concepts, you’ll be well on your way to creating beautiful, handmade textiles that you’ll treasure for years to come.
Basic Weaving Tools and Understanding Terminology
To get started with weaving, you’ll need a few basic tools. Don’t worry, I’ve got you covered – we’ll go through each one together. You’ll need a loom, which can be as simple as a handheld frame or as complex as a floor loom. You’ll also need a shuttle, which is used to pass the yarn back and forth through the warp threads. A pair of scissors and a tapestry needle will also come in handy. Now, let’s talk terminology – don’t worry if it seems overwhelming at first, we’ll break it down step by step. Key terms to know include “warp” (the threads that run lengthwise on the loom) and “weft” (the threads that run widthwise).
Choosing the Right Yarn for Simple Weaving
When it comes to choosing the right yarn for simple weaving, I like to think of it as selecting a special ingredient for a favorite recipe. You want something that will bring out the best in your project, and that’s easy to work with. For beginners, I recommend starting with a smooth, medium-weight yarn that’s not too slippery or too bulky. This will make it easier to handle and weave, allowing you to focus on getting the hang of the technique.
Look for yarns made from natural fibers like cotton, wool, or bamboo – they’re often a great choice for weaving because they have a gentle texture and a soft drape. Avoid anything too shiny or too fuzzy, as these can be tricky to work with, especially if you’re just starting out. By choosing a yarn that feels pleasant to touch and easy to manipulate, you’ll set yourself up for a delightful weaving experience.
5 Essential Tips to Get You Started with Weaving
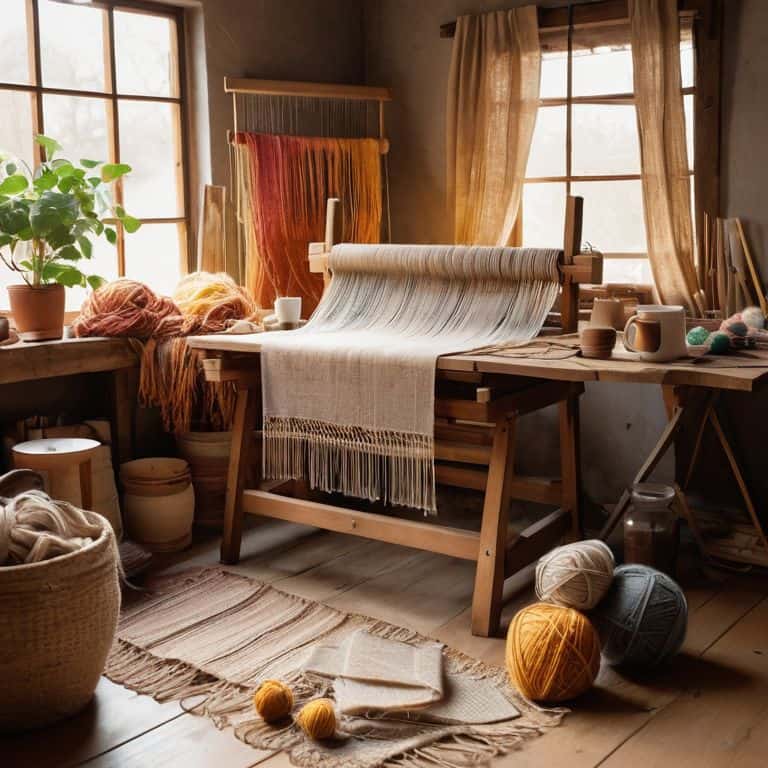
- Start with a simple loom or a frame loom to get a feel for the weaving process, and don’t be afraid to experiment with different yarns and textures
- Choose a yarn that’s soft and easy to work with, such as cotton or wool, and consider the color and texture you want to achieve in your final project
- Practice your weaving technique with a simple scarf or wall hanging before moving on to more complex projects, and don’t worry if it’s not perfect – it’s all part of the learning process
- Pay attention to tension when weaving, as it can affect the final texture and appearance of your project – aim for a consistent, gentle tension that’s not too tight or too loose
- Don’t be too hard on yourself if you make mistakes – they’re an opportunity to learn and improve, and you can always undo and re-do a section if needed, or incorporate the mistake into your design as a unique feature
Key Takeaways for Beginner Weavers
Remember to choose the right yarn for your project by considering factors like fiber type, weight, and color to ensure a beautiful and cohesive finish
Always start with the basic weaving tools, including a loom, shuttle, and scissors, and take the time to understand key terminology like warp, weft, and tension to avoid confusion
Break down the weaving process into manageable steps, practice patience, and don’t be afraid to make mistakes – with time and practice, you’ll develop your unique rhythm and style
Weaving Your Path to Creativity
As we come to the end of this journey together, I want to remind you of the key elements we’ve covered to get you started with weaving. From choosing the right yarn for your project to understanding the basic tools and terminology, we’ve broken down the process into manageable, easy-to-follow steps. Remember, the art of weaving is all about experimentation and patience, so don’t be too hard on yourself if your first projects don’t turn out exactly as you imagined. The most important thing is that you’re taking the first steps towards creating something beautiful and unique.
Now that you have the foundation, it’s time to let your creativity shine. Don’t be afraid to try new things, mix different yarns, and push the boundaries of what you thought was possible. Weaving is not just about creating a piece of fabric; it’s about telling a story, expressing yourself, and connecting with a community of like-minded crafters. As you continue on your weaving journey, I hope you find joy, peace, and a sense of accomplishment in every thread you weave. Happy weaving, and I look forward to seeing the beautiful creations you’ll make!
Frequently Asked Questions
What type of loom is best for a beginner to start with?
For a beginner, I recommend starting with a simple rigid heddle loom or a frame loom. Both are easy to use, affordable, and versatile, allowing you to create a variety of projects, from scarves to wall hangings. They’re perfect for getting a feel for the weaving process without overwhelming you with complex machinery.
How do I know if I'm using the right tension when weaving?
To check your tension, gently tug on the weaving. It should feel firm, but not too tight. Think of it like a happy medium – not too loose, not too tight. You can also try comparing it to the tension of a quietly plucked guitar string. That’s the sweet spot you’re aiming for.
Can I use any type of yarn for weaving, or are there specific types that are recommended for beginners?
Not all yarns are created equal for weaving, my friend. As a beginner, you’ll want to start with yarns that are smooth, medium-weight, and have a bit of texture. Look for yarns made from natural fibers like wool, cotton, or linen. Avoid slippery or overly bulky yarns, as they can be tricky to work with. I’ll share my favorite beginner-friendly yarns in just a moment.