As I sit amidst my loom and half-finished weaving projects, I often think about the common misconception that how to weave in your ends on a weaving is a tedious, unnecessary step. Many believe it’s a chore that can be skipped or rushed through, but I’m here to tell you that’s not the case. In fact, properly securing your ends is what transforms a beautiful piece of woven art into a polished, professional masterpiece. I’ve seen it time and time again in my own work as a textile artist – a stunning weave, ruined by sloppy endings.
So, what if you could master the art of weaving in your ends with ease and precision? In this article, I’ll share my personal approach to securing your weaving’s foundations, one that I’ve developed through years of experimentation and practice. You’ll learn the simple, yet effective techniques I use to tuck in those pesky threads, and how to make the process a seamless part of your weaving routine. By the end of this guide, you’ll be equipped with the knowledge and confidence to take your weaving to the next level, and create pieces that truly showcase your skill and artistry.
Table of Contents
Guide Overview: What You'll Need

Total Time: 30 minutes to 1 hour
Estimated Cost: $0 – $5
Difficulty Level: Easy
Tools Required
- Yarn Needle (also known as a tapestry needle)
- Scissors (sharp and dedicated to cutting yarn)
Supplies & Materials
- Yarn matching the yarn used in the weaving
- Measuring Tape or Ruler for measuring 6 inches of yarn tail
Step-by-Step Instructions
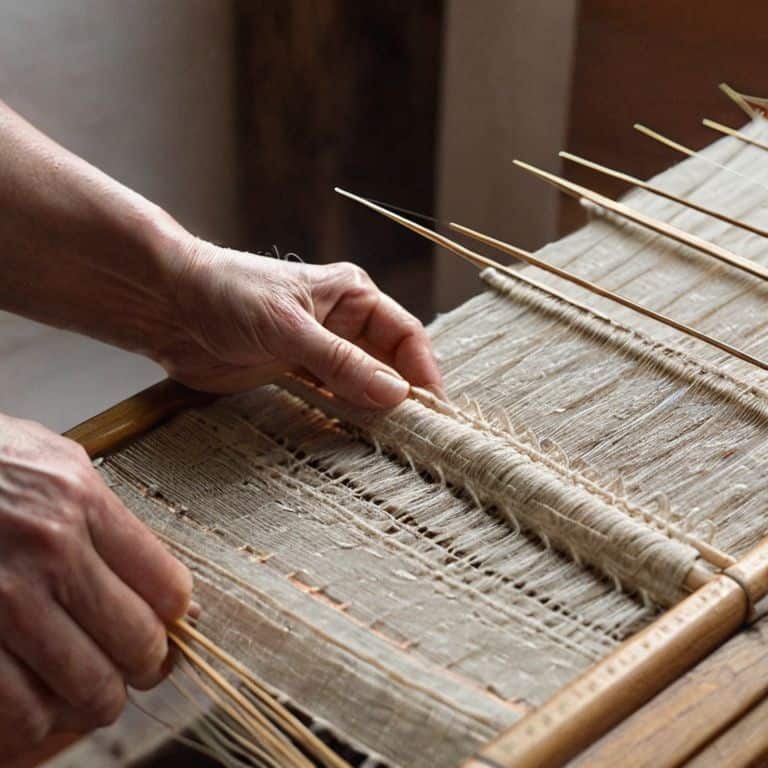
- 1. To begin, let’s examine the edges of your weaving, where the threads are loose and waiting to be secured. Take a moment to appreciate the _texture_ of your piece, the way the fibers interact with each other, and the _visual interest_ created by the loose ends.
- 2. Next, thread your yarn needle with the end of the yarn you wish to secure, and gently weave it through the warp threads, about 1-2 inches from the edge of the weaving. This is where the foundation of your weaving is established, and it’s essential to be meticulous in this step to ensure a polished finish.
- 3. Now, pull the yarn gently to tighten the thread, making sure not to pull too hard, as this can _distort the fabric_ or create uneven tension. You want to aim for a smooth, even surface, much like the clean lines of a well-designed building.
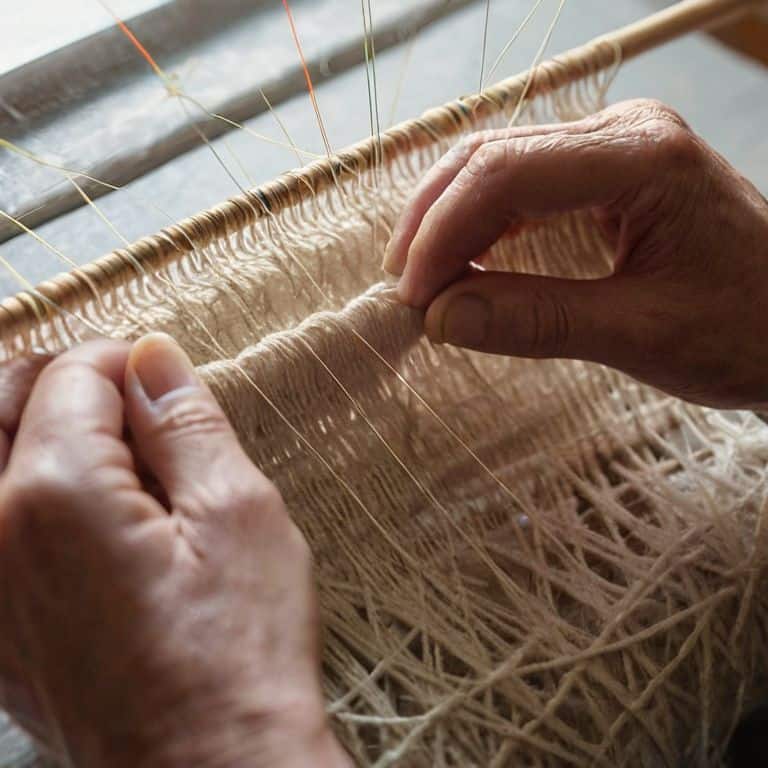
- 4. Using your yarn needle, carefully weave the yarn end in and out of the warp threads, moving incrementally along the edge of the weaving. As you work, pay attention to the _interplay of colors_ and textures, ensuring that your yarn end is blending seamlessly with the surrounding fibers.
- 5. As you continue to weave in the ends, you may encounter areas where the yarn is thicker or thinner than the surrounding threads. In these cases, use a gentle twisting motion to coax the yarn into place, taking care not to _compromise the integrity_ of the fabric.
- 6. Once you’ve completed weaving in the ends, inspect your work to ensure that all threads are securely fastened and the surface of the weaving is smooth and even. If necessary, use a lint roller or a small brush to remove any _excess fibers_ or debris that may have accumulated during the process.
- 7. Finally, take a step back and admire your handiwork, appreciating the finished edges and the sense of satisfaction that comes from knowing you’ve created something truly unique and beautiful. Your weaving is now ready to be displayed, and with proper care, it will remain a stunning piece of _textile art_ for years to come.
Mastering Ends in Weaving
As I delve into the nuances of mastering ends in weaving, I’m reminded of the importance of patience. It’s a process that requires attention to detail, much like the precise craftsmanship involved in architectural design. Securing weaving threads is an art form in itself, where every subtle movement of the yarn needle can make a significant difference in the overall appearance of the piece. I’ve found that using a yarn needle to weave in ends is not only efficient but also allows for a level of control that’s hard to achieve with other methods.
When it comes to yarn tail management, I’ve developed a few techniques that have become indispensable in my weaving practice. One of these is the invisible yarn weaving technique, which involves carefully blending the ends of the yarn into the body of the weaving. This not only creates a clean finish but also adds to the overall texture and visual interest of the piece. By mastering this technique, weavers can create a seamless transition between different colors and textures, adding depth and complexity to their work.
In my experience, the key to successful weaving finishing tips lies in the ability to balance functionality with aesthetics. A well-finished weaving is not only visually appealing but also durable and long-lasting. By paying attention to the smallest details, such as the way the ends are secured or the yarn tails are managed, weavers can create pieces that are truly timeless and captivating. Whether you’re working on a intricate wall hanging or a simple scarf, the art of mastering ends in weaving is an essential skill that can elevate your craft to new heights.
Invisible Yarn Techniques for Finishing
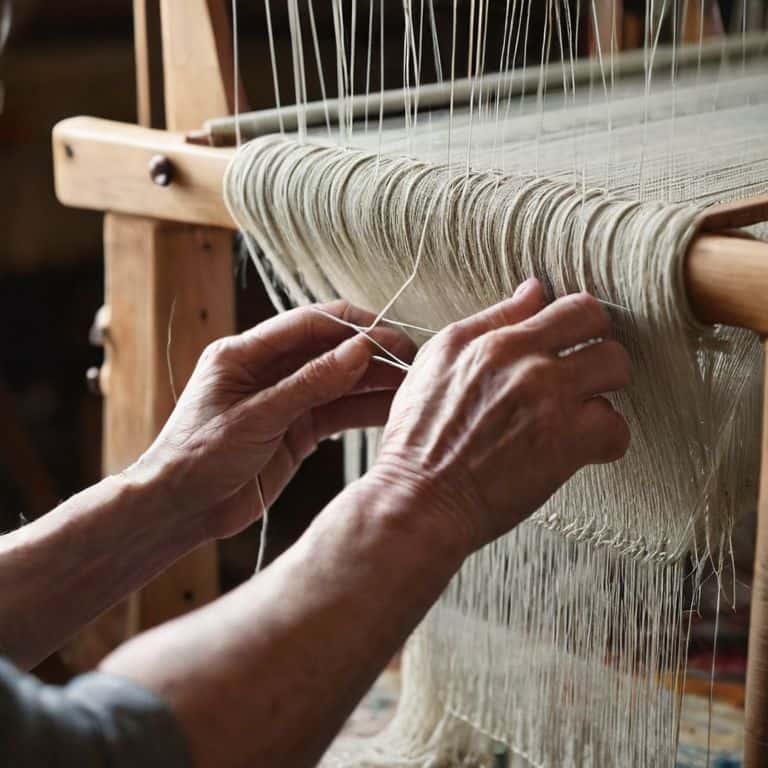
To achieve a seamless finish, I employ invisible yarn techniques that blur the lines between the woven piece and its foundations. By using a yarn needle to weave in ends, I create a virtually undetectable transition between the warp and weft threads. This method allows the texture and pattern of the weaving to take center stage, unobscured by loose ends or bulky knots.
I find that the key to success lies in patience and attention to detail, carefully threading each end through the woven fabric to create a cohesive, polished whole. The result is a piece that appears to be woven from a single, unbroken thread – a testament to the beauty of meticulous craftsmanship and the art of subtle, invisible technique.
Tucking Threads With Yarn Needles
When it comes to tucking threads with yarn needles, precision is key. I like to think of it as adding the final details to a beautifully designed building. With a yarn needle, you can carefully weave in those stray ends, securing them in place. It’s a meditative process, really – the gentle push and pull of the yarn through the weave, the soft click of the needle as it glides through the fabric.
I find that using a yarn needle with an eye big enough to accommodate the yarn, yet small enough to navigate the weave, is essential. It allows for a seamless blend of the ends with the rest of the piece, creating a polished finish that elevates the entire work. As I work, I think about the texture and form of the weaving, how each thread contributes to the overall design. It’s a painstaking process, but one that’s well worth the effort.
Weaving Wisdom: 5 Essential Tips for Securing Your Ends
- Plan Your Ending: Consider the color and texture of your yarn ends and how they will interact with the overall design of your piece, just as an architect considers the facade of a building
- Thread by Thread: Use a yarn needle to meticulously weave in each end, treating each thread as a vital part of the structure, much like the individual beams in a wooden framework
- Blend with the Background: Employ invisible yarn techniques to seamlessly merge your ends with the surrounding fabric, creating a cohesive and polished finish
- Pay Attention to Tension: Be mindful of the tension you apply when weaving in your ends, as excessive pulling can pucker the fabric or create unsightly bulges, much like uneven foundation work in a building
- Step Back and Evaluate: Once you’ve completed weaving in your ends, take a step back to assess your work, making any necessary adjustments to ensure a flawless and professionally finished piece that showcases your artistic vision
Key Takeaways for Weaving in Ends
Tucking in threads is not just about securing loose ends, but also about maintaining the texture and form of your woven piece, much like the attention to detail in architectural design
Mastering the art of weaving in ends requires patience, a yarn needle, and a gentle touch, as well as an understanding of how different yarns and fibers respond to being tucked in
By incorporating invisible yarn techniques and thoughtful thread management into your weaving practice, you can create polished, professional-looking pieces that showcase your skill as a textile artist and weaver
The Foundation of Beauty
Weaving in your ends is not just a technical step, but a poetic gesture – it’s where the invisible threads of your creativity become the foundation upon which your entire piece stands, a testament to the beauty that lies in the details.
Ethan Thorne
Weaving a Polished Finish
As we’ve explored the world of weaving in ends, it’s clear that this final step is what transforms a beautiful piece of art into a truly polished masterpiece. From using yarn needles to tuck threads with precision, to mastering invisible yarn techniques for a seamless finish, each method requires patience, attention to detail, and a deep understanding of the interplay between texture and form. By dedicating time to this often-overlooked aspect of weaving, you not only ensure the longevity of your piece but also elevate its aesthetic appeal, making every thread count in the grand design of your woven architecture.
As you complete your weaving and step back to admire the intricate dance of colors and textures, remember that the true art of weaving lies not just in the creation, but in the finishing touches. It’s in these small, meticulous details that your personality shines through, and your piece becomes a reflection of your unique vision and craftsmanship. So, don’t rush the process; instead, savor the journey, and let the joy of weaving in your ends be a meditative culmination of your creative expression, where every end tells a story of dedication and love for the craft.
Frequently Asked Questions
What if my yarn is too thick to fit through a yarn needle, are there alternative methods for tucking in ends?
When working with thicker yarns, I often use a tapestry needle or a blunt-tipped sewing needle to gently weave the ends into the fabric. Alternatively, you can try using a simple overhand knot to secure the yarn, then trimming the excess close to the knot, creating a nearly invisible finish.
How do I avoid visible bumps or lumps when weaving in ends, especially with thicker or more textured yarns?
To avoid visible bumps, I use a technique called ‘thread tracing’ – essentially, I weave the end yarn in a path that mirrors the warp threads, using a yarn needle to gently coax it into place, ensuring a smooth, textured finish that’s reminiscent of a well-crafted architectural detail.
Can I use a sewing machine to weave in ends, or is it always better to do it by hand for a more polished finish?
While a sewing machine can be tempting for speed, I always recommend finishing by hand for a polished look. Hand-weaving in ends allows for a more precise, gentle touch, preserving the texture and integrity of your woven piece, much like the attention to detail in a well-crafted architectural model.