As I sit at my loom, surrounded by threads of every texture and hue, I’m reminded of the countless times I’ve heard a guide to hemstitch for finishing being touted as a tedious, necessary evil. But I’m here to tell you that this couldn’t be further from the truth. Hemstitch is an art form, a way to add a touch of elegance and sophistication to your woven pieces. I’ve spent years perfecting my craft, and I can confidently say that mastering the hemstitch technique has taken my work to a whole new level.
In this article, I’ll share my personal approach to a guide to hemstitch for finishing, distilled from years of experimentation and practice. You’ll learn how to build a strong foundation for your hemstitch, how to choose the right threads and yarns, and how to troubleshoot common issues that can arise during the process. My goal is to empower you with the knowledge and confidence to take your weaving to new heights, and to show you that with a little patience and practice, you can create truly stunning pieces that showcase your unique style and creativity.
Table of Contents
- Guide Overview: What You'll Need
- Step-by-Step Instructions
- A Guide to Hemstitch for Finishing
- Mastering Hand Weaving Techniques for Elegant Edges
- Secure Fabric Finishing Hemstitch vs Other Methods
- Weaving Wisdom: 5 Essential Tips for Mastering Hemstitch Finishing
- Key Takeaways for Elegant Edges
- Weaving Wisdom
- Weaving a Lasting Impression
- Frequently Asked Questions
Guide Overview: What You'll Need
Total Time: 1 hour 15 minutes
Estimated Cost: $10 – $20
Difficulty Level: Intermediate
Tools Required
- Sewing Machine (with embroidery or decorative stitch capabilities)
- Hand Sewing Needles (sharp and heavy-duty)
- Tape Measure (for measuring fabric edges)
- Ruler (for guiding straight stitches)
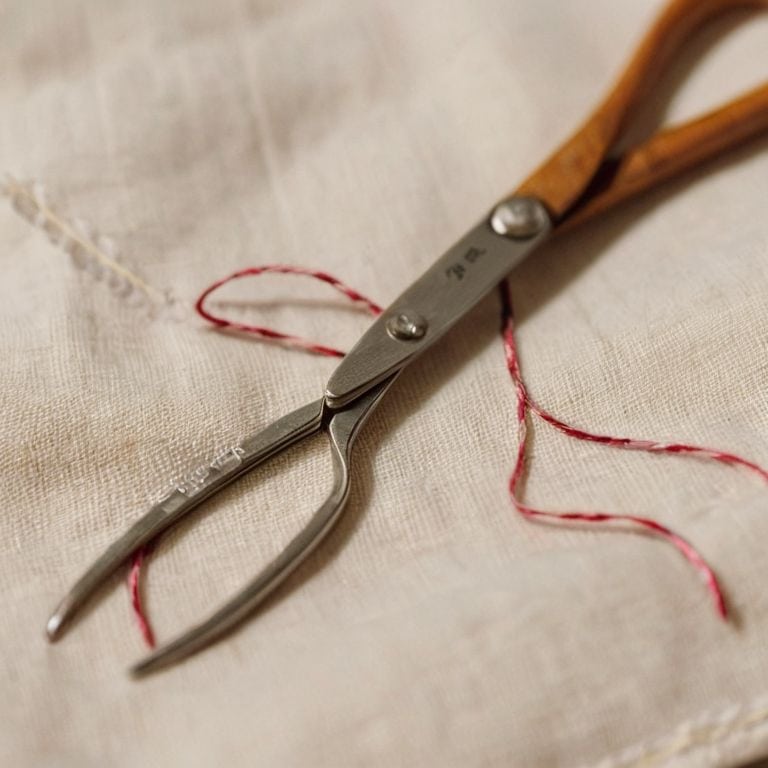
- Scissors (sharp and dedicated to cutting fabric)
Supplies & Materials
- Fabric of Choice (cotton or linen work well for hemstitching)
- Thread (to match or contrast with fabric color)
- Stabilizing Material (such as interfacing or water-soluble stabilizer)
- Hemstitch Templates or Guides (optional, for consistent stitching)
Step-by-Step Instructions
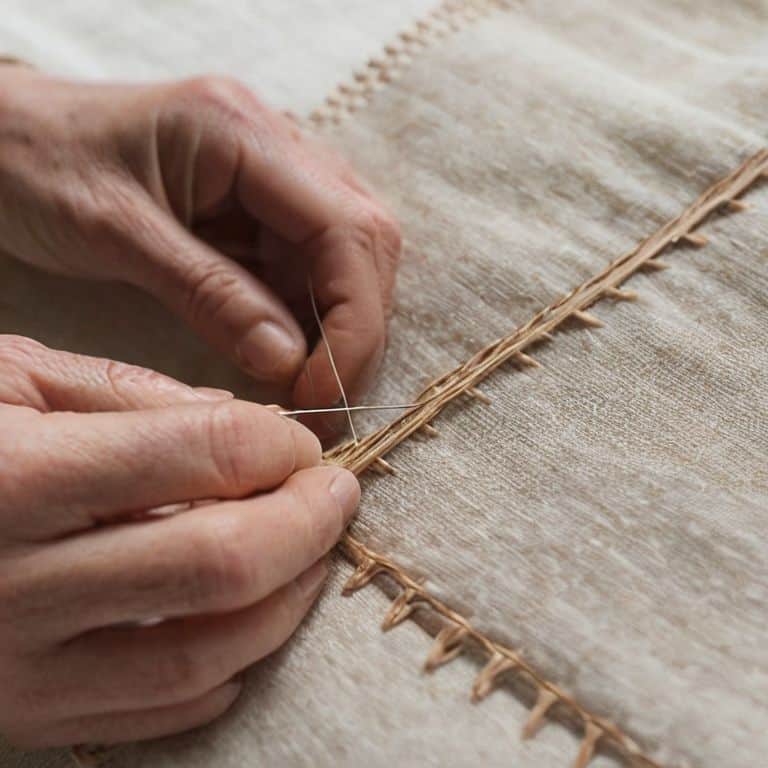
- 1. To begin with, let’s start by preparing our loom and getting all the necessary tools and materials within reach. This includes our woven piece, a tapestry needle, a pair of scissors, and some extra yarn for the hemstitch. I like to think of this process as building the foundation for our finishing technique, where every thread counts.
- 2. Next, we need to carefully examine the edges of our woven piece to determine where we want to start the hemstitch. This is a crucial step, as it sets the stage for the entire finishing process. I find that visualizing the end result helps me decide on the perfect starting point, taking into account the texture and color of the fabric.
- 3. Now, let’s thread our tapestry needle with the extra yarn. I prefer to use a yarn that matches the dominant color of my woven piece, as this creates a sense of cohesion and continuity. Make sure to leave a small tail at the end, which will be used to secure the yarn in place later on.
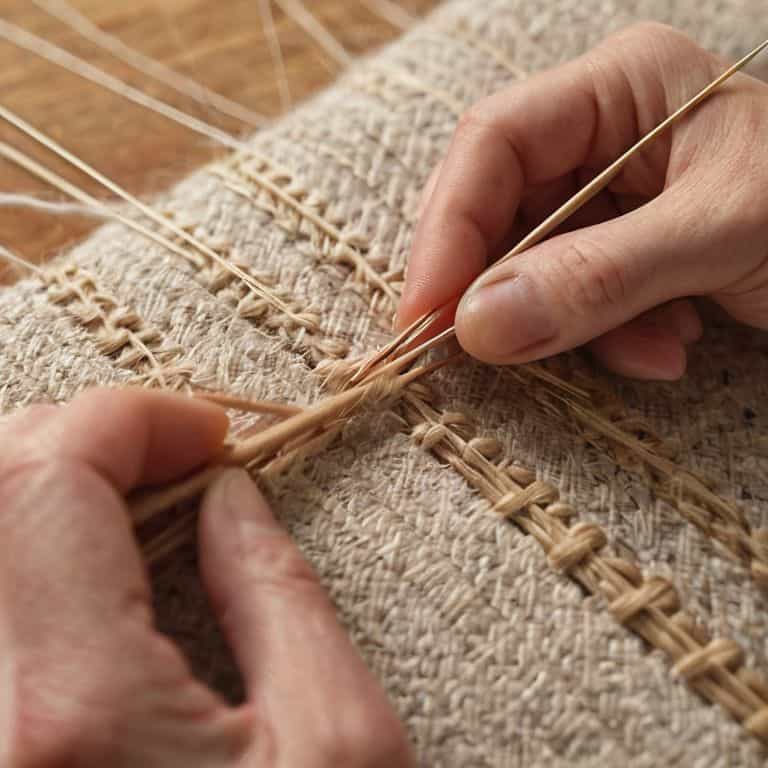
- 4. With our needle threaded, we can begin the hemstitch process by inserting the needle into the first warp thread from the edge of the fabric. Then, we pass the needle over the top of the next warp thread, creating a small loop. This loop is the core of the hemstitch, and it’s essential to keep it consistent throughout the process.
- 5. We continue this process, moving from one warp thread to the next, creating a series of small loops along the edge of the fabric. As we work, it’s essential to maintain a consistent tension, neither too tight nor too loose, to ensure that our hemstitch lies flat and even. I find that working in a rhythmic motion helps me achieve this consistency.
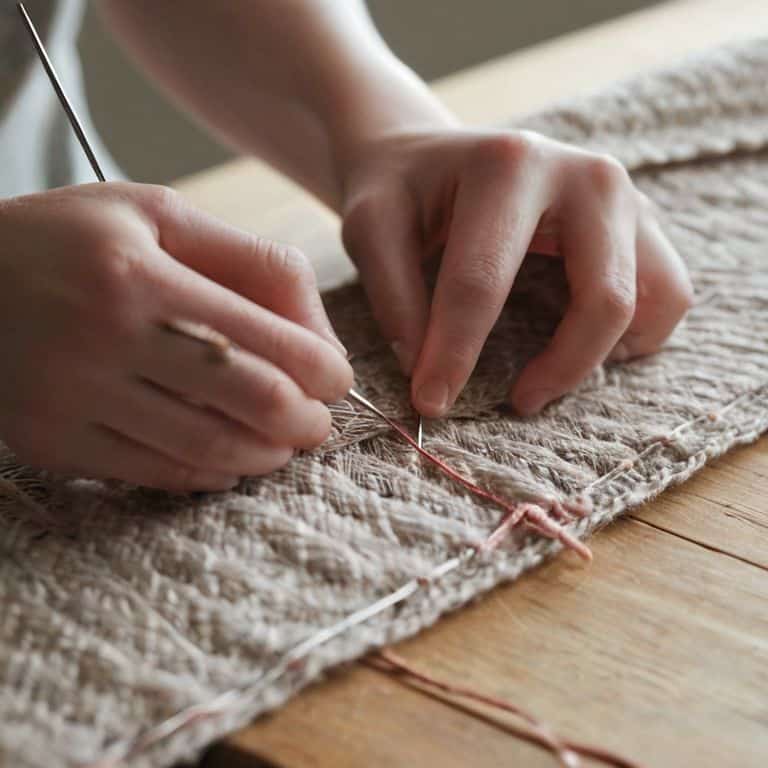
- 6. As we approach the end of our hemstitch, we need to secure the yarn in place. To do this, we pass the needle through the last loop we created, then pull the yarn gently to tighten it. Finally, we trim the excess yarn, leaving a small tail that can be woven back into the fabric. This final step is crucial, as it gives our hemstitch a clean and polished finish.
- 7. Once we’ve completed the hemstitch on one edge, we can repeat the process on the remaining edges, making sure to maintain consistency throughout. As we work, we can step back and admire our progress, seeing how the hemstitch adds a touch of elegance and sophistication to our woven piece. With practice and patience, this finishing technique can become a hallmark of our weaving style.
A Guide to Hemstitch for Finishing
As I delve deeper into the world of hemstitch, I’ve come to appreciate the nuances of hand weaving techniques that make this finishing method truly special. One of the key benefits of hemstitch is its ability to create a secure fabric finishing method that not only protects the edges of your woven piece but also adds a touch of elegance. By using a simple yet effective series of knots and stitches, you can create a beautiful and durable finish that will withstand the test of time.
When it comes to decorative elements, hemstitch offers a wide range of possibilities. From simple and subtle patterns to more intricate and elaborate designs, the possibilities are endless. I’ve found that experimenting with different decorative hemstitch patterns can add an extra layer of depth and visual interest to your woven pieces. Whether you’re looking to create a bold statement or a more understated look, hemstitch can be adapted to suit your unique style and vision.
For beginners, one of the most common challenges when learning hemstitch is navigating the transition from one stitch to the next. To avoid common mistakes in hemstitch weaving, it’s essential to take your time and focus on maintaining a consistent tension and rhythm. With practice and patience, you’ll soon find yourself weaving like a pro and creating beautiful, professional-looking finishes that will elevate your woven pieces to the next level.
Mastering Hand Weaving Techniques for Elegant Edges
As I delve deeper into the world of hemstitch, I’m reminded of the importance of mastering hand weaving techniques for creating elegant edges. For me, it’s all about building with yarn, just as I would with architectural structures. The key to achieving a polished finish lies in the subtle manipulation of threads and the patience to weave each strand with precision. I find that using natural fibers like linen or raw silk adds an extra layer of texture and depth to the finished piece.
By focusing on the intersection of modern design and ancient craft, I’ve developed a few trusted techniques for mastering hand weaving techniques. One of my favorites is to experiment with different yarn weights and colors to create unique, intricate patterns that add visual interest to the edge of a woven piece. This attention to detail is what sets a beautifully finished piece apart from a merely functional one, and it’s a skill that I’m excited to share with others.
Secure Fabric Finishing Hemstitch vs Other Methods
When it comes to securing fabric finishing, I often find myself comparing hemstitch to other methods. For me, the choice between hemstitch, overlock, or whipstitch depends on the texture and form I’m aiming to achieve. Hemstitch offers a level of elegance and subtlety that’s hard to match, especially in my larger woven art installations. The delicate loops created by the hemstitch technique blend seamlessly into the surrounding fabric, creating a sense of continuity that’s essential for my design aesthetic.
In contrast, other methods can sometimes feel too harsh or visible, disrupting the flow of the piece. Of course, there are situations where a more robust finish is necessary, but for my artistic pursuits, hemstitch remains a trusted favorite. Its unique blend of functionality and visual appeal makes it an indispensable tool in my weaving practice, allowing me to focus on the intersection of modern design and ancient craft that drives my creative vision.
Weaving Wisdom: 5 Essential Tips for Mastering Hemstitch Finishing
- Start with a strong foundation: ensure your woven piece is securely attached to the loom or a stable surface to maintain even tension
- Choose the right thread: select a yarn that complements your woven piece’s texture and color, and isn’t too thick or too thin for the hemstitch technique
- Keep it consistent: maintain a steady rhythm and stitch length to achieve a professional-looking finish, and don’t be afraid to adjust as needed
- Pay attention to the edge: hemstitch is all about creating a beautiful, finished edge – take your time and make sure each stitch is precise and evenly spaced
- Practice makes perfect: don’t be discouraged if your first attempts at hemstitch don’t turn out as expected – with patience and practice, you’ll soon be creating stunning, professional-grade finishes
Key Takeaways for Elegant Edges
Weaving a flawless hemstitch requires patience and practice, but with the right techniques, you can achieve professional-looking edges that elevate your woven pieces
Understanding the difference between hemstitch and other finishing methods is crucial for choosing the best approach for your project, considering factors like fabric type, desired texture, and overall aesthetic
By mastering the hemstitch technique and experimenting with various yarns, colors, and patterns, you can unlock a world of creative possibilities and add a unique touch to your handmade textiles
Weaving Wisdom
The hemstitch is not just a technique, but a gesture of reverence for the edge – a declaration that even the boundaries of a piece deserve beauty and attention.
Ethan Thorne
Weaving a Lasting Impression
As we conclude this guide to hemstitch for finishing, let’s reflect on the journey we’ve taken to master this elegant technique. From the initial steps of understanding the basics of hemstitch to comparing it with other methods for securing fabric, we’ve covered a significant amount of ground. The key to successfully implementing hemstitch lies in attention to detail and a willingness to practice until the stitches become second nature. By following the steps outlined and dedicating time to hone your skills, you’ll be well on your way to creating beautifully finished woven pieces that showcase your craftsmanship.
As you continue to explore the world of weaving and hemstitch, remember that the true beauty of this craft lies in its ability to combine texture and form in unique and expressive ways. Don’t be afraid to experiment and push the boundaries of what’s possible with hemstitch, and always keep in mind that the process of creating something with your own hands is just as valuable as the end result. With patience, dedication, and a passion for building with yarn, you’ll find that the art of hemstitch becomes an integral part of your weaving journey, allowing you to create pieces that are not only functional but also truly works of art.
Frequently Asked Questions
What are the most common mistakes to avoid when attempting a hemstitch for the first time?
When attempting a hemstitch for the first time, I’ve found that the most common mistakes to avoid are uneven tension, inconsistent stitch length, and not leaving enough tail for securing. These oversights can lead to a sloppy or loose finish, undermining the elegance of the hemstitch.
How does the type of yarn or thread used affect the appearance and durability of a hemstitch?
The yarn or thread used significantly impacts the hemstitch’s appearance and durability. Thicker yarns create a more rustic look, while finer threads produce a delicate edge. Natural fibers like linen or silk add a beautiful texture, and their durability ensures a long-lasting finish, making them my personal favorites for creating timeless pieces.
Can hemstitch be used on all types of woven fabrics, or are there certain textures or weights that are more suitable for this technique?
While hemstitch can be applied to various woven fabrics, it’s most suited for lighter to medium-weight textiles with a more open weave, such as linen or cotton. Thicker or densely woven fabrics can be more challenging to work with, but experimenting with different yarns and tensions can still yield beautiful results.