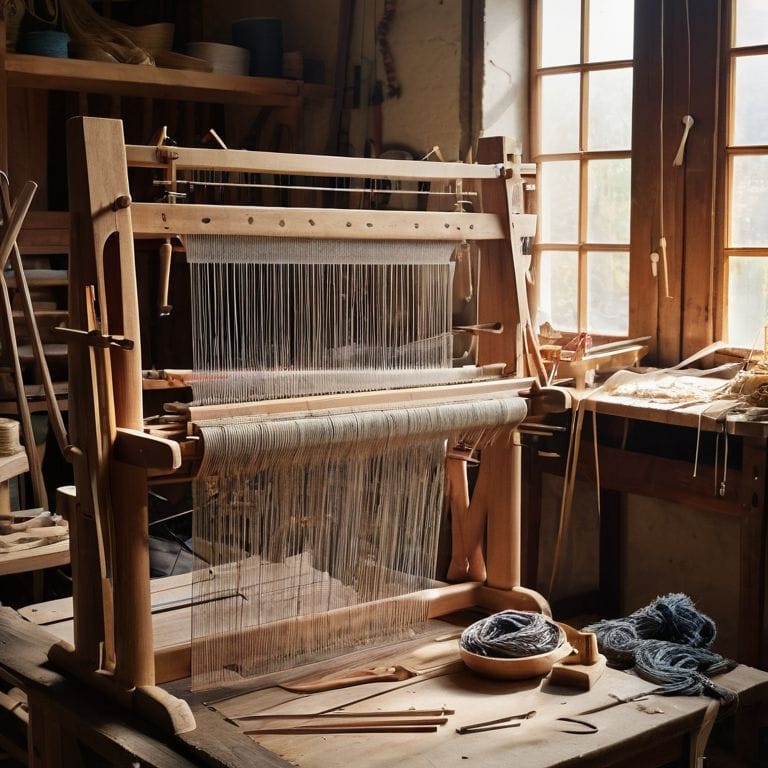
I still remember the day my wife asked me to build her a weaving loom – I thought, how hard could it be? But as I dove into the world of how to build a weaving loom, I realized that most guides were either overly complicated or lacking in crucial details. The truth is, building a weaving loom doesn’t have to be a daunting task, and with the right approach, you can create a beautiful and functional piece of art. My journey began with a simple question: what makes a loom truly great? Is it the type of wood used, the design, or something else entirely?
As I share my story and expertise with you, I promise to cut through the noise and provide you with practical, hands-on advice on how to build a weaving loom that will make you proud. In this guide, you’ll learn the ins and outs of creating a custom loom that meets your specific needs, from selecting the perfect wood to assembling the final product. I’ll walk you through each step, sharing my own experiences and tips along the way, so you can avoid common pitfalls and create a loom that will become your trusted companion in the world of weaving. With this guide, you’ll be well on your way to crafting a beautiful, functional loom that will bring you joy and inspiration for years to come.
Table of Contents
Guide Overview: What You'll Need
Total Time: 4 hours 30 minutes
Estimated Cost: $100 – $200
Difficulty Level: Intermediate
Tools Required
- Table saw (for cutting lumber to size)
- Drill press (for precise hole drilling)
- Hand saw or circular saw (for cutting curves or irregular shapes)
- Sander (for smoothing out wood surfaces)
- Tape measure (for accurate measurements)
- Square (for ensuring corners are square)
- Clamps (for holding pieces together during assembly)
- Wrench or socket set (for tightening bolts and nuts)
- Pencil and marker (for marking measurements and cuts)
Supplies & Materials
- 2-in x 4-in lumber (for frame construction)
- 3/4-in plywood (for shuttle and other components)
- 1/4-in plywood (for heddle and other small parts)
- Wood glue (for bonding wood pieces together)
- 2 1/2 inches wood screws (for assembling frame)
- 1 1/4 inches wood screws (for attaching smaller components)
- Cotton or nylon cord (for creating heddle and warp)
- Metal or plastic rods (for creating shed and pick-up sticks)
- Wood finish (optional) (for protecting and enhancing wood surfaces)
Step-by-Step Instructions
- 1. First, let’s gather our materials, because having everything we need is essential for a smooth project. We’ll need a few pieces of wood for the frame, some screws, a drill press, a saw, and a sanding block. I like to use reclaimed wood whenever possible, not just for the environmental benefits, but also because it adds a unique character to our loom.
- 2. Next, we’ll start by cutting the frame pieces. This is where our project really begins to take shape. Use your saw to cut four pieces of wood to the same length for the sides of your loom and two more for the top and bottom. Remember, precision is key here, so take your time and make sure all your cuts are accurate.
- 3. Now, let’s assemble the frame. This is a crucial step and requires some patience. Use your drill press to make holes for the screws, and then screw the sides together with the top and bottom pieces. Make sure it’s square and sturdy, as this will be the foundation of our loom.
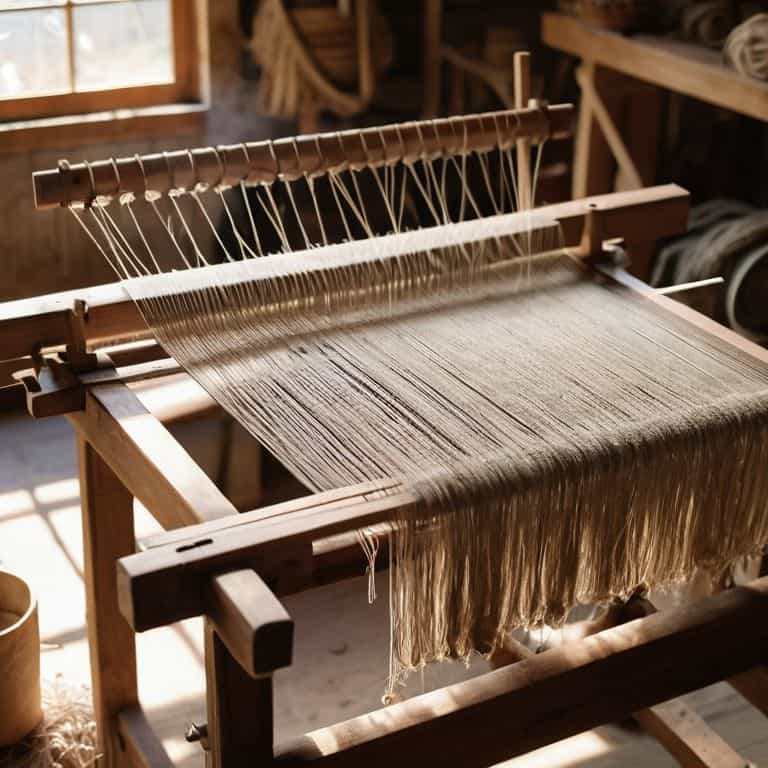
- 4. After the frame is assembled, we’ll move on to creating the warp and weft beams. These are the horizontal pieces where the yarn will be stretched. Cut two more pieces of wood to the desired width of your loom, and then attach them inside the frame using screws. It’s essential to make sure these beams are level and securely attached.
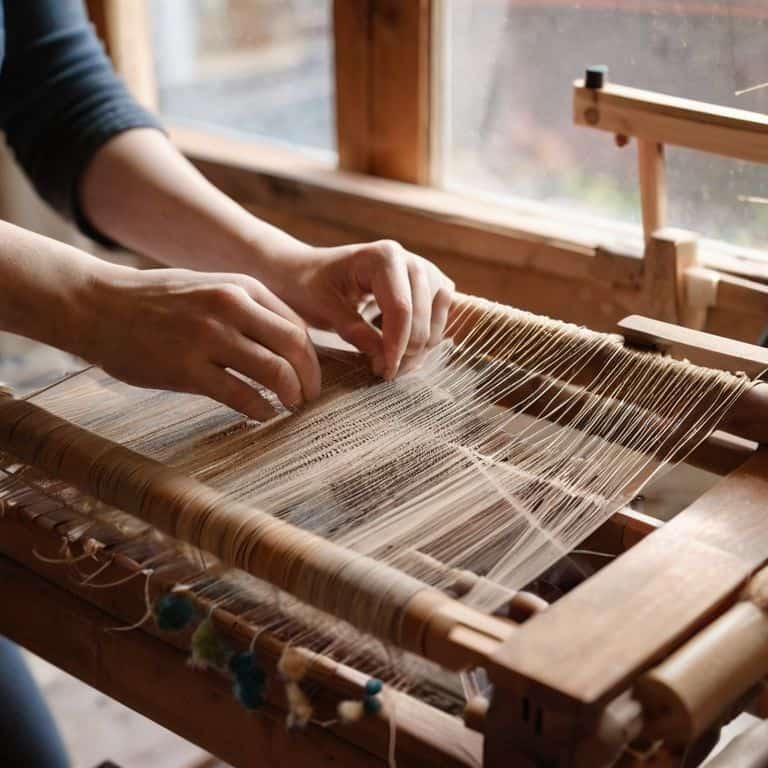
- 5. The next step involves adding the heddle bars. The heddle is what allows us to lift and lower the warp threads, making the weaving process possible. Cut several thin strips of wood to the width of your loom and attach them between the warp and weft beams, spaced evenly apart. This is where the magic happens, as these bars will help create the fabric’s texture and pattern.
- 6. With the basic structure of our loom in place, it’s time to add the shedding mechanism. This part can be a bit tricky, but essentially, we’re creating a system that allows us to easily lift and lower the heddle bars. Use some leather straps and a couple of wooden levers to create this mechanism. The goal is to make it smooth and effortless to operate.
- 7. Finally, let’s sand and finish our loom. Once all the parts are assembled, use a sanding block to smooth out any rough edges or splinters. Then, apply a finish of your choice – I like to use a natural oil that brings out the beauty of the wood without altering its texture. This step not only protects our loom but also makes it look beautiful and professional.
Building Magic With Wood
As I work on a new wooden loom construction project, I’m reminded of the importance of handmade weaving techniques. There’s something special about creating a piece from scratch, using natural materials and traditional methods. The smell of freshly sanded wood, the feel of the yarn between my fingers – it’s a sensory experience like no other. When it comes to types of loom yarn, I always recommend experimenting with different textures and colors to find what works best for you.
One of the most rewarding aspects of loom weaving is seeing a simple weaving pattern for beginners come to life. With a little practice and patience, anyone can create beautiful, intricate designs. I’ve found that using high-quality, basic weaving tools and materials makes all the difference in the world. Whether you’re working on a tapestry or a simple scarf, the right tools can help you achieve professional-looking results.
As a woodworker, I can appreciate the beauty of a well-crafted wooden loom. Loom weaving for tapestry is a unique and challenging art form that requires a deep understanding of the materials and techniques involved. By following a set of wooden loom construction plans, you can create a sturdy and functional loom that will last for years to come. With a little creativity and experimentation, you can unlock the full potential of your handmade weaving loom and create truly magical pieces.
Handmade Looms for Beginners
As a beginner, it’s essential to start with a simple yet functional design. I recommend using locally sourced woods like maple or cherry, which are perfect for creating a beautiful and durable loom. When I first started making looms for my wife, I was amazed at how a handmade tool could elevate her weaving experience. The smell of freshly sanded wood still gets me excited about creating something new.
For a beginner-friendly project, consider using pre-cut wood pieces or a DIY loom kit. These can help you get started quickly and build confidence in your woodworking skills. Remember, the goal is to have fun and create something unique, so don’t be afraid to experiment and add your own personal touch to the project. With a little patience and practice, you’ll be weaving like a pro in no time.
Simple Wooden Construction Plans
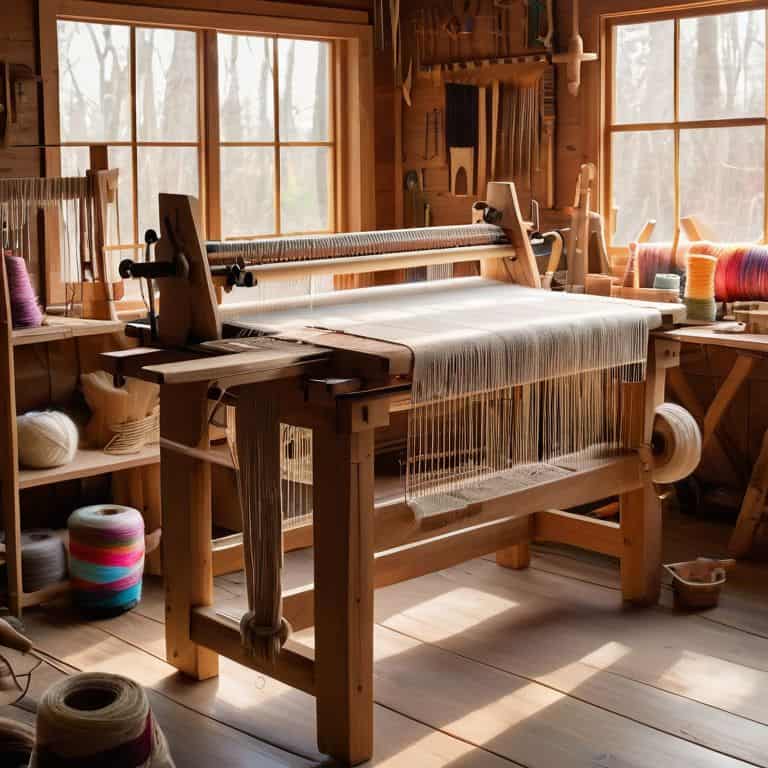
When it comes to simple wooden construction plans, I always say, “less is more.” A good loom doesn’t need a lot of fancy features to be functional. I like to keep my designs straightforward, using high-quality woods like oak or maple. For a beginner, it’s best to start with a basic frame design and add your own personal touches later. I’ve found that a simple rectangular frame with a sturdy base is a great place to start.
I’ve included some basic plans to get you started. Just remember to measure twice and cut once – and don’t be afraid to get creative with your design. The wood you choose will add its own unique character to your loom, so take your time and enjoy the process.
Weaving Wisdom: 5 Essential Tips for Building Your Dream Loom
- Choose the Right Wood: Select a sturdy, durable wood like oak or maple for your loom’s frame, and consider the weight and stability it will provide
- Measure Twice, Cut Once: Double-check your measurements before cutting any wood to ensure a precise fit and avoid costly mistakes
- Keep it Simple, yet Sturdy: Don’t overcomplicate your design – focus on a simple, functional construction that will make weaving a joy, not a chore
- Add a Personal Touch: Consider adding a unique feature, like a handmade wooden shuttle or a customized tensioning system, to make your loom truly one-of-a-kind
- Safety First: Always wear protective gear, like safety glasses and a dust mask, when working with power tools and sanding wood to avoid injury and ensure a safe building experience
Key Takeaways for Your Handmade Loom
By following these steps and tips, you’ll be able to create a functional and beautiful weaving loom that meets your specific needs and enhances your weaving experience
Remember, the type of wood and the attention to detail in construction are crucial – don’t be afraid to experiment with different types of wood and designs to find what works best for you
With patience, the right materials, and a bit of creativity, you can build a handmade loom that not only serves as a tool for your craft but also becomes a piece of art in its own right, reflecting your personal touch and style
Weaving a Legacy, One Loom at a Time
As we conclude this journey of building a weaving loom from scratch, let’s take a moment to reflect on the process. We’ve covered everything from selecting the perfect wood to assembling the frame and adding the finishing touches. Through the step-by-step instructions and simple wooden construction plans, you’ve gained the skills and confidence to create a beautiful, functional loom that will become the heart of your weaving practice. Whether you’re a beginner or an experienced maker, the sense of accomplishment that comes with crafting your own tools is unparalleled.
Now, as you stand back to admire your handmade loom, remember that the true magic lies not just in the craftsmanship, but in the stories and traditions that will be woven into every thread. As you begin to weave your own unique tales, recall the joy of creation, the satisfaction of working with your hands, and the knowledge that you’ve bridged the gap between woodworking and fiber arts. May your loom become a trusted companion, a symbol of your creativity and a testament to the beauty of handmade, functional objects that bring people together.
Frequently Asked Questions
What type of wood is best suited for building a weaving loom?
For a weaving loom, I swear by hardwoods like oak or maple – they’re sturdy and resistant to warping. I also love working with cherry, it’s a personal favorite, the smell of sanded cherry wood is unmistakable. These woods will give your loom a solid foundation and a beautiful finish, trust me, I’ve made my fair share of looms for my wife!
How do I ensure that my loom is properly tensioned for even weaving?
To ensure even weaving, proper tension is key. I like to think of it as finding the sweet spot – not too loose, not too tight. Check your warp threads, they should have a gentle give, like a well-tuned guitar string. Adjust as needed, and remember, it’s all about feel, so don’t be afraid to experiment and find what works best for you and your loom.
Can I customize the design of my loom to fit specific types of yarn or weaving projects?
Absolutely, I love experimenting with custom designs to match specific yarns or projects. For instance, if you’re working with bulky yarns, you might want a loom with wider spacing between the warp threads. I’ve made looms with adjustable pegs to accommodate different yarn weights and types – it’s all about creating the right tool for the job, and I’m happy to share some tips on how to modify your loom to suit your needs.