I still remember the day my wife, a passionate weaver, complained about the quality of her store-bought heddle. She had been struggling to find one that met her needs, and I, being a carpenter, decided to take matters into my own hands. That’s when I discovered the joy of creating my own tools, and a guide to making your own heddle became my mission. I learned that with the right materials and a bit of patience, anyone can craft a heddle that’s tailored to their specific weaving needs. The smell of freshly sanded wood still brings me back to that moment, and I’m excited to share my knowledge with you.
In this article, I’ll walk you through the process of creating your own heddle from scratch. You’ll learn how to select the perfect wood, measure and cut the slots, and assemble the frame. I’ll share my own tips and tricks for ensuring a smooth, even tension, and provide you with a clear, step-by-step plan to follow. By the end of this guide, you’ll be equipped with the knowledge and confidence to create your own custom heddle, one that will elevate your weaving experience and bring you closer to creating truly unique, handmade pieces. So, let’s get started and make something beautiful together!
Table of Contents
Guide Overview: What You'll Need
Total Time: 2 hours 30 minutes
Estimated Cost: $20 – $40
Difficulty Level: Intermediate
Tools Required
- Table Saw for cutting wood to size
- Drill Press for precise hole drilling
- Hand Saw or a coping saw for curved cuts
- Sander for smoothing out wood surfaces
- Measuring Tape for accurate measurements
- Square for ensuring right angles
- Clamps for holding pieces in place while gluing
Supplies & Materials
- 1/4 inch thick wood for the heddle frame, about 6 inches by 12 inches
- 1/8 inch thick wood for the heddle slots, about 1/2 inch by 12 inches
- Wood Glue
- Nails or small screws for assembling the frame
- Sandpaper for smoothing out the wood
- Paint or finish optional, for protecting the wood
Step-by-Step Instructions
- 1. First, let’s gather our materials and get familiar with the tools we’ll be using. For this project, you’ll need a piece of wood (I prefer cedar for its unique scent and durability), a saw, a drill press, some sandpaper, and a metal rod or wire for the heddle’s teeth. Make sure your workspace is clean and well-lit, and that you have all your materials within reach.
- 2. Next, we’ll cut our wood to size. Cut a piece of wood to the length you want your heddle to be, plus a little extra for the ends. For a standard heddle, you’ll want it to be around 12-18 inches long, and about 1-2 inches wide. Use a saw to make a straight cut, and then use some sandpaper to smooth out the edges.
- 3. Now, let’s create the slots for the heddle’s teeth. Using a drill press, make evenly spaced holes along the length of the wood, about 1/4 inch from the top. These holes should be just big enough for the metal rod or wire to fit through. Be careful not to drill too close to the edge, or the wood may split.
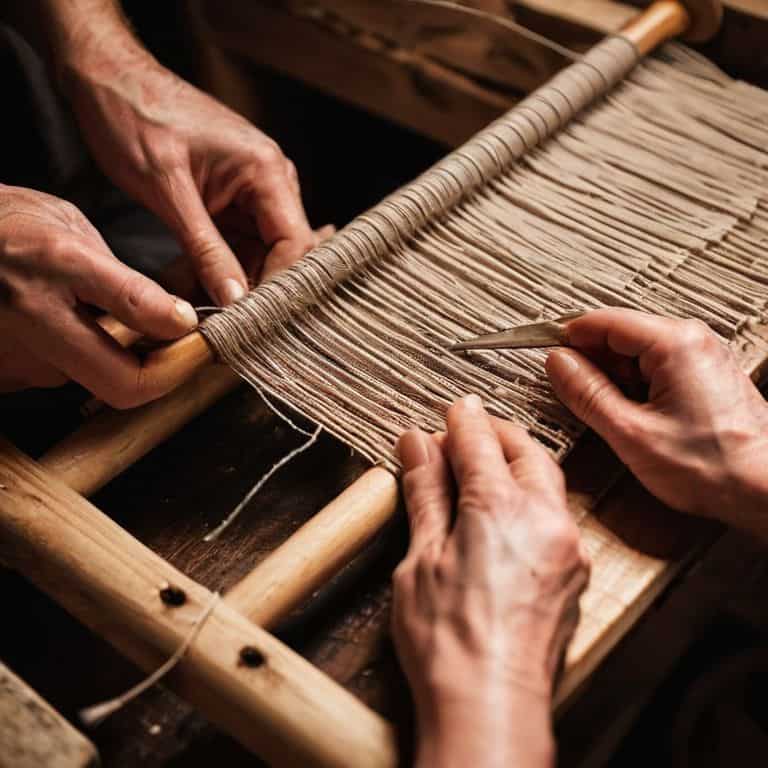
- 4. After that, we’ll shape the teeth of the heddle. Cut the metal rod or wire into small pieces, about 1-2 inches long, and use a pair of pliers to shape them into small hooks. These hooks will be used to separate the warp threads, so make sure they’re evenly spaced and consistent.
- 5. Then, we’ll assemble the heddle. Thread the metal rod or wire pieces through the holes you drilled earlier, making sure they’re securely in place. Use a small amount of wood glue to hold them in position, if needed. Make sure the teeth are evenly spaced and the heddle is lying flat.
- 6. Next, we’ll add the ends to the heddle. Cut two small pieces of wood to fit on either end of the heddle, and use some wood glue and nails to attach them. These ends will help keep the heddle stable and prevent it from warping or bending.
- 7. Finally, let’s sand and finish our heddle. Use some sandpaper to smooth out any rough edges or splinters, and then apply a wood finish to protect the wood and give it a nice sheen. Once the finish is dry, your heddle is ready to use. Congratulations, you’ve just made your very own heddle from scratch!
Making Your Own Heddle Guide

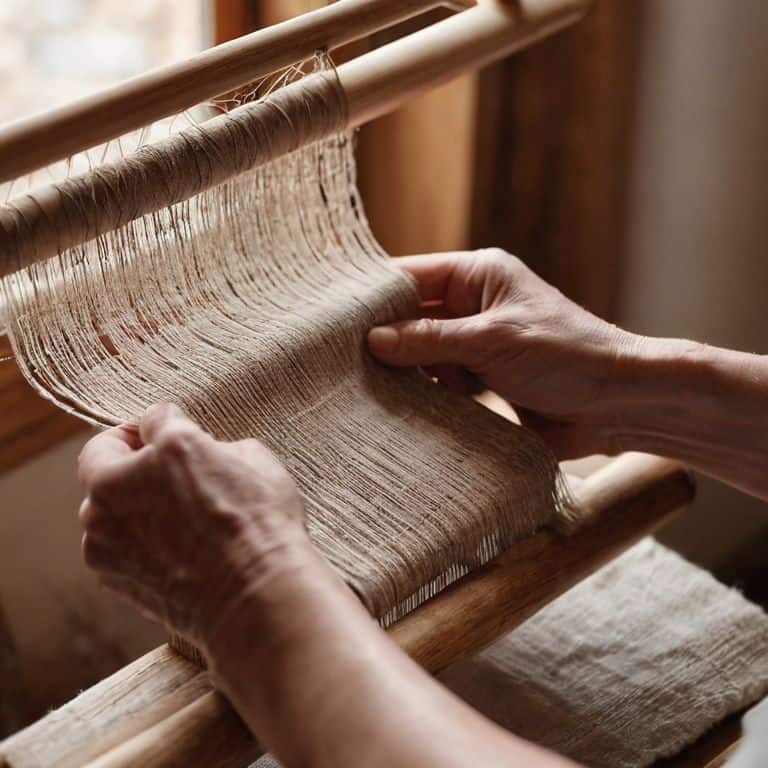
As I work on my latest custom heddle designs, I’m reminded of the importance of choosing the right materials. For a homemade heddle, I recommend using durable woods like oak or maple, which can withstand the tension of the yarn. When paired with a rigid heddle loom, these heddles can produce beautiful, intricate patterns.
One of my favorite things about weaving with a homemade heddle is the flexibility it offers. You can experiment with different yarns, colors, and textures to create unique pieces. For beginners, I suggest starting with simple craft stick weaving ideas to get a feel for the process. As you gain more experience, you can move on to more complex projects, like creating your own diy loom parts tutorials.
When it comes to heddle making materials, the possibilities are endless. I’ve used everything from wood to metal to create my heddles. The key is to find a material that works well with your yarn and weaving style. By making your own heddle, you’ll not only save money but also gain a deeper understanding of the weaving process, allowing you to create truly custom pieces that reflect your personal style.
Crafting Custom Heddle Designs
Now that we’ve covered the basics, let’s talk about taking your heddle game to the next level. Crafting custom heddle designs is where things get really exciting – it’s like unlocking a whole new world of weaving possibilities. I love experimenting with different woods and designs to create one-of-a-kind heddles that reflect my personality and style.
By playing around with various materials and patterns, you can create a heddle that’s not only functional but also a beautiful piece of art. I’ve made heddles with intricate inlays, custom engravings, and even ones that incorporate found objects like driftwood or antique metal parts. The key is to let your imagination run wild and have fun with the process – after all, that’s what making your own tools is all about.
Weaving Magic With Homemade Heddles
Weaving Magic with Homemade Heddles
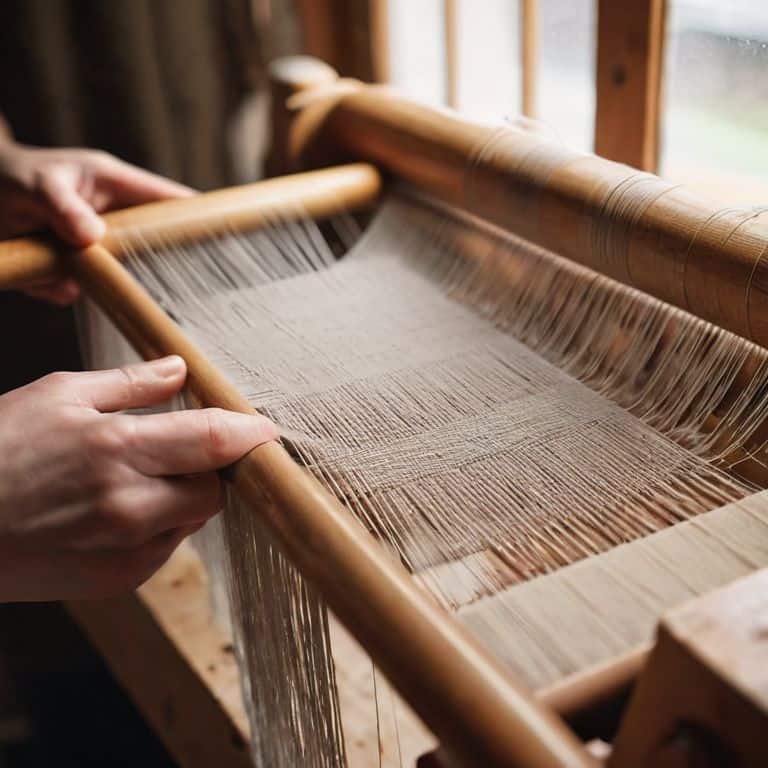
Now that you’ve crafted your very own heddle, it’s time to unleash its full potential. I still remember the first time my wife used a homemade heddle on her loom – the way the yarn seemed to dance through the warp threads, creating a tapestry of intricate patterns and textures. There’s something special about weaving with a tool you’ve made yourself, a sense of connection to the craft that’s hard to find with store-bought alternatives.
As you begin to weave, you’ll notice the subtle differences in tension and texture that your handmade heddle brings to the table. Experiment with different yarns and techniques to find what works best for you, and don’t be afraid to push the boundaries of what’s possible. With a homemade heddle, you’re not just weaving fabric – you’re crafting a piece of art that reflects your unique touch and creativity.
5 Essential Tips for Crafting Your Perfect Heddle
- Choose the Right Wood: Select a hardwood like maple or cherry for your heddle, as they are less prone to warping and will provide a smooth surface for your yarn
- Measure Twice, Cut Once: Double-check your measurements before cutting your wood to ensure accuracy and avoid costly mistakes
- Sand with Care: Use progressively finer grits of sandpaper to achieve a silky smooth finish, and don’t forget to sand in the direction of the wood grain
- Add a Personal Touch: Consider adding a custom design or inlay to your heddle to make it truly unique and reflective of your personal style
- Test and Refine: Before putting your heddle to use, test it with a scrap piece of yarn to ensure it’s working smoothly and make any necessary adjustments to the tension or spacing
Key Takeaways for Crafting Your Perfect Heddle
By following these steps and experimenting with different materials, you can create a custom heddle that suits your weaving needs and adds a personal touch to your projects
With a little patience and practice, making your own heddle can be a fun and rewarding DIY experience that bridges the gap between woodworking and fiber arts
Whether you’re a seasoned weaver or just starting out, crafting your own heddle from scratch can help you develop a deeper understanding of the tools and techniques involved, and inspire you to try new and exciting things in your weaving journey
Weaving Wisdom
The heddle is not just a tool, it’s the bridge between the fiber and the fabric, and crafting your own is a testament to the beauty of human touch in a world of mass production.
Finnian "Finn" Burke
Weaving a Legacy with Your Own Two Hands
As we conclude this journey of making your own heddle, remember that the process is just as important as the product. We’ve covered the essential steps, from selecting the perfect wood to crafting custom designs that reflect your unique style. By following these guidelines, you’ve not only created a functional tool but also a piece of art that will elevate your weaving experience. The satisfaction of creating something with your own hands is unparalleled, and I’m thrilled to have been a part of your creative process.
As you embark on your weaving adventures with your new handmade heddle, I encourage you to experiment and push the boundaries of what’s possible. Don’t be afraid to try new patterns, colors, and textures – after all, that’s what makes weaving so magically expressive. With every thread and every pass of the shuttle, you’re not just creating something beautiful; you’re telling a story that’s uniquely yours. So, go ahead, get weaving, and make every piece a testament to the joy of handmade craftsmanship!
Frequently Asked Questions
What type of wood is best suited for making a heddle?
For a heddle, I recommend using a hardwood like maple or cherry – they’re durable and resistant to wear. I personally love working with maple, the smell of it when sanded is unmistakable. It’s a versatile wood that can withstand the tension of the warp threads, making it perfect for a handmade heddle.
How do I determine the correct number of slots for my homemade heddle?
To determine the correct number of slots for your homemade heddle, consider the type of weaving you’ll be doing and the yarn weight. A good rule of thumb is to space slots about 1/4 inch apart for finer yarns and up to 1/2 inch for thicker ones. I like to think of it as finding a harmony between the yarn, the heddle, and the weave.
Can I customize the size and shape of my heddle to fit specific weaving projects?
Absolutely, you can customize your heddle’s size and shape to fit specific projects. I love experimenting with different designs in my workshop. For instance, a narrower heddle is perfect for weaving scarves, while a wider one suits thicker fabrics. Feel free to get creative and adjust the size and shape to suit your unique weaving needs – it’s all about finding the right fit for your project.