I still remember the first time my wife, a talented weaver, tried to block a lace shawl without using blocking wires. Let’s just say it was a frustrating experience for both of us. She had been searching for a guide to using blocking wires for lace, but all the tutorials she found seemed to assume she already knew the basics. As a carpenter and custom tool maker, I decided to take matters into my own hands and create a simple, straightforward guide to help her master the art of blocking lace.
In this article, I’ll share my honest, no-hype advice on how to use blocking wires to take your lace game to the next level. You’ll learn the basics of blocking wires, from choosing the right type to troubleshooting common issues. My goal is to empower you with the knowledge and confidence to create beautiful, professional-looking lace pieces. Whether you’re a seasoned pro or just starting out, this guide will provide you with the practical tips and tricks you need to succeed. So, let’s get started and explore the world of a guide to using blocking wires for lace together!
Table of Contents
Guide Overview: What You'll Need
Total Time: 1 hour 15 minutes
Estimated Cost: $10 – $30
Difficulty Level: Intermediate
Tools Required
- Blocking wires (various sizes)
- Tapestry needle (for weaving in ends)
- Scissors (dedicated to cutting yarn)
- Measuring tape (for measuring work)
- Yarn needle (for sewing seams)
Supplies & Materials
- Lace weight yarn (choose a fiber that blocks well)
- Stitch markers (optional, for tracking patterns)
- Blocking mat (at least 12 inches by 12 inches)
- Pins (T-pins or rust-resistant pins)
- Mist bottle (for wetting lace before blocking)
Step-by-Step Instructions
- 1. First, let’s talk about preparing your lace for blocking. This is a crucial step that many people overlook, but trust me, it makes all the difference. You want to make sure your lace is clean and free of any finishes that might affect the blocking process. I like to use a mild soap and lukewarm water to gently wash my lace, then let it air dry before moving on to the next step.
- 2. Next, you’ll need to choose the right blocking wires for your project. Now, I know what you’re thinking – what’s the difference between all these wires? Well, my friend, it’s all about the gauge and the material. I prefer to use a sturdy copper wire for its durability and ease of shaping. You’ll want to select a wire that’s suitable for the type of lace you’re working with, so be sure to do your research and choose wisely.
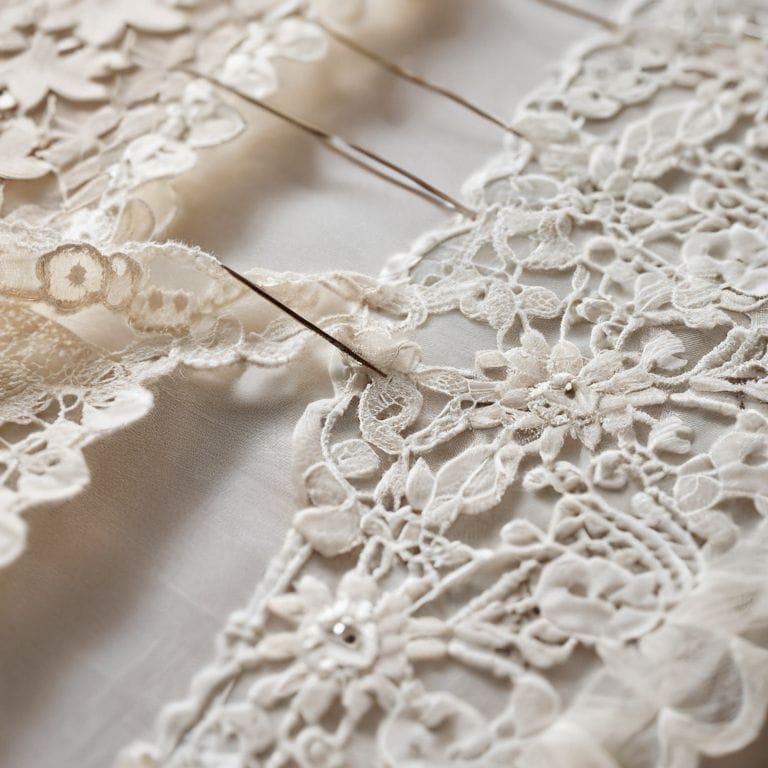
- 3. Now it’s time to thread your blocking wire through the edge of your lace. This can be a bit fiddly, but don’t worry, it’s worth the effort. Start by threading one end of the wire through the first stitch, then gently work your way along the edge, making sure to keep the wire taut but not too tight. You want to create a smooth, even curve that will help your lace lie flat.
- 4. With your wire in place, it’s time to shape your lace. This is where the magic happens, my friends. Use your wire to gently coax your lace into the desired shape, making sure to maintain even tension throughout. Don’t be afraid to experiment and try out different shapes – after all, that’s what blocking is all about.
- 5. Once you’re happy with the shape of your lace, it’s time to secure the wire. I like to use a simple twist tie or a small clamp to keep everything in place. Make sure the wire is snug but not too tight, as you want to allow for a bit of give as the lace dries.
- 6. Now, let’s talk about drying and finishing. Depending on the type of lace you’re working with, you may need to allow it to air dry for several hours or even overnight. I like to use a fan to speed up the process, but be careful not to blow the lace out of shape. Once it’s dry, you can remove the wire and give your lace a good pressing to remove any wrinkles.
- 7. Finally, it’s time to admire your handiwork. Take a step back and appreciate the beauty of your blocked lace. You’ve worked hard to get to this point, and it’s time to enjoy the fruits of your labor. Whether you’re using your lace to create a stunning garment or simply as a decorative element, you can be proud of the fact that you’ve taken the time to create something truly special.
Mastering Lace With Blocking Wires
As I work with blocking wires, I’ve come to realize that mastering even lace tension is crucial for a professional finish. It’s all about finding the right balance, so your lace lies flat and even. To achieve this, I recommend using blocking wires vs pins, as wires allow for a more precise and gentle manipulation of the fabric.
When working with intricate designs, using blocking wires for intricate designs can be a game-changer. By carefully threading the wires through the lace, you can create a stunning piece that showcases your skill and attention to detail. For those just starting out, I recommend exploring lace shawl patterns for beginners, which can help you build confidence and develop the skills needed for more complex projects.
To take your lace to the next level, it’s essential to be mindful of lace knitting mistakes to avoid, such as uneven tension or misshapen stitches. By being aware of these common pitfalls, you can take steps to prevent them and ensure your finished piece is truly exceptional. With practice and patience, you’ll be creating beautiful, intricate lace that will make you proud, and with the right care, your lace fabric care and maintenance routine will keep it looking its best for years to come.
From Loose to Lovely Lace Shawl Patterns
Now that we’ve got the basics of blocking wires down, let’s talk about how to take your lace game to the next level with some stunning shawl patterns. I’ve always been a fan of the classic triangular shawl, but with blocking wires, you can create intricate, curved designs that will make your friends green with envy. From delicate florals to geometric masterpieces, the possibilities are endless.
I’ve experimented with a range of patterns, and I’m excited to share some of my favorites with you. Whether you’re a fan of traditional lace or something more modern, there’s a pattern out there to suit your style. With blocking wires, you can achieve a level of precision and detail that’s hard to match with regular knitting or crochet techniques. Trust me, once you see the results, you’ll be hooked!
Wires vs Pins the Blocking Truth Revealed
When it comes to blocking lace, the debate between wires and pins can get pretty heated. As someone who’s spent countless hours in the workshop, I’ve tried both methods and have to say, wires are my go-to. There’s just something about the way they gently coax the lace into shape, without leaving any pesky pin holes behind. Plus, they’re a total game-changer when it comes to intricate patterns – no more worrying about pins getting in the way or distorting the fabric.
That being said, I do think pins have their place, especially for smaller projects or delicate fabrics. But for big, show-stopping lace shawls, wires are the way to go. Trust me, the extra effort is worth it – there’s nothing quite like the feeling of wrapping yourself up in a beautifully blocked lace shawl, knowing that every stitch is perfectly in place.
5 Essential Tips for Elevating Your Lace Game with Blocking Wires
- Choose the right wire size for your project – too thin and it won’t hold its shape, too thick and it’ll be too stiff
- Use a wire that’s designed specifically for lace, as they’re usually coated to prevent snagging and breakage
- Don’t be afraid to experiment with different wire tensions to achieve the perfect drape and texture
- Always, always, always use a measuring tape or gauge to ensure your wires are evenly spaced and your lace is blocked to the correct dimensions
- Consider using a wire with a bit of ‘give’ for more intricate or curved designs, as it will allow for a more natural, flowing shape
Key Takeaways for Mastering Blocking Wires in Lace Making
Always choose the right blocking wire size for your lace project to ensure even tension and prevent damage to the yarn
Experiment with different blocking wire materials, such as stainless steel or nylon, to find the one that works best for your specific lace pattern and yarn type
Don’t be afraid to mix and match blocking wires with pins or other tools to achieve the perfect shape and texture for your lace shawl or other project
Bringing It All Together
As we’ve explored in this guide to using blocking wires for lace, the key to mastering this technique lies in understanding the basics of tension and balance. We’ve covered the essential steps for using blocking wires, from preparing your lace piece to securing it with wires or pins, and even delved into the art of wire vs pin blocking. By grasping these fundamental concepts and practicing them with patience and dedication, you’ll be well on your way to creating lace pieces that are truly lovely and professional-looking.
So, as you put down your blocking wires and step back to admire your handiwork, remember that the true beauty of lace lies not just in its intricate patterns, but in the process of creation itself. Don’t be afraid to experiment, try new things, and make mistakes – for it’s in these moments of creative freedom that we often discover our most stunning, one-of-a-kind pieces.
Frequently Asked Questions
What are the best types of blocking wires to use for delicate lace patterns?
For delicate lace patterns, I swear by flexible, stainless steel blocking wires – they’re gentle on your work and won’t leave kinks. I also love using nylon-coated wires, they reduce friction and prevent snagging. Both are game-changers for preserving those intricate details.
How do I determine the right tension for blocking wires to achieve a professional finish?
To determine the right tension, gently stretch your lace piece over the blocking wires, then tweak until it’s taut, but not too tight – you want a smooth, even drape. Think of it like tuning a guitar string: not too loose, not too tight, just right.
Can I use blocking wires for other types of fiber projects, such as crochet or tapestry weaving?
Absolutely, blocking wires aren’t just for lace! I’ve seen them used to great effect in crochet and tapestry weaving projects, helping to even out stitches and add definition. Just be sure to choose the right gauge wire for your project’s specific needs – I’ve got a whole section on wire selection in my workshop notes, if you’re curious.