
I still remember the first time I struggled with how to increase and decrease in crochet. I was working on a beautiful lace shawl, and my tension was all off, resulting in a piece that was more like a misshapen blob than a elegant garment. It wasn’t until I mastered the art of increasing and decreasing that my crochet projects started to look like, well, something I’d actually want to wear or display in my home. The truth is, getting a handle on these fundamental techniques can make all the difference between a professional-looking piece and one that looks like it was made by a beginner.
In this article, I’ll share my no-nonsense approach to increasing and decreasing in crochet, including tips and tricks I’ve learned along the way. You’ll learn how to confidently add or subtract stitches to achieve the perfect fit and texture, and how to troubleshoot common mistakes that can throw off your entire project. My goal is to empower you with the knowledge and skills to take your crochet game to the next level, so you can create beautiful, handmade items that reflect your personal style and bring joy to your life. By the end of this guide, you’ll be well on your way to mastering the art of how to increase and decrease in crochet, and unlocking a world of creative possibilities.
Table of Contents
- Guide Overview: What You'll Need
- Step-by-Step Instructions
- Mastering Crochet Increases
- Stitch Savvy: 5 Essential Tips for Mastering Increases and Decreases in Crochet
- Key Takeaways to Elevate Your Crochet Game
- The Art of Balance
- Embracing the Art of Crochet: A Journey of Twists and Turns
- Frequently Asked Questions
Guide Overview: What You'll Need
Total Time: 1 hour 15 minutes
Estimated Cost: $10 – $20
Difficulty Level: Intermediate
Tools Required
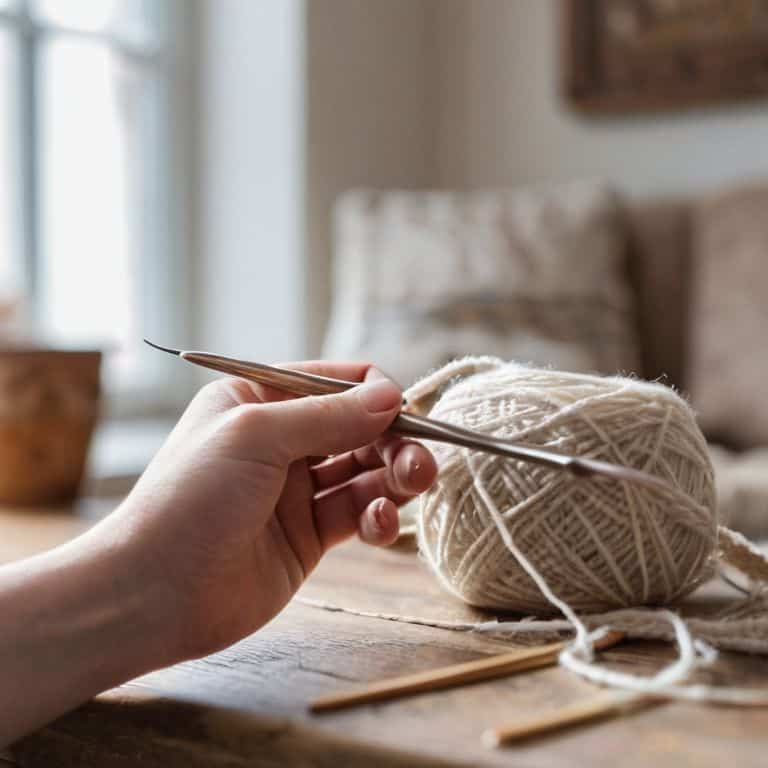
- Crochet Hook (size depending on project)
- Tapestry Needle (for weaving in ends)
Supplies & Materials
- Crochet Pattern or Tutorial
- Yarn (in desired color and weight)
- Scissors
- Stitch Markers (optional)
Step-by-Step Instructions
- 1. First, let’s talk about increasing stitches in your crochet project. To do this, you’ll need to create a new stitch in the middle of your existing stitches. Start by inserting your hook into the stitch where you want to increase, and then yarn over. Pull the yarn through the stitch, but don’t pull it all the way – you want to leave a small loop on the hook. Now, take the yarn and wrap it around the hook again, and pull it through the loop you just created. This will give you one new stitch. Repeat this process as many times as you need to, depending on how many stitches you want to increase.
- 2. Next up, let’s dive into decreasing stitches. This can be a bit trickier, but don’t worry, I’ve got you covered. To decrease a stitch, you’ll need to work two stitches together. Insert your hook into the first stitch, and then into the second stitch. Yarn over, and pull the yarn through both stitches. You should now have one loop on the hook. Pull the yarn tight to secure the decrease, and voila! You’ve just decreased one stitch.
- 3. Now that you know the basics of increasing and decreasing, let’s talk about evening out your stitches. This is where things can get a bit fiddly, but trust me, it’s worth it. To even out your stitches, you’ll need to count them carefully and make adjustments as needed. If you find that you have too many stitches in one area, you can decrease a few to even things out. On the other hand, if you have too few stitches, you can increase a few to get the right fit.
- 4. One of the most important things to keep in mind when increasing and decreasing is to pay attention to your tension. If your tension is too tight, you may find that your stitches are uneven or that your fabric is stiff. On the other hand, if your tension is too loose, your stitches may be sloppy or your fabric may be too loose. To get the right tension, try to keep your stitches consistent and even, and don’t be afraid to adjust as needed.
- 5. Another tip for mastering the art of increase and decrease is to practice, practice, practice. Don’t be discouraged if it takes a few tries to get the hang of it – increasing and decreasing can take some time to get used to. Start with a simple project, like a scarf or a hat, and practice increasing and decreasing until you feel comfortable with the stitches.
- 6. As you get more comfortable with increasing and decreasing, you can start to experiment with different patterns and stitches. Try combining increases and decreases to create interesting textures and shapes. You can also play around with different yarn weights and colors to add visual interest to your project.
- 7. Finally, don’t be afraid to make mistakes and try again. Increasing and decreasing can be a bit tricky, and it’s easy to make mistakes. But the beauty of crochet is that it’s easy to fix mistakes – just frogging (rip out) your work and start again. Remember, the most important thing is to have fun and enjoy the process of creating something with your own hands.
Mastering Crochet Increases
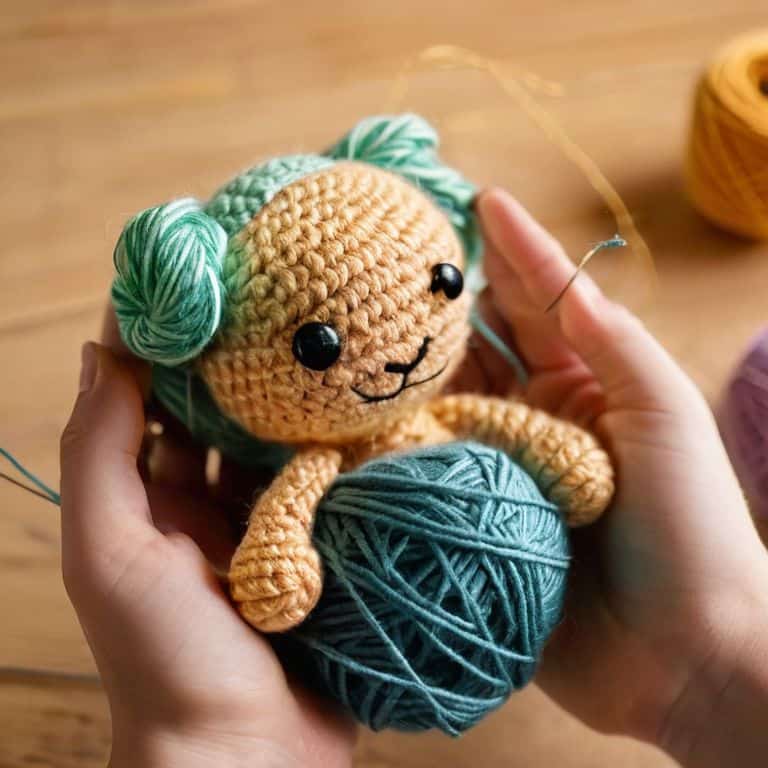
As I dive deeper into the world of crochet, I’ve come to realize that mastering the art of increasing stitches is a game-changer. It’s amazing how a simple increase can transform a flat piece of fabric into a beautiful, three-dimensional shape. When working on amigurumi toys, for instance, increasing stitches in just the right spots can bring your characters to life. I’ve found that it’s all about understanding the math behind the stitches, and how to use it to your advantage.
One of my favorite things about crochet is the freedom to experiment and try new things. When it comes to increasing stitches, I love to play with different techniques, like the double crochet increase or the half double crochet increase. Each one gives a unique texture and visual interest to your work. Whether you’re making a beautiful lace shawl or a cute amigurumi toy, increasing stitches with confidence is key to creating a professional-looking finish.
As you practice increasing stitches, you’ll start to develop a sense of crochet intuition, knowing just when to add a stitch to create the perfect shape. This is especially important when working on garments, where a well-placed increase can make all the difference in the fit. With time and practice, you’ll become a pro at shaping your crochet projects, and the world of possibilities will open up to you.
Crochet Stitch Reduction Methods
Now that we’ve got increasing down, let’s talk about the flip side: decreasing. I like to think of it as editing – you’re refining your work, making sure every stitch counts. To decrease, you’ll essentially be working two stitches together as one. It’s a subtle move, but it makes a big difference in the overall fit and flow of your project. Whether you’re making a sweater, a hat, or a scarf, knowing how to decrease is key to getting that perfect shape.
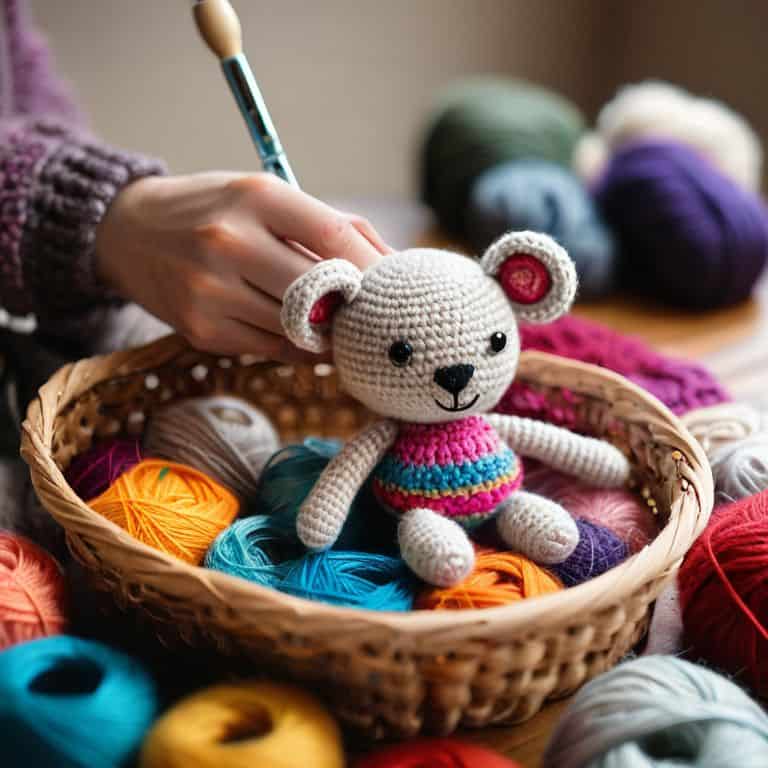
Increasing Stitches in Amigurumi Toys
When it comes to amigurumi toys, increasing stitches is an art that requires a gentle touch. You want to make sure your cute creatures have the right proportions, and that means knowing just when to add a few extra loops. For me, it’s all about creating a sense of whimsy and playfulness in every stitch. I love using the classic increase method, where you simply work two stitches in one, to add volume to those adorable amigurumi heads and bodies.
To get it just right, I always make sure to count my stitches carefully, and adjust as needed to maintain that perfect balance of cute and cuddly. With a little practice, you’ll be hooked (pun intended!) on creating amigurumi friends that are uniquely yours, and full of personality. Whether you’re making a sweet bunny or a happy hedgehog, mastering the art of increasing stitches will take your toys to the next level.
Stitch Savvy: 5 Essential Tips for Mastering Increases and Decreases in Crochet
- Know your stitch: Understanding the type of stitch you’re working with is crucial for making seamless increases and decreases – it’s all about the rhythm of the yarn and hook
- Swatch it out: Before diving into your project, create a swatch to practice your increases and decreases – trust me, it’s a game-changer for getting the hang of it
- Count those stitches: Keeping track of your stitch count is vital for ensuring your increases and decreases are even and symmetrical – don’t be afraid to get out the old pencil and paper
- Read your work: Pay attention to the fabric of your crochet piece as you go, adjusting your increases and decreases accordingly to achieve the desired texture and drape
- Practice, practice, practice: The more you crochet, the more intuitive increases and decreases will become – don’t be too hard on yourself if it takes time to get the hang of it, just keep on hooking
Key Takeaways to Elevate Your Crochet Game
Mastering the art of increasing and decreasing stitches is all about experimentation and patience – don’t be afraid to try new things and make mistakes along the way
Understanding how to reduce stitches is just as important as increasing them, and can make all the difference in achieving the perfect fit for your crochet projects
Whether you’re working on amigurumi toys or complex garments, the ability to confidently increase and decrease stitches will open up a world of creative possibilities and take your crochet skills to the next level
The Art of Balance
The beauty of crochet lies not in perfection, but in the gentle dance of increase and decrease, where every stitch tells a story of imperfection and uniqueness, reminding us that it’s okay to stray from the pattern and make it our own.
Ruby Warren
Embracing the Art of Crochet: A Journey of Twists and Turns
As we’ve explored the world of crochet increases and decreases, I hope you’ve come to realize that it’s all about finding your own rhythm and embracing the imperfections. We’ve covered the essential steps, from mastering crochet increases to reducing stitches with ease, and even delved into the whimsical realm of amigurumi toys. Remember, the key to becoming a skilled crochet artist lies in practice, patience, and a willingness to experiment with different techniques. Don’t be afraid to try new things and make mistakes – they’re an integral part of the learning process.
So, as you put down your hook and yarn for the day, I want to leave you with a final thought: the true beauty of crochet lies in its uniqueness. Every stitch, every increase, and every decrease is a reflection of your personality and creativity. Don’t be tempted to compare your work to others – instead, celebrate your individuality and the fact that you’re creating something truly one-of-a-kind. Happy hooking, and I’ll see you in the next tutorial!
Frequently Asked Questions
What's the best way to hide the extra yarn when decreasing stitches in a crochet project?
Hiding extra yarn when decreasing stitches can be a bit tricky, but I’ve got a secret for you: try weaving it in as you go or using a yarn needle to sew it in securely. You can also use a stitch marker to keep track of where you’ve decreased, making it easier to hide that excess yarn. Voilà, a seamless finish!
How do I know when to increase or decrease stitches to achieve the perfect fit for my amigurumi toy?
For me, it’s all about feeling the fabric of the project and trusting my instincts. I like to think of it as a conversation with the yarn – when it feels too tight, I know it’s time to increase, and when it’s too loose, I decrease. With amigurumi toys, it’s especially important to pay attention to the shape and proportions, so don’t be afraid to try it on as you go!
Can I use the same increase and decrease techniques for different types of crochet stitches, like single crochet and half double crochet?
Ah, great question, friend! While the basic concept of increase and decrease applies across stitches, the specifics can vary. For single crochet and half double crochet, you’ll want to adjust your technique slightly. I like to think of it as a fun puzzle to solve – just remember, it’s all about balancing those stitches to keep your fabric even and lovely!