I still remember the day my wife, an avid weaver, came to me with a handful of colorful pom poms and asked if I could help her find some creative ways to use them in our decor. At first, I thought it was just a quirky idea, but as I started brainstorming with her, I realized that pom poms can add a playful touch to any room. We started experimenting with different designs and soon discovered that creative ways to use pom poms in your decor can be both fun and functional. From colorful garlands to decorative accents, the possibilities are endless, and I’m excited to share our favorite ideas with you.
In this article, I’ll show you how to bring some personality to your space with easy-to-make pom pom projects. You’ll learn how to create beautiful, one-of-a-kind pieces that reflect your personal style, from simple pom pom ornaments to more complex designs like macrame wall hangings. My goal is to empower you with the skills and confidence to try new things and make your home truly unique. Whether you’re a seasoned crafter or a DIY beginner, I’ll guide you through each step with clear instructions and photos, so you can enjoy the process of creating something beautiful and functional from scratch.
Table of Contents
Guide Overview: What You'll Need
Total Time: 1 hour 15 minutes
Estimated Cost: $10 – $30
Difficulty Level: Easy
Tools Required
- Scissors (sharp and dedicated to cutting pom poms)
- Hot Glue Gun (with extra glue sticks)
- Styrofoam Ball (various sizes)
- String or Twine (for hanging pom poms)
- Tape Measure (for measuring spaces for decoration)
Supplies & Materials
- Pom Poms (various colors and sizes)
- Fabric (for creating pom pom garlands)
- Sticks or Wires (for creating pom pom mobiles)
- Glitter or Sequins (optional for added decoration)
- Cardboard or Paper (for creating pom pom ornaments)
Step-by-Step Instructions
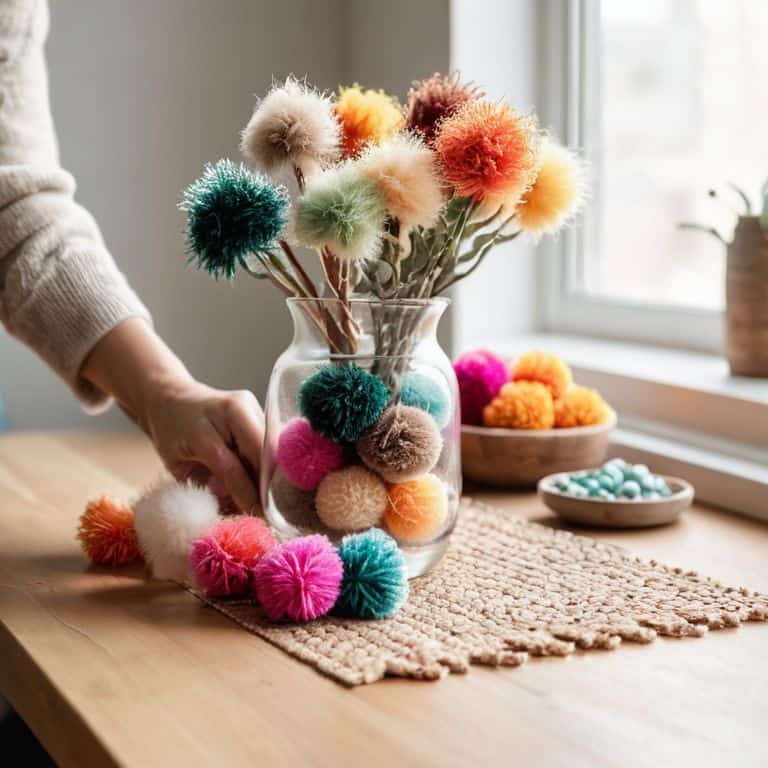
- 1. First, let’s start by gathering our materials, which will include pom poms in various sizes and colors, a hot glue gun, scissors, and any base material we want to decorate, like a vase, picture frame, or even a piece of furniture. I love the feeling of preparing for a new project, and I’m sure you will too as we dive into this fun and creative process.
- 2. Next, we need to plan our design. This is where the magic happens, and our imagination runs wild. Think about the theme, color scheme, and the overall aesthetic you want to achieve. Do you want a playful, whimsical look or something more elegant and sophisticated? Consider sketching out a few ideas or looking for inspiration online to get those creative juices flowing.
- 3. Now, let’s talk about preparing our surface. If we’re decorating something like a vase or a box, we might need to clean it first to ensure our glue adheres properly. For more complex shapes or surfaces that might not take glue well, like fabric or wood, we can use other adhesives or even sew the pom poms on. It’s all about experimenting and finding what works best for our specific project.
- 4. With our surface ready, it’s time to start attaching the pom poms. Using our hot glue gun, we’ll apply a small amount of glue to the base of a pom pom and then attach it to our surface. It’s a good idea to start with the larger pom poms first and then fill in the gaps with the smaller ones. Remember, less is often more, so don’t be afraid to step back and evaluate your design as you go.
- 5. As we continue adding more pom poms, let’s think about creating texture and depth. We can achieve this by layering pom poms of different sizes or by leaving some areas of our surface undecorated to create contrast. This step is all about playing with dimensions and seeing what looks visually appealing to us.
- 6. Once we’ve covered our surface to our liking, it’s time to add any finishing touches. This might include adding a coat of varnish to protect our work, especially if it’s going to be exposed to the elements, or adding some decorative trim around the edges. It’s also a good time to step back and admire our handiwork, making sure everything is securely attached and looking its best.
- 7. Finally, let’s display our masterpiece. Whether it’s a centerpiece for our dining table, a decoration for our wall, or a unique gift for a friend, our pom pom decorated item is sure to bring a pop of color and fun into any room. Don’t be afraid to experiment with different placements and settings to find where it looks best.
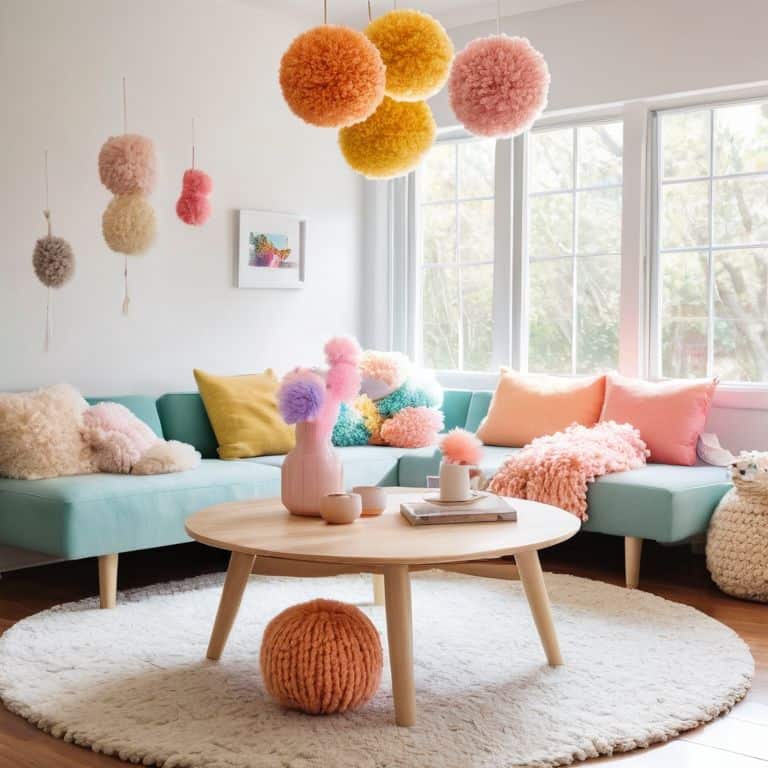
Pom Pom Decor Magic
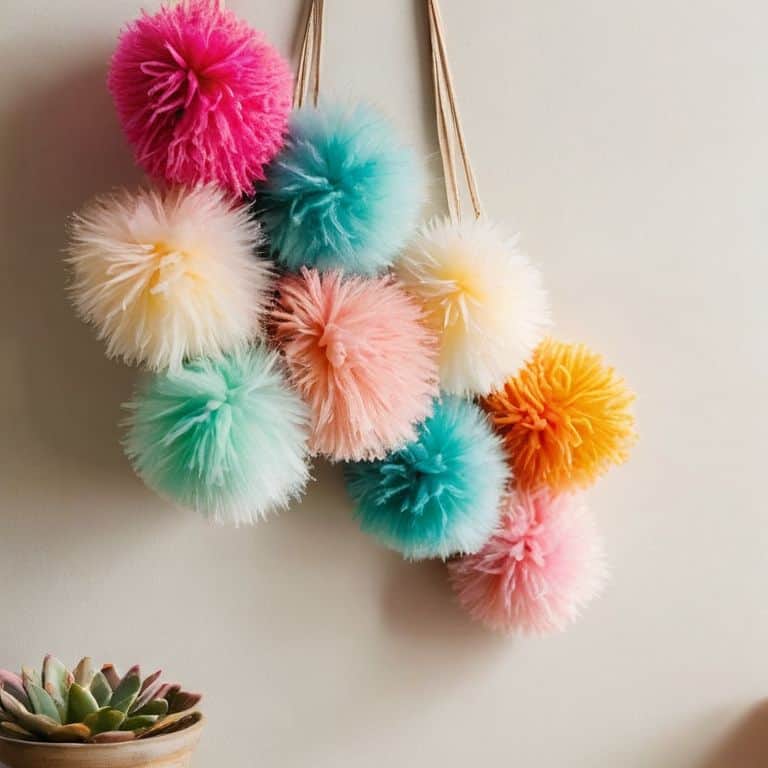
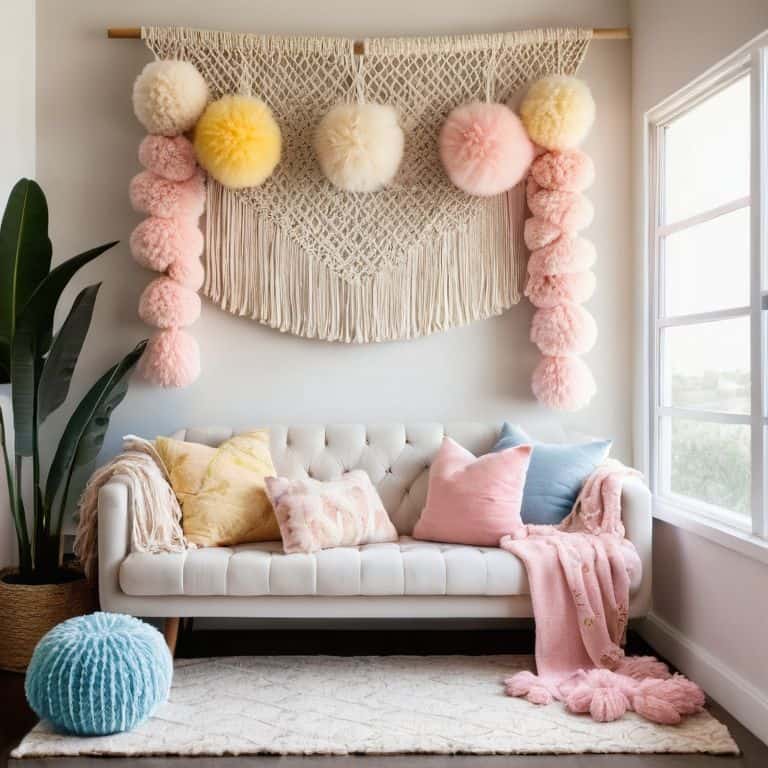
As I delve into the world of pom pom decor, I’m reminded of the magical touch it adds to any room. One of my favorite ways to incorporate pom poms is by creating a diy pom pom wall hanging. It’s a simple yet effective way to bring a pop of color and texture to a blank wall. I love using a mix of bright and pastel hues to create a unique piece that reflects my personality.
When it comes to parties, pom pom garland ideas are a great way to add a festive touch. I like to use a combination of large and small pom poms in complementary colors to create a visually appealing garland. You can hang it above the food table or along the stairs to create a fun and playful atmosphere. For a more subtle look, you can also use pom poms as a decorative accent in your centerpiece or wreath.
To take your pom pom decor to the next level, consider experimenting with different materials and textures. You can use handmade pom pom rug tutorial as a guide to create a one-of-a-kind rug that adds warmth and coziness to your space. Alternatively, you can explore pom pom craft supplies for kids and create a fun and interactive project with your little ones. Whatever you choose, remember to have fun and be creative with your pom pom decor!
Diy Pom Pom Wall Hanging Fun
Now that we’ve explored the magical world of pom pom decor, let’s dive into one of my favorite projects: creating a stunning DIY pom pom wall hanging. I love how this project combines colorful pom poms with a natural wood dowel, adding a touch of handmade charm to any room. To get started, simply thread your favorite pom poms onto a length of twine or yarn, spacing them out to create a visually appealing pattern.
As you work on your wall hanging, don’t be afraid to experiment with different pom pom sizes, colors, and textures. You can also add some greenery, like eucalyptus or ferns, to give your piece a fresh, organic feel. Once you’re happy with your design, tie off the ends and attach the twine to a wooden dowel or rod. Hang your masterpiece in a doorway, window, or above a fireplace for a playful touch that’s sure to spark conversations.
Pom Pom Garland Party Ideas
Now that we’ve explored the whimsy of DIY pom pom wall hangings, let’s take the party to the next level with pom pom garlands. I love how a simple string of colorful pom poms can add a playful touch to any room. To create your own, start by threading pom poms onto a twine or yarn, spacing them out to your desired density. You can also experiment with mixing different sizes and colors for a unique look.
For a more festive feel, try adding a few decorative elements like beads or tiny bells to your garland. This is a great project to get creative with, and it’s perfect for a fun afternoon of crafting with friends or family. With a pom pom garland, you can instantly elevate your space and bring a smile to everyone’s face.
Pom Pom Perfection: 5 Tips to Elevate Your Decor
- Choose the Right Pom Pom Size: Don’t be afraid to mix and match different sizes to add visual interest to your space
- Play with Colors: Experiment with bold, bright hues and soft pastels to create unique pom pom combinations that reflect your personality
- Get Creative with Shapes: Move beyond the traditional round pom pom and try using different shapes, like flowers or stars, to add an extra layer of whimsy
- Combine with Other Textiles: Pair your pom poms with other materials like felt, lace, or burlap to create a rich, layered look
- Lighting is Everything: Use string lights or fairy lights to illuminate your pom pom creations and add an extra touch of magic to your decor
Pom Pom Project Takeaways
I’ve found that the key to making pom pom decor truly special is in the details, like using a variety of yarn colors and textures to add depth and visual interest
Creating a beautiful pom pom wall hanging or garland is all about balance – don’t be afraid to experiment and adjust your design as you go to get the look just right
With a little patience and practice, you can use pom poms to add a playful, handmade touch to any room in your home, from a funky nursery to a cozy reading nook
Wrapping Up the Pom Pom Fun
As we’ve explored the creative ways to use pom poms in your decor, I hope you’ve enjoyed the journey from making your own pom poms to creating a stunning Pom Pom Wall Hanging or a vibrant Pom Pom Garland. We’ve delved into the world of DIY Pom Pom Wall Hanging Fun and discovered how to throw a Pom Pom Garland Party that your guests will never forget. The key to making these projects truly special is to remember that it’s all about having fun and experimenting with different colors, textures, and patterns.
As you finish your pom pom project and step back to admire your handiwork, remember that the true magic happens when you let your imagination run wild and embrace the process. Don’t be afraid to try new things and make mistakes – they can often lead to unexpected surprises and a sense of pride in your creations. Happy crafting, and I look forward to seeing the amazing things you’ll make with your newfound love of pom poms!
Frequently Asked Questions
What are some alternative materials I can use to make pom poms if I don't have the traditional yarn?
No yarn? No problem! I love experimenting with alternative materials. You can try using twine, hemp, or even strips of fabric to create unique pom poms. I’ve also had success with wool roving and thin strips of leather. The key is to find a material with some texture and flexibility. Get creative and see what works for you!
How do I prevent pom poms from getting tangled or messy when using them in decor?
To keep pom poms from getting tangled, I swear by a simple trick: use a bit of hairspray to set them in place. It’s an old woodworker’s hack – a light hold that keeps things from getting messy. Just spritz, fluff, and you’re good to go!
Can I use pom poms in outdoor decor, and if so, how can I protect them from the elements?
Absolutely, you can use pom poms in outdoor decor. To protect them from the elements, try using waterproof glue or a clear coat of varnish. You can also make pom poms from water-resistant materials like nylon or polyester. I’ve used them on my porch in a fun garland, and with a little extra care, they’ve held up beautifully to the weather.