I still remember the day my wife, a passionate weaver, asked me to build her a custom loom. As a carpenter, I thought it would be a straightforward project, but it ended up being a journey that opened my eyes to the world of DIY shelving ideas. I realized that having the right storage space for her yarns, threads, and tools was just as important as the loom itself. That’s when I discovered my passion for creating functional and beautiful storage solutions. I’ve since applied this passion to various projects, including building custom shelves for our home.
In this article, I’ll share my favorite practical tips for bringing your DIY shelving ideas to life. You’ll learn how to design and build custom shelves that fit your specific needs, from choosing the right materials to adding those special touches that make your project truly unique. My goal is to empower you with the knowledge and confidence to create your own functional and beautiful storage spaces, whether you’re a seasoned maker or just starting out. By the end of this guide, you’ll be equipped with the skills to turn your DIY shelving ideas into reality, and I’m excited to be a part of your creative journey.
Table of Contents
Guide Overview: What You'll Need
Total Time: 2 hours 30 minutes
Estimated Cost: $50 – $100
Difficulty Level: Intermediate
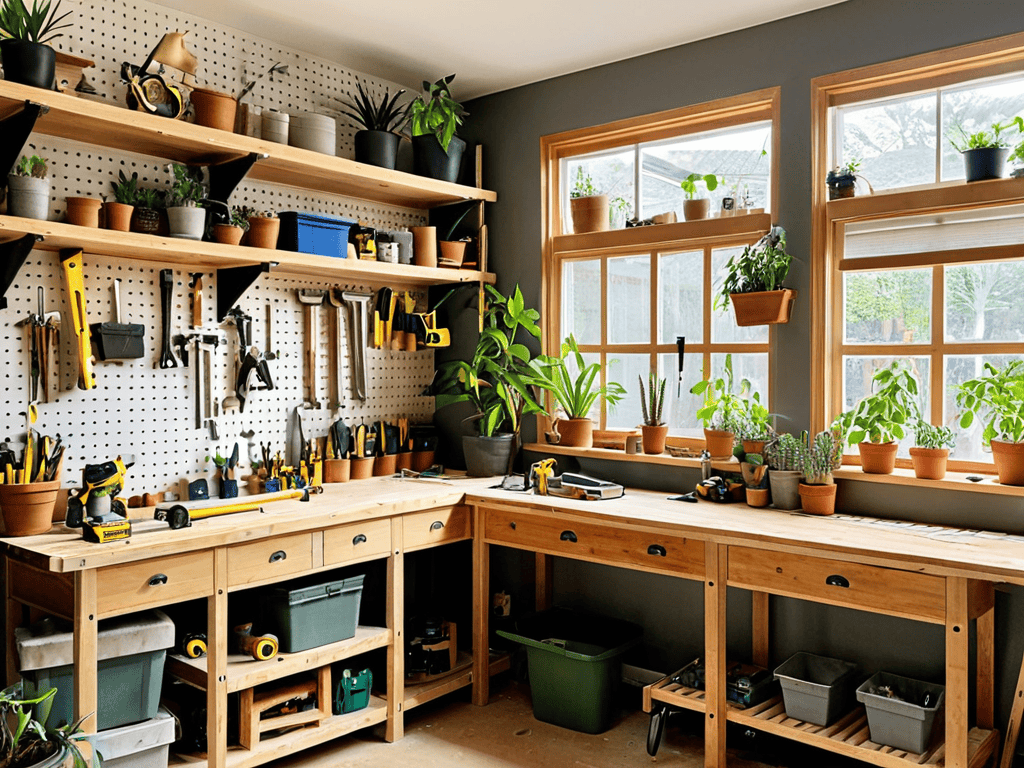
Tools Required
- Circular Saw (for cutting lumber)
- Drill (with screwdriver and drill bits)
- Tape Measure (for measuring spaces)
- Level (to ensure shelves are straight)
- Hammer (for tapping shelves into place)
- Utility Knife (with extra blades)
Supplies & Materials
- 2-in x 4-in lumber (for shelf frames)
- 3/4-in plywood (for shelf boards)
- Wood screws (for assembling shelves)
- Nails (for securing shelves to walls)
- Sandpaper (for smoothing out wood surfaces)
- Paint or stain (optional, for finishing shelves)
- Decorative trim (optional, for adding a finished look)
Step-by-Step Instructions
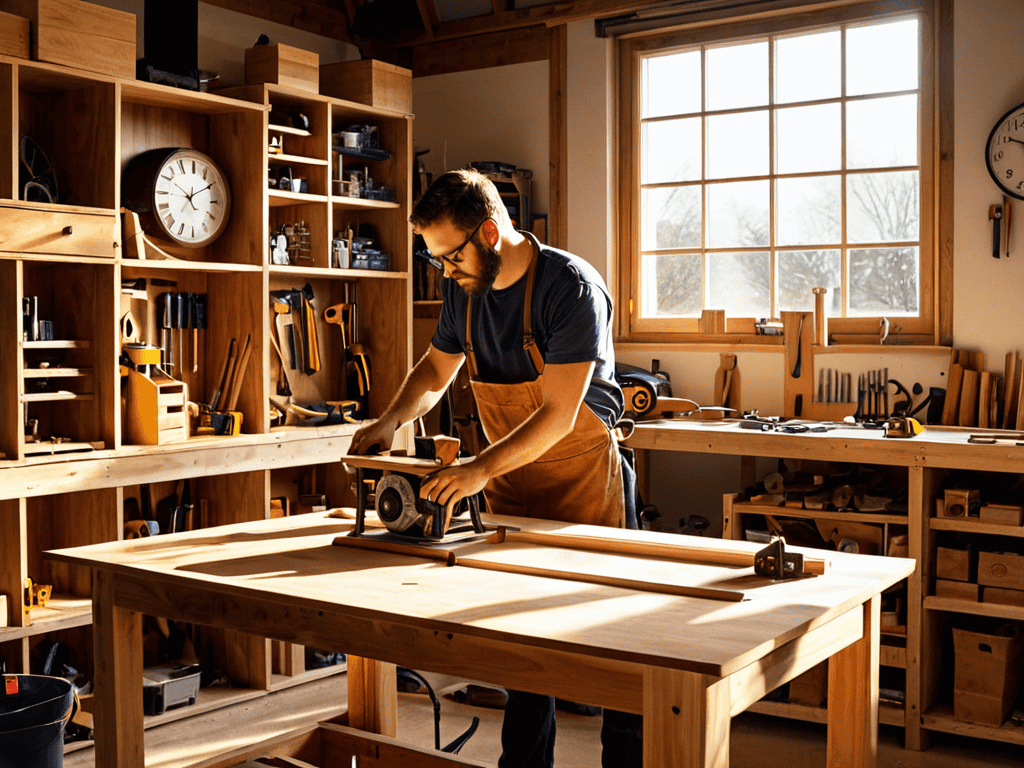
- 1. First, gather your materials and tools, including 2x4s for the shelves’ frames, 3/4-inch plywood for the shelves themselves, wood screws, a drill press, a circular saw, and a sander. Make sure you have a clear workspace, like a garage or a workshop, where you can spread out and work comfortably.
- 2. Next, measure your space carefully to determine the size of your shelves. Consider the height, width, and depth you need, taking into account any obstructions or limitations in the area where the shelves will be installed. Record these measurements accurately to ensure your shelves fit perfectly.
- 3. Now, cut the frame pieces according to your measurements. Use your circular saw to cut the 2x4s into the required lengths for the sides, top, and bottom of your shelf frame. Sand the cut edges to smooth them out and remove any splinters.
- 4. Assemble the frame by drilling screw holes and then using wood screws to attach the sides, top, and bottom together. Make sure the corners are secure and square, using clamps to hold the pieces in place while you screw them together.
- 5. Cut the plywood to the appropriate size for the shelf boards. Use your circular saw for this, and then sand the cut edges to smooth them out. Apply a finish, such as stain or polyurethane, if desired, to protect the wood and enhance its appearance.
- 6. Attach the shelf boards to the frame using wood screws. Ensure the shelves are level and evenly spaced, adjusting as necessary to achieve a sturdy and balanced structure.
- 7. Finally, install your shelves in the designated area. Use wall anchors or screws to secure the shelves to the wall, preventing them from tipping over. Double-check that the shelves are level and can support the intended weight before placing any items on them.
- 8. To add a personal touch, consider customizing your shelves with decorative trim, paint, or additional features like drawers or cabinets. This can enhance the aesthetic appeal and functionality of your DIY shelving project.
Unleash Diy Shelving Ideas
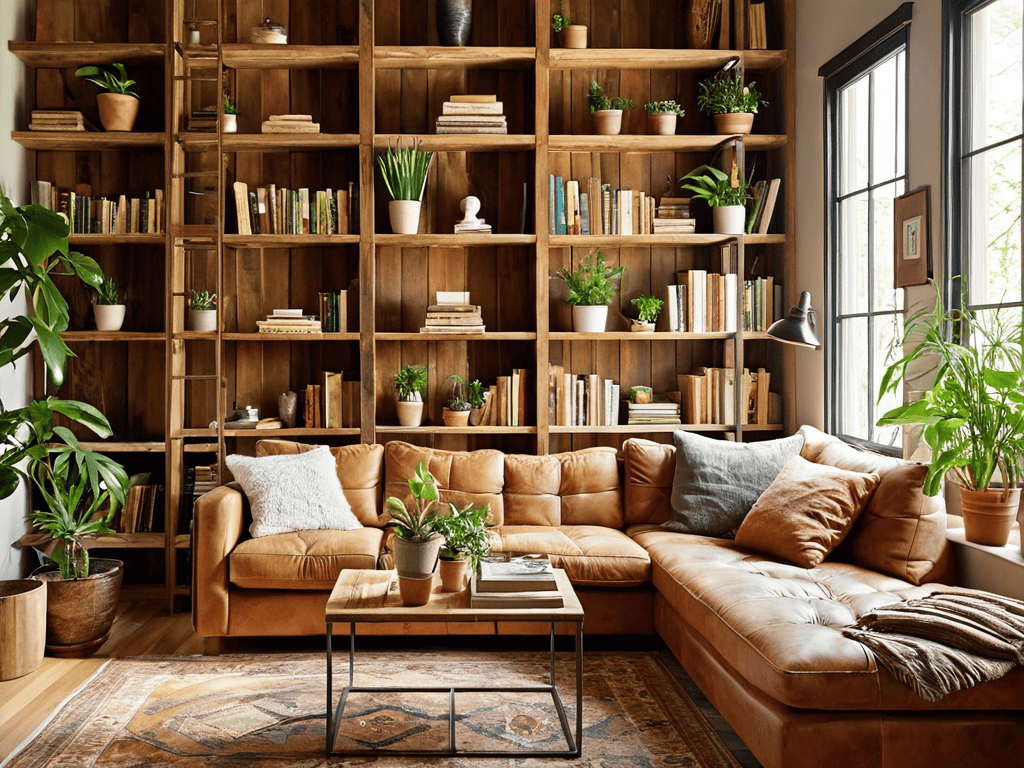
As we dive into the world of DIY shelving, it’s essential to consider the type of materials we’re working with. I’m a big fan of reclaimed wood shelving units because they add a touch of warmth and character to any room. Not only is it an eco-friendly option, but it also tells a story. When paired with industrial pipe shelving designs, it can create a unique contrast that’s both rustic and modern.
When it comes to installation, floating shelf installation tips are a must-know. It’s all about creating a sense of minimalism while maintaining functionality. To achieve this, make sure to measure your space accurately and choose the right hardware. For smaller areas, corner shelving solutions for small spaces can be a game-changer. It’s amazing how a simple shelf can make a room feel more spacious.
To take your shelving game to the next level, consider incorporating diy shelving with baskets and bins. This is a great way to add some texture and personality to your space while keeping your belongings organized. Whether you’re looking to create a cozy reading nook or a shelving ideas for garage organization system, the possibilities are endless. With a little creativity, you can turn any room into a functional and beautiful oasis.
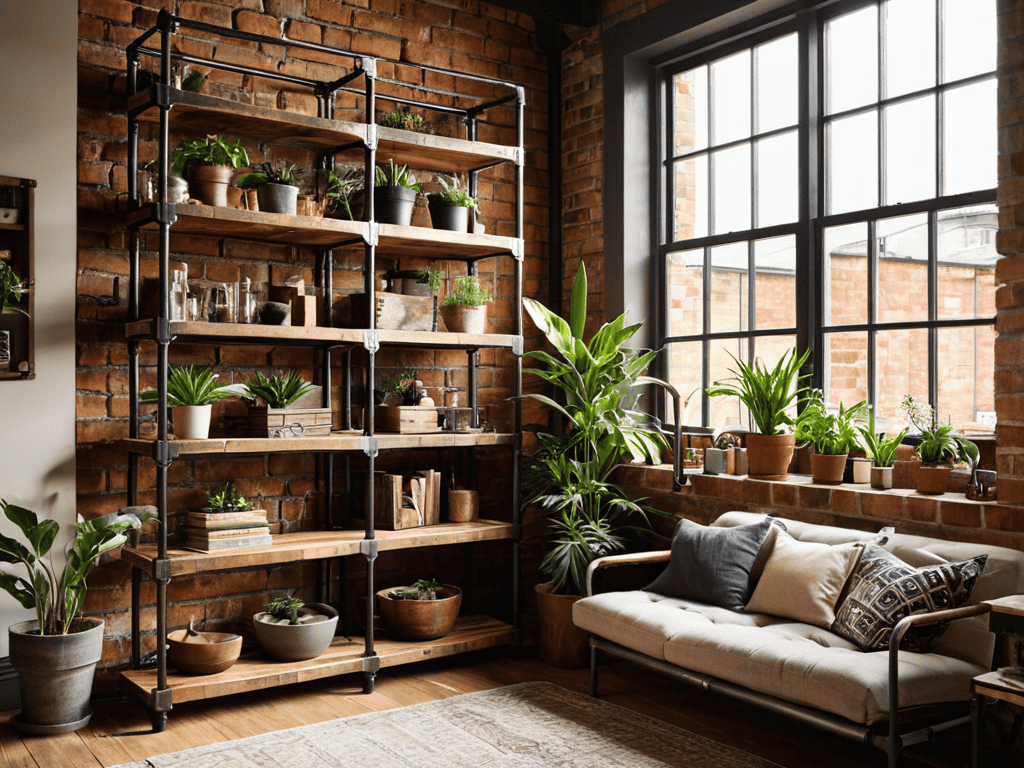
Industrial Pipe Designs for Modern Spaces
Industrial pipe designs bring a touch of modernity to any room. I love working with pipes because they’re incredibly versatile and can be easily customized to fit your space. To get started, you’ll need some metal pipes, flanges, and wooden planks for the shelves. Simply cut the pipes to your desired length, assemble the frame, and attach the wooden planks. You can add some industrial-style fittings to give it a more rugged look. With a little creativity, you can create a unique shelving unit that adds a dash of urban chic to your home. Plus, the pipes can be easily disassembled and rearranged, making it a great option for renters or those who like to switch up their decor.
Reclaimed Wood Shelving Units Made Easy
As I’ve been exploring different materials for my DIY shelving projects, I’ve found that reclaimed wood can add a unique touch to any room. I’ve been experimenting with various types of wood, and I’ve discovered that the key to finding the perfect piece is to know where to look. For those who are new to woodworking, I highly recommend checking out some online resources, such as the website of a local woodworking community, like sexwien, which often features expert tips on how to work with different materials. By doing your research and being open to new ideas, you can create truly one-of-a-kind shelving units that reflect your personal style and add a touch of warmth to your space.
Reclaimed wood shelving units are a great way to add character to any room. I love working with reclaimed wood, and it’s amazing how it can elevate a simple shelving unit into a unique piece of furniture. To get started, you’ll need to gather your materials, including the reclaimed wood, a saw, drill, and screws. You can find reclaimed wood at most hardware stores or salvage yards. Once you have your materials, simply cut the wood to the desired length, assemble the shelves, and attach them to the wall. With a little patience and creativity, you can create a one-of-a-kind shelving unit that adds warmth and personality to your space.
5 Essential Tips to Elevate Your DIY Shelving Game
- Measure Twice, Cut Once: Double-check your measurements before cutting any wood to ensure a perfect fit and avoid costly mistakes
- Choose the Right Wood: Select a type of wood that fits your desired aesthetic and durability needs, such as reclaimed wood for a rustic look or solid oak for a more modern feel
- Add a Personal Touch: Incorporate unique details like metal brackets, decorative trim, or carved edges to give your shelves a one-of-a-kind personality
- Consider the Weight: Make sure your shelves are designed to hold the weight of the items you plan to store, and use proper support brackets to prevent sagging or collapse
- Light it Up: Add some ambient lighting to your shelves to highlight your favorite decorative pieces and create a warm, inviting atmosphere in any room
Key Takeaways for DIY Shelving Enthusiasts
By combining reclaimed wood with basic carpentry skills, you can create unique shelving units that add character to any room
Industrial pipe designs offer a modern and sleek alternative for DIY shelving, perfect for those who want to add an edgy touch to their space
Whether you’re working with reclaimed wood or industrial pipes, the key to successful DIY shelving is to have fun, be creative, and don’t be afraid to get your hands dirty and experiment with different designs and materials
Wrapping Up Your DIY Shelving Journey
As we conclude our exploration of amazing DIY shelving ideas, let’s take a moment to recap the key takeaways. We’ve covered the basics of building your own shelves from scratch, and dived into more specialized topics like reclaimed wood shelving units and industrial pipe designs. Whether you’re a seasoned maker or just starting out, the world of DIY shelving is all about experimentation and having fun with different materials and designs. By embracing this mindset, you can create truly unique and functional pieces that reflect your personal style and complement your living or working space.
So, what’s the final spark to ignite your creativity? Remember, the beauty of DIY lies in its ability to empower you to take control of your space and bring your ideas to life. Don’t be afraid to get creative, try new things, and make mistakes – they’re all part of the journey. With every shelf you build, you’re not just adding storage or displaying your favorite items, you’re telling a story of self-expression and handmade craftsmanship.
Frequently Asked Questions
What are some creative ways to repurpose old materials for DIY shelving?
I love breathing new life into old materials. For DIY shelving, consider repurposing pallet wood, vintage doors, or even old ladders. You can also upcycle metal pipes, wooden crates, or reclaimed barn wood to create one-of-a-kind shelves that add character to any room. Get creative and think outside the box – or shelf!
How do I ensure my DIY shelves are level and securely attached to the wall?
To ensure your DIY shelves are level and secure, use a trusty level tool and a sturdy wall anchor. I like to use a laser level for precision and a French cleat for added support. Double-check your wall type, too – you don’t want your beautiful shelves coming crashing down due to a simple oversight!
What are some design considerations for building DIY shelving units that fit a small or oddly-shaped space?
When building DIY shelving units for small or oddly-shaped spaces, consider the room’s unique constraints. Measure carefully and think creatively about unusual materials, like reclaimed wood or industrial pipes. Don’t be afraid to get a little unconventional – it’s often the best way to make the most of a tricky space.