I still remember the day my wife, an avid weaver, complained about her project bag falling apart – again. That’s when I decided to create a sturdy leather project bag for her, and in the process, I stumbled upon a passion for leatherworking. As I delved deeper into the world of leather crafting, I realized that a good leather project bag is not just about aesthetics, but about functionality and durability. That’s why I’m excited to share with you a guide to making a leather project bag that will last a lifetime.
In this article, I’ll walk you through the process of creating a beautiful, functional leather project bag from scratch. You’ll get honest, no-hype advice on selecting the right leather, measuring, and stitching your bag together. I’ll share my favorite tips and tricks for working with leather, and by the end of this guide, you’ll be equipped with the knowledge to create your own custom leather project bag. Whether you’re a seasoned crafter or a beginner, this guide is designed to be easy to follow and fun to work through. So, let’s get started and create something amazing together!
Table of Contents
- Guide Overview: What You'll Need
- Step-by-Step Instructions
- Crafting Leather Bag Mastery
- Sewing Up Success: 5 Essential Tips for a Top-Notch Leather Project Bag
- Key Takeaways for Crafting Your Leather Project Bag
- The Heart of Leathercraft
- Conclusion: You're Now a Leather Project Bag Master
- Frequently Asked Questions
Guide Overview: What You'll Need
Total Time: 4 hours 30 minutes
Estimated Cost: $50 – $100
Difficulty Level: Intermediate
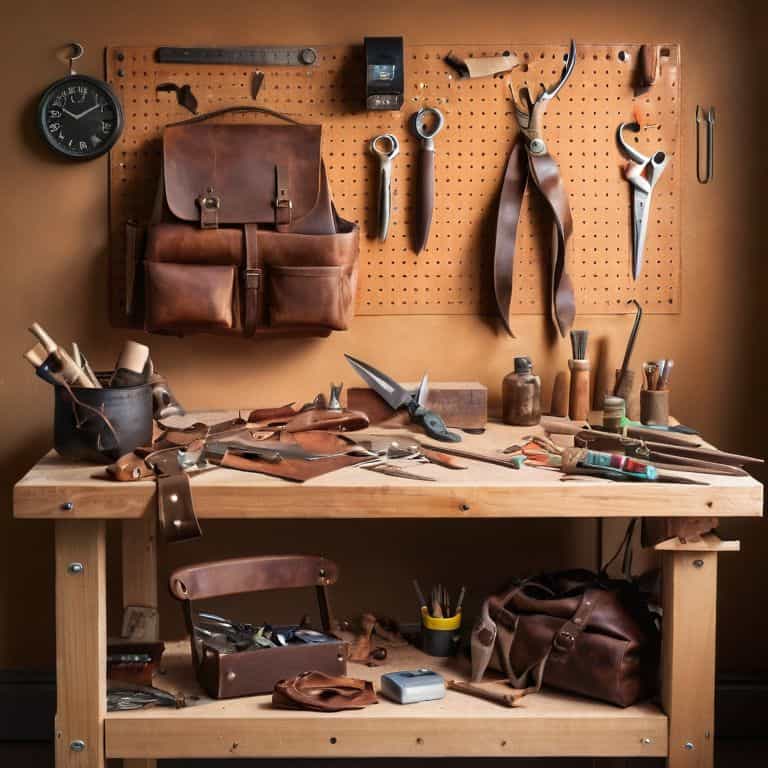
Tools Required
- Utility Knife (with extra blades)
- Ruler (for measuring and cutting leather)
- Pencil (for marking leather)
- Leather Hole Punch (for creating holes for stitching)
- Hammer (for tapping holes and shaping leather)
- Sewing Machine (optional for sewing leather pieces together)
- Leather Edge Beveler (for smoothing and finishing leather edges)
Supplies & Materials
- Leather Sheets (available in various sizes, e.g., 12 inches x 12 inches)
- Leather Thread (for stitching leather pieces together)
- Leather Glue (for bonding leather pieces together)
- Fabric Interfacing (optional for adding stability and structure to the bag)
- Metal Rivets (for reinforcing stress points and adding decorative elements)
- Leather Conditioner (for protecting and maintaining the leather)
Step-by-Step Instructions
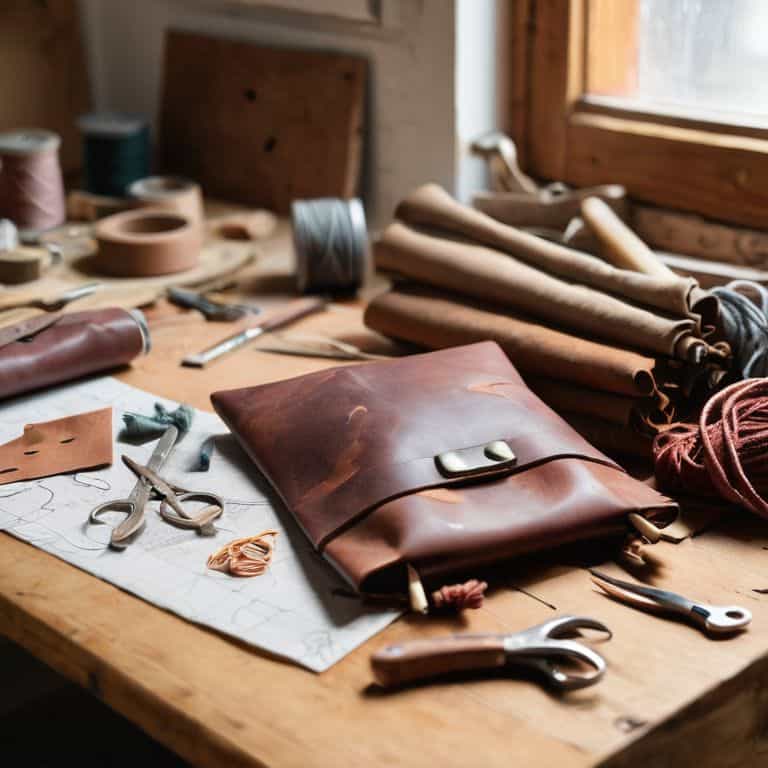
- 1. First, let’s start by gathering our materials, which include a piece of high-quality leather, some durable thread, a few brass rivets, and a leather needle. I like to use a thick, full-grain leather for my project bags because it’s sturdy and develops a beautiful patina over time. Make sure you have all your tools and materials within arm’s reach to avoid any distractions during the crafting process.
- 2. Next, we need to cut out our leather pieces according to the pattern we’ve chosen for our project bag. I recommend using a rotary cutter and a cutting mat to get clean, precise cuts. If you’re new to working with leather, don’t worry if your cuts aren’t perfect – it’s all part of the charm. Remember to cut two main pieces for the body of the bag, as well as some additional pieces for the pockets and straps.
- 3. Now it’s time to skive the edges of our leather pieces to prevent them from becoming too thick and stiff. Skiving involves carefully cutting away a thin layer of leather from the edge of each piece, which helps the leather fold and bend more smoothly. Be careful not to cut too deeply, as this can weaken the leather and cause it to tear.
- 4. With our leather pieces prepared, we can start assembling the bag by stitching the sides and bottom together. Use a simple running stitch or a more decorative stitch, depending on your personal preference. Make sure to leave a small opening at the top of the bag so we can turn it right side out later.
- 5. Once we’ve stitched the body of the bag together, it’s time to add the pockets and straps. Cut out small pieces of leather for the pockets and attach them to the inside of the bag using a strong adhesive or some additional stitching. For the straps, cut longer, thinner pieces of leather and attach them to the top of the bag using brass rivets.
- 6. Next, we need to add a lining to our project bag to give it a finished look and prevent yarn or other materials from getting caught in the stitching. Cut a piece of fabric to match the size and shape of the bag, and stitch it in place using a whipstitch or a slipstitch. Make sure to leave a small opening so we can turn the bag right side out.
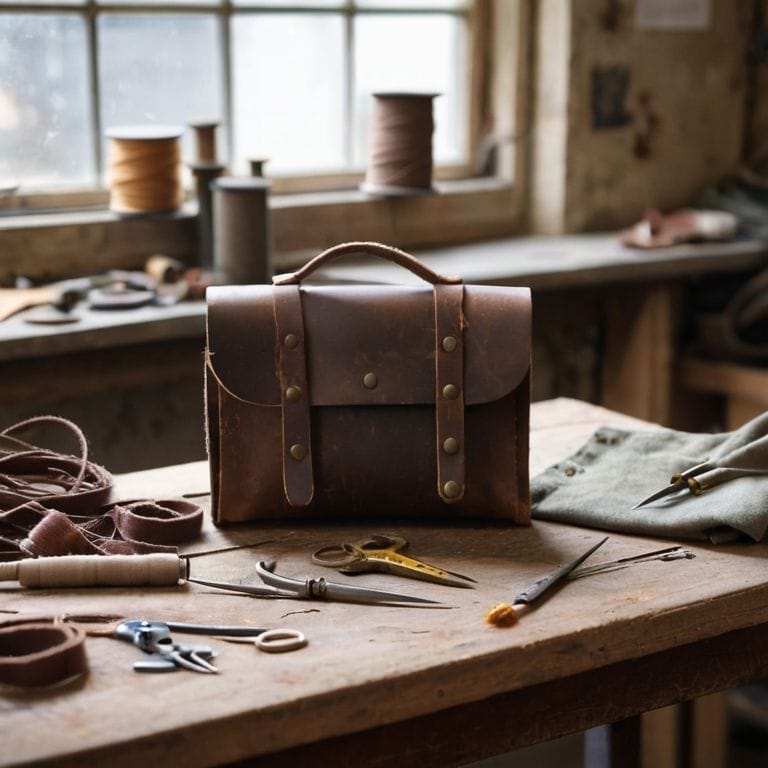
- 7. Finally, let’s add some finishing touches to our project bag, such as a decorative stitch or a small leather label. Use a leather conditioner to protect the leather and give it a soft, supple feel. With our project bag complete, we can now fill it with our favorite yarns, needles, and other crafting supplies, and get ready to take our projects on the go.
Crafting Leather Bag Mastery
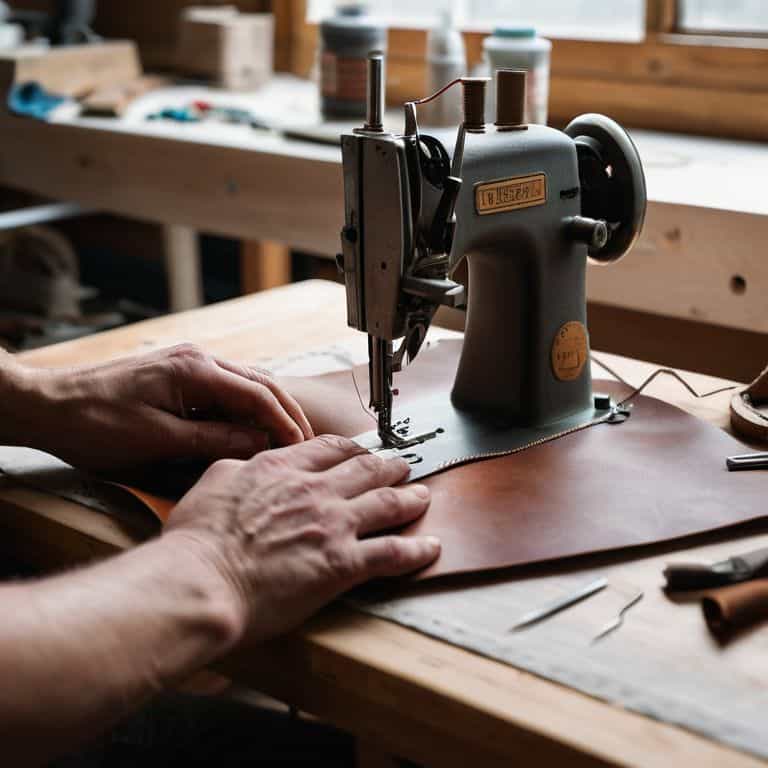
As I work on my latest leather project, I’m reminded of the importance of choosing the right leather for sewing. It’s a decision that can make or break the final product. I’ve found that using high-quality, full-grain leather is essential for creating a durable and beautiful bag. When it comes to sewing, I prefer to use an industrial sewing machine for leather, as it provides the necessary power and precision to handle thick leather.
When designing a custom leather bag, it’s essential to consider the leather bag hardware and accessories that will be used. From buckles to zippers, these small details can add a touch of elegance and functionality to the final product. I also recommend investing in good leather working tools for cutting, as they will make the process much easier and more accurate.
To take your leather bag making skills to the next level, I recommend exploring different leather bag patterns for beginners. These patterns can provide a great starting point for creating unique and functional bags. Additionally, practicing sewing leather straps and handles can help you develop the skills and confidence needed to tackle more complex projects. With patience and practice, you’ll be well on your way to crafting beautiful, handmade leather bags.
Choosing Leather for Beginners
When it comes to selecting leather, I always say, “the right hide makes all the difference.” As a beginner, it’s essential to choose a leather that’s forgiving and easy to work with. I recommend starting with a medium-weight leather, around 4-5 oz, as it’s sturdy enough to hold its shape but still soft enough to mold and shape. Look for leathers with a smooth, even grain – they’ll be less prone to tears and scratches.
For my own project bags, I love using bridle leather or suede. They have a beautiful texture and a rich, earthy smell that’s just incredible. Plus, they develop a gorgeous patina over time, giving your bag a unique character. Remember, the leather you choose will ultimately determine the look and feel of your finished project, so take your time and pick one that speaks to you.
Designing Custom Leather Bags
When it comes to designing custom leather bags, I always say the possibilities are endless. For me, it starts with thinking about the type of projects I’ll be using the bag for – will it be for my wife’s spinning adventures or my own woodworking escapades? Consider the size, shape, and number of compartments you need. Do you want a bag that can hold multiple projects at once, or one that’s tailored to a specific type of yarn or tool? I like to sketch out my ideas by hand, taking note of the leather type, thread color, and any hardware I’ll need.
As I design, I think about the flow of the bag – how will it open, how will the leather fold and crease? It’s amazing how a well-designed bag can elevate your entire making experience. I’ve found that taking the time to really think through the design always pays off in the end, resulting in a bag that’s not only beautiful but also functional and uniquely yours.
Sewing Up Success: 5 Essential Tips for a Top-Notch Leather Project Bag
- Select the right leather weight and type for your project, considering factors like durability, flexibility, and aesthetics to ensure your bag is both functional and beautiful
- Use a consistent and high-quality thread that matches your leather, and consider waxing it for extra strength and protection against wear and tear
- Reinforce your stitches, especially at stress points like handles and seams, to prevent fraying and extend the lifespan of your leather project bag
- Add a protective lining to your bag, not only to give it a finished look but also to shield your projects from dust, dirt, and other potential damages
- Condition your leather before and after construction to keep it soft, supple, and resistant to cracking, ensuring your project bag remains a trusted companion for years to come
Key Takeaways for Crafting Your Leather Project Bag
Always choose the right leather for your project, considering factors like thickness, texture, and intended use to ensure durability and aesthetic appeal
Design your custom leather bag with functionality in mind, thinking about the size, pockets, and closure method that will best suit your needs and the type of projects you’ll be using it for
Remember, mastering leather bag craftsmanship is a process that requires patience, practice, and attention to detail, so don’t be afraid to experiment, make mistakes, and learn from them as you continue to hone your skills
The Heart of Leathercraft
A leather project bag is more than just a container, it’s a testament to the maker’s touch – every stitch, every cut, and every scrape tells a story of patience, dedication, and the pursuit of functional beauty.
Finnian "Finn" Burke
Conclusion: You're Now a Leather Project Bag Master
As we wrap up this guide to making a leather project bag, let’s take a moment to reflect on what we’ve accomplished. We’ve covered the basics of choosing the right leather, designing a custom bag, and bringing it all together with some careful craftsmanship. Whether you’re a seasoned maker or just starting out, I hope you’ve found this journey as rewarding as I do. We’ve also touched on some advanced techniques for crafting leather bag mastery, from selecting the perfect hardware to adding those finishing touches that make your project truly special.
So as you put the final stitches on your leather project bag, remember that the joy of making is just as important as the end result. Don’t be afraid to experiment, try new things, and push the boundaries of what’s possible with leather. With every project, you’ll hone your skills, develop your own style, and create something truly unique that reflects your personality and craftsmanship. Happy making, and I’ll see you in the workshop!
Frequently Asked Questions
What type of leather is best suited for a project bag with multiple compartments?
For a project bag with multiple compartments, I recommend using a sturdy, full-grain leather like 8-10 oz cowhide. It’s got the perfect balance of durability and flexibility, making it ideal for bags with lots of nooks and crannies. Trust me, it’s worth the investment – it’ll last you a lifetime of crafting!
How do I ensure a snug and even fit for my leather project bag's zipper or closure?
To get a snug and even fit for your leather project bag’s zipper or closure, make sure to measure twice and cut once. I like to use a zipper foot on my sewing machine and a bit of wax paper to help the zipper glide smoothly into place. Trust me, it’s all about the little details – like sanding a piece of wood just right, it’s all about feel and finesse.
Can I use a sewing machine to stitch my leather project bag, or is hand-stitching recommended?
Ah, great question! While a sewing machine can work for leather, I recommend hand-stitching for a more personal touch and better control. Trust me, the extra time is worth it – your project bag will thank you. Plus, there’s something special about seeing those stitches come together under your own two hands.