I still remember the day my wife, a talented weaver, asked me to help her with how to ply yarn on a spinning wheel. She was frustrated with the uneven threads and wanted to create something truly special. As a carpenter, I was eager to dive in and help her solve the problem. We spent hours experimenting, and I was amazed by the complexity of the process. It wasn’t just about twisting threads together; it was an art that required patience, skill, and the right tools. My wife’s passion for weaving sparked a new interest in me – creating custom tools for fiber artists. I began to appreciate the importance of well-crafted tools in the creative process, and my journey as a custom woodworker and craft tool maker began.
In this article, I’ll share my honest, no-nonsense advice on how to ply yarn on a spinning wheel. You’ll learn the basics of plying, from preparing your yarn to troubleshooting common issues. I’ll walk you through the process, sharing practical tips and tricks I’ve learned from my wife and other experienced fiber artists. By the end of this guide, you’ll be equipped with the knowledge and confidence to create beautiful, functional yarns that will elevate your weaving or knitting projects. Whether you’re a seasoned pro or just starting out, my goal is to empower you with the skills and knowledge to take your fiber arts to the next level.
Table of Contents
Guide Overview: What You'll Need
Total Time: 2 hours 30 minutes
Estimated Cost: $50 – $100
Difficulty Level: Intermediate
Tools Required
- Spinning Wheel in good working condition
- Scissors dedicated to cutting yarn
- Yarn Ball Winder optional, but recommended
- Measuring Tape for measuring yarn length in inches
- Plying Tool such as a yarn fork or a plying stick
Supplies & Materials
- Yarn multiple strands of the same or different colors
- Yarn Needle for weaving in ends
- Stool or Chair for comfortable seating while spinning, approximately 18 inches in height
Step-by-Step Instructions
- 1. First, let’s get started by preparing our spinning wheel for plying. This involves cleaning the wheel and making sure all the parts are in good working condition. I like to use a soft brush to remove any dirt or debris that might have accumulated, and then give it a quick wipe with a damp cloth.
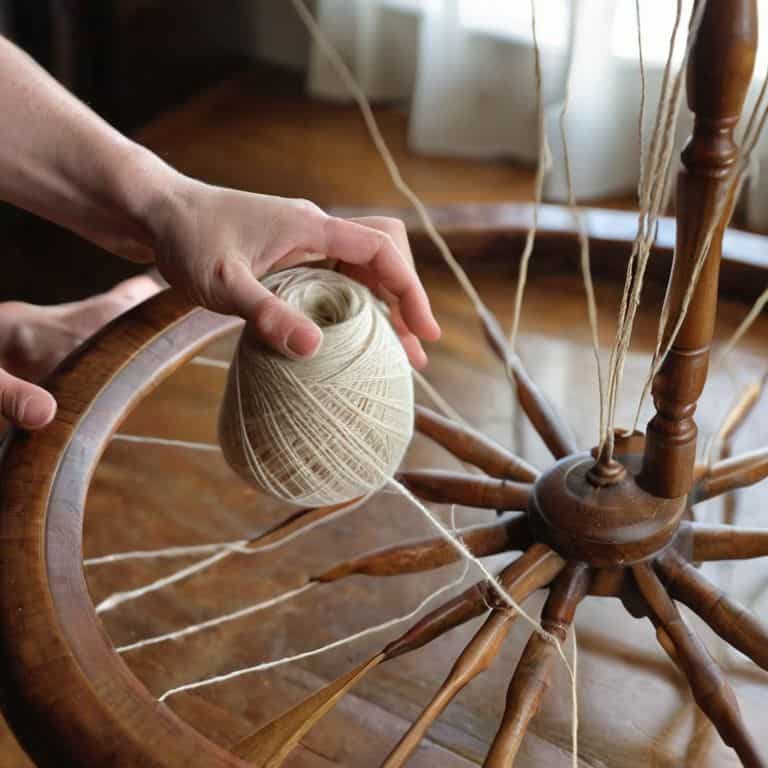
- 2. Next, we need to attach the ply yarn to the wheel. This is a crucial step, as it determines the tension and overall quality of the final product. I find it helpful to use a small amount of yarn to tie a temporary knot, which can be easily removed later. This ensures that the yarn is securely attached without compromising the integrity of the fiber.
- 3. Now it’s time to set the wheel in motion. I love the sound of the spinning wheel whirring to life, and the feeling of the yarn beginning to twist and turn. As the wheel starts to spin, gently feed the yarn into the orifice, making sure to maintain a consistent tension. This is where the magic happens, and the yarn starts to take shape.
- 4. With the yarn flowing smoothly, we can start to monitor the twist. This is a critical step, as too much or too little twist can affect the final texture and durability of the yarn. I like to use a small gauge to measure the twist, and make adjustments as needed to achieve the perfect balance.
- 5. As we continue to ply the yarn, it’s essential to maintain even tension. This can be achieved by gently guiding the yarn with your hands, making sure it’s not too tight or too loose. I find it helpful to use a small amount of tension to keep the yarn flowing smoothly, while also preventing it from becoming too twisted or knotted.
- 6. Now that we’re in the rhythm of plying, it’s time to add more yarn to the mix. This involves carefully merging the new yarn with the existing ply, making sure to maintain a consistent texture and color. I love the challenge of blending different yarns and colors to create unique and intricate patterns.
- 7. As we near the end of the plying process, it’s time to remove the yarn from the spinning wheel. This involves carefully cutting the yarn, and then winding it onto a spindle or into a ball. I find it satisfying to see the finished yarn, knowing that it’s been crafted with care and attention to detail.
Sawdust to Skein Plying Yarn
As I sit at my workbench, surrounded by the sweet scent of freshly sanded wood, I’m reminded that yarn plying techniques for beginners require patience and practice. One of the most common mistakes I see is rushing through the process, which can result in uneven yarn. To avoid this, I recommend taking your time and focusing on consistent tension as you ply. This will help you achieve a beautifully balanced yarn that’s perfect for knitting or weaving.
When it comes to blending fibers for unique yarns, the possibilities are endless. I love experimenting with different combinations of wool, alpaca, and silk to create one-of-a-kind yarns. By calculating yarn twist and ply, you can predict how your finished yarn will behave and make informed decisions about its intended use. For example, a tighter twist is often better suited for garments that will be subject to heavy wear and tear.
To take your yarn plying to the next level, consider investing in a few yarn plying tools and accessories, such as a yarn ball winder or a drum carder. These can help you achieve a more consistent yarn and make the process less tedious. Additionally, don’t forget to perform regular spinning wheel maintenance to ensure your equipment is running smoothly and efficiently. By following these tips and practicing regularly, you’ll be well on your way to creating beautiful, functional yarns that you can be proud of.
Calculating Twist and Ply for Unique Yarns
When it comes to creating unique yarns, calculating twist and ply is an art that requires a bit of experimentation. I love getting my hands dirty and testing out different combinations to see what works best. For me, it’s all about finding that perfect balance between twist and ply to bring out the best in the fiber. My wife, an avid weaver, always says that the right twist and ply can make or break a yarn, and I’ve found that to be true.
To get started, I recommend taking notes on the type of fiber you’re working with, its natural twist, and how it responds to different ply combinations. This will help you develop a sense of what works best for your specific project. I’ve found that some fibers, like wool, can handle a lot of twist, while others, like cotton, require a more gentle touch. By taking the time to calculate and test your twist and ply, you’ll be able to create yarns that are truly one-of-a-kind.
Spinning Wheel Maintenance for Smooth Plying
To keep your spinning wheel humming along, regular maintenance is key. I like to think of it as giving my trusty wheel a little TLC. A quick once-over to ensure all the parts are moving smoothly, and a gentle cleaning to remove any stray fibers or dust. My wife always says a well-maintained wheel is a happy wheel, and I couldn’t agree more.
I’ve found that a soft brush and a bit of wood oil are all you need to keep your wheel in top condition. Just gently sweep away any debris and apply a small amount of oil to the moving parts. It’s amazing how much of a difference it can make in the quality of your yarn. And, as someone who’s passionate about woodworking, I can appreciate the beauty of a well-crafted wheel that’s been properly cared for.
Plying Like a Pro: 5 Tips to Get You Spinning
- Start with a clean slate: make sure your spinning wheel is free of dust, dirt, and previous yarn residue to avoid tangles and uneven plying
- Choose the right twist: consider the type of fiber, its natural crimp, and the desired texture of your final yarn to determine the perfect twist ratio
- Draft with intention: pay attention to the fiber’s draft, using gentle, consistent pulls to maintain evenness and prevent over-twisting or under-twisting
- Watch your tension: keep an eye on the yarn’s tension as you ply, adjusting the take-up and brake to achieve a smooth, even flow
- Sample and adjust: don’t be afraid to stop and sample your yarn as you go, making adjustments to twist, ply, or tension to achieve the perfect blend of strength, softness, and drape
Key Takeaways for Plying Yarn on a Spinning Wheel
Plying yarn on a spinning wheel requires the right balance of twist and ply to achieve the desired texture and strength, and understanding how to calculate these factors is crucial for unique yarns
Regular maintenance of your spinning wheel is essential for smooth plying, including cleaning, oiling, and ensuring all parts are in good working condition
By mastering the art of plying yarn, you can unlock a world of creative possibilities, from crafting custom yarns for specific projects to experimenting with different fibers and techniques to create truly one-of-a-kind textiles
Spinning a New Chapter
As we conclude this journey of plying yarn on a spinning wheel, let’s recap the essential steps we’ve covered: from preparing our spinning wheel to calculating the perfect twist and ply for unique yarns. We’ve also delved into the importance of spinning wheel maintenance for a seamless plying experience. By mastering these techniques, you’ll be well on your way to creating beautifully crafted yarns that reflect your personal touch.
Now, as you sit at your spinning wheel, surrounded by the scent of wood and wool, remember that the true magic lies not just in the end product, but in the process of creation itself. With every twist and ply, you’re not just making yarn – you’re weaving a story, and that’s what makes this craft so incredibly rewarding. So, go ahead, get a little messy, and let the joy of spinning and plying yarn on a spinning wheel be your guide.
Frequently Asked Questions
What are the best types of yarn to use for plying on a spinning wheel?
My wife loves working with wool and alpaca blends for plying – they take twist beautifully. I’ve also seen great results with silk and linen mixes. Really, the best yarn is one that’s been prepared with care, like hand-carded or combed fibers. The key is to experiment and find what works best for your project, and don’t be afraid to get creative and try new combinations!
How do I know if my spinning wheel is properly aligned for smooth plying?
Ah, great question! To check if your spinning wheel is properly aligned, give the wheel a gentle spin and look for any wobble. Also, make sure the maiden and mother-of-all are evenly spaced and the tension is even. A well-aligned wheel is key to smooth plying, trust me, I’ve seen my wife’s loom benefit from a finely tuned spinning wheel!
Can I ply yarn with different fiber contents or colors together to create a unique texture and appearance?
Absolutely, my friend! I love experimenting with different fibers and colors. Plying yarns with varying contents or hues can create some truly stunning textures and appearances. Just keep in mind that fibers with different lengths or crimp may affect the overall twist and ply, so some trial and error might be necessary to get the desired result.