
I still remember the first time I tried to join granny squares together – it was a hot mess, if I’m being honest. I had spent hours crocheting these beautiful, colorful squares, but when it came to sewing them together, I felt like I was staring up at a mountain with no climbing gear. The internet was flooded with tutorials, but they all seemed to assume I had some secret knowledge about how to join granny squares together that I just didn’t possess. It wasn’t until I stumbled upon a quirky little crochet community that I discovered the truth: joining granny squares is not about following some magical formula, but about embracing the imperfect beauty of handmade craftsmanship.
As someone who’s been around the block a few times with crochet, I want to share my favorite tips and tricks for how to join granny squares together in a way that’s both functional and visually stunning. In this article, I’ll walk you through the no-fuss, no-muss methods I’ve learned over the years, from choosing the right yarn to weaving in those pesky ends. My goal is to empower you to take your granny squares to the next level, whether you’re a seasoned pro or just starting out, and to show you that with a little patience and practice, you can create something truly unique and beautiful.
Table of Contents
Guide Overview: What You'll Need
Total Time: 2 hours 30 minutes
Estimated Cost: $10 – $30
Difficulty Level: Intermediate
Tools Required
- Tapestry Needle (for weaving in ends)
- Yarn Needle (for sewing squares together)
- Scissors (sharp and dedicated to cutting yarn)
- Measuring Tape (for ensuring consistent seam allowance)
- Stitch Markers (optional, for marking seam starting points)
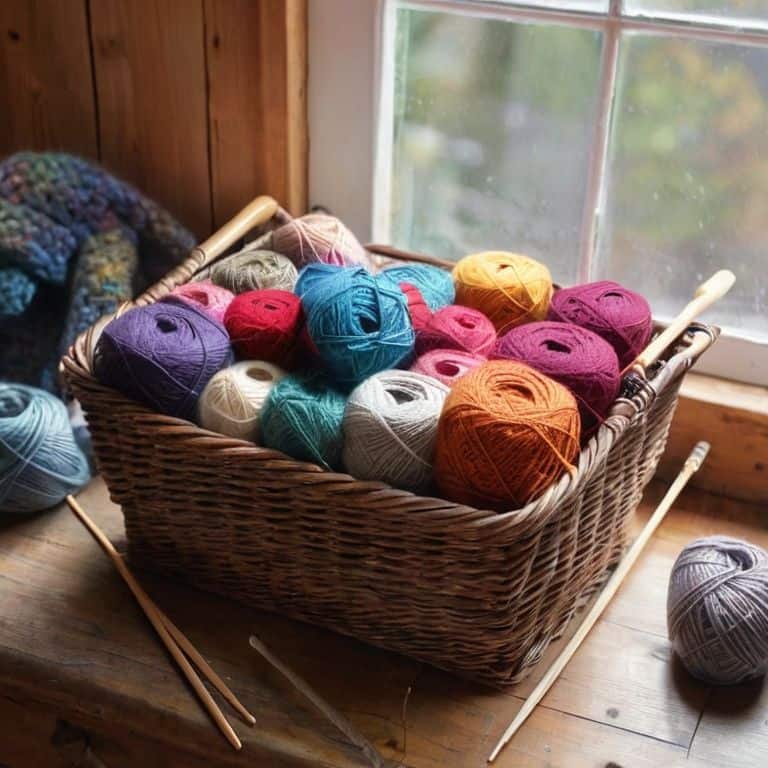
Supplies & Materials
- Granny Squares (pre-made, in desired colors and quantities)
- Yarn (in a color that matches or complements the squares, for sewing)
- Yarn for Border (optional, for adding a border around the joined squares)
Step-by-Step Instructions
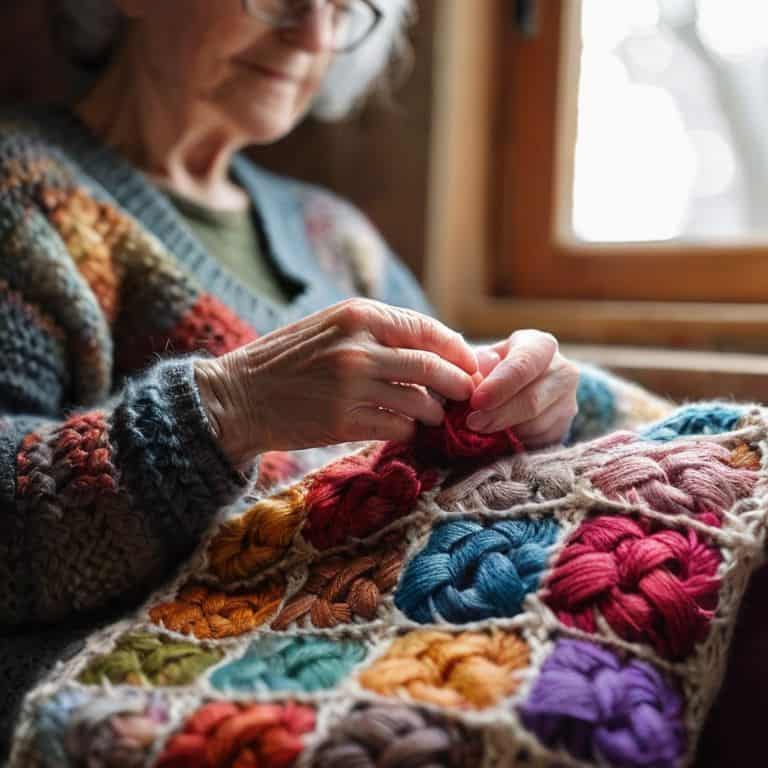
- 1. First, let’s get our granny squares ready for their big debut – gathering all the squares you’ve lovingly created is the initial step. Make sure they’re all completed, and you have a good idea of the layout you want to achieve with your finished project. I like to lay mine out on a large flat surface, like a bed or a table, to get a sense of the overall design.
- 2. Next, choose a joining method that resonates with you. There are several ways to join granny squares, including the whipstitch, single crochet, or slip stitch. For this example, we’ll be using the slip stitch, which is a personal favorite of mine because it creates a nearly invisible seam.
- 3. Now, let’s talk about yarn tails. You’ll need a piece of yarn that matches the color of your granny squares. Cut a length of yarn, about 12-18 inches long, to use for sewing your squares together. Don’t worry too much about the length; you can always cut more if you need it.
- 4. To begin joining your squares, place two of them side by side, with the right sides together. Take your yarn needle and insert it into the first stitch of both squares. Pull the yarn gently to secure the squares in place. Then, using your yarn needle, weave the yarn in and out of the stitches, working your way across the edge of the squares.
- 5. As you join each square, make sure to leave a small gap between them to allow for even spacing. You can use a stitch marker or a small piece of scrap yarn to mark the spot where you want to leave the gap. This will help you maintain a consistent spacing throughout your project.
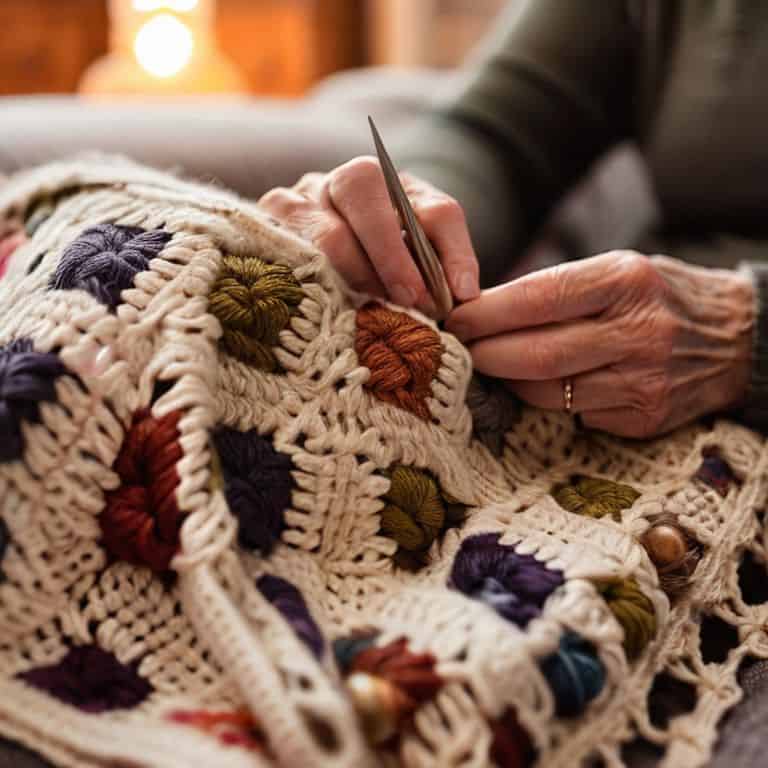
- 6. Once you’ve joined all your squares, it’s time to weave in those ends. Using your yarn needle, carefully weave the yarn tails in and out of the stitches to secure them. Make sure to pull the yarn tight enough to keep everything in place, but not so tight that it puckers the fabric.
- 7. Finally, take a step back and admire your handiwork – you’ve successfully joined your granny squares together. To add a finished touch, you can single crochet around the entire piece to create a border. This will not only add a decorative element but also help to reinforce the seams.
Joining Granny Squares With Love
As I sit here surrounded by my yarn stash, I just can’t help but feel a sense of joy when thinking about granny square joining techniques. There’s something so special about taking individual squares and turning them into a beautiful, cohesive blanket. When it comes to choosing the right yarn for your project, I always say experiment with different textures and colors to find the perfect combination that reflects your personality.
One of my favorite things about working with granny squares is the flexibility they offer. Whether you’re a beginner looking for a simple crochet pattern for beginners or a seasoned pro, there’s always room to add your own unique twist. When it comes to afghan blanket construction, I like to think outside the box and try new things, like adding a pop of color with a fun border or mixing and matching different square sizes.
As you start to join your granny squares, remember that tips for sewing granny squares are all about patience and practice. Don’t be too hard on yourself if it takes a few tries to get the hang of it – the imperfections are all part of the charm. And when you’re finished, you can add a beautiful granny square border design to really make your blanket shine. The end result is well worth the effort, and I just know you’ll love snuggling up with your new handmade blanket.
Granny Square Joining Techniques for Beginners
When I first started joining granny squares, I was a total newbie, and it showed in my work. But with time and practice, I developed a few techniques that made the process so much easier. For beginners, I always recommend starting with the simplest method: the whipstitch. It’s a classic for a reason – it’s easy to learn, and it creates a nearly invisible seam. Plus, it’s forgiving, so even if your stitches are a bit wonky, the overall effect will still be charming.
As you get more comfortable, you can experiment with other techniques, like the single crochet join or the tapestry needle method. These will give you a bit more flexibility and can add some extra visual interest to your project. Remember, the key is to take your time and have fun with it – joining granny squares is all about embracing the imperfections and loving the process.
Tips for Sewing Granny Squares With Yarn
When it comes to sewing granny squares with yarn, I just can’t stress enough how much I adore using a simple whipstitch. It’s easy, intuitive, and adds a charming texture to your finished piece. I like to use a yarn that matches one of the colors in my squares, but feel free to get creative and experiment with contrasting hues – it’s all about adding your personal touch!
To make the process even smoother, try using a tapestry needle and a length of yarn that’s not too bulky. This will help you weave in ends with ease and avoid any pesky tangles. As you stitch, remember to keep your tension relaxed – you want your granny squares to lie flat and cozy, not puckered or tight. With a little practice, you’ll be joining those squares like a pro, and your handmade masterpiece will start to take shape.
Weaving It All Together: 5 Essential Tips for Joining Granny Squares
- Choose a joining method that speaks to your soul – whether it’s the classic whipstitch or the more adventurous tapestry needle method, make it your own!
- Pay attention to the tension of your yarn as you join – you want it to be snug, but not too tight, or your blanket might start to pucker and lose its charm
- Don’t be afraid to add a little extra flair with embroidery floss or contrasting yarn – it’s all about making those granny squares shine!
- Press those seams, baby! Using a hot iron and a steam setting can make all the difference in getting a crisp, professional finish
- Remember, it’s okay if it’s not perfect – the beauty of handmade lies in its imperfections, so don’t stress if your stitches are a little wonky or your tension is off in some places
Stitching It All Together: 3 Key Takeaways
Embracing the beauty of imperfection is key when joining granny squares – it’s all about the journey, not just the finished product
Experimenting with different yarns and stitching techniques can add a unique touch to your granny square project, making it truly one-of-a-kind
Remember, joining granny squares is a process that requires patience, love, and a willingness to try new things – don’t be too hard on yourself if it’s not perfect, because that’s what makes it handmade and special
The Beauty of Connection
Joining granny squares together is not just about stitching pieces of yarn, it’s about weaving stories, memories, and love into every seam, creating a tapestry that’s uniquely yours, imperfectly perfect and beautiful.
Ruby Warren
Weaving it All Together
As we’ve explored the world of joining granny squares together, I hope you’ve picked up some valuable tips and tricks to make your projects truly special. From the basics of sewing to more advanced techniques, we’ve covered it all. Remember, the key to creating something beautiful is to not be afraid of imperfections – they’re what make your handmade pieces unique and full of character. Don’t be too hard on yourself if your stitches aren’t perfect or if your squares don’t line up exactly – it’s all part of the charm. With practice, you’ll develop your own style and voice in your crochet work, and that’s what will truly make your projects stand out.
So, as you put down your hook and yarn for the day, I want to leave you with a final thought: the true magic happens when you let go of the need for perfection and allow yourself to create from the heart. Don’t just make something because you need it – make it because you love the process, because you love the feeling of yarn between your fingers, and because you love the sense of accomplishment that comes with creating something with your own two hands. Happy hooking, friends!
Frequently Asked Questions
What type of yarn is best to use when joining granny squares together?
Oh, sweet friends, when it comes to joining granny squares, I’m all about using a yarn that’s similar in weight and fiber to the one you used for the squares. Think cotton, acrylic, or a blend – something that’s gonna play nice with your stitches. I personally love using a neutral-colored yarn, like beige or gray, to let the squares be the stars of the show!
How do I ensure that my granny squares are all the same size before joining them?
To ensure your granny squares are the same size, I recommend blocking them before joining – it’s a total game-changer! Simply wet, stretch, and pin each square to the same dimensions, letting them dry completely. This will even out any inconsistencies and make the joining process a breeze. Trust me, it’s worth the extra step!
Can I use a sewing machine to join granny squares, or is it better to do it by hand?
Honestly, I’m a total fan of doing it by hand – there’s something so special about stitching those squares together with love. But, if you’re short on time, a sewing machine can work too! Just be sure to use a denim or heavy-duty needle, and a simple straight stitch. It’s not my fave method, but it gets the job done.