I still remember the day my wife, an avid knitter, complained about losing her stitch markers for the umpteenth time. I decided to take matters into my own hands and create something better. That’s when I discovered the joy of working with polymer clay, and how to make stitch markers with polymer clay became my new obsession. I found that with just a few simple tools and some creativity, I could craft custom markers that would make her knitting sessions easier and more enjoyable. As a carpenter turned craft tool maker, I’ve always believed that the right tools can make all the difference in any project.
In this article, I’ll share my no-nonsense approach to creating custom stitch markers using polymer clay. You’ll learn the basics of working with polymer clay, from conditioning to baking, and how to shape and design your markers to fit your specific knitting needs. I’ll walk you through a step-by-step process that’s easy to follow, even if you’re new to working with clay. By the end of this guide, you’ll be equipped with the knowledge to create your own custom stitch markers that are both functional and beautiful, making your knitting sessions more efficient and enjoyable.
Table of Contents
Guide Overview: What You'll Need
Total Time: 1 hour 15 minutes
Estimated Cost: $10 – $20
Difficulty Level: Easy
Tools Required
- Rolling Pin (for flattening clay)
- Shaping Tools (e.g., toothpicks, skewers, or modeling tools)
- Oven (for baking polymer clay)
- Wire Cutter (for cutting jump rings or head pins)
- Pliers (optional, for shaping or bending jump rings)
Supplies & Materials
- Polymer Clay (various colors)
- Jump Rings (or head pins)
- Acrylic Roller (or other smoothing tool)
- Baking Sheet (lined with parchment paper, approximately 6 inches by 6 inches)
- Sandpaper (optional, for smoothing edges)
Step-by-Step Instructions
- 1. First, let’s get our materials ready. To make custom stitch markers with polymer clay, you’ll need a few basic supplies: polymer clay in your choice of colors, a rolling pin, a cookie cutter or small shape cutter, a toothpick or skewer, and a baking sheet lined with parchment paper. Make sure your workspace is clean and dry, as you don’t want any dust or moisture affecting your clay.
- 2. Next, condition your polymer clay by kneading it until it’s soft and pliable. This step is crucial because it ensures the clay will be easy to work with and will help prevent it from cracking when you bake it. If you find your clay is particularly hard, you can try warming it up in your hands or by leaving it in a warm place for a few minutes.
- 3. Now, roll out the clay to your desired thickness. You want it to be thin enough to be lightweight on your yarn but not so thin that it breaks easily. A good starting point is about 1/8 inch thick. Use your rolling pin to get an even thickness, and don’t worry too much about getting it perfect – a bit of character can be nice in handmade items.
- 4. Use your cookie cutter or shape cutter to cut out shapes from the rolled-out clay. For stitch markers, small shapes like circles, hearts, or stars work well. You can also use a glass or a knife to cut out simple shapes if you don’t have a cutter. Remember, the shape you choose should be easy to thread onto your yarn, so keep that in mind when selecting your cutter.
- 5. Once you have your shapes cut out, use a toothpick or skewer to create a hole in each one. This hole is where you’ll thread your yarn through when using the stitch marker, so make sure it’s big enough. Gently twirl the toothpick to enlarge the hole if necessary, being careful not to crack the clay.
- 6. Place your cut-out shapes on the prepared baking sheet, leaving a bit of space between each one to allow for even baking. Follow the baking instructions provided with your polymer clay, which usually involves baking in a preheated oven at around 275°F (135°C) for about 15-30 minutes, depending on the thickness of your clay.
- 7. After baking, let your stitch markers cool completely on the baking sheet. This is an important step, as handling them while they’re still warm can cause them to break. Once they’re cool, you can use a light coat of varnish to protect them and give them a glossy finish, although this step is optional.
- 8. Finally, assemble and use your stitch markers. Thread your yarn through the hole you created, and you’re ready to go. These custom markers can add a personal touch to your knitting or crochet projects and make great gifts for fellow crafters. Enjoy the process of creating something functional and beautiful from scratch.
Crafting Custom Stitch Markers
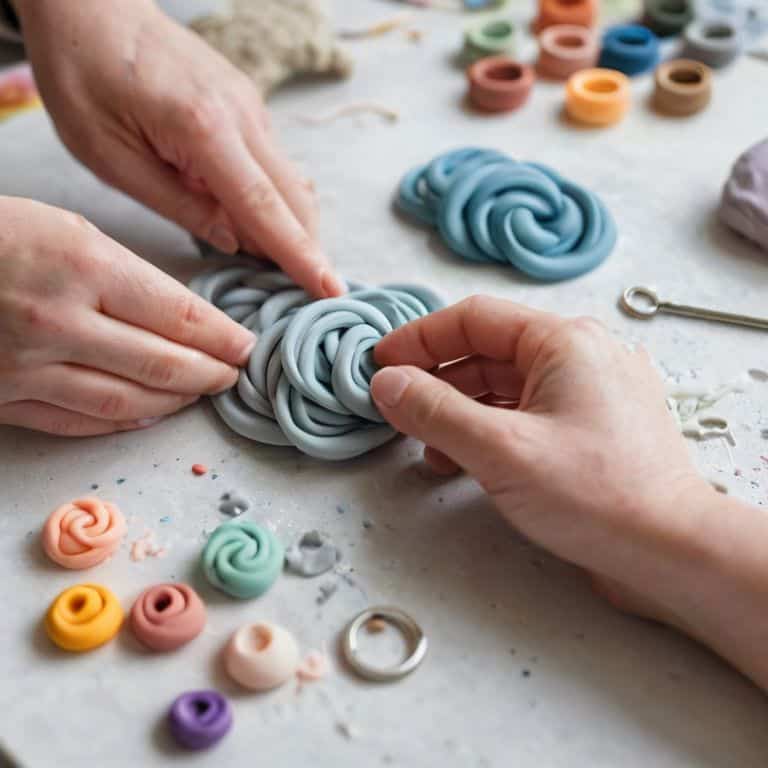
As I work with polymer clay, I’ve found that polymer clay conditioning tips are essential to achieving the right consistency for crafting custom stitch markers. To get the clay ready, I like to knead it until it’s smooth and pliable. This step is crucial, as it ensures that the clay will be easy to shape and mold into the desired forms. When it comes to designing your stitch markers, don’t be afraid to get creative with stitch marker design ideas – you can use different colors, shapes, and patterns to make them truly unique.
When baking your polymer clay creations, it’s vital to follow some basic safety precautions. Baking polymer clay safely requires attention to temperature and time guidelines, so be sure to consult your clay’s instructions for specific details. I’ve also experimented with polymer clay color mixing techniques to create custom hues that match my yarn projects. By mixing and matching different colors, you can create a wide range of shades and tones that will add a personal touch to your stitch markers.
As you work on your custom stitch markers, remember that the process is just as important as the end result. With a little practice and patience, you can create beautiful, functional markers that will elevate your knitting or crochet projects. Whether you’re a seasoned crafter or just starting out, custom stitch marker tutorials can be a great resource for inspiration and guidance. By following these tips and techniques, you’ll be well on your way to creating stunning stitch markers that reflect your personal style.
Baking Safely for Durable Markers
When it comes to baking your polymer clay stitch markers, safety is key to ensuring durability. I always say, a good bake can make all the difference in how long your markers last. To avoid any mishaps, make sure your oven is preheated to the right temperature, usually around 275°F (135°C). It’s also crucial to keep an eye on the baking time, as overcooking can lead to brittle markers.
I like to use a thermometer to double-check my oven’s temperature, and I always bake my markers on a parchment-lined tray to prevent sticking. By following these simple tips, you’ll be able to achieve perfectly baked, durable stitch markers that will withstand countless knitting sessions.
Polymer Clay Conditioning for Beginners
Now that we’ve dived into crafting custom stitch markers, let’s talk about the foundation of working with polymer clay: conditioning. As a woodworker, I can appreciate the importance of preparing your material before creating something beautiful. Conditioning polymer clay is similar to sanding a piece of wood – it helps to remove any imperfections and makes it more pliable to work with. For beginners, it’s essential to understand that polymer clay can be a bit stiff at first, but with some kneading and warming it up in your hands, it becomes much more manageable.
I like to think of conditioning polymer clay as a therapeutic process – it’s almost meditative, like whittling a piece of wood. By taking the time to properly condition your clay, you’ll be able to achieve a more consistent texture and color, which is crucial for creating uniform stitch markers. Trust me, the extra few minutes of conditioning will be worth it in the end, when you’re left with a set of custom markers that not only function well but also look amazing.
Handy Hints for Homemade Stitch Markers
- Always knead your polymer clay before use to ensure it’s evenly colored and pliable, making it easier to shape into your desired marker forms
- Use a variety of shapes and colors to differentiate between markers for different sizes or types of stitches, adding a personal touch to your knitting or crochet projects
- Make sure to bake your polymer clay creations in a well-ventilated area and on a baking sheet lined with parchment paper to prevent damage and ensure even cooking
- Experiment with adding textures or patterns to your markers using household items like toothpicks, leaves, or even fabric scraps to give them a unique, handmade look
- Consider adding a clear coat of varnish after baking to protect your markers from wear and tear, and to give them a glossy finish that will make them stand out in your project bag
Key Takeaways for Crafting Custom Stitch Markers
Always condition your polymer clay before crafting to ensure pliability and even baking, resulting in durable stitch markers
Experiment with different shapes, colors, and designs to create unique stitch markers that reflect your personal style and complement your yarn projects
Remember to bake your polymer clay creations safely and at the correct temperature to prevent damage and ensure your custom stitch markers last through many knitting sessions
Putting it All Together: Handmade Stitch Markers
As we’ve explored in this guide, creating your own stitch markers with polymer clay is a fun and rewarding DIY project. From conditioning the clay to baking safely, we’ve covered the essential steps to ensure your markers are not only beautiful but also durable. By following these steps and experimenting with different colors and designs, you can create custom stitch markers that reflect your personal style and add a touch of handmade charm to your knitting or crochet projects. Whether you’re a seasoned crafter or just starting out, this project is a great way to get creative and take your yarn work to the next level.
As you finish your handmade stitch markers and start using them in your projects, remember that the joy of making is just as important as the end result. Don’t be afraid to experiment, try new things, and make mistakes – it’s all part of the creative process. By embracing the DIY spirit and taking the time to craft your own tools and accessories, you’ll not only develop new skills but also cultivate a deeper appreciation for the beauty of handmade objects. So go ahead, get crafting, and see where your creativity takes you!
Frequently Asked Questions
What kind of polymer clay is best suited for making stitch markers?
For stitch markers, I swear by Fimo Professional or Sculpey III – they’re durable and come in a wide range of colors. I like Fimo for its fine details and Sculpey for its ease of conditioning. Both will give you sturdy markers that’ll withstand your knitting sessions.
How do I ensure that my stitch markers are evenly sized and consistent?
To get evenly sized stitch markers, I use a simple trick: I roll out the polymer clay to a consistent thickness, then use a small cookie cutter or a leather punch to cut out uniform shapes. This way, my markers are not only cute but also consistent, making my wife’s knitting projects a breeze.
Can I add decorations or colors to my polymer clay stitch markers before baking them?
Absolutely, you can add decorations or colors to your polymer clay stitch markers before baking. Try using acrylic paints, metallic powders, or even embedding small beads for a personalized touch. Just make sure to seal any added decorations with a clear varnish after baking to protect them from wear and tear.