I still remember the first time I tried to learn how to knit garter stitch. I was frustrated by the confusing patterns and tutorials that seemed to assume I already knew the basics. But as a former librarian and now a full-time craft instructor, I’ve made it my mission to break down complex techniques into simple, easy-to-follow steps. I believe that with the right guidance, anyone can master the garter stitch and create something beautiful. My approach is all about taking it one stitch at a time, and I’m excited to share my knowledge with you.
In this article, I promise to provide you with practical advice and a clear, step-by-step guide on how to knit garter stitch. You won’t find any confusing jargon or assumptions about prior knowledge here. Instead, I’ll walk you through every step of the process, from casting on to binding off, and share my own tips and tricks for troubleshooting common mistakes. By the end of this article, you’ll be confident in your ability to knit a beautiful garter stitch project, and you’ll be ready to tackle more complex patterns with ease. So, let’s get started on this journey together, and I’ll show you just how simple and rewarding knitting can be.
Table of Contents
Guide Overview: What You'll Need
Total Time: 2 hours 30 minutes
Estimated Cost: $10 – $30
Difficulty Level: Easy
Tools Required
- Knitting Needles US size 8 or 9
- Scissors for cutting yarn
- Tapestry Needle for weaving in ends
Supplies & Materials
- Yarn choose your preferred color and type
- Stitch Markers optional, for tracking pattern
- Measuring Tape for measuring work in inches
Step-by-Step Instructions
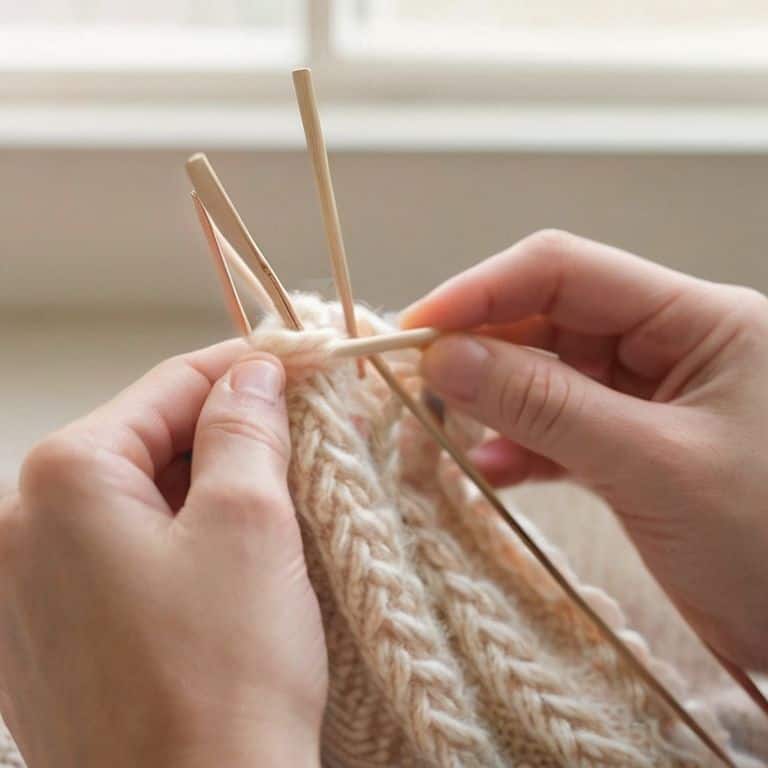
- 1. First, let’s start with the basics: to knit the garter stitch, you’ll need to cast on the desired number of stitches onto your knitting needles. I like to use a long-tail cast on method, as it creates a neat and tidy edge. To do this, create a slipknot on one of your needles, then use your other needle to pick up the working yarn and pull it through the slipknot. You’ll then have one stitch on your needle. Repeat this process until you have the desired number of stitches.
- 2. Next, we’ll move on to the actual knitting part. To knit a garter stitch row, you’ll need to insert the right needle into the first stitch on the left needle. Make sure the right needle is going into the stitch as if it’s a little house, with the needle being the door and the stitch being the room. Then, wrap the working yarn around the right needle, moving it from the front of the work to the back. This is called a yarn over. You’ll then have one knit stitch on your right needle.
- 3. Now, let’s talk about how to knit a row. To do this, you’ll repeat the process of inserting the right needle into the next stitch on the left needle, wrapping the yarn around the right needle, and pulling it through. Remember to keep the tension even, not too tight and not too loose. As you knit each stitch, you’ll see the garter stitch pattern start to emerge. It’s a bit like watching a puzzle come together, one piece at a time.
- 4. As you reach the end of the row, you’ll need to turn your work. To do this, simply rotate your knitting so that the other side is facing you. You’ll then be ready to start a new row. Make sure to keep track of your rows, as the garter stitch pattern can be easy to lose if you’re not careful. I like to use a row counter to keep myself on track.
- 5. Now that we’ve covered the basics of knitting a garter stitch row, let’s talk about how to repeat the process. To create a fabric with a garter stitch pattern, you’ll need to repeat rows of knit stitches. Simply knit one row, turn your work, and then knit another row. Keep repeating this process until your work is the desired length. As you knit, remember to take your time and enjoy the process. The garter stitch is a great stitch for beginners, as it’s very forgiving.
- 6. As you become more comfortable with the garter stitch, you can start to experiment with different yarns and colors. The garter stitch looks great in a variety of yarn weights and colors, from soft pastels to bold brights. Don’t be afraid to try out new combinations and see what you like. You can also try adding texture with different yarn weights to create a unique and interesting fabric.
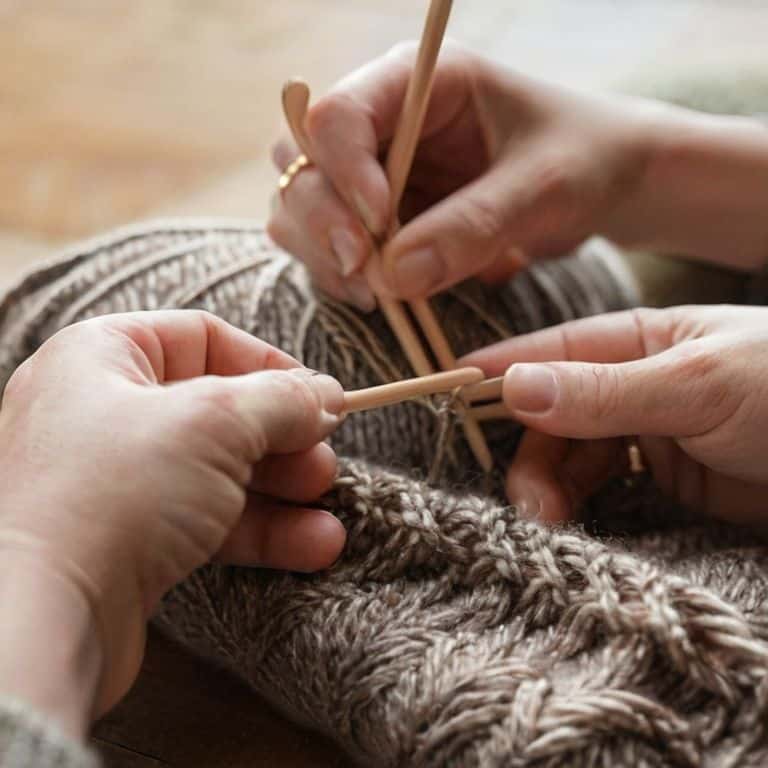
- 7. Finally, when you’re ready to bind off your work, you can use a basic bind-off method. To do this, knit the first stitch on the left needle, then pass the second stitch over the first stitch. Repeat this process until you have one stitch left on the left needle. Cut the working yarn and pull it through the last loop to secure it. And that’s it! You’ve now completed a garter stitch project. Take a step back and admire your handiwork – you should be proud of yourself for learning this new skill.
Mastering Garter Stitch
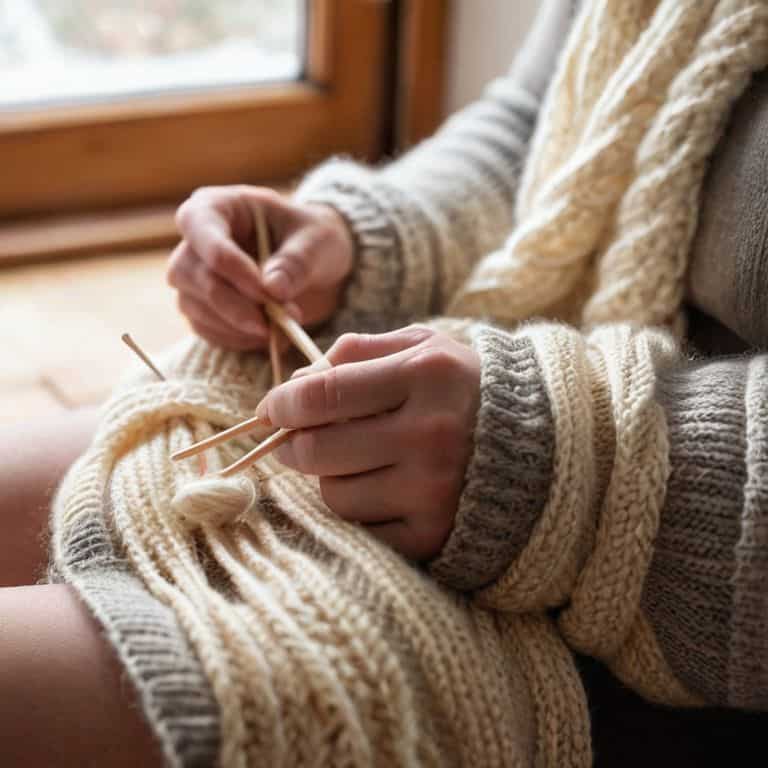
As you become more comfortable with the garter stitch, you can start to explore various garter stitch patterns for beginners. These patterns can add a touch of elegance to your knitting projects, from scarves to hats. Remember, the key to mastering these patterns is to focus on the sequence of knit stitches and how they interact with each other.
When working on projects like hats, it’s essential to understand knitting in the round. This technique allows you to create a seamless, cylindrical shape that is perfect for beanies or caps. To achieve this, you’ll need to use double-pointed needles or circular needles, which can take some getting used to. However, with practice, you’ll find that flat knitting techniques are just as valuable for creating beautiful scarves or blankets.
One common issue beginners face is common mistakes in garter stitch knitting, such as unintentionally adding or dropping stitches. To avoid this, make sure to count your stitches regularly and pay attention to your tension. It’s also worth noting the difference between garter stitch vs stockinette stitch, as understanding these two fundamental stitches will open up a world of possibilities for your knitting projects.
Avoiding Common Garter Stitch Mistakes
As you continue to work on your garter stitch project, it’s essential to be mindful of a few common mistakes that can easily be avoided. One of the most frequent errors is uneven tension, which can cause your fabric to pucker or become misshapen. To avoid this, try to maintain a consistent tension as you knit, neither too tight nor too loose.
Another mistake to watch out for is accidentally dropping stitches, which can be frustrating to fix. To prevent this, make sure to count your stitches regularly and keep a close eye on your work, especially when turning your work at the end of a row. By being aware of these potential pitfalls, you can ensure a smooth and enjoyable knitting experience.
Unraveling Garter Stitch Patterns
As we delve deeper into the world of garter stitch, let’s explore the various patterns that can be created using this versatile technique. By combining garter stitch with other stitches or manipulating the stitch count, you can create a wide range of textures and designs. I love breaking down these patterns into simple, manageable steps – it’s amazing how a few subtle changes can transform a basic garter stitch into something entirely new and exciting.
To get started, try experimenting with different stitch counts or row repeats to see how they affect the overall fabric of your project. You can also try combining garter stitch with other stitches, like stockinette or seed stitch, to create interesting contrasts and visual interest. Remember, the key to mastering garter stitch patterns is to take your time and be patient – with practice, you’ll be creating beautiful, intricate designs in no time.
Weaving Wisdom: 5 Essential Tips for Knitting Garter Stitch
- Start with the right tools: invest in a good quality yarn and a pair of knitting needles that feel comfortable in your hands
- Swatch, swatch, swatch: before diving into your project, take the time to create a swatch to ensure your tension is even and your stitches are consistent
- Pay attention to your stitch count: keeping track of your stitches will help you avoid mistakes and ensure your project turns out as planned
- Don’t pull the yarn too tight: garter stitch is all about creating a soft, textured fabric, so be sure to keep your stitches relaxed and even
- Practice, practice, practice: like any new skill, knitting garter stitch takes time and practice to master, so don’t be discouraged if it takes a few tries to get the hang of it
Key Takeaways for Knitting Garter Stitch
Remember to cast on an even number of stitches to ensure a smooth and symmetrical garter stitch pattern
Always keep a gentle tension while knitting to avoid puckering or loose stitches that can disrupt the fabric of your project
Practice patience and don’t be afraid to unravel your work if you encounter mistakes – with time and practice, you’ll master the garter stitch and be ready to take on more complex knitting projects
Embracing the Joy of Garter Stitch
As we’ve journeyed through the world of garter stitch together, I hope you’ve come to realize that mastering this technique is all about breaking it down into manageable steps. We’ve covered the basics of casting on, the rhythm of knit stitches, and how to read your work as you go. We’ve also explored ways to unravel garter stitch patterns and troubleshoot common mistakes. By now, you should feel confident in your ability to create beautiful, textured fabrics using this timeless technique.
As you move forward on your knitting path, remember that the true magic happens when you let go of perfection and allow yourself to enjoy the process. Don’t be afraid to experiment with different yarns, colors, and projects – the garter stitch is a versatile friend that will accompany you on many creative adventures. So, take a deep breath, pick up those needles, and let the gentle rhythm of the garter stitch guide you into a world of endless possibility.
Frequently Asked Questions
What if I accidentally drop a stitch while knitting garter stitch, how do I fix it?
Don’t worry, it’s an easy fix. If you drop a stitch, simply insert your needle into the stitch below and gently pull it back up to its original position. You can also use a crochet hook to scoop up the dropped stitch and guide it back to its rightful place. Take a deep breath, and with a little patience, you’ll be back on track in no time.
How do I know when to switch to a new ball of yarn while working on a garter stitch project?
When working on a garter stitch project, I like to keep a simple yarn tracker: a small sticky note where I jot down the yardage used. This way, I can easily estimate when to switch to a new ball of yarn, usually when I have about 6-8 inches of yarn left. It’s a foolproof system that helps me avoid running out of yarn mid-row.
Can I use garter stitch to create intricate textures or patterns, or is it better suited for simple designs?
While garter stitch is often associated with simple designs, it can indeed be used to create intricate textures and patterns. By combining garter stitch with other techniques, such as cables or fair isle, you can add complexity and visual interest to your projects. Let’s explore some examples together!