I still remember the day my wife, an avid weaver, complained about the clutter of yarn in her workshop. She needed a solution to organize her threads, and I, being a carpenter, thought, how hard can it be to build a pegboard for yarn? Little did I know, this simple project would spark a passion for creating custom tools for fiber artists. As I delved into the world of how to build a pegboard for yarn, I realized that most tutorials focused on generic, one-size-fits-all solutions. But what about the unique needs of yarn enthusiasts? What about the beauty of handmade functional objects that can elevate their craft?
In this article, I’ll share my personal approach to building a pegboard that’s tailored to the yarn lover’s needs. You’ll learn practical tips and tricks for designing and constructing a custom storage solution that’s both functional and visually appealing. From choosing the right materials to adding a personal touch, I’ll guide you through the process of creating a pegboard that will make your yarn organization dreams come true. By the end of this tutorial, you’ll be equipped with the knowledge and confidence to build a pegboard that’s as unique as your yarn collection, and you’ll be one step closer to elevating your fiber arts game.
Table of Contents
Guide Overview: What You'll Need
Total Time: 2 hours 30 minutes
Estimated Cost: $50 – $100
Difficulty Level: Intermediate
Tools Required
- Circular Saw (for cutting lumber)
- Drill (with drill bits)
- Hammer (for tapping pegs into place)
- Tape Measure (for accurate measurements)
- Level (to ensure the pegboard is straight)
- Pencil (for marking holes)
- Sandpaper (for smoothing out wood edges)
Supplies & Materials
- 1/2 inch or 1/4 inch Plywood (for the pegboard back)
- 1 inch by 2 inch Lumber (for the frame)
- Pegboard Hooks (in various sizes for yarn organization)
- Wood Screws (for assembling the frame)
- Wood Glue (for reinforcing joints)
- Pegboard (specifically designed for pegs, usually 1/4 inch thick)
Step-by-Step Instructions
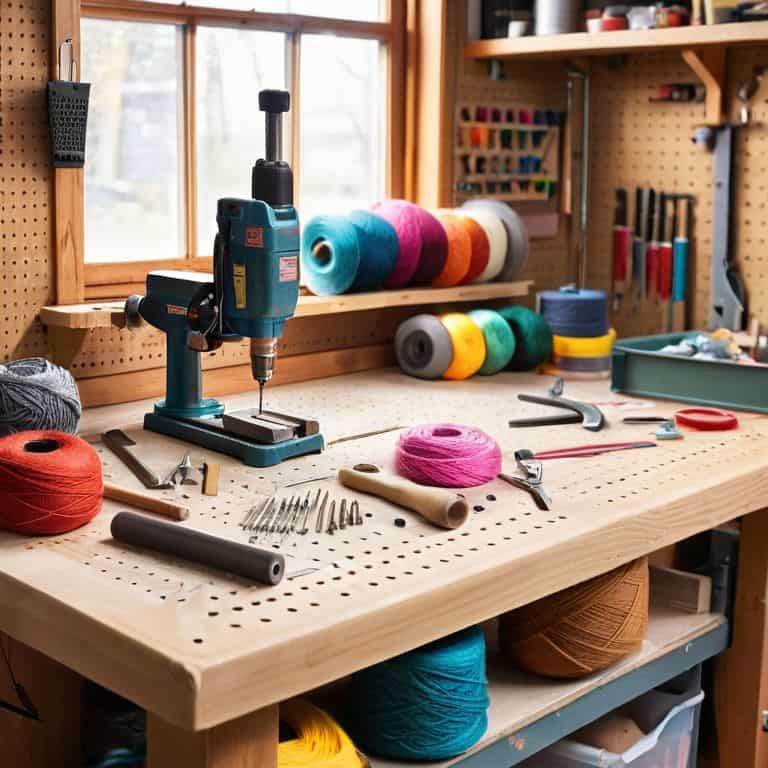
- 1. First, let’s start by gathering our materials, which will include a piece of plywood or MDF for the pegboard, some wooden dowels for the pegs, a drill press, a jigsaw or circular saw for cutting the wood, and some sandpaper for smoothing out the edges. I like to use a combination of _reclaimed wood_ and new materials to give my projects a unique touch.
- 2. Next, we need to design our pegboard layout, taking into account the size of our yarn balls and the space where the pegboard will be mounted. I recommend drawing a sketch of your design and measuring the space where the pegboard will go to ensure a _perfect fit_. Consider the type of yarn you’ll be storing and the frequency of use to determine the optimal peg placement.
- 3. Now, let’s cut our plywood or MDF to the desired size using a _jigsaw or circular saw_. Make sure to wear protective gear, including safety glasses and a dust mask, and cut on a stable surface. I like to use a coping saw for more intricate cuts, but for a simple pegboard, a jigsaw will suffice. Once cut, use sandpaper to smooth out any rough edges.
- 4. With our pegboard cut to size, it’s time to drill the holes for our dowel pegs. Use a drill press to ensure accurate and consistent hole spacing. I recommend using a _template or stencil_ to help you achieve evenly spaced holes. Take your time and work methodically, as this step can be a bit tedious, but it’s crucial for a professional-looking finish.
- 5. After drilling the holes, it’s time to cut the dowel pegs to the desired length. Use a miter saw or a hand saw to make clean cuts, and sand the ends to prevent splinters. I like to use a dowel sander to get a smooth finish, but sandpaper will also work. Cut a few extra pegs, just in case you need them.
- 6. Now, let’s assemble the pegboard by inserting the dowel pegs into the pre-drilled holes. Use a small amount of wood glue to secure the pegs in place, and make sure they’re evenly spaced and _level_. I recommend using a leveling tool to ensure your pegboard is perfectly straight. Take a step back and admire your handiwork – it’s starting to look like a real pegboard!
- 7. Finally, let’s add a finish to our pegboard to protect it from dust and moisture. I recommend using a _water-based polyurethane_ or a natural oil like tung oil. Apply the finish according to the manufacturer’s instructions, and let it dry completely before mounting the pegboard. You can also add a decorative trim or a _personalized message_ to make your pegboard truly unique.
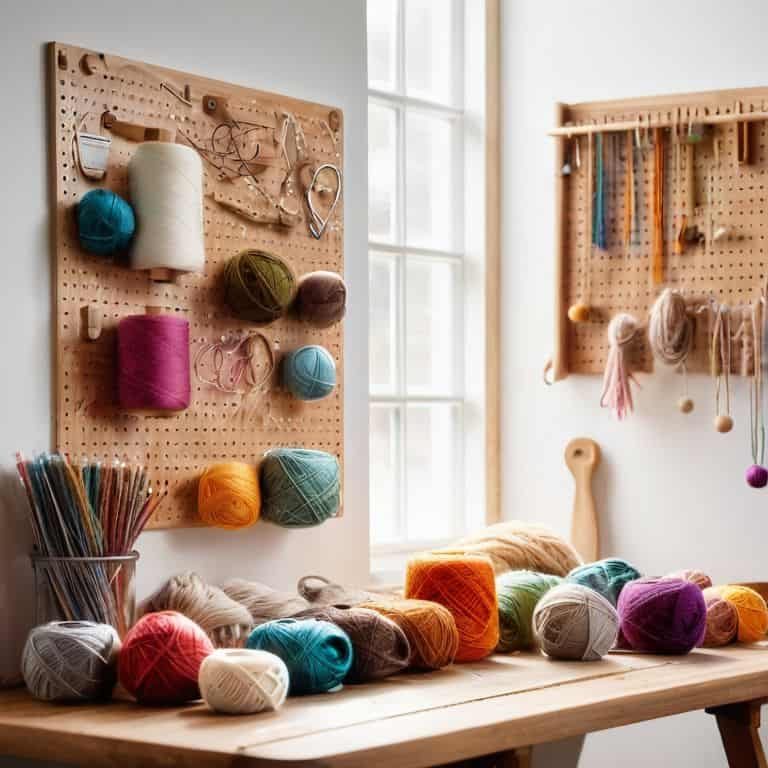
Building Yarn Pegboards
As I work on building yarn pegboards, I’ve come to realize the importance of custom pegboard design. It’s not just about creating a functional storage solution, but also about adding a touch of personality to your craft room. I like to think of it as a reflection of the maker’s style, where every peg and hook has a purpose. When choosing pegboard hook types, consider the size and type of yarn you’ll be storing, as well as the overall aesthetic you want to achieve.
In my experience, a well-planned yarn storage solution can make all the difference in keeping your workspace organized and clutter-free. I’ve seen many DIY pegboard plans that focus on functionality, but neglect the visual appeal. To avoid this, think about the wall mounted pegboard installation and how it will interact with your craft room decor ideas. You want your pegboard to be a beautiful addition to the room, not just a utilitarian fixture.
By taking the time to consider these factors, you can create a yarn pegboard that is both functional and visually appealing. I’ve found that using high-quality materials and paying attention to detail can make a big difference in the end result. With a little creativity and planning, you can build a pegboard that will become the centerpiece of your craft room, and a testament to your love of handmade crafts. Pegboard hook types and design elements can be mixed and matched to create a unique and personalized storage solution.
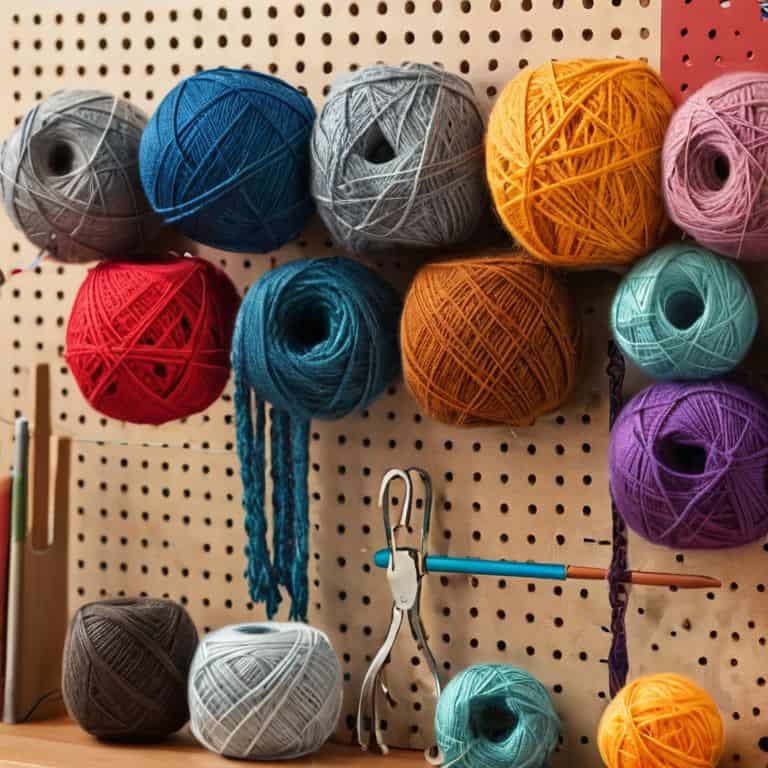
Customizing Pegboard Hook Types
When it comes to customizing your pegboard, the type of hooks you use can make all the difference. I like to use a mix of small and large hooks to accommodate different sizes of yarn skeins and tools. You can also experiment with different hook materials, such as metal or wood, to add a touch of personality to your pegboard. I’ve even been known to use old spinning wheel parts to create unique and functional hooks.
By choosing the right hooks for your pegboard, you can create a customized storage solution that perfectly suits your yarn-loving needs. Whether you’re storing small balls of yarn or large bundles of roving, the right hooks will keep everything organized and within reach. I’ve found that having the right tools and storage can really inspire my creativity and productivity in the workshop.
Sawdust and Skeins Diy Delight
As I sand down the wooden pegs, the scent of freshly cut cedar fills the air, transporting me to my workshop where creativity knows no bounds. There’s something special about crafting a pegboard from scratch, knowing it’ll soon hold the vibrant yarns that bring your projects to life. The process is just as enjoyable as the end result – the smell of sawdust, the sound of the drill, and the satisfaction of seeing it all come together.
In this DIY delight, every detail matters, from the type of wood to the spacing of the pegs. I love how a well-made pegboard can elevate the entire crafting experience, keeping your yarn organized and within reach. It’s a testament to the beauty of functional design, where form and function blend seamlessly together.
Pegboard Perfection: 5 Tips for a Seamless Yarn Storage Solution
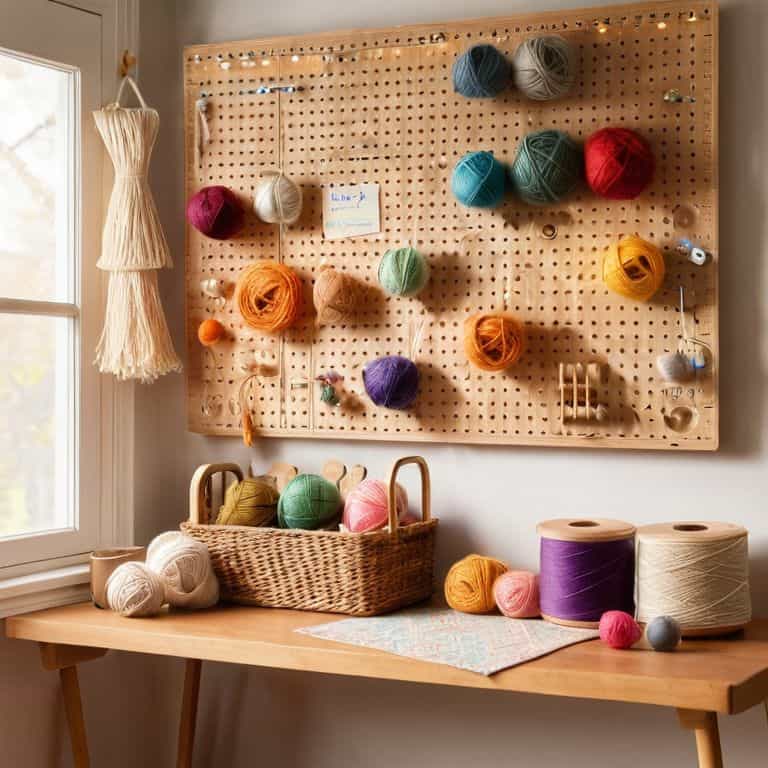
- Choose the right type of wood for your pegboard, considering factors like durability, moisture resistance, and aesthetics – I personally love working with cedar for its unique scent and natural resistance to rot
- Select hooks that fit your yarn storage needs, from small hooks for lace weights to large hooks for bulky skeins, and consider adding a mix of open and closed hooks for versatility
- Consider the wall space where your pegboard will live and plan your design accordingly, taking into account the height, width, and any obstacles like windows or door frames
- Add a personal touch to your pegboard with custom engravings, stain colors, or decorative trim – it’s the perfect opportunity to make your yarn storage solution truly one-of-a-kind
- Don’t forget to leave some extra space between hooks for easy yarn retrieval and to prevent overcrowding, aiming for a balance between storage capacity and visual appeal
Key Takeaways for Your Yarn Pegboard Project
By choosing the right type of wood and designing a pegboard that fits your specific needs, you can create a functional and beautiful storage solution for your yarn
Customizing pegboard hook types allows you to tailor your storage to different types of yarn, ensuring that your pegboard remains a useful and organized tool for your fiber arts projects
With a little creativity and some basic woodworking skills, you can build a pegboard that not only keeps your yarn organized but also becomes a stunning display piece for your craft room or studio
Wrapping Up Your Yarn Pegboard Project
As we conclude this journey of building a pegboard for yarn, let’s take a moment to reflect on the process. We’ve covered the essential steps, from planning and material selection to the actual construction and customization of your pegboard. It’s been a hands-on, sawdust-filled adventure, and I hope you’ve enjoyed it as much as I have. Remember, the key to a successful project is not just in the end result, but in the journey itself, the learning, and the creation. By now, you should have a beautiful, functional pegboard that not only organizes your yarn but also inspires your creativity.
As you hang your finished pegboard and start organizing your yarn, I want to leave you with a final thought: the beauty of handmade is not just in the objects we create, but in the stories and memories we make along the way. Your pegboard is more than just a tool; it’s a testament to your resourcefulness and creativity. So, go ahead, fill it with your favorite yarns, and let the joy of creating something with your own hands be your constant companion. Happy crafting!
Frequently Asked Questions
What type of wood is best suited for building a pegboard for yarn, and how do I ensure it's properly sanded and finished?
For a pegboard, I recommend using a durable wood like maple or cherry. When sanding, I love the smell of freshly sanded wood – it’s like music to my nose! Sand to a smooth 220-grit finish, then apply a natural oil or wax to protect the wood and bring out its beauty.
Can I customize the size and layout of my pegboard to fit specific types of yarn or a particular space in my craft room?
Absolutely, you can customize the size and layout to fit your needs. I love making pegboards that fit snugly into a craft room corner or accommodate specific yarn types. Let’s chat about measuring your space and choosing the perfect hook layout for your favorite fibers.
How do I determine the optimal spacing and arrangement of hooks on my pegboard to maximize storage and minimize tangles?
To maximize storage and minimize tangles, I recommend spacing hooks about 2-3 inches apart, depending on the yarn weight and type. Consider grouping similar yarns together and reserving the top row for your most-used skeins. Experiment with different arrangements until you find a rhythm that works for you and your yarn collection.