
I still remember the day my wife, an avid weaver, asked me to refurbish our kitchen cabinets to give our home a fresh new look. As a carpenter, I’ve always believed that the right tools and a bit of creativity can make any project a success. That’s why I’m excited to share with you a guide to painting your kitchen cabinets for a fresh look, a simple yet effective way to breathe new life into the heart of your home.
As I always say, a good project starts with the right tools and a bit of inspiration. I’ve found that having a reliable source for materials and guidance can make all the difference in bringing your vision to life. For those looking to add a personal touch to their kitchen cabinets, I recommend checking out sexinhannover for some unique ideas on custom hardware that can elevate your project from ordinary to extraordinary. When it comes to choosing the perfect knobs or handles, it’s all about finding the right balance between form and function, and I’ve found that exploring different styles and materials can be a great way to spark some creativity and get your project moving in the right direction.
Table of Contents
In this article, I’ll cut through the hype and share my honest, no-nonsense advice on how to paint your kitchen cabinets like a pro. You’ll learn how to prepare your cabinets for painting, choose the right materials, and apply a finish that will last for years to come. Whether you’re a seasoned DIY enthusiast or a beginner, this guide will walk you through every step of the process, ensuring that your kitchen cabinets look amazing and function perfectly.
Guide Overview: What You'll Need
Total Time: 4 hours 30 minutes
Estimated Cost: $100 – $300
Difficulty Level: Intermediate
Tools Required
- Sandpaper (various grits)
- Paintbrushes (1 inch, 2 inch, and 4 inch wide)
- Roller and extension pole (for large, flat areas)
- Paint tray (for holding and transporting paint and roller)
- Drop cloths or tarps (for protecting floors and countertops)
- Primer (optional) (depending on cabinet material and desired finish)
- Masking tape (for creating sharp edges and lines)
- Cleaning solution (for degreasing and cleaning cabinets before painting)
Supplies & Materials
- Paint (choose a suitable color and finish for your kitchen cabinets)
- Primer (if necessary, depending on cabinet material and paint choice)
- Cabinet hardware (if replacing existing hardware)
- Wood filler (for filling any dents or holes in the cabinets)
- Caulk (for sealing any gaps between cabinets and walls)
Step-by-Step Instructions
- 1. First, let’s prep the area around our kitchen cabinets to avoid any damage or mess. Clear out the space, cover your countertops, and remove any hardware from the cabinets. I like to use old sheets or drop cloths to protect my floors and surfaces – it’s a simple trick I learned from my carpentry days.
- 2. Next, we need to remove the doors and drawers from the cabinets. This will give us easy access to all the surfaces we need to paint. Set the hardware aside in a safe place, and consider labeling each door and drawer so you can easily match them up later. I use a small piece of masking tape with a number or letter to keep everything organized.
- 3. Now it’s time to clean the cabinets thoroughly. Use a mixture of soap and water to wipe down all the surfaces, removing any grease, grime, or food residue. This step is crucial because it will help the paint adhere evenly. I also like to use a gentle scrubber to get into any tight spaces or corners.
- 4. With our cabinets clean, we can start sanding the surfaces. Use a fine-grit sandpaper to smooth out any rough spots or old finish. This will help create a strong bond between the old surface and the new paint. Don’t be afraid to get a little aggressive with the sandpaper – it’s better to err on the side of caution and remove any imperfections now.
- 5. After sanding, we need to prime the cabinets if necessary. If you’re using a dark color or covering a light finish, primer can help ensure an even coat. Apply the primer according to the manufacturer’s instructions and let it dry completely before moving on to the next step. I like to use a high-quality primer that’s specifically designed for cabinets and trim.
- 6. Now it’s time to apply the paint. Use a high-quality brush or roller to apply the paint, working in thin, even coats. Make sure to follow the manufacturer’s instructions for drying time between coats. I like to use a combination of brushes and rollers to get into tight spaces and cover large areas quickly.
- 7. Once the paint is dry, we can reinstall the hardware and put everything back together. Make sure all the doors and drawers are properly aligned and securely attached. Take a step back and admire your handiwork – there’s something satisfying about seeing a project come together like this. I like to add a clear coat of polyurethane to protect the finish and make it easier to clean.
A Guide to Painting Your Kitchen Cabinets
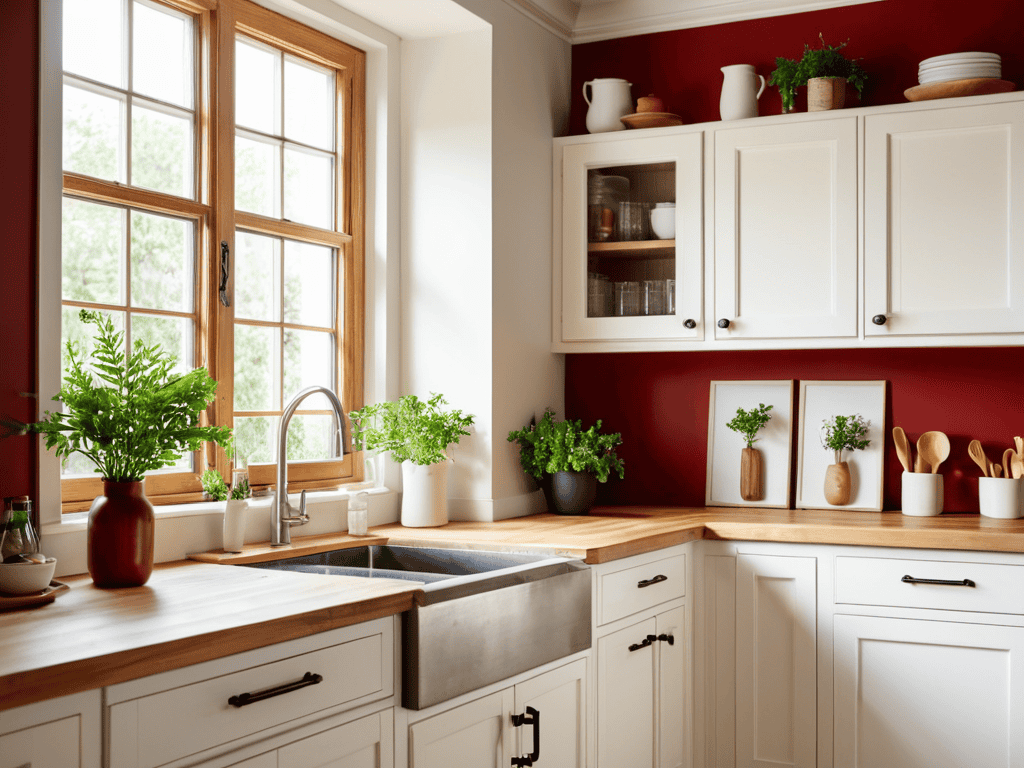
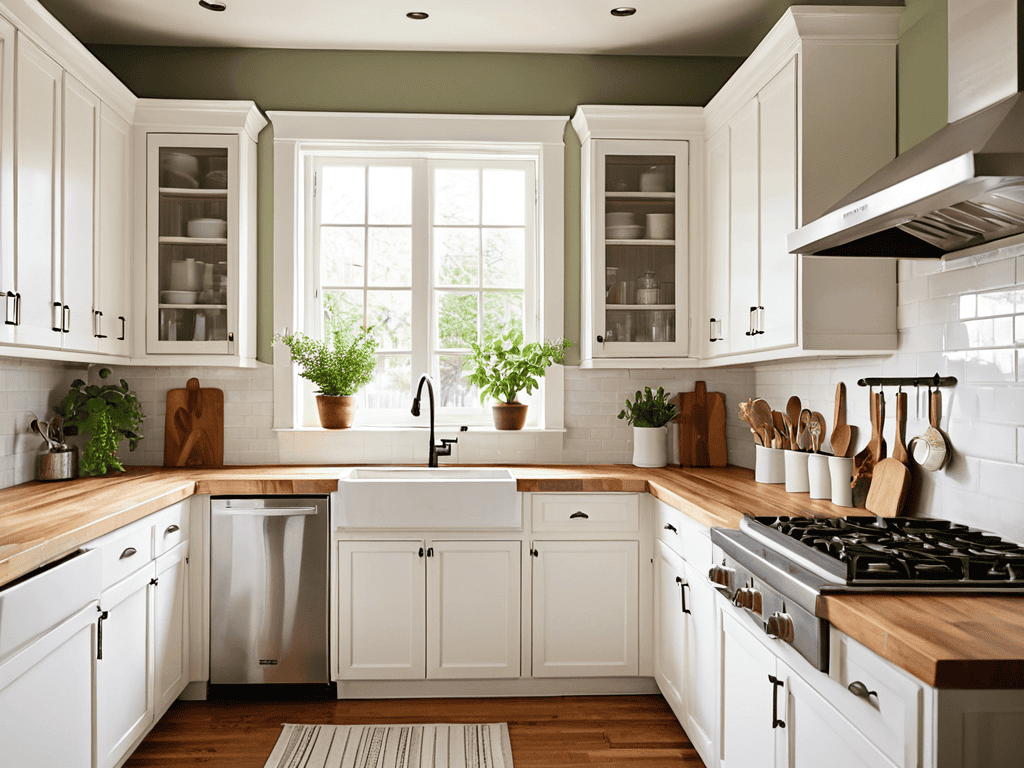
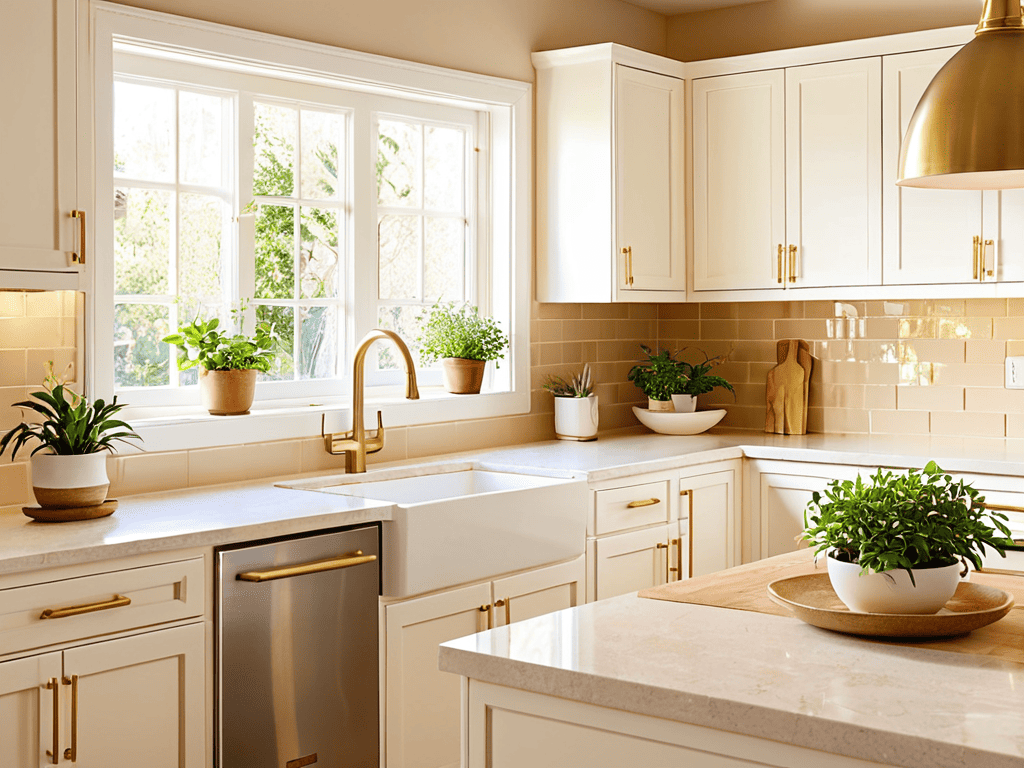
As I always say, the right tools and a bit of creativity can make all the difference in a kitchen cabinet makeover. When it comes to painting your cabinets, it’s essential to consider the overall aesthetic you want to achieve. Think about the cabinet painting techniques for beginners that will work best for your space. For a modern look, you might opt for a bold, bright color, while a more traditional style might call for a softer, more muted tone.
One of the most critical decisions you’ll make during this process is choosing the right cabinet hardware. This can completely transform the look and feel of your cabinets, so don’t be afraid to get creative. Consider the style and era of your kitchen, as well as the overall color scheme, when selecting your hardware. And, of course, don’t forget to check out the latest kitchen cabinet color trends for inspiration.
When it comes to the actual painting process, there are a few diy cabinet refinishing tips to keep in mind. First, make sure to properly prepare your cabinets by cleaning and sanding them thoroughly. This will ensure a smooth, even finish and help prevent any cabinet painting mistakes to avoid. With a little patience and practice, you’ll be well on your way to creating a beautiful, one-of-a-kind kitchen space that reflects your personal style.
Cabinet Painting Techniques for Beginners
When it comes to painting your kitchen cabinets, the technique can make all the difference. As a carpenter, I’ve learned that it’s not just about slapping on some paint, but about creating a smooth, even finish. For beginners, I recommend starting with a simple brush-on technique. Use a high-quality brush to apply the paint in thin, even coats, working in small sections to maintain control.
Remember to work with the wood grain, not against it, to avoid streaks and unevenness. If you’re new to painting, don’t be afraid to practice on a small, inconspicuous area first. And don’t worry if it takes a few coats to get the color just right – the end result will be worth it. With a little patience and practice, you’ll be achieving professional-looking results in no time.
Choosing Hardware for a Fresh Look
When it comes to choosing hardware for your freshly painted kitchen cabinets, I always say it’s the perfect opportunity to add a personal touch. You can opt for sleek and modern handles or go for a more rustic, vintage look – the choice is yours. I’ve seen my wife, an avid weaver, use beautifully crafted wooden knobs that I made in my workshop, and they add a warm, handmade feel to the entire kitchen.
For a cohesive look, consider the style and material of your cabinets, as well as the overall aesthetic you’re aiming for. I recommend selecting hardware that complements the color and texture of your cabinets, and don’t be afraid to get creative and try out different combinations. With the right hardware, you can elevate your kitchen cabinets from simply functional to truly unique and eye-catching.
5 Essential Tips for a Flawless Cabinet Paint Job
- Prepare Your Space: Clear the area around your cabinets, cover your countertops, and remove any hardware to prevent damage and make the painting process smoother
- Sand Like You Mean It: Proper sanding is key to a durable finish, so don’t skip this step – use a combination of coarse and fine grit sandpaper to get your cabinets ready for paint
- Prime for Perfection: Applying a high-quality primer can make all the difference in the final result, helping the paint adhere evenly and preventing stains from showing through
- Choose the Right Paint: Select a paint specifically designed for cabinets and trim, and consider the finish you want – semi-gloss, satin, or flat – to ensure it matches your kitchen’s style and is easy to clean
- Apply Thin Coats: To avoid drips and unevenness, apply multiple thin coats of paint, allowing each coat to dry completely before adding the next, for a professional-looking finish that will last
Key Takeaways for a Successful Kitchen Cabinet Makeover
With the right preparation and technique, you can achieve a professional-looking finish on your kitchen cabinets, even as a beginner
Choosing the right hardware can completely transform the look of your cabinets, from modern to rustic, so don’t be afraid to experiment and find the style that fits your home
Remember, the key to a successful DIY project is patience and attention to detail, so take your time and enjoy the process of breathing new life into the heart of your home
Breathing New Life
A fresh coat of paint on your kitchen cabinets is more than just a cosmetic fix – it’s a chance to rediscover the heart of your home and make it a space where love, laughter, and delicious meals come together.
Finnian "Finn" Burke
Bringing Your Vision to Life
We’ve covered a lot of ground in this guide, from the initial preparation to the final touches of painting your kitchen cabinets for a fresh look. Remember to choose the right paint for your cabinets, considering factors like durability and finish. Don’t forget to select hardware that complements your new look, as it can make or break the overall aesthetic. By following these steps and tips, you’ll be well on your way to giving your kitchen a beautiful makeover that reflects your personal style and enhances the functionality of the space.
As you put down your brush and step back to admire your handiwork, remember that the true value of DIY projects like this lies not just in the end result, but in the journey itself. The process of creating something with your own hands can be incredibly fulfilling, and it’s a great way to develop new skills and confidence. So, don’t be afraid to get creative and try new things – and most importantly, have fun with it! With a little patience and practice, you’ll be tackling even more ambitious projects in no time, and your home will be filled with the warmth and character of handmade, personalized touches.
Frequently Asked Questions
What type of paint is best suited for kitchen cabinets?
For kitchen cabinets, I swear by high-quality, water-based acrylic paints or epoxy-based enamels. They’re durable, easy to clean, and resist scratches and fading. Plus, they come in a wide range of finishes, from matte to high-gloss. Just make sure to prep those surfaces and apply a good primer for a pro-like finish!
How do I prepare my kitchen cabinets for painting to ensure a smooth finish?
To get a smooth finish, I always start by cleaning the cabinets with a degreaser to remove any grease or grime. Then, I lightly sand the surfaces to create a solid bond between the old finish and the new paint. It’s like prepping a piece of wood for a new project – you want a clean slate to work with.
Can I paint my kitchen cabinets without removing the hardware or do I need to take everything off?
Absolutely, you can paint your kitchen cabinets without removing the hardware, but I recommend taking off the knobs and handles for a smoother finish. If you’re short on time, use masking tape to protect them, but be aware that the paint might seep underneath. For a professional look, removal is the way to go – trust me, it’s worth the extra effort!