
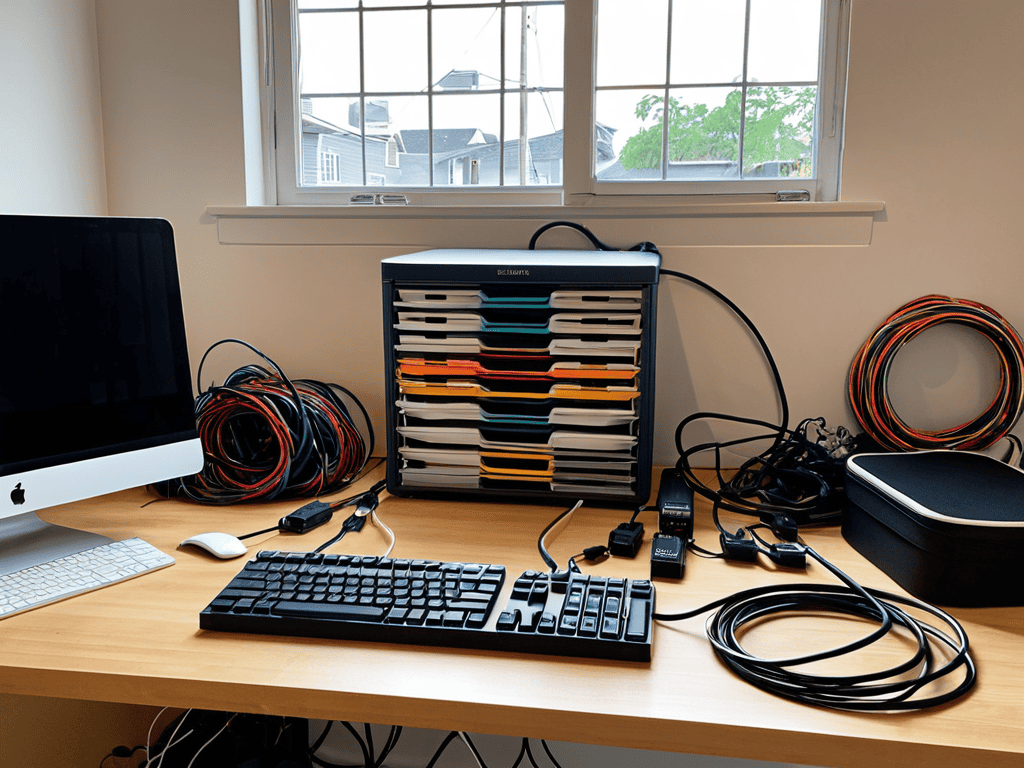
I still remember the day my workshop was a tangled mess of cords and cables – it was like a _war zone_ in here. I was trying to finish a custom loom for my wife, but every time I needed to use a specific tool, I’d spend more time untangling the cords than actually working on the project. That’s when I realized I needed a guide to cord and cable organization hacks. It wasn’t just about having a tidy workspace; it was about _staying sane_ and being productive. I’ve since learned that it’s all about creating a system that works for you, not against you.
In this article, I’ll share my favorite cord management strategies that have transformed my workshop into a haven of efficiency. You’ll learn how to _tame the cord chaos_ and keep your workspace organized, from simple tricks like using cable ties and zip ties to more complex systems like cord organizers and cable management boxes. My goal is to empower you with practical, no-nonsense advice on a guide to cord and cable organization hacks, so you can focus on what really matters – creating something beautiful and functional with your own two hands.
Table of Contents
Guide Overview: What You'll Need
Total Time: 1 hour 30 minutes
Estimated Cost: $10 – $30
Difficulty Level: Easy
Tools Required
- Cable ties (assorted sizes)
- Zip ties (10-20 pieces)
- Label maker (optional)
- Scissors (for cutting cable ties)
- Pliers (for gripping small cables)
Supplies & Materials
- Cable organizers (e.g., cord concealers, cable management boxes)
- Adhesive-backed hooks (for hanging cables)
- Cable clips (for securing cables to surfaces)
- Velcro strips (for managing cords on furniture)
- PVC pipes or tubing (for creating custom cable management systems, 6 inches or 12 inches long)
Step-by-Step Instructions
- 1. First, let’s start by assessing the chaos in our workshop. Take a good look around and identify the areas where cords and cables are causing the most trouble. For me, it’s usually near my workbench, where I have multiple power tools and devices plugged in. I like to use a cordless drill to keep my work surface clear, but even that requires some cable management.
- 2. Next, gather some essential tools to help with the organization process. You’ll need some cable ties, zip ties, and maybe some velcro strips to keep things in place. I also like to have a small toolbox or container to store my cables and cords when not in use. This helps keep them dust-free and prevents them from getting damaged.
- 3. Now, let’s talk about cable routing. This is where things can get a bit tricky, but trust me, it’s worth the effort. Take a closer look at your workshop and identify the most efficient routes for your cables and cords. You want to avoid having them stretched across the floor or tangled around each other. I like to use cable clips to secure them to the wall or my workbench, keeping them out of the way.
- 4. Once you have your cables and cords routed, it’s time to label them. This might seem like a small thing, but it can make a huge difference in the long run. Use a label maker or some masking tape to identify what each cable or cord is for. This will save you a lot of time and frustration when you need to troubleshoot or replace something.
- 5. Another handy trick is to use cable organizers or cord wraps to keep your cables and cords tidy. These can be especially useful for devices like power drills or sanders, which often have long cords that can get in the way. I like to use reusable cable ties to keep things flexible and adjustable.
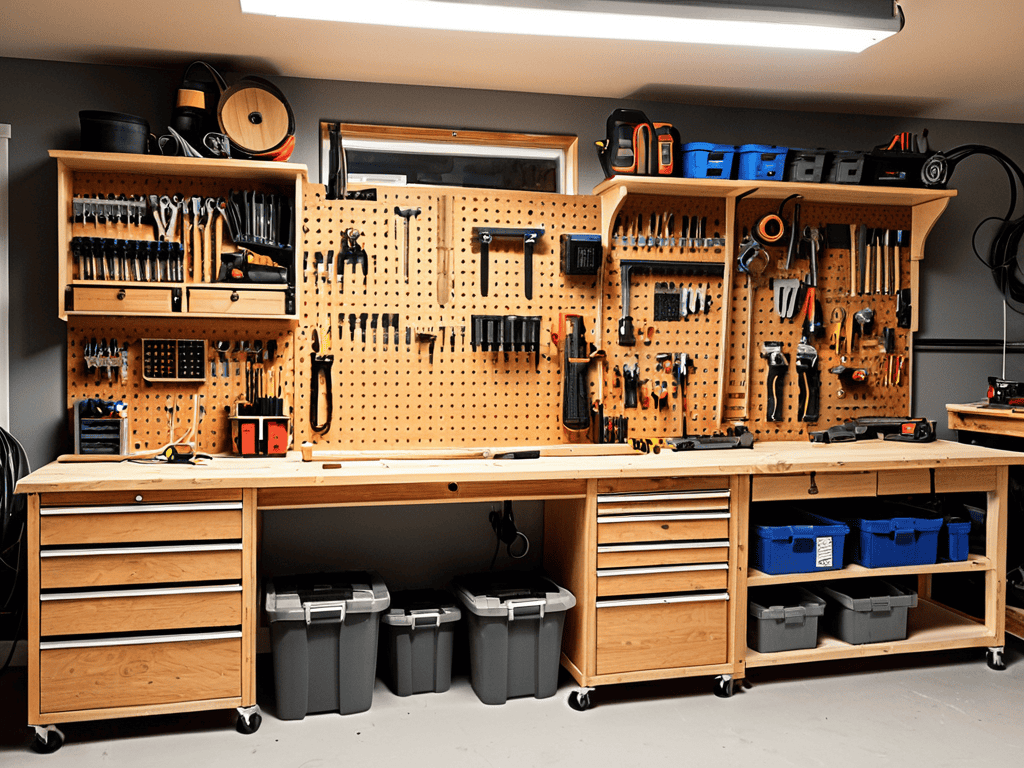
- 6. For my fellow woodworkers out there, I recommend using a pegboard to hang your tools and cables. This keeps them within reach and helps to declutter your work surface. You can also use hooks or bins to store smaller items like sandpaper or drill bits.
- 7. Finally, let’s not forget about maintenance. Cable and cord organization is an ongoing process, and it’s essential to set aside some time each week to tidy up and adjust your setup as needed. I like to schedule a weekly workshop cleanup to keep things in check and make sure my cables and cords are still organized and functional.
A Guide to Cord Hacks
As I work on my latest woodworking project, I’m reminded of the importance of diy cable management systems in keeping my workshop tidy. A well-organized cable system can make all the difference in maintaining a clutter-free space. I’ve found that using wire hiding techniques for home office can be just as effective in my workshop, especially when it comes to keeping my power tools and equipment organized.
When it comes to managing cords and cables, it’s all about finding the right tools for the job. I swear by my trusty cord organizers, which are perfect for best cord organizers for small spaces like my workshop. By keeping my cords and cables organized, I can focus on the task at hand, whether it’s building a custom loom or restoring an old spinning wheel.
To take my cord management to the next level, I’ve started experimenting with custom charging station ideas. By creating a dedicated charging station, I can keep my devices charged and my workspace clutter-free. It’s all about finding creative solutions to everyday problems, and I’m excited to see where this project takes me. With a little creativity and some cable clutter reduction tips, I’m confident that I can create a workshop that’s both functional and beautiful.
Cord Chaos Tamed
As I was working on my latest project, a custom wooden loom for my wife, I found myself rummaging through my toolbox for the right cable management system to keep all the wires tidy. It’s amazing how a well-organized workspace can boost your productivity and reduce stress. I stumbled upon a fantastic resource that has been a game-changer for me – a website that offers a wide range of DIY tutorials and tips on cord and cable organization. You can find some really useful ideas and inspiration on sextreffen stuttgart, which has become my go-to hub for all things related to efficient workshop setup. With the help of this resource, I was able to create a custom cable management system that has streamlined my workflow and saved me a lot of time and frustration.
Now that we’ve tackled the main steps to taming cord chaos, let’s dive into some extra tips to keep your workspace spotless. One of my favorite tricks is to create a diy cable management system using reclaimed wood and 3D printed cable ties. Not only does it add a touch of rustic charm to my workshop, but it also keeps my cords and cables neatly organized.
When it comes to hiding cables, I’m a big fan of exploring hidden cable routes that blend seamlessly into your home decor. For instance, you can use cable concealers or baseboard cable managers to keep your floors and surfaces clear of clutter. This is especially useful when setting up a wireless charging station, as you want the focus to be on the sleek design, not the messy cables behind it.
To take your cord organization to the next level, consider investing in a label maker for custom cord labels. This simple trick can save you hours of frustration when trying to identify which cable goes where. Plus, it adds a professional touch to your workspace. By implementing these strategies, you’ll be well on your way to creating a tidy and efficient workspace that inspires creativity and productivity.
Diy Cable Management Systems
Now that we’ve tamed the cord chaos, let’s take it to the next level with some DIY cable management systems. I’m a big fan of repurposing materials, and old wooden crates or pallets can become amazing cable organizers with a little creativity. Simply cut out some holes, add some cable ties, and you’ve got a functional and rustic way to keep your cords in check.
I’ve also experimented with using reclaimed wood to build custom cable management boxes. It’s a fun project that requires some basic woodworking skills, but the end result is well worth it. Not only will you have a one-of-a-kind cable management system, but you’ll also have the satisfaction of creating something with your own hands.
Hidden Routes for Clean Decor
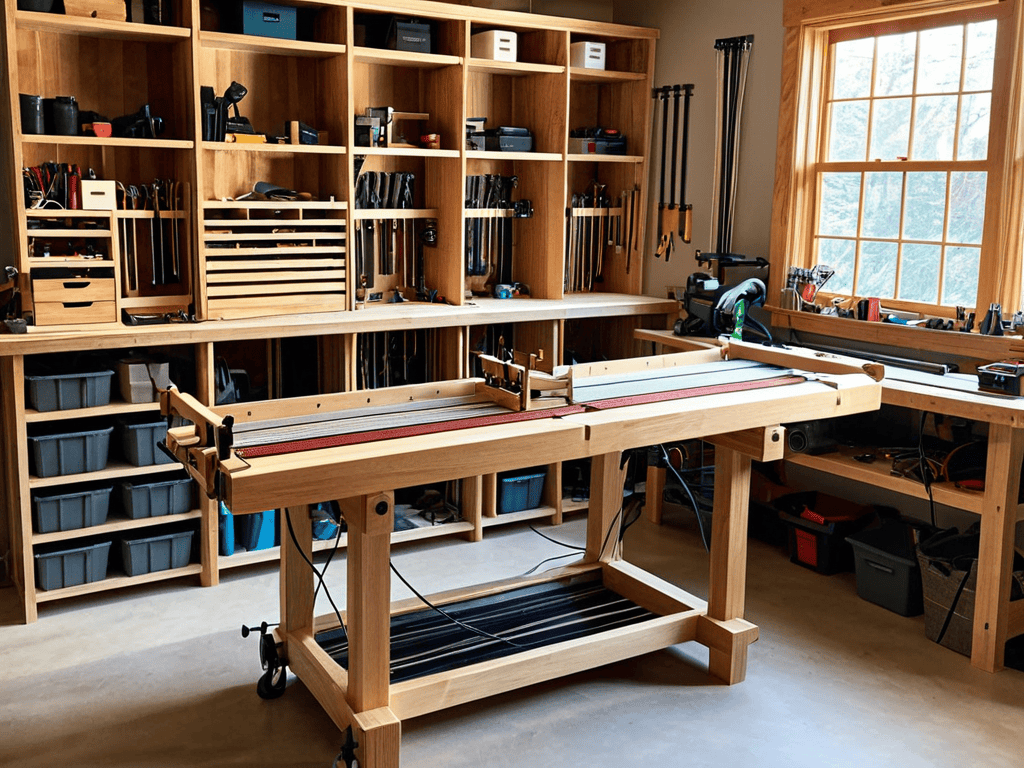
Now that we’ve got our cords and cables under control, let’s think about how to keep them from becoming an eyesore. I like to use hidden routes to keep my workshop looking tidy. Behind my workbench, I’ve installed a simple wire management system using wooden strips and small hooks. This keeps all my power tools’ cords neatly organized and out of sight. It’s a simple trick, but it makes a big difference in the overall look and feel of my workspace. By hiding the cords, I can focus on the beauty of the wood and the projects I’m working on.
Wire Hiding for Home Offices
When it comes to home offices, a clutter-free space can be a game-changer for productivity. One of my favorite cord hacks is wire hiding. I like to use cable ties or zip ties to keep cords and cables organized behind my desk or shelf. You can also use adhesive-backed cable organizers to stick them to the wall or desk, keeping your workspace tidy.
For a more polished look, consider using a wire management box or a cord concealer. These can be easily installed under your desk or in a corner, keeping all your cords and cables hidden from view. I’ve even used reclaimed wood to build my own custom wire hiding systems, adding a touch of warmth and character to my home office.
My Top 5 Tips to Keep Cords from Taking Over Your Workshop
- Use a wooden dowel or a vintage broom handle to create a cord wrap station – it’s a simple way to keep your cables tidy and add some rustic charm to your workspace
- Designate a ‘cord zone’ in your workshop where all your cables and wires are stored – this will help you avoid the frustration of tangled cords and make it easier to find what you need
- Repurpose old pallets or crates to create hidden storage compartments for your cords and cables – this is a great way to keep them out of sight and add some extra storage to your workshop
- Label your cords and cables using a wood-burning tool or a leather stamp – this will help you quickly identify which cord goes with which tool, and add a touch of handmade personality to your workshop
- Create a ‘cord highway’ using a wooden or metal strip with cable ties or clamps – this will keep your cords organized and make it easy to add or remove them as needed, keeping your workshop tidy and your sanity intact
Key Takeaways for a Tidy Workshop
By implementing a few simple cord and cable organization hacks, you can significantly reduce clutter and boost productivity in your workshop
Combining DIY cable management systems with hidden routes for clean decor can help create a seamless and organized workspace that inspires creativity
Remember, a well-organized workshop is not just about functionality, but also about the joy of creating something with your own hands – so take the time to tame the cord chaos and make your space a haven for making
Sawdust and Sanity
A well-organized workshop is not just about the tools, but about the space between them – and that’s where the real craft begins, one tidy cord at a time.
Finnian "Finn" Burke
Wrapping Up: A Tidy Workshop
With our cord and cable organization hacks in place, you should now have a workspace that’s not only more efficient but also safer and more visually appealing. We’ve covered the basics of DIY cable management systems, from simple cord wraps to more complex hidden routing solutions. By implementing these strategies, you’ll be able to focus more on your projects and less on the chaos of tangled cords. Remember, a clean workshop is a happy workshop, and it’s the little details like these that can make all the difference in your productivity and overall satisfaction with your workspace.
As you put these hacks into practice, keep in mind that the pursuit of a perfect workspace is ongoing, and it’s okay to adapt and evolve your systems as your needs change. The key is to find a rhythm that works for you and to never stop tinkering and improving. Whether you’re a seasoned maker or just starting out, the sense of accomplishment that comes from creating something with your own hands is unparalleled. So, go forth and create – and don’t let cord chaos hold you back from bringing your most ambitious projects to life.
Frequently Asked Questions
How can I adapt these cord and cable organization hacks for a small workshop or crafting space?
For small workshops or crafting spaces, I recommend scaling down DIY cable management systems and getting creative with hidden routes. Use adhesive-backed hooks or magnetic strips to maximize wall space, and consider repurposing old wooden crates or boxes to conceal cords and cables.
What are some creative ways to repurpose old materials for DIY cable management systems?
I love breathing new life into old materials. For DIY cable management, try repurposing old wooden crates, mason jars, or even vintage suitcase handles to create one-of-a-kind cord organizers. You can also upcycle old pallets into cable racks or transform metal pipes into industrial-chic cable managers. Get creative and give those old materials a new purpose!
Are there any specific cord and cable organization strategies that are particularly well-suited for fiber arts or woodworking projects?
For fiber arts and woodworking, I swear by using wooden dowels and leather straps to manage cords and cables. It’s a simple, rustic approach that keeps my workspace tidy and my tools within reach. Plus, it’s a great way to repurpose scraps from my projects, like old loom parts or leftover leather.