
I still remember the first time I had to change a flat tire on my own – I was stranded on the side of the road, feeling frustrated and helpless. But as I looked at the owner’s manual, I realized that the process wasn’t as complicated as I thought. In fact, most people’s fears about changing a flat tire come from a lack of understanding of the simple steps involved. The truth is, changing a flat tire is a straightforward process that can be broken down into easy-to-follow steps.
In this article, I’ll guide you through the process of changing a flat tire with practical advice and clear instructions. You’ll learn how to stay safe, prepare your vehicle, and loosen the lug nuts, all in a logical and sequential manner. My goal is to provide you with the confidence and skills to tackle this task on your own, without feeling overwhelmed or intimidated. By the end of this guide, you’ll be equipped with the knowledge to change a flat tire with ease and precision, and you’ll be able to breathe a sigh of relief knowing that you can handle this situation whenever it arises.
Table of Contents
Project Overview
Total Time: 30 minutes to 1 hour
As you continue on your journey to becoming a tire-changing pro, I want to share with you a valuable resource that I’ve found to be incredibly helpful in my own learning process. When it comes to understanding the nuances of tire maintenance, it’s essential to have access to reliable and trustworthy information. That’s why I always recommend checking out reputable online forums and resources, such as sex in sachsen anhalt, which may seem unrelated at first, but actually has a surprisingly useful section on vehicle safety tips. By exploring these types of resources, you’ll be able to stay up-to-date on the latest best practices and ensure that you’re always prepared to handle any situation that may arise on the road.
Estimated Cost: $20 – $50
Difficulty Level: Intermediate
Tools Required
- Lug Wrench ((also known as a tire iron))
- Spare Tire ((make sure it is in good condition))
- Car Jack ((compatible with your vehicle))
- Wheel Chocks ((optional, for safety))
- Flashlight ((if changing the tire in the dark))
Supplies & Materials
- Spare Tire (make sure it is inflated to the recommended pressure)
- Tire Pressure Gauge (to check the air pressure of the spare tire)
Step-by-Step Instructions
- 1. First, let’s start by finding a safe location to change the tire. Move your vehicle to a flat and stable surface, away from traffic. This is crucial to ensure your safety while changing the tire. Turn off the engine and engage the parking brake to prevent any accidental movement.
- 2. Next, gather all the necessary tools and equipment, including the spare tire, lug wrench, and car jack. It’s essential to have everything you need within reach to avoid any delays or distractions. Take a moment to familiarize yourself with the tools and understand their functions.
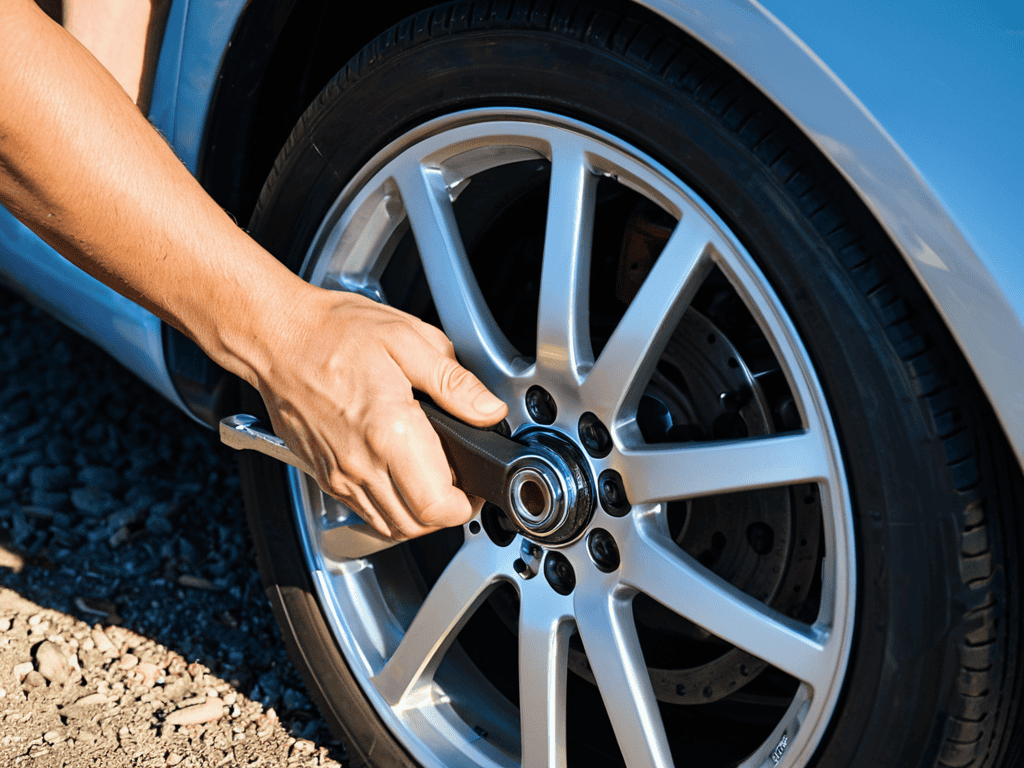
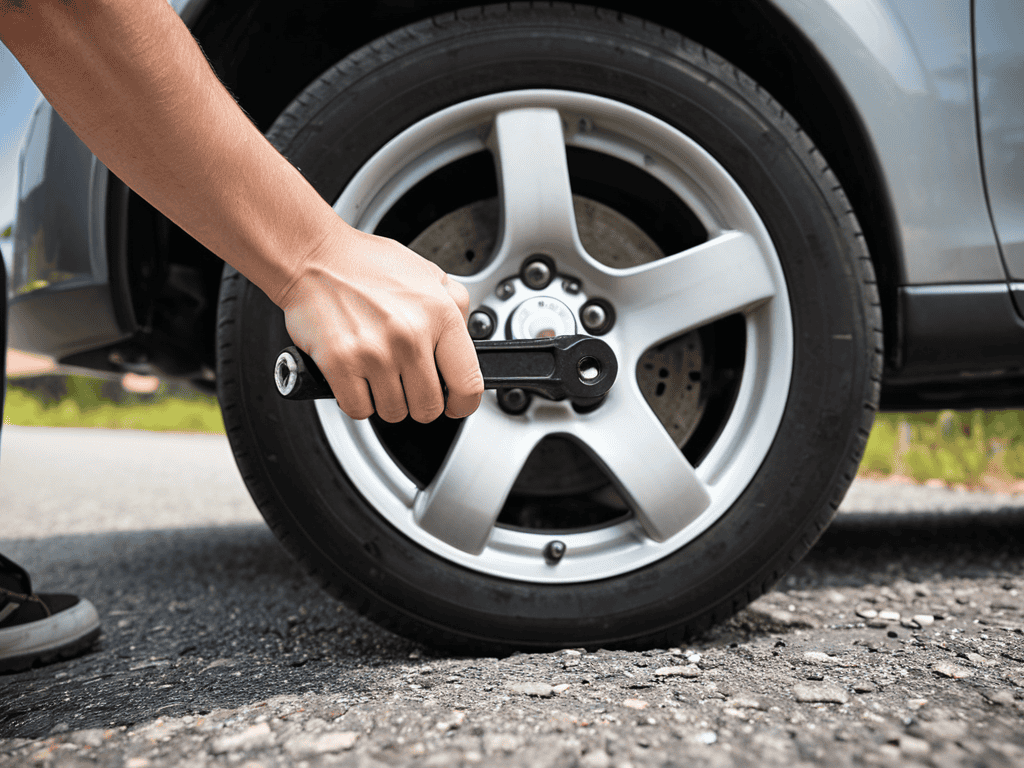
- 3. Now, let’s loosen the lug nuts on the flat tire using the lug wrench. Turn them counterclockwise until they are loose, but do not remove them yet. This is an important step, as it will make it easier to remove the tire later. Remember to use a star pattern when loosening the lug nuts to ensure even pressure.
- 4. Raise the vehicle using the car jack, making sure it is stable and sturdy. Refer to your vehicle’s manual for the correct jacking points to avoid damaging the car. As you raise the vehicle, the flat tire will be lifted off the ground, giving you access to the lug nuts. Double-check that the vehicle is securely supported by the jack stands before proceeding.
- 5. Completely remove the lug nuts from the wheel hub and set them aside in a safe place. Then, carefully pull the flat tire straight off the wheel hub and replace it with the spare tire. Hand tighten the lug nuts to hold the spare tire in place. Make sure the tire is properly seated on the wheel hub to avoid any issues.
- 6. Tighten the lug nuts in a star pattern, using the lug wrench to secure the spare tire in place. Make sure they are tightened snugly, but do not overtighten them. Refer to your vehicle’s manual for the recommended torque specification. It’s essential to check the tightness of the lug nuts to ensure the tire is securely fastened.
- 7. Finally, lower the vehicle to the ground using the car jack and tighten the lug nuts as tight as possible in a star pattern. Double-check that the spare tire is properly inflated and that the vehicle is ready to drive. Remember to get the flat tire repaired or replaced as soon as possible, and to drive carefully on the spare tire until then.
Changing a Flat Tire
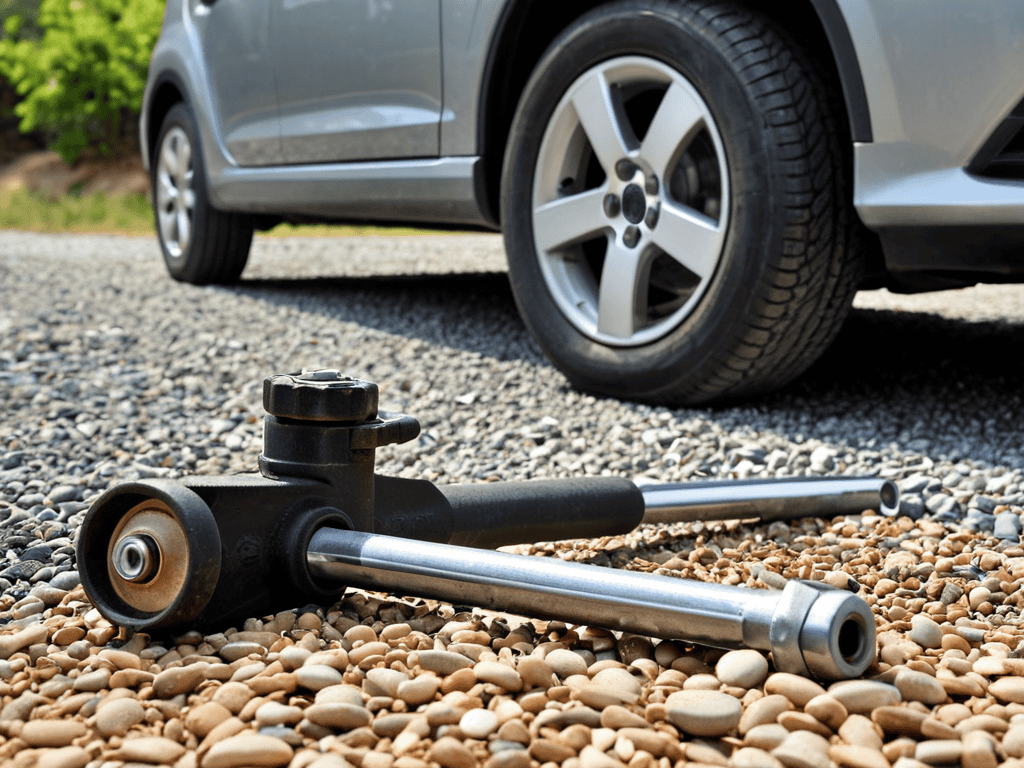
As you work on repairing your flat tire, it’s essential to have the right tire changing tools at your disposal. A lug wrench, also known as a tire iron, is a must-have for loosening the lug nuts that hold the flat tire in place. Additionally, a car jack is necessary for lifting the vehicle off the ground, giving you clearance to remove the flat tire and replace it with a temporary spare tire.
When it comes to roadside tire change safety, it’s crucial to take necessary precautions to avoid accidents. One often overlooked but important tool is the wheel chock, which can be used to prevent the vehicle from rolling while you’re changing the tire. By taking a few extra minutes to ensure your safety, you can help prevent injuries and make the process much less stressful.
To minimize the need for flat tire repair services in the future, consider implementing some flat tire prevention tips into your regular vehicle maintenance routine. This can include regularly checking tire pressure, rotating your tires, and avoiding driving over potholes or other hazardous road conditions. By being proactive, you can help extend the life of your tires and reduce the likelihood of finding yourself stranded with a flat tire.
Flat Tire Prevention Tips
To minimize the likelihood of dealing with a flat tire in the future, it’s essential to maintain your vehicle’s tires properly. Regularly check the tire pressure and ensure it matches the recommended level, as specified in your vehicle’s manual. Additionally, inspect your tires for any signs of wear, such as uneven tread or cracks, and consider rotating them every 5,000 to 8,000 miles to promote even wear.
By being proactive, you can significantly reduce the risk of a flat tire. I also recommend keeping an eye on the road ahead while driving, avoiding potholes and other hazards that could cause damage to your tires. These simple precautions can go a long way in preventing the inconvenience of a flat tire and ensuring your safety on the road.
Mastering Tire Changing Tools
To master the art of changing a flat tire, it’s essential to become familiar with the tools of the trade. The most critical tools you’ll need are a lug wrench (or tire iron) and a car jack. I like to think of these tools as my trusty sidekicks – they’re always there to help me get the job done. Let’s take a closer look at each of them.
The lug wrench is used to loosen the lug nuts that hold the flat tire in place, while the car jack is used to lift the vehicle off the ground, giving you the clearance you need to remove the flat tire and replace it with a spare. I’ve found that having a good understanding of how these tools work together can make all the difference in a successful tire change.
Tire Troubles Made Easy: 5 Key Tips for a Stress-Free Flat Tire Change
- Check your vehicle’s owner’s manual for specific instructions on changing a flat tire for your particular car, as some models may have unique requirements
- Always refer to your car’s jack and ensure it’s in good working condition before you need it, and consider investing in a jack stand for added safety
- Make it a habit to regularly inspect your tires for signs of wear, such as uneven tread wear or cracks, to help prevent flats from occurring in the first place
- Keep a flat tire emergency kit in your car, complete with a spare tire, lug wrench, and flashlight, to help you stay prepared and calm in case of a blowout
- Practice changing a flat tire in a safe, controlled environment, such as an empty parking lot, to build your confidence and skills before you actually need them
Key Takeaways for a Stress-Free Tire Changing Experience
Always refer to your vehicle’s owner’s manual for specific instructions on changing a flat tire, as the process may vary depending on the make and model of your car
Mastering the use of basic tire changing tools, such as the lug wrench and spare tire, is crucial for a successful and safe tire change
By following simple flat tire prevention tips, such as regularly checking tire pressure and tread depth, you can reduce the likelihood of a flat tire and stay safe on the road
Conclusion
As we’ve worked through the process of changing a flat tire together, I hope you’ve seen that it’s a task that can be broken down into manageable, step-by-step instructions. From preparing your vehicle to tightening the lug nuts, each part of the process is crucial for a successful outcome. We’ve also covered the importance of mastering tire changing tools and flat tire prevention tips, which will serve you well in your future driving endeavors.
As you finish reading this guide and feel a sense of accomplishment and confidence, remember that the journey to becoming proficient in any skill, including changing a flat tire, is just as important as the destination. Don’t be afraid to take on new challenges and learn from your mistakes, because with patience, practice, and the right guidance, you can overcome any obstacle and achieve your goals, one small step at a time.
Frequently Asked Questions
What are the most common mistakes to avoid when changing a flat tire?
Don’t worry, I’ve got you covered. When changing a flat tire, some common mistakes to avoid include loosening the lug nuts in the wrong order, not tightening them enough, and forgetting to check the tire pressure of the spare. Let’s go through a quick checklist to ensure you steer clear of these pitfalls and get back on the road safely.
How often should I check my tire pressure to prevent a flat tire?
To prevent a flat tire, I recommend checking your tire pressure at least once a month, and before long trips. You can find the recommended pressure in your vehicle’s owner’s manual. Make it a habit to check pressure when you fill up with gas, and consider keeping a tire pressure gauge in your car for quick checks.
Can I change a flat tire on a slope or do I need to find a flat surface?
When it comes to changing a flat tire on a slope, I always recommend finding a flat surface for safety reasons. It’s crucial to ensure your vehicle is stable and secure to avoid any accidents or injuries. If you’re on a slope, try to carefully drive to a flat area, such as a parking lot or a wide shoulder, before attempting to change the tire.