I still remember the day my wife, an avid sewer, came to me frustrated with her sewing needles constantly getting stuck and tangled. She had tried every store-bought needle conditioner on the market, but nothing seemed to work. That’s when I decided to take matters into my own hands and create a custom needle conditioner from scratch. After some trial and error, I discovered that making your own needle conditioner is not only easy but also incredibly effective. In fact, I believe that having a good needle conditioner is just as important as having a good sewing machine. That’s why I’m excited to share with you a guide to making your own needle conditioner, so you can say goodbye to frustrating sewing sessions and hello to smooth, effortless stitching.
In this article, I’ll walk you through the simple process of creating your own needle conditioner using everyday materials. You’ll learn how to combine natural ingredients to create a powerful conditioner that will keep your sewing needles running smoothly. I’ll share my own experiences, tips, and tricks for making the process easy and fun. By the end of this guide, you’ll be equipped with the knowledge and skills to create your own custom needle conditioner and take your sewing to the next level. Whether you’re a seasoned sewer or just starting out, this guide is perfect for anyone looking to improve their sewing experience with a homemade needle conditioner.
Table of Contents
- Guide Overview: What You'll Need
- Step-by-Step Instructions
- A Guide to Making Your Own Needle Conditioner
- Crafting Homemade Needle Lubricant With Beeswax
- Eco Friendly Sewing Natural Fiber Needle Protection Tips
- Sewing Savvy: 5 Essential Tips for a Stellar Homemade Needle Conditioner
- Key Takeaways for a Smooth Sewing Experience
- Bringing It All Together: A Homemade Needle Conditioner
- Frequently Asked Questions
Guide Overview: What You'll Need
Total Time: 30 minutes to 1 hour
Estimated Cost: $5 – $15
Difficulty Level: Easy
Tools Required
- Small Saucepan (for heating the mixture)
- Whisk (for mixing the ingredients)
- Measuring Cups (for accurate measurements)
- Measuring Spoons (for precise measurements)
- Glass Jar (with a lid, for storing the conditioner)
Supplies & Materials
- Beeswax (1/4 cup or 2 ounces)
- Coconut Oil (1/4 cup or 2 ounces)
- Vitamin E Oil (1 teaspoon)
- Lanolin (1 tablespoon or 0.5 ounces)
Step-by-Step Instructions
- 1. First, let’s start by gathering our materials, which include beeswax, a natural wax produced by honeybees that’s perfect for conditioning needles. We’ll also need some jojoba oil, a lightweight oil that won’t leave any residue on our fabrics, and a few other basic ingredients like vitamin E oil and lavender essential oil.
- 2. Next, we’ll need to melt the beeswax in a double boiler or a heat-proof glass bowl set over a pot of simmering water. This will help us to mix it evenly with the other ingredients. While the beeswax is melting, let’s prepare our jojoba oil by measuring out the right amount – about 2 tablespoons should do the trick.
- 3. Now that our beeswax is melted, let’s add in the jojoba oil and stir until it’s fully incorporated. We’ll also add a few drops of vitamin E oil, which will help to extend the shelf life of our needle conditioner and give it some extra nourishing properties.
- 4. With our mixture fully combined, it’s time to add in some lavender essential oil – just a few drops will give our needle conditioner a nice, calming scent. Let’s stir everything together and then remove the mixture from the heat.
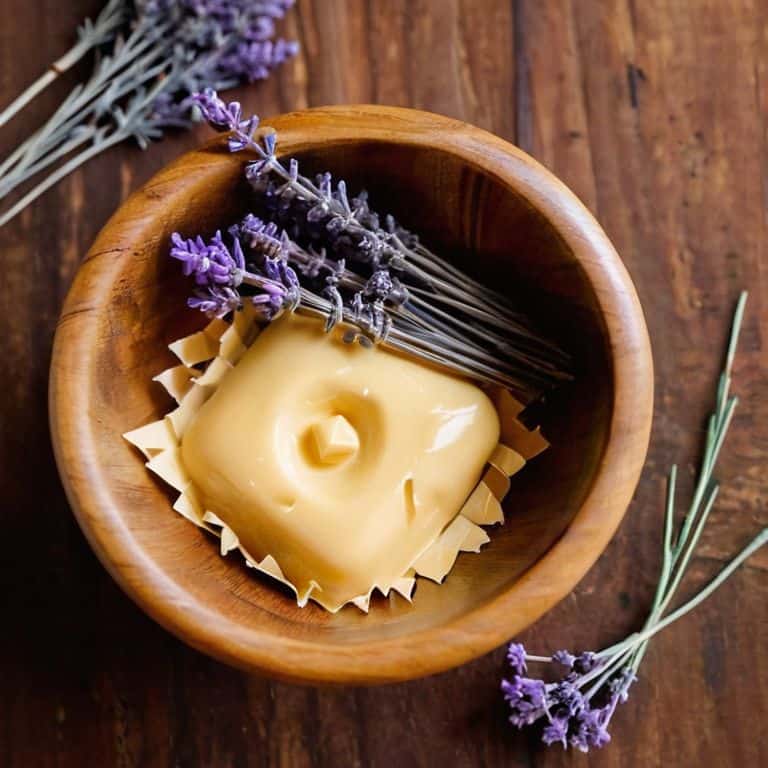
- 5. As our mixture cools, it will start to thicken and solidify. This is exactly what we want, so let’s just let it be for a few minutes. Once it’s reached a consistency that’s similar to soft butter, we can scoop it into a small tin or jar and let it cool completely.
- 6. With our needle conditioner fully cooled and solidified, let’s give it a try. Simply rub a small amount onto your needle and thread it through your fabric – you should notice that it glides through much more smoothly than before. This is because the beeswax and jojoba oil are working together to reduce friction and condition your needle.
- 7. Finally, let’s talk about storing our needle conditioner. Since it’s made with natural ingredients, it’s best to keep it in a cool, dry place to prevent it from melting or becoming rancid. A small tin or jar with a tight-fitting lid is perfect for this – just be sure to label it so you know what’s inside. With proper care, your homemade needle conditioner should last for several months and provide you with smooth, frustration-free sewing every time.
A Guide to Making Your Own Needle Conditioner
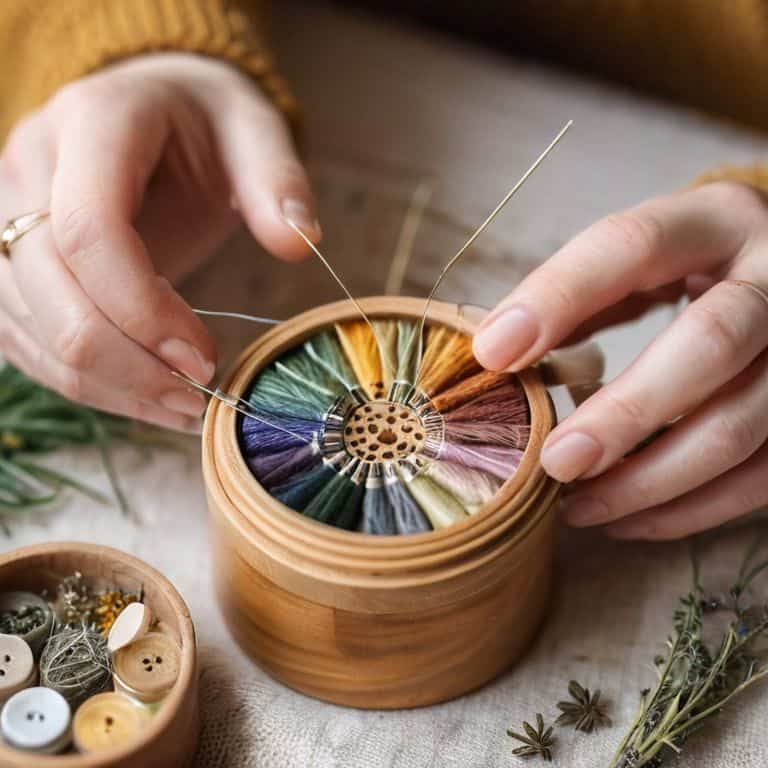
As I work on my latest woodworking project, a custom spindle for my wife’s weaving, I always keep in mind the importance of proper tool maintenance. This is especially true for our sewing needles, which can become worn and damaged over time. To combat this, I like to use a homemade needle lubricant made from a beeswax and oil blend. Not only does this help to keep our needles running smoothly, but it also provides a layer of natural fiber needle protection.
When it comes to diy sewing tool care, I believe that every little bit counts. By taking the time to properly maintain our sewing needles, we can help to extend their lifespan and improve our overall sewing experience. One of my favorite tips is to use a small amount of beeswax and oil blend recipe to condition our needles after each use. This helps to keep them lubricated and protected, making them less prone to rust and corrosion.
In addition to using a homemade needle lubricant, I also like to practice eco friendly sewing practices in my workshop. This includes using natural fibers, repurposing old materials, and reducing waste whenever possible. By taking a more mindful approach to our sewing practices, we can help to reduce our impact on the environment while also creating beautiful, handmade items that will last for years to come.
Crafting Homemade Needle Lubricant With Beeswax
Now that we’ve covered the basics of making a needle conditioner, let’s take it to the next level by crafting our own homemade needle lubricant with beeswax. I love working with beeswax – it’s like the wood of the wax world, with its own unique scent and texture. To make this lubricant, you’ll need some beeswax pellets, a bit of coconut oil, and a few drops of lavender essential oil. Simply melt the beeswax and coconut oil together in a double boiler, then stir in the lavender oil.
The result is a smooth, non-sticky lubricant that’s perfect for conditioning your needles and keeping them running smoothly. I like to apply it to my needles after each use, just to keep them in top shape. With this homemade lubricant, you’ll be able to thread your way to bliss in no time – and the best part is, you can customize the recipe to your heart’s content. Experiment with different essential oils or add a bit of vitamin E oil for extra nourishment. The possibilities are endless, and I’m excited to see what you come up with!
Eco Friendly Sewing Natural Fiber Needle Protection Tips
When it comes to protecting your needles while sewing with natural fibers, I’ve found that a little creativity can go a long way. Not only does my homemade needle conditioner work wonders, but I also like to use a small piece of felted wool to store my needles. The natural oils in the wool help keep my needles rust-free and conditioned. Plus, it’s a great way to reuse an old sweater or two.
I also recommend using a needle threader made from a piece of bamboo or a wooden dowel. It’s a simple, eco-friendly alternative to plastic threaders, and it’s easy to make yourself with just a few basic tools. By incorporating these natural, reusable materials into your sewing practice, you’ll not only reduce waste but also add a touch of handmade charm to your craft.
Sewing Savvy: 5 Essential Tips for a Stellar Homemade Needle Conditioner
- Choose the right beeswax: I always opt for high-quality, pure beeswax for my homemade needle conditioners – it makes all the difference in how well your needles glide through fabric
- Keep it simple with natural fibers: When it comes to protecting your needles, natural fibers like cotton, linen, or hemp are the way to go – they’re eco-friendly and effective
- Don’t overdo it on the lubricant: Too much of a good thing can be, well, too much – use a light hand when applying your homemade needle conditioner to avoid gumming up your needles
- Experiment with essential oils: Adding a few drops of your favorite essential oil to your homemade needle conditioner can give it a lovely scent and even provide some extra benefits, like tea tree oil’s antimicrobial properties
- Store it properly: To keep your homemade needle conditioner fresh and effective, store it in an airtight container away from direct sunlight and heat sources – trust me, you don’t want it to melt into a sticky mess
Key Takeaways for a Smooth Sewing Experience
By making your own needle conditioner, you can ensure your sewing needles stay in top condition, reducing friction and breakage, and ultimately leading to more professional-looking finishes
Using natural ingredients like beeswax not only conditions your needles but also aligns with eco-friendly sewing practices, reducing your reliance on synthetic chemicals and products
With a little creativity and some basic materials, you can craft your own needle conditioner and other sewing accessories, bridging the gap between woodworking and fiber arts, and taking your sewing projects to the next level
Bringing It All Together: A Homemade Needle Conditioner
As we’ve explored in this guide, making your own needle conditioner is a straightforward process that requires just a few simple ingredients, including beeswax, which provides a natural barrier against friction and wear. By following the steps outlined here, you can create a customized lubricant that suits your specific sewing needs, whether you’re working with delicate fabrics or heavy-duty materials. Additionally, we’ve touched on the importance of eco-friendly sewing practices, highlighting the benefits of using natural fibers and minimizing waste in your projects.
As you put your new needle conditioner to use, remember that the true beauty of DIY lies not just in the end result, but in the journey itself. The process of creating something with your own hands can be deeply fulfilling, and it’s a great way to develop a greater appreciation for the tools and materials you work with. So don’t be afraid to get creative and experiment with new recipes and techniques – you never know what innovative solutions you might discover, and the sense of accomplishment you’ll feel will be well worth the effort.
Frequently Asked Questions
What are the benefits of using a homemade needle conditioner compared to store-bought alternatives?
Using a homemade needle conditioner has several benefits – it’s cost-effective, customizable, and free of harsh chemicals. Plus, it’s a great way to reuse and recycle materials, reducing waste. I’ve found that my handmade conditioners perform just as well, if not better, than store-bought ones, and they add a personal touch to my sewing projects.
Can I customize the recipe for my needle conditioner to suit specific types of needles or sewing projects?
Absolutely, you can tweak the recipe to suit your needs. For example, add a bit more beeswax for heavier-duty needles or use a lighter touch for delicate sewing projects. Experiment with different ratios of ingredients to find your perfect blend – it’s all about finding what works best for you and your sewing style.
How long does a homemade needle conditioner typically last and what's the best way to store it to maintain its effectiveness?
A homemade needle conditioner can last several months, depending on use. To keep it fresh, store it in an airtight container, like a small wooden box or a tin. I like to wrap mine in a leather pouch, keeps it dry and within reach. Just make sure to reapply every few projects to keep your needles humming.