
As I sit at my loom, surrounded by threads of every hue, I’m reminded of the common myth that creating an ombre effect in weaving is a complicated, tedious process. But the truth is, building a gradient with yarn can be as straightforward as designing a blueprint. I’ve found that with a little patience and practice, anyone can craft a stunning ombre textile. In fact, I’m excited to share my journey of discovery with you in this guide to creating an ombre effect in weaving, where I’ll show you how to weave a beautiful, subtle transition from one color to another.
In this article, I promise to share my honest, no-nonsense advice on how to achieve a breathtaking ombre effect in your weaving projects. You’ll learn how to select the perfect threads, balance texture and tone, and bring your design to life. Whether you’re a seasoned weaver or just starting out, my goal is to empower you with the knowledge and confidence to create your own unique, large-scale woven art installations. So, let’s dive into the world of ombre weaving together, and explore the endless possibilities of texture and color that await us.
Table of Contents
Guide Overview: What You'll Need
Total Time: 3 hours 15 minutes
Estimated Cost: $50 – $100
Difficulty Level: Intermediate
Tools Required
- Loom a simple frame loom or a rigid heddle loom
- Shuttle for passing the weft yarn
- Scissors for cutting the yarn
- Measuring tape for measuring the warp and weft
- Yarn needle for weaving in ends
Supplies & Materials
- Warp yarn in a light color, approximately 100 yards
- Weft yarn in a gradient of colors, approximately 200 yards
- Fringe twine optional, for creating a fringe
- Weaving needle for weaving the yarn
- Threading hook for threading the yarn through the loom
Step-by-Step Instructions
- 1. To begin crafting your ombre masterpiece, start by selecting a palette that resonates with your artistic vision. This could range from the soft, serene hues of a misty dawn to the vibrant, energetic tones of a sunset. I find that natural fibers such as linen or raw silk lend themselves beautifully to ombre effects, as they have a subtle texture that adds depth to the gradient.
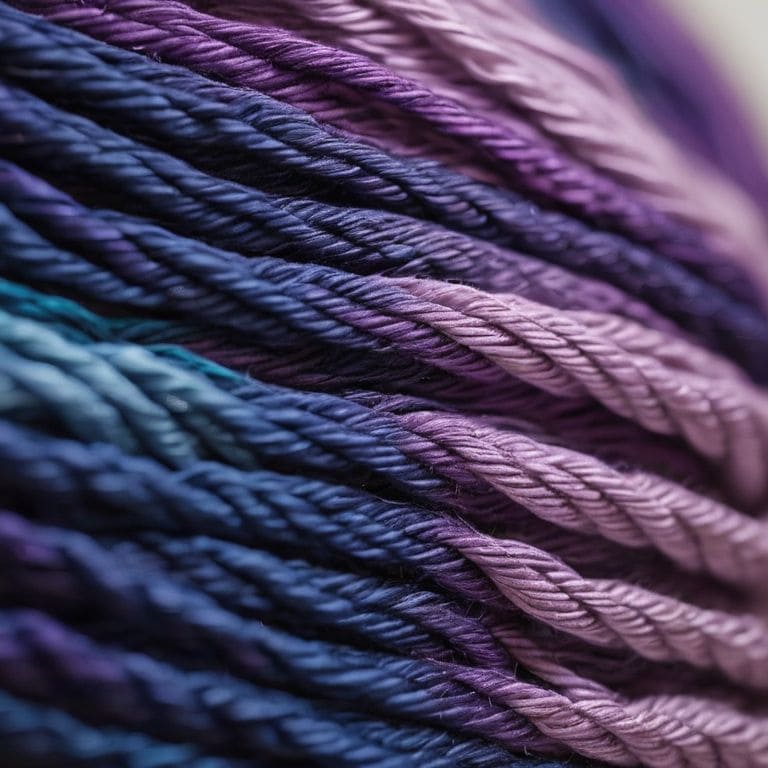
- 2. Next, prepare your yarns by dividing them into increments of color. If you’re aiming for a smooth, seamless transition between hues, it’s essential to have a range of shades that blend harmoniously. You can achieve this by either dyeing your yarns in gradual shades or by selecting pre-dyed yarns that fit your desired color spectrum.
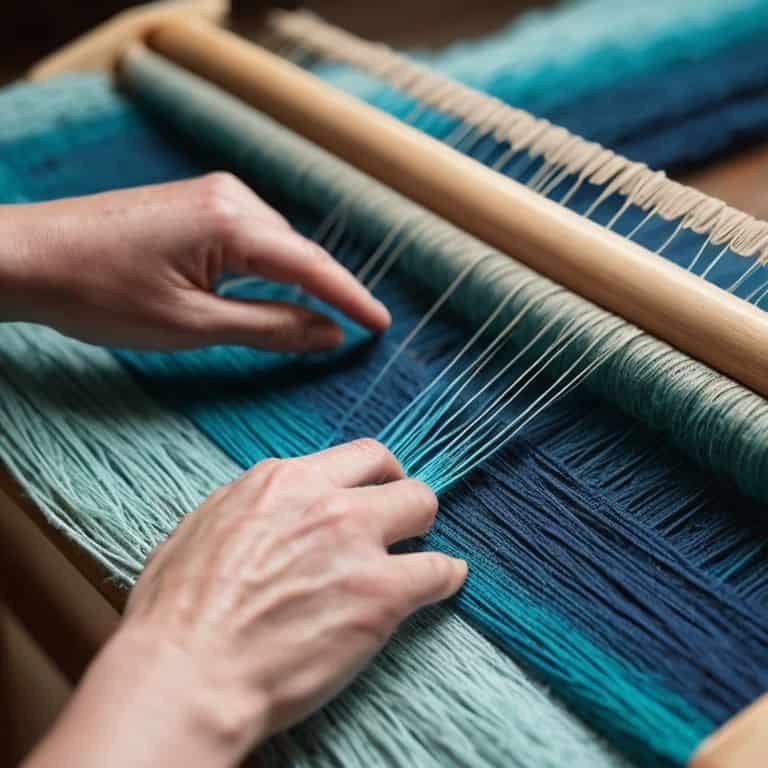
- 3. Now, set up your loom with the warp threads, taking into account the scale and intricacy of your design. For an ombre effect, it’s crucial to maintain even tension across the warp to ensure that your weave lies flat and the colors transition smoothly. I often sketch out my design on graph paper beforehand, treating it much like an architectural blueprint.
- 4. With your loom prepared, begin weaving your weft threads, starting from the lightest shade and gradually moving into the deeper tones. It’s essential to maintain a consistent weave pattern to allow the ombre effect to be the focal point. Whether you’re using a simple over-under pattern or something more complex, the key is in the gradual transition of colors.
- 5. As you progress through your shades, introduce the next color increment by blending it with the previous one. This can be achieved by weaving a few rows with a mixture of the two shades before fully transitioning to the next color. This blending technique is what gives ombre its characteristic smoothness and visual appeal.
- 6. To enhance the textural element of your ombre weave, consider incorporating different yarn weights or textures. For instance, moving from a fine, smooth yarn to a thicker, more hairy yarn can add a fascinating dimension to your piece. This mix of textures not only adds visual interest but also tactile appeal, inviting the viewer to touch and explore the weave.
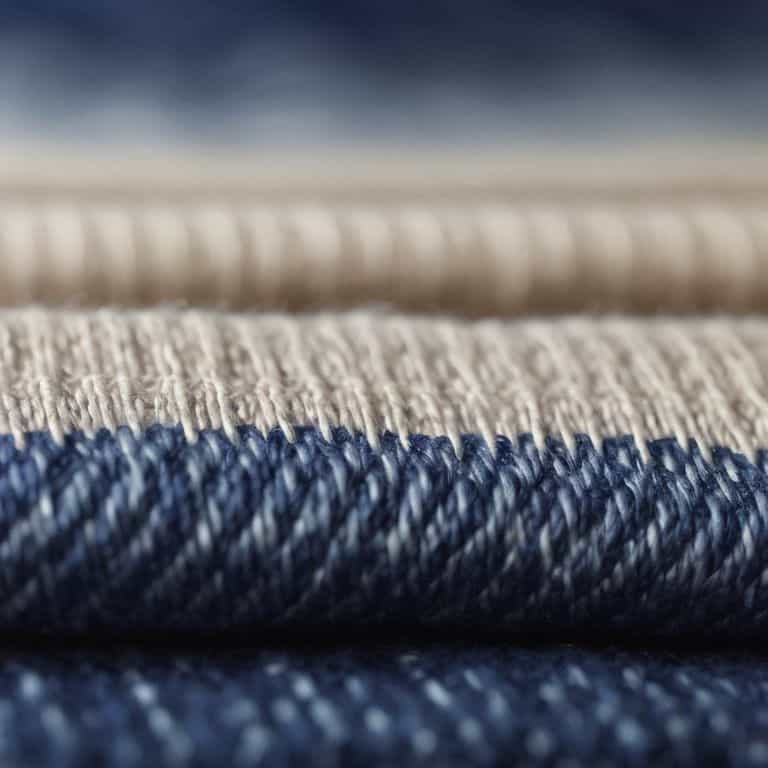
- 7. Once you’ve completed your weaving, finish your edges carefully to prevent fraying and give your piece a professional finish. This could involve a simple overlock stitch or a more decorative edge, depending on the desired aesthetic. Finally, step back and admire your handiwork, taking pride in the beautiful, gradient texture you’ve created, one thread at a time.
Unraveling Ombre Weaving
As I delve into the world of ombre weaving, I’m reminded of the importance of texture and tone in creating a stunning visual gradient. The key to a successful ombre effect lies in the careful selection of yarn colors, which can be achieved through hand dyeing yarn for unique shades. This technique allows for a level of customization that can elevate your weaving project from ordinary to extraordinary.
When it comes to choosing yarn colors for ombre, it’s essential to consider the color theory principles that govern how hues interact with one another. By understanding how colors blend and contrast, you can create a seamless transition between shades, resulting in a beautiful ombre pattern. Weaving techniques for gradient effects can also play a significant role in achieving the desired outcome, as different methods can produce varying levels of subtlety or drama in the final piece.
To take your ombre weaving to the next level, experiment with creating ombre patterns with different fibers, such as combining wool and silk to create a unique texture and sheen. By embracing the possibilities of fiber blending and color manipulation, you can unlock a world of creative possibilities and produce truly one-of-a-kind woven art pieces.
Blending Colors With Hand Dyeing Techniques
To truly master the ombre effect, I’ve found that hand dyeing my own yarns is essential. There’s something magical about watching a skein transform from a uniform hue to a nuanced, multi-dimensional color. By dyeing my yarns by hand, I can achieve subtle transitions between shades that would be impossible to replicate with commercial yarns. I experiment with natural dyes like indigo, pomegranate, and turmeric to create unique, earthy palettes that add depth to my weavings. The process is almost meditative, as I carefully mix and match colors to achieve the perfect gradient.
Choosing Yarns for Gradient Effects
When it comes to crafting an ombre effect, the yarns you choose are just as crucial as the technique itself. I love experimenting with different fibers to achieve unique gradient effects. For a subtle, nuanced transition, I often opt for yarns with similar textures, such as mercerized cotton or raw silk. The key is to select yarns that will blend seamlessly into one another, creating a sense of depth and dimensionality. By combining yarns with varying shades and textures, you can add complexity and visual interest to your ombre piece.
Weaving Wisdom: 5 Essential Tips for Mastering Ombre Effects
- Select yarns with varying fiber contents to achieve distinct textures that complement the gradient effect
- Experiment with hand dyeing techniques to create unique, bespoke color transitions that add depth to your ombre weave
- Consider the warp and weft threads as separate entities, allowing you to play with tension and density for a more dynamic ombre effect
- Consider the rule of thirds when planning your ombre gradient, dividing the piece into sections to create visual interest and balance
- Don’t be afraid to introduce subtle inconsistencies and irregularities in your ombre effect – these can add a touch of human imperfection and character to your woven piece
Key Takeaways for Crafting Sublime Ombre Textures
By carefully selecting and blending yarns, you can achieve a seamless ombre effect that adds depth and visual interest to your woven pieces
Hand dyeing techniques offer a world of possibilities for creating unique, gradient-inspired colors that can elevate your weaving from simple fabric to stunning work of art
Remember, the key to mastering ombre weaving lies in experimentation and patience, so don’t be afraid to try new combinations of colors and textures to unlock the full potential of this captivating technique
The Essence of Ombre Weaving
As I weave, I’m not just blending colors, I’m crafting a narrative of light and shadow, where each thread tells a story of transition and harmony, reminding us that the beauty of ombre lies not just in its visual gradient, but in the tactile journey it takes us on.
Ethan Thorne
Weaving a Legacy: The Timeless Appeal of Ombre
As we conclude this guide to creating an ombre effect in weaving, let’s reflect on the journey we’ve undertaken. From the initial steps of understanding the basics of ombre weaving, through the process of choosing the right yarns for gradient effects, and finally to the art of blending colors with hand dyeing techniques, each stage has been a testament to the versatility and beauty of this ancient craft. The ability to merge colors seamlessly and create a stunning visual gradient is not just about technique, but about evoking emotions and telling stories through texture and form.
As you embark on your own ombre weaving adventures, remember that the true magic lies not in the destination, but in the creative process itself. Weaving is an art form that allows us to build with yarn, to construct worlds that are both tactile and visual. So, let your imagination soar, experiment with different fibers and hues, and most importantly, enjoy the meditative rhythm of the loom. For in the words of a weaving enthusiast, the art of ombre weaving is not just about crafting a piece of fabric, but about weaving a legacy that will be treasured for generations to come.
Frequently Asked Questions
How do I ensure a seamless transition between colors when creating an ombre effect in weaving?
To achieve a seamless transition, I blend yarns by subtly shifting hues, using a technique I call ‘thread bridging.’ By overlapping threads of adjacent colors, I create a gentle, ombré-like gradient that’s both visually striking and texturally intriguing. This approach allows the colors to melt into one another, crafting a beautiful, nuanced effect.
What types of yarns are best suited for achieving a subtle, nuanced ombre gradient?
For subtle ombre gradients, I prefer yarns with gentle color transitions, such as merino wool, silk, or linen blends. These fibers absorb dye beautifully, allowing for soft, nuanced shifts in tone. I also enjoy working with yarns that have a natural texture, as it adds depth to the ombre effect, creating a visually intriguing gradient that invites the eye to explore.
Can I achieve an ombre effect using natural dyes, and if so, what are some tips for working with plant-based colors?
Yes, you can achieve an ombre effect with natural dyes. I recommend experimenting with plant-based colors like indigo, pomegranate, and turmeric. To create a seamless gradient, gradually add or subtract dye materials, and consider over-dyeing to deepen colors and enhance texture.