I still remember the first time I tried to knit a sweater, only to have it turn out two sizes too big. It was a harsh lesson in the importance of how to swatch for gauge correctly. I’ve since learned that swatching is not just a tedious step, but a crucial one in ensuring that your finished project fits perfectly. As I’ve traveled to fiber festivals and spoken to countless makers, I’ve realized that many of us have been misled into thinking that swatching is a one-size-fits-all solution. But the truth is, every yarn and every project is unique, and swatching is an art that requires patience, practice, and a willingness to learn.
In this article, I’ll share my own experiences and tips on how to swatch for gauge correctly, along with insights from seasoned designers and makers. You’ll learn how to choose the right swatch size, how to read your gauge, and how to adjust your stitches to achieve a perfect fit. I’ll also debunk some common myths and share some practical advice on how to make swatching a enjoyable and rewarding part of your knitting journey. Whether you’re a beginner or an experienced knitter, this guide will help you master the art of swatching and take your knitting to the next level. So, let’s get started and explore the world of swatching together!
Table of Contents
- Guide Overview: What You'll Need
- Step-by-Step Instructions
- Unraveling Gauge Mysteries
- Unraveling Gauge Secrets
- Avoiding Common Swatching Mistakes
- Common Swatching Mistakes
- Understanding Knitting Gauge Secrets
- Understanding Knitting Gauge
- My Top 5 Tips for Mastering the Art of Swatching
- Key Takeaways for Perfect Gauge Swatching
- The Heart of Swatching
- Weaving it all Together
- Frequently Asked Questions
Guide Overview: What You'll Need
Total Time: 1 hour 15 minutes
Estimated Cost: $0 – $10
Difficulty Level: Easy
Tools Required
- US size knitting needles (or size appropriate for yarn)
- Measuring tape or ruler
- Scissors (for cutting yarn)
- Yarn needle (for weaving in ends)
Supplies & Materials
- Yarn (same yarn to be used for project)
- Stitch markers (optional)
- Paper and pencil (for recording measurements)
Step-by-Step Instructions
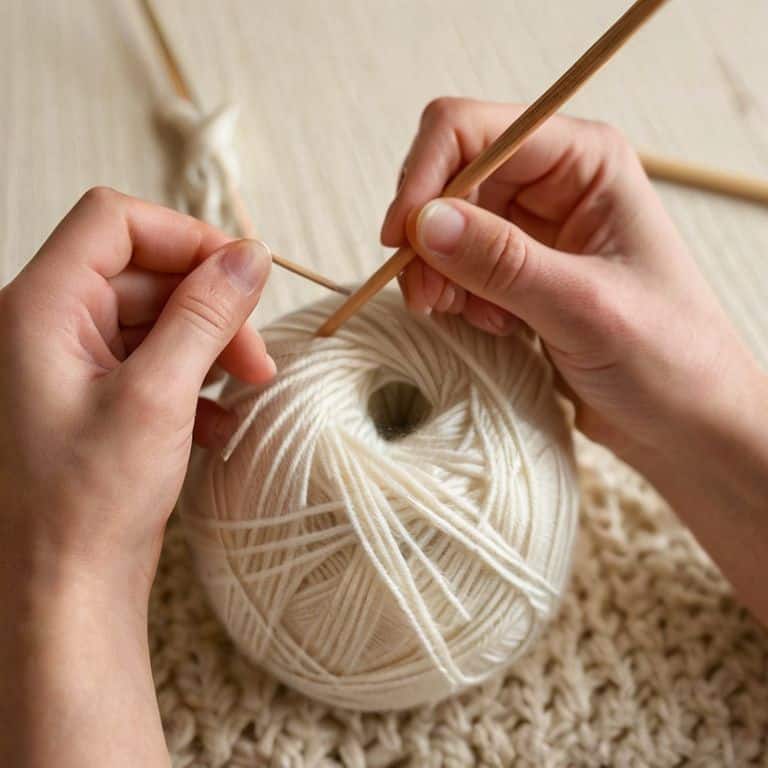
- 1. First, let’s talk about the importance of swatching for gauge – it’s the foundation of any successful knitting project. To start, you’ll need to choose the right needles and yarn for your project, and then cast on the recommended number of stitches for your swatch. I like to think of this step as the beginning of a beautiful journey, where every stitch tells a story.
- 2. Next, you’ll want to knit your swatch, making sure to maintain a consistent tension – this is where the magic happens, and your yarn starts to come alive. Try to knit at least 4-6 inches of fabric to get an accurate gauge, and don’t worry if it’s not perfect, we’re just trying to get a sense of the fabric. I’ve found that listening to music or a favorite podcast can help you get into a rhythm and make this step more enjoyable.
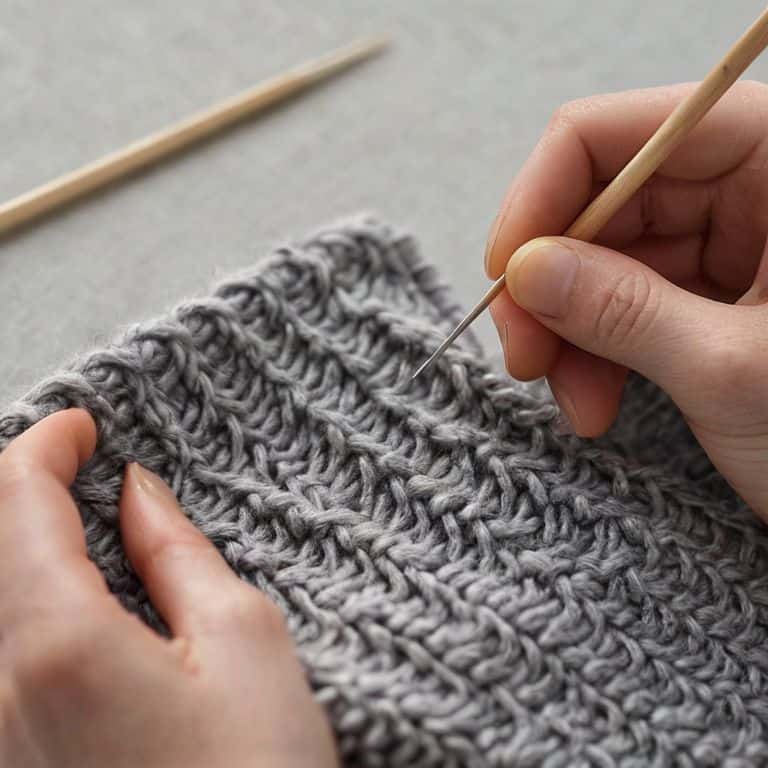
- 3. Now it’s time to bind off your swatch, and this is where many of us get a little nervous – but don’t worry, it’s easier than you think. Simply bind off in pattern, making sure to keep your tension even, and then block your swatch to get an accurate measurement. I like to use a ruler or measuring tape to get precise measurements, and I’ve found that it’s essential to be patient and take your time during this step.
- 4. With your swatch blocked and measured, it’s time to calculate your gauge – this is the part where we get to see if our hard work has paid off. To do this, simply count the number of stitches per inch, and then compare it to the recommended gauge for your project. If you’re off, don’t worry, it’s easy to adjust your needles or yarn to get the right fit. I’ve found that keeping a journal of my gauge measurements can be really helpful in tracking my progress and making adjustments.
- 5. Now that you have your gauge, it’s time to start your project – this is the exciting part, where you get to see your vision come to life. Make sure to double-check your gauge as you go, especially if you’re working on a complex pattern or using a new yarn. I like to take breaks and come back to my project with fresh eyes to ensure that I’m staying on track.
- 6. As you work on your project, remember that gauge is not just about the numbers – it’s about the story you’re telling with every stitch. Don’t be afraid to experiment and try new things, and always keep in mind the why behind your project. Are you making it for yourself, or as a gift for someone special? Whatever your reason, remember to enjoy the journey and have fun.
- 7. Finally, don’t be too hard on yourself if your gauge isn’t perfect – it’s all part of the process, and even experienced knitters have off days. The most important thing is to relax and enjoy the process, and remember that every stitch is a chance to learn and grow. With practice and patience, you’ll become a gauge-master in no time, and your projects will be all the more beautiful for it.
Unraveling Gauge Mysteries
As I’ve traveled to various fiber festivals, I’ve noticed that understanding knitting gauge is a crucial aspect of creating beautiful, well-fitting garments. One of the most common mistakes I’ve seen is not taking the time to properly swatch for different yarn weights. This can lead to a finished project that’s either too loose or too tight, which can be frustrating for any maker. To avoid this, it’s essential to swatch with intention, taking into account the specific yarn and needles you’re using.
When it comes to measuring knitting gauge accurately, I’ve found that it’s all about patience and attention to detail. Don’t be afraid to take your time and double-check your measurements, as this can make all the difference in the end result. I’ve also learned that common mistakes in knitting gauge can often be avoided by simply swatching in the round, rather than back and forth. This can give you a more accurate representation of how your stitches will lie in the finished project.
For knitting gauge for beginners, I always recommend starting with a simple swatch and gradually increasing the complexity of your projects. This will help you develop a sense of how different yarns and needles interact, and how to adjust your gauge accordingly. By doing so, you’ll be well on your way to creating beautiful, professional-looking garments that fit perfectly, and that’s what it’s all about – creating something with love and care.
Unraveling Gauge Secrets
As I’ve traveled to various fiber festivals, I’ve had the chance to talk to numerous designers and dyers about the importance of swatching in knitting. It’s amazing how often a simple swatch can make or break a project. One common mistake I’ve seen is not taking into account the yarn weight when swatching. Different yarns have unique characteristics that can affect the gauge, and it’s crucial to understand these nuances to achieve the desired fabric drape.
When it comes to gauge measurement for beginners, I always recommend starting with a simple stockinette stitch swatch. This allows you to get a feel for the yarn and needles, and it’s a great way to practice understanding knitting gauge. I’ve had the pleasure of interviewing several indie dyers who swear by this method, and it’s been fascinating to hear about their experiences with different yarn weights and fiber types.
As you continue to work on your swatching skills, remember that common mistakes in gauge measurement can often be avoided by taking your time and being patient. Don’t be afraid to rip out your swatch and start again if you’re not getting the results you want. With practice, you’ll develop a keen sense of knitting gauge and fabric drape, and your finished projects will thank you.
Avoiding Common Swatching Mistakes
As I’ve traveled to fiber festivals and spoken with makers from all walks of the craft, I’ve noticed that even the most seasoned knitters can fall prey to common swatching mistakes. One of the most frequent errors is not blocking your swatch – it’s amazing how much of a difference a simple soak and dry can make in getting an accurate gauge reading. I’ve also seen makers use the wrong needles or yarn weight, which can throw off their entire project. By being mindful of these potential pitfalls, we can ensure that our swatches are accurate and our finished projects turn out just as we envisioned.
Common Swatching Mistakes
As I’ve traveled to fiber festivals and spoken with makers from all over, I’ve noticed that even the most experienced among us can fall into common swatching pitfalls. One of the most frequent mistakes I’ve seen is not blocking the swatch before measuring gauge. It’s easy to overlook, but those extra steps can make all the difference in ensuring accuracy. I’ve also met designers who’ve shared their own struggles with inconsistent tension, which can throw off even the most carefully crafted swatch.
I’ve been guilty of it myself – rushing through the swatching process or not giving my yarn enough time to relax after knitting. It’s a hard lesson to learn, but taking the time to do it right is essential. By being mindful of these common mistakes, we can avoid frustration and ensure that our finished projects turn out just as we imagined.
Understanding Knitting Gauge Secrets
As I delve deeper into the world of gauge, I’m reminded of my conversations with indie dyer, Emma, who shared her own struggles with achieving consistent tension. It’s fascinating to see how different yarns and needles can affect our knitting. I’ve found that understanding the subtleties of gauge is key to unlocking the secrets of our craft. By exploring the intersection of yarn weight, fiber content, and needle size, we can begin to grasp the nuances that make each project unique.
I’ve come to realize that gauge is not just about numbers, but about the story behind each stitch. It’s about the maker’s touch, the yarn’s character, and the needle’s whisper. As I continue to explore the mysteries of gauge, I’m excited to share more insights from the makers who inspire me, and to uncover the secrets that will take our knitting to the next level.
Understanding Knitting Gauge
As I’ve traveled to fiber festivals and spoken with designers, I’ve come to realize that understanding knitting gauge is about more than just numbers – it’s about the story of the yarn and the maker. Every skein has a unique character, and gauge is a reflection of that. I’ve seen how different yarns and needles can affect the fabric of a project, and it’s fascinating to explore these nuances. By grasping the concept of gauge, we can unlock the full potential of our yarn and create something truly special.
For me, understanding gauge is also about connection – connecting with the yarn, the needles, and the community. I’ve learned so much from the makers I’ve interviewed, and I’m excited to share their insights with you. By embracing the art of gauge, we can become more intuitive knitters, trusting our instincts and creating beautiful, unique pieces that reflect our own stories.
My Top 5 Tips for Mastering the Art of Swatching
- Start with the right tools: invest in a good quality measuring tape or ruler to ensure accuracy
- Choose the right yarn and needles for your swatch, as this will greatly impact your gauge
- Swatch in the round whenever possible, as this will give you a more accurate representation of your finished project
- Don’t be afraid to rip out your swatch and start again – it’s all part of the process, and I’ve lost count of how many times I’ve had to do it myself
- Block your swatch before measuring, as this will even out the stitches and give you a true gauge – trust me, it makes all the difference
Key Takeaways for Perfect Gauge Swatching
Always swatch with the same yarn, needles, and pattern as your main project to ensure accurate gauge
Pay attention to your swatch’s row and stitch gauge, as both are crucial for a well-fitting finished product
Don’t be afraid to frog your swatch and start again if your gauge is off – it’s better to take the time to get it right than to risk a garment that’s unwearable
The Heart of Swatching
Swatching for gauge is not just about measuring stitches, it’s about understanding the soul of the yarn and the rhythm of your needles – it’s where the story of your project begins.
Noah Byrne
Weaving it all Together
As we’ve explored the world of gauge swatching, I hope you’ve come to realize that it’s not just about following a set of rules, but about understanding the intricacies of your craft. We’ve covered the essential steps to swatch for gauge correctly, from casting on to binding off, and unraveling the mysteries of knitting gauge secrets. By avoiding common swatching mistakes and taking the time to truly understand your stitches, you’ll be well on your way to creating garments that fit perfectly.
So, as you put down your needles and pick up your next project, remember that every stitch tells a story. The story of a maker who cares deeply about their craft, who is willing to take the time to get it just right. Don’t be afraid to experiment, to try new things, and to share your journey with others. For in the end, it’s not just about the yarn or the needles, but about the people and the stories that bring our craft to life.
Frequently Asked Questions
What happens if I'm still getting inconsistent gauge even after swatching multiple times?
Don’t worry, friend, it’s not uncommon to still struggle with gauge even after multiple swatches. I’ve been there too, and I’ve learned that sometimes it’s about tweaking your technique or trying a different needle size. Let’s troubleshoot together – what’s your yarn and project like, and I’ll share some tips that might help you crack the code?
How do I know which swatching method is best for the specific yarn and project I'm working on?
For me, it’s all about experimenting and getting to know the yarn. I like to ask the yarn dyers and designers I interview about their favorite swatching methods, and it’s amazing how often they say it’s all about feeling the fiber. What are you working on, and I can try to help you find the perfect swatch match?
Can I really trust my gauge swatch if I'm using a different needle material or size than what's recommended in the pattern?
You know, I’ve had this question come up on my podcast before, and I love digging into it. Honestly, it’s all about understanding how different materials and sizes can impact your stitch density. If you’re using a different needle material or size, it’s a good idea to swatch with those specifics to ensure accuracy – your finished project will thank you!