
As I sit amidst my loom and threads, I often think about the misconception that creating a weaving cartoon or sketch is a daunting task, reserved for the skilled and experienced. But the truth is, it’s a process that can be broken down into simple, manageable steps. I’ve seen many beginners struggle with the idea of translating their vision into a tangible design, but with the right guidance, anyone can learn how to create a weaving cartoon or sketch that brings their ideas to life.
In this article, I’ll share my personal approach to crafting a weaving cartoon or sketch, one that emphasizes the importance of texture and form. You’ll learn how to bridge the gap between your creative vision and the physical act of weaving, and how to use simple tools like graph paper to bring your design to life. By the end of this guide, you’ll have a clear understanding of how to create a weaving cartoon or sketch that serves as a foundation for your unique woven art pieces, and you’ll be ready to start building your own stunning textile designs, thread by thread.
Table of Contents
Guide Overview: What You'll Need
Total Time: 1 hour 15 minutes
Estimated Cost: $10 – $30
Difficulty Level: Easy
Tools Required
- Pencil (sharp) for sketching
- Eraser (kneaded) for corrections
- Marker or Colored Pencil (various colors) for coloring
Supplies & Materials
- Paper at least 8.5 inches x 11 inches in size
- Ruler for drawing straight lines
- Sketchbook optional, for practicing and storing work
Step-by-Step Instructions
- 1. To start creating a weaving cartoon or sketch, begin by brainstorming your ideas and gathering inspiration from the world around you – nature, architecture, or even the intricate patterns found in everyday objects. I find that carrying a small notebook to jot down ideas as they come helps to keep my creative juices flowing. As I always say, building with yarn is all about experimenting with different textures and colors to bring your vision to life.
- 2. Next, select a theme or concept that resonates with you, something that sparks your creativity and enthusiasm. This could be a favorite quote, a personal symbol, or even a memory that you’d like to capture in your weaving. For me, the key to a compelling design lies in its textural elements, so consider how different fibers and yarns can add depth and interest to your piece.
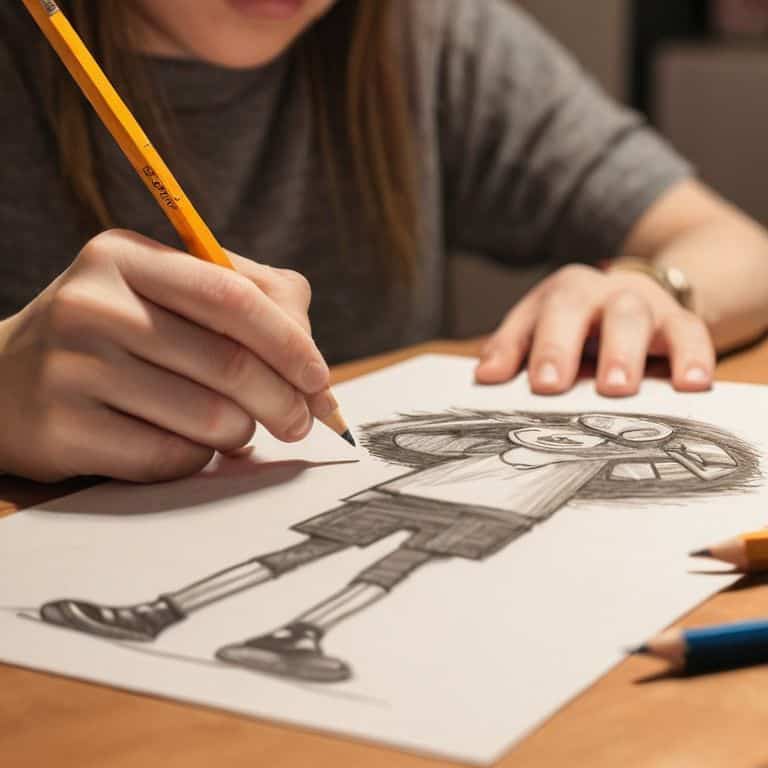
- 3. With your theme in mind, sketch out rough ideas on graph paper, using different colors and symbols to represent various yarns and textures. I like to think of this stage as creating a blueprint for my weaving, where every line and shape has a purpose and contributes to the overall aesthetic. Don’t worry too much about perfection at this stage – it’s all about exploring possibilities and allowing your ideas to evolve.
- 4. Now it’s time to refine your design, considering factors like scale, proportion, and balance. Ask yourself questions like: What will be the focal point of my weaving? How will I use color and texture to create visual interest? What kind of yarns will I use to achieve the desired effect? For me, this stage is all about problem-solving, using my knowledge of architecture and design to create a cohesive and visually stunning piece.
- 5. Once you’re happy with your refined design, create a detailed cartoon or sketch that includes all the necessary information for your weaving project. This should include measurements, yarn requirements, and any special instructions or notes. I like to use a combination of graph paper and colored pencils to bring my design to life, making it easier to visualize the final result.
- 6. With your cartoon or sketch in hand, start selecting your yarns and materials, choosing colors and textures that align with your design vision. This is where the magic happens, and your weaving begins to take shape. Remember to experiment and play with different yarn combinations, as this is often where the most exciting and unexpected results emerge.
- 7. Finally, test and refine your design by creating a small sample or swatch of your weaving. This will give you a chance to see how your yarns and colors work together, make any necessary adjustments, and ensure that your final piece turns out as envisioned. For me, this stage is all about iterating and improving, using my skills as a weaver and artist to create a truly unique and captivating work of art.
Weaving Cartoon Magic
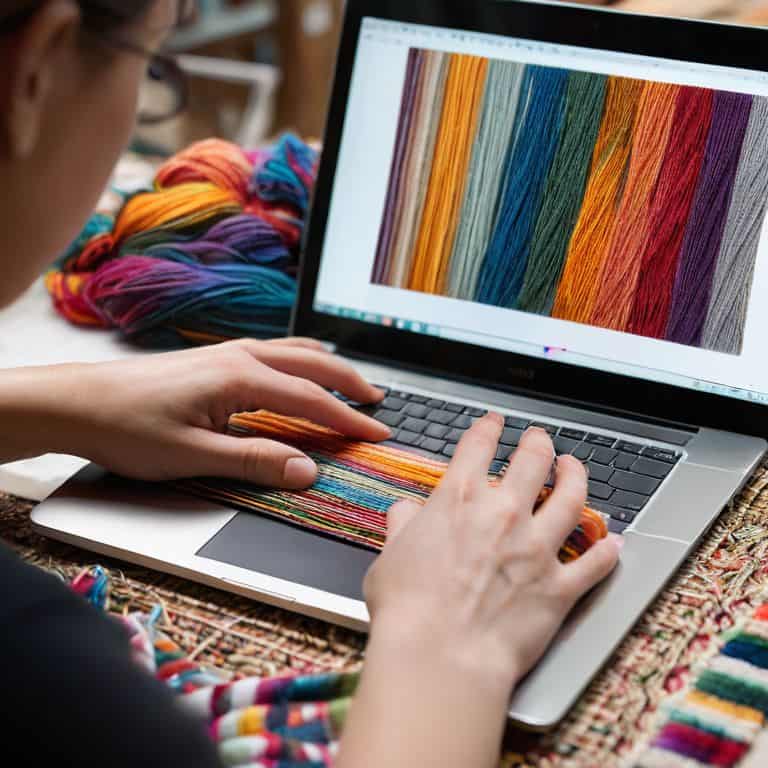
As I delve into the world of weaving cartoon magic, I find myself drawn to the intersection of art and technology. Weaving pattern design software has revolutionized the way I approach my craft, allowing me to precision-craft my designs with ease. With the aid of digital drawing tools for weaving, I can experiment with different colors, textures, and patterns, bringing my visions to life in a way that was previously unimaginable.
When it comes to cartooning for beginners, I always emphasize the importance of simplicity and clarity. A good weaving cartoon should be easy to read and understand, with clean lines and a clear color theory framework. By using sketching tapestry designs as a foundation, I can build upon my ideas, layer by layer, until I have a cohesive and beautiful piece of art. Whether I’m working with traditional materials or digital tools, my goal is always to create a sense of depth and dimensionality in my work.
In my own practice, I’ve found that creating a weaving blueprint template is essential for bringing my ideas to life. By establishing a clear framework and using digital drawing tools to refine my design, I can ensure that my final piece is both visually stunning and technically sound. With practice and patience, anyone can master the art of weaving cartoon magic, and I’m excited to share my own journey and discoveries with you.
Digital Tapestry Design Tools
As I delve into the world of digital tapestry design, I’m reminded of my architectural roots. The precision and clarity that software offers is akin to drafting blueprints, but now I get to play with color and texture. I use programs that allow me to create intricate patterns and designs, experimenting with different yarn weights and hues. This process is meditative, as I weave together threads of digital code to form a cohesive visual language.
With these tools, I can effortlessly scale, rotate, and manipulate my designs, much like I would with graph paper and pencil. The digital realm has opened up new avenues for me to explore the intersection of modern design and ancient craft, and I’m excited to share these discoveries with you.
Thread by Thread Cartooning
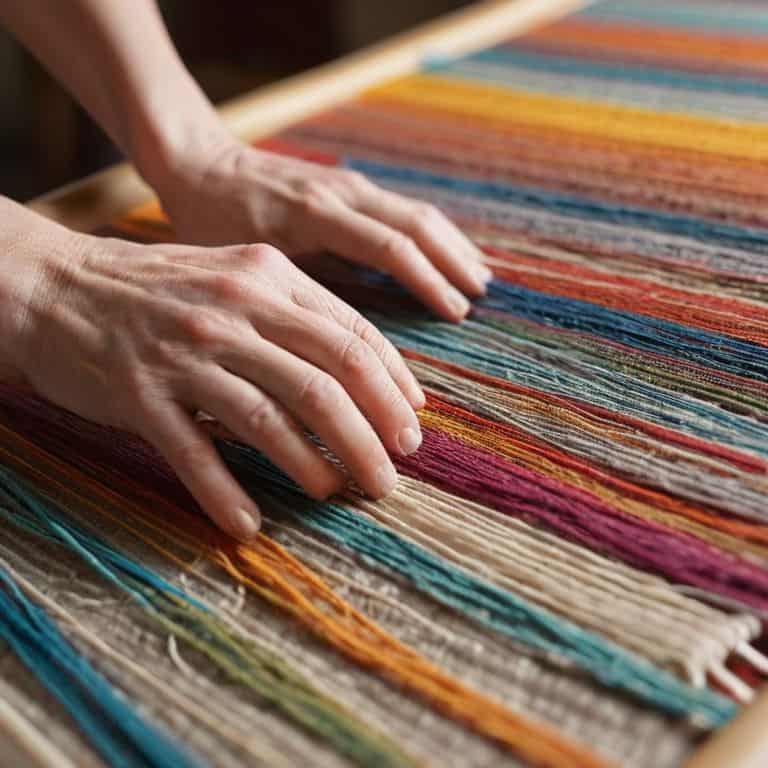
As I sit at my loom, surrounded by skeins of linen and raw silk, I’m reminded that cartooning is where the magic begins. It’s the process of translating my vision into a tangible, thread-by-thread blueprint. I start by sketching my design on graph paper, much like I used to draft architectural plans. The pencil scratches against the paper, bringing my idea to life. I consider the texture, color, and form of each thread, carefully planning how they’ll intersect and interact.
With my sketch in hand, I begin to envision the woven piece as a three-dimensional entity, with each thread playing its part in the larger structure. The cartoon becomes a map, guiding my hands as I weave, thread by thread, to bring the design into being. It’s a meditative process, one that requires patience, attention to detail, and a willingness to let the fibers guide me. As the cartoon takes shape, so does my excitement to see the final, tactile result.
Weaving Your Vision: 5 Essential Tips for Crafting a Compelling Cartoon or Sketch
- Start with a concept, not a pattern – let your imagination run wild and consider the story you want your weaving to tell
- Experiment with different mediums – from traditional graphite to digital drawing tools, find what works best for you and your creative process
- Play with texture and dimension – consider how different fibers and techniques will bring your design to life
- Keep it simple, yet bold – a strong cartoon or sketch should balance complexity with clarity, guiding the viewer’s eye through your composition
- Don’t be afraid to iterate and refine – your cartoon or sketch is a blueprint for your weaving, and it’s okay to make changes and adjustments as you go along
Weaving Cartoon Essentials: 3 Key Takeaways
By embracing the intersection of traditional craftsmanship and modern design, you can create weaving cartoons that are not only functional but also visually stunning and uniquely personal
Thread by thread, cartooning allows you to build a narrative with fiber, experimenting with texture, color, and form to bring your vision to life in a tangible, woven piece of art
Whether you prefer sketching on graph paper or utilizing digital tapestry design tools, the process of creating a weaving cartoon is an iterative journey of discovery, where every step informs the next and every thread counts
Weaving Words of Wisdom
A weaving cartoon or sketch is not just a technical blueprint, but a poetic map that guides the threads of your imagination into a tangible work of art, where every fiber and texture tells a story of its own.
Ethan Thorne
Weaving a Lasting Impression
As we conclude our journey through the world of weaving cartoons and sketches, remember that the key to unlocking your full creative potential lies in embracing the intersection of art and technique. We’ve explored the fundamentals of creating a weaving cartoon, from initial concept to final design, and delved into the magic of thread by thread cartooning and digital tapestry design tools. By mastering these skills, you’ll be well on your way to crafting unique, visually stunning pieces that showcase your personality and style. Whether you’re a seasoned weaver or just starting out, the ability to bring your vision to life is a powerful tool that can help you grow as an artist and push the boundaries of what’s possible with fiber and thread.
As you move forward on your weaving journey, don’t be afraid to experiment and try new things – it’s often the unexpected combinations of color, texture, and pattern that lead to the most striking and innovative designs. So go ahead, take the skills and knowledge you’ve gained, and use them to weave your own story, one thread at a time. With patience, practice, and a willingness to take risks, you’ll be creating breathtaking woven art that inspires and delights all who see it. Happy weaving, and remember – the loom is your canvas, and the possibilities are endless.
Frequently Asked Questions
What are the essential tools and materials needed to create a weaving cartoon or sketch?
To bring your weaving cartoon to life, you’ll need a few essential tools: graph paper, a pencil, and a set of colored pencils or markers. I also recommend having a natural fiber reference library, like my own collection of linen and raw silk samples, to inspire texture and color choices.
How do I choose the right colors and textures to bring my weaving cartoon to life?
To bring your weaving cartoon to life, I recommend experimenting with a limited color palette and mixing textures to add depth. Consider the mood and atmosphere you want to evoke, and choose colors that resonate with your vision. Natural fibers like linen and raw silk can add a beautiful tactility to your piece, while subtle color variations can create visual interest.
Can I use digital design software to create my weaving cartoon, or is hand-drawing still the best approach?
While I adore the tactile nature of hand-drawing, I also appreciate the precision of digital design software. Programs like Adobe Illustrator or Procreate can be fantastic tools for creating weaving cartoons, allowing for ease of editing and scaling. I often use them myself to refine my designs before bringing them to life on my loom.