
I still remember the first time I tried to weave in my ends neatly – it was a disaster. I had spent hours knitting a beautiful scarf, but the finishing touches were a mess. I thought that securing those loose threads would be a daunting task, but it didn’t have to be. As someone who’s passionate about how to weave in your ends neatly, I’ve learned that it’s all about breaking down the process into simple, manageable steps. Whether you’re a seasoned crafter or a beginner, you’ve likely struggled with those pesky yarn ends at some point.
In this article, I’ll share my favorite tips and tricks for how to weave in your ends neatly, so you can achieve a polished and professional finish. You’ll learn how to tackle those loose threads with confidence and ease, and I’ll guide you through every step of the way. From preparing your yarn to seamlessly integrating the ends into your project, I’ll provide you with practical advice and clear instructions to ensure your creations look their best. By the end of this guide, you’ll be equipped with the knowledge and skills to weave in your ends like a pro, and you’ll be able to enjoy the satisfaction of a beautifully finished project.
Table of Contents
Guide Overview: What You'll Need
Total Time: 30 minutes to 1 hour
Estimated Cost: $0 – $5
Difficulty Level: Easy
Tools Required
- Yarn Needle (also known as a tapestry needle)
- Scissors (sharp and dedicated to cutting yarn)
- Stitch Markers (optional, for complex patterns)
Supplies & Materials
- Yarn (the same yarn used in your project)
- Measuring Tape (for measuring 6 inches of yarn tail)
- Stitch Dictionary or Pattern (for reference on weaving in ends)
Step-by-Step Instructions
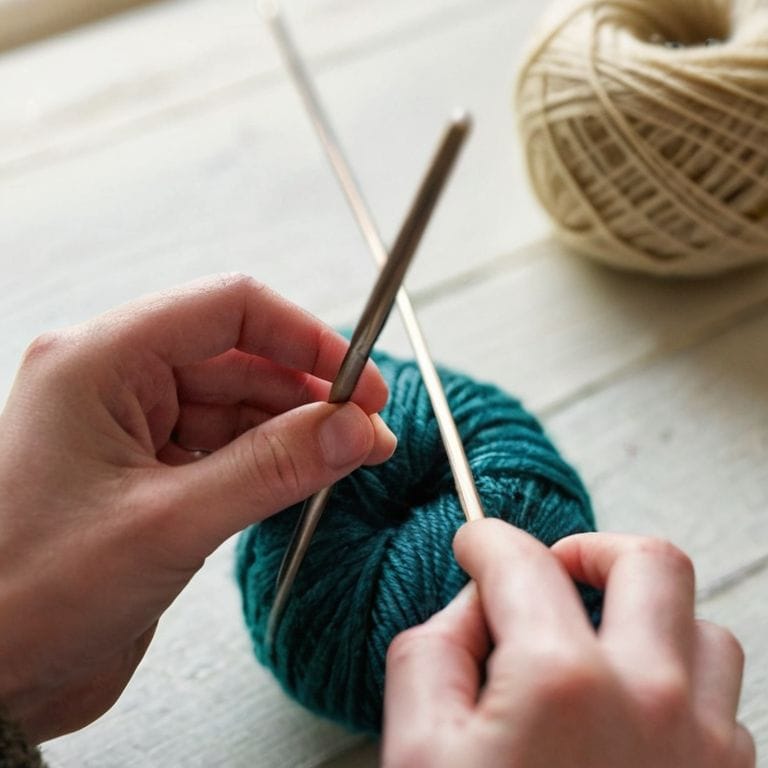
- 1. First, let’s get started by preparing our tools – you’ll need a yarn needle, a pair of scissors, and the project you’re working on. Take a moment to familiarize yourself with the yarn needle, as it’s a special type of needle with an eye big enough to accommodate yarn.
- 2. Next, locate the yarn ends that need to be woven in – these are usually the loose threads at the beginning or end of a project. Gently tug on each yarn end to make sure it’s not tangled or twisted, as this can make the weaving process more difficult.
- 3. Now, thread the yarn needle with the yarn end you want to weave in. Make sure the yarn is seated properly in the needle’s eye to avoid any tangles or knots. If you’re having trouble, try using a needle threader or a small piece of tape to help guide the yarn through the needle’s eye.
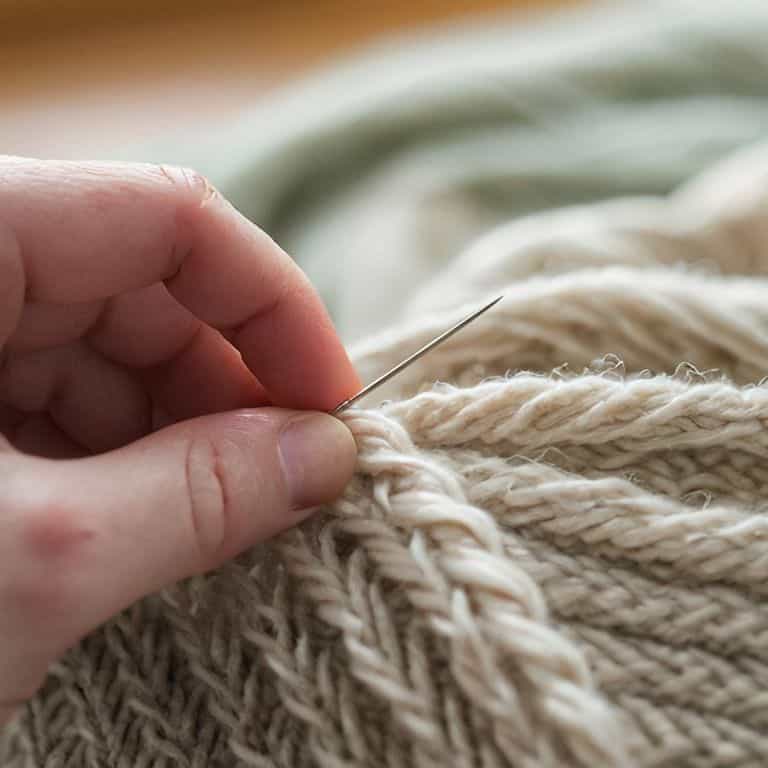
- 4. Insert the yarn needle into the stitch closest to where the yarn end is located. Work the needle through the stitch, moving from the wrong side of the fabric to the right side. This will help you secure the yarn end and prevent it from coming loose.
- 5. Continue to weave the yarn end in and out of the stitches, moving in a consistent pattern. Try to keep the tension even, as uneven tension can cause the fabric to pucker or distort. If you’re unsure, you can always refer to a diagram or a photo of the stitch pattern to help guide you.
- 6. As you weave in the yarn end, use your fingers to gently tug on the yarn, making sure it’s not too loose or too tight. You want the yarn to be snug against the fabric, but not so tight that it causes the fabric to pucker. If you find that the yarn is too tight, you can always loosen it slightly by gently pulling on the yarn end.
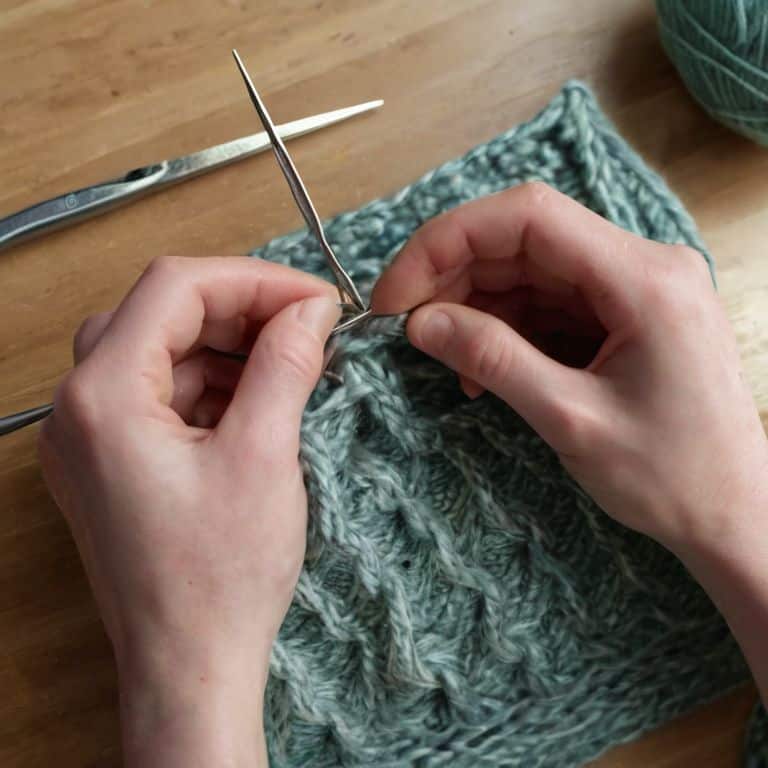
- 7. Once you’ve woven in the yarn end, use your scissors to trim the excess yarn close to the fabric. Make sure to leave a small tail of yarn, about 1/4 inch long, to prevent the yarn end from coming loose over time. Finally, use your fingers to tuck the yarn end into the fabric, making sure it’s secure and even.
Weaving Ends With Ease
As we dive deeper into the world of yarn crafting, it’s essential to master the art of invisible yarn weaving. This technique is crucial in creating a polished and professional finish. To achieve this, I recommend using a yarn needle that’s suitable for the type of yarn you’re working with. For example, if you’re using a bulky yarn, you’ll want to use a larger needle to avoid splitting the stitches.
When it comes to securing yarn tails, it’s all about being gentle and patient. You want to weave the ends in a way that they become almost invisible, blending seamlessly with the rest of the fabric. To make this process easier, try using a knitting needle to help guide the yarn tail as you weave it in. This will help you maintain a consistent tension and avoid any bulky spots.
By incorporating these tips into your knitting routine, you’ll be well on your way to becoming a master of yarn tail management. Remember, the key is to take your time and work slowly, especially when dealing with multiple yarn tails. With practice, you’ll develop a system that works for you, and you’ll be able to finish your projects with confidence, knowing that your ends are securely woven in.
Mastering Invisible Yarn Weaving
To take your yarn weaving to the next level, let’s dive into the art of making those ends nearly invisible. This is where patience and a gentle touch come into play. I like to think of it as a soothing ritual, where every thread is carefully coaxed into place. By using a yarn needle and working in small, incremental steps, you’ll be amazed at how seamlessly those ends blend into your project.
As you work, remember to keep your tension even and your stitches consistent. This will help your woven ends lie flat, creating a polished finish that’s both professional and beautiful. With a little practice, you’ll be a master of invisible yarn weaving, and your projects will radiate a sense of love and care that’s hard to find in mass-produced items.
Securing Yarn Tails With Love
Now that we’ve mastered the art of invisible yarn weaving, let’s talk about securing those yarn tails with love. This is where the magic happens, and your project starts to look polished and professional. I like to think of it as tucking in a sweet secret – a little finishing touch that makes all the difference.
To secure your yarn tails, simply thread the end through the last loop and pull it gently to create a tiny knot. Then, use your yarn needle to weave the tail under a few stitches, making sure it’s snug and even. Trim the excess, and voila! Your yarn tail is now beautifully secured, leaving your project looking neat and tidy.
Weaving Wisdom: 5 Essential Tips for Tucking in Your Ends
- Use a yarn needle with an eye big enough to accommodate your yarn, but not so big that it leaves visible holes in your fabric
- Always weave in ends in the same direction as the row or round you’re working on, to avoid visible lines or texture changes
- Keep your tension even and gentle, so you don’t pucker or distort the fabric as you weave in your ends
- Use a simple running stitch or duplicate stitch to secure your yarn tails, and try to match the stitch pattern of your project as closely as possible
- Take your time and work slowly, especially when weaving in ends in visible areas or with contrasting yarn colors, to ensure a polished and professional finish
Key Takeaways for Neatly Weaving in Your Ends
Always start by threading your yarn tail through a yarn needle, then gently weave it through the stitches on the wrong side of your project to keep it hidden
Use a gentle pulling motion to snug up the yarn as you weave it in, but avoid pulling too tightly, which can pucker the fabric or create uneven tension
Finish by trimming the excess yarn close to the work, taking care not to cut the main fabric, and your neatly woven-in ends will give your project a polished, professional finish
The Wisdom of Weaving
Weaving in your ends is not just about tidying up loose threads, it’s about embracing the gentle rhythm of completion, where every stitch and every strand comes together in perfect harmony.
Beatrice "Bea" Quinn
Conclusion: The Joy of Neatly Woven Ends
As we come to the end of our journey together, I hope you’ve seen how breaking down the process into simple, manageable steps can make all the difference in mastering the art of weaving in your ends. We’ve covered the essential steps, from preparing your yarn to securing those pesky yarn tails with love. By following these steps and practicing patience, you’ll be well on your way to creating projects that look polished and professional. Remember, the key to success lies in taking your time and being gentle with your yarn.
Now, as you embark on your next crafting adventure, I want to leave you with a final thought: the beauty of handmade lies not just in the end result, but in the journey itself. Every stitch, every weave, and every carefully secured yarn end is a testament to your dedication and love for the craft. So, don’t be too hard on yourself if things don’t turn out perfectly at first – with time and practice, you’ll find that weaving in your ends becomes second nature, and you’ll be free to focus on the true joy of creating something truly unique and beautiful.
Frequently Asked Questions
What if my yarn is too thick to weave in easily, are there any special techniques for bulky yarns?
Don’t worry, my friend, I’ve got you covered. For thicker yarns, try using a yarn needle with an eye big enough to accommodate the bulkier thread. You can also use a bit of gentle tugging to help the yarn tail settle into place, or even try weaving in ends in a slightly different pattern to distribute the thickness more evenly.
How do I avoid puckering or distorting the fabric when weaving in ends, especially on delicate or loose-weave projects?
To avoid puckering or distorting the fabric, I recommend using a yarn needle with a blunt tip and weaving in ends in small, gentle stitches, following the natural weave of the fabric. For delicate projects, try weaving in ends in the same direction as the rows, and use a matching yarn color to blend in seamlessly.
Can I use a sewing needle instead of a yarn needle to weave in ends, or are there specific benefits to using a yarn needle?
While you can use a sewing needle, I recommend a yarn needle for weaving in ends. Its blunt tip and large eye make it perfect for gently coaxing yarn tails through stitches without splitting them, ensuring a neat and polished finish. Trust me, it’s worth the extra step to get the right tool for the job!