I still remember the day my wife, a passionate weaver, asked me to build her a custom loom. I had no idea what wood to use for a weaving loom, but I was determined to create something special. As I delved into the world of woodworking and fiber arts, I discovered that choosing the right wood is not just about durability, but also about the beauty and character it brings to the finished piece. I’ve since learned that oak and maple are popular choices, but what makes them so well-suited for weaving looms?
In this article, I’ll share my honest, no-hype advice on what wood to use for a weaving loom. I’ll walk you through the process of selecting the perfect wood for your project, considering factors like workability, cost, and aesthetics. You’ll learn how to evaluate different types of wood, from domestic hardwoods to exotic options, and how to make an informed decision that suits your needs and skill level. By the end of this guide, you’ll be equipped with the knowledge to create a beautiful, functional weaving loom that will last for years to come.
Table of Contents
- Guide Overview: What You'll Need
- Step-by-Step Instructions
- Sawdust Shuttle Choosing Loom Wood
- Sawdust & Shuttle: 5 Key Tips for Choosing the Perfect Wood for Your Handmade Weaving Loom
- Key Takeaways for Your Handmade Weaving Loom
- The Heart of the Loom
- Wrapping Up: Choosing the Perfect Wood for Your Weaving Loom
- Frequently Asked Questions
Guide Overview: What You'll Need
Total Time: 2 hours 30 minutes
Estimated Cost: $50 – $100
Difficulty Level: Intermediate
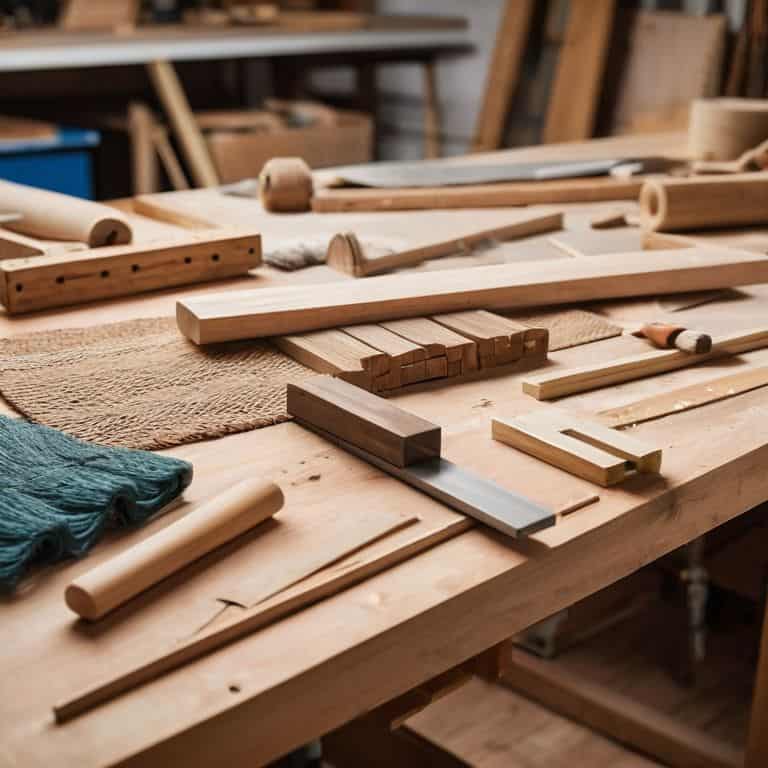
Tools Required
- Table Saw (for cutting lumber to size)
- Drill Press (for precise drilling)
- Sander (for smoothing out wood surfaces)
- Tape Measure (for accurate measurements)
- Square (for ensuring corners are square)
- Clamps (for holding pieces in place during assembly)
Supplies & Materials
- 2-in x 4-in lumber (for frame construction)
- 3/4-in plywood (for loom base and shuttle)
- 1-in x 2-in lumber (for creating the weaving area)
- Wood glue
- 2 1/4-in wood screws
- 1 1/4-in wood screws
- Wood finish (optional, for protecting the wood)
Step-by-Step Instructions
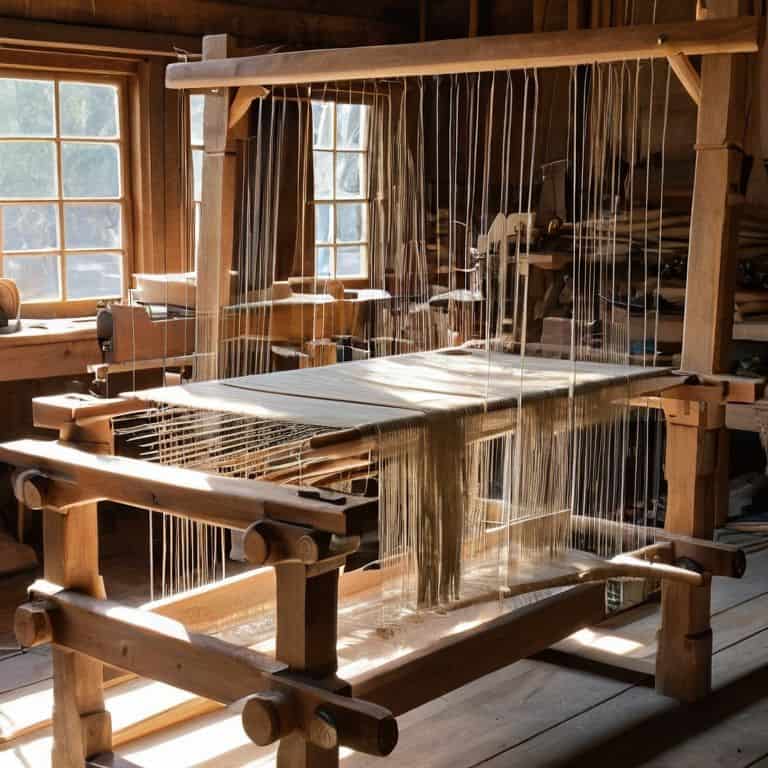
- 1. First, let’s start with the basics: when it comes to choosing the wood for your weaving loom, you want to consider the durability and aesthetic appeal of the material. I always say, the wood you choose is just as important as the yarn you’ll be weaving with. For a loom, you’ll want wood that’s sturdy, yet gentle on your yarn. I’ve found that oak and maple are fantastic options, as they’re both resistant to wear and tear, and have a beautiful grain pattern that will add a touch of warmth to your finished loom.
- 2. Next, you’ll want to consider the weight of the wood. A loom can be a hefty piece of equipment, so you’ll want to choose a wood that’s substantial enough to provide stability, but not so heavy that it’s unwieldy. I like to use domestic hardwoods for my looms, as they offer a great balance of weight and durability. Plus, they’re often sustainably sourced, which is important to me as a woodworker.
- 3. Now, let’s talk about the workability of the wood. You’ll want to choose a wood that’s easy to cut, shape, and sand, as these will be crucial steps in building your loom. Cherry and walnut are both great options, as they’re relatively soft and forgiving, making them a pleasure to work with. Plus, they have a beautiful color that will add a touch of elegance to your finished loom.
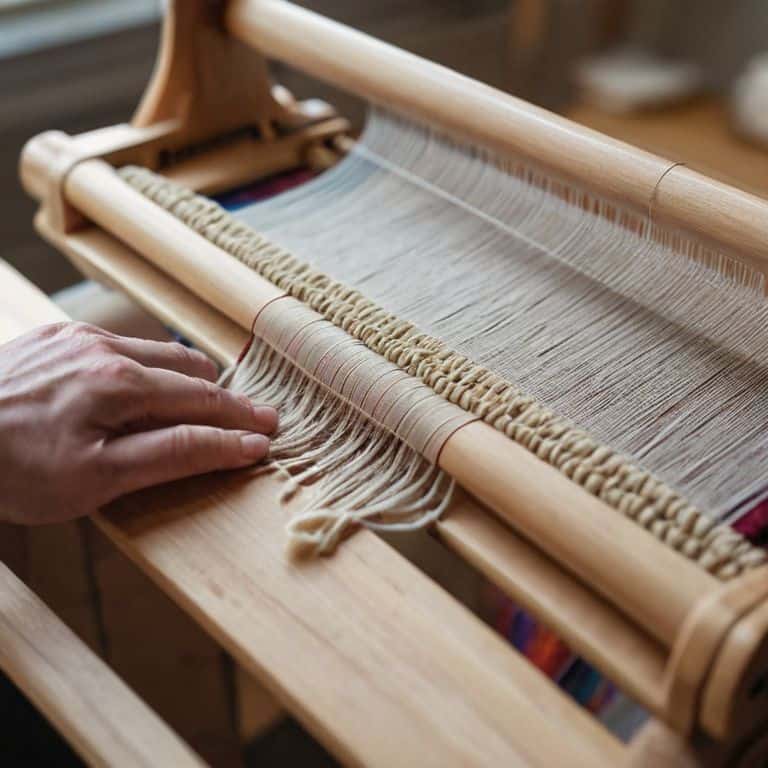
- 4. Once you’ve selected your wood, it’s time to think about the grain pattern. The grain pattern will not only affect the appearance of your loom, but also its structural integrity. You’ll want to choose a wood with a straight grain pattern, as this will provide the most stability and support for your yarn. I like to use a combination of straight and curved grain patterns, as this adds visual interest to the finished loom.
- 5. With your wood selected and cut to size, it’s time to start assembling your loom. This is where the fun really begins, as you get to see your project come to life. I like to use traditional joinery techniques, such as mortise and tenon joints, to ensure that my loom is sturdy and long-lasting. Don’t be afraid to get creative with your design, as this is where you can really make your loom unique.
- 6. As you’re assembling your loom, be sure to pay attention to the tension of the wood. You’ll want to make sure that all the pieces fit together smoothly, with no gaps or cracks. This will ensure that your loom is stable and secure, and that your yarn will glide smoothly through the harnesses. I like to use wood glue and clamps to hold everything in place, as this provides a strong and lasting bond.
- 7. Finally, once your loom is assembled, it’s time to add the finishing touches. This is where you can really let your creativity shine, as you add the final details to your project. I like to use natural oils and waxes to protect and enhance the beauty of the wood, as these will help to bring out the grain pattern and add a touch of warmth to the finished loom. With these final touches in place, your loom is now ready to use, and you can start weaving your own unique creations.
Sawdust Shuttle Choosing Loom Wood

When it comes to choosing the best wood for your loom frame, I always look for sustainable wood options that not only reduce our environmental footprint but also add a unique character to the finished piece. I’ve found that working with locally sourced woods, such as oak or maple, can result in a truly one-of-a-kind loom. Wood grain direction is also crucial, as it can affect the overall durability and stability of the loom.
In my experience, diy loom wood selection requires a bit of patience and research. It’s essential to consider the wood moisture content, as high moisture levels can lead to warping or cracking over time. I always make sure to properly dry and season my wood before starting a new project. This extra step may take some time, but it’s well worth the effort to ensure your loom will last for years to come.
For a beautiful finish, I recommend using wood finishing techniques that enhance the natural beauty of the wood. A simple oil or wax finish can bring out the unique characteristics of the wood grain, adding a touch of warmth and personality to your loom. By choosing the right wood and finish, you can create a truly functional and beautiful piece that will inspire your creativity and passion for weaving.
Best Wood for Loom Frame Durability Tips
When it comes to the loom frame, durability is key. I always recommend opting for hardwoods like oak or maple, as they can withstand the constant tension and movement of the loom. These woods are not only incredibly sturdy, but they also develop a beautiful patina over time, adding character to your handmade loom.
To ensure the frame remains stable and secure, consider using wood with a straight grain, as it’s less prone to warping or cracking. A wood thickness of at least 1.5 inches is also a good rule of thumb, providing ample support for your weaving projects.
Diy Loom Wood Selection Sustainable Options
When it comes to selecting wood for your DIY loom, I’m a big fan of sustainable options. You can consider reclaimed or recycled wood, which not only reduces waste but also adds a unique character to your project. I’ve worked with old barn wood, and it’s amazing how it can bring a touch of history to your loom. Another option is to use locally sourced wood, such as cedar or cypress, which are often more environmentally friendly than imported alternatives.
I’ve also experimented with using wood from my own property, like fallen branches or trees that need to be pruned. Not only does this reduce my carbon footprint, but it also gives me a sense of connection to the land and the materials I’m working with. Plus, it’s a great way to get creative and think outside the box when it comes to wood selection.
Sawdust & Shuttle: 5 Key Tips for Choosing the Perfect Wood for Your Handmade Weaving Loom
- Consider the density of the wood: I’ve found that hardwoods like oak or maple are perfect for creating a sturdy loom that’ll withstand the tension of your yarn
- Think about the moisture content: wood with low moisture content is less likely to warp or crack over time, ensuring your loom stays stable and true
- Look for wood with a straight grain: this will help prevent your loom from becoming misshapen or developing weak spots, and it’s just plain pretty to look at
- Don’t overlook the importance of weight: a loom that’s too light might not stay put on your work surface, while one that’s too heavy can be a real pain to move around – find a wood that strikes a balance
- Trust your nose: when I sand a piece of wood, I can tell if it’s going to work well for a loom just by the smell – it’s hard to describe, but it’s a bit like the difference between freshly cut grass and a field of wildflowers, and it’s a trick that’s served me well over the years
Key Takeaways for Your Handmade Weaving Loom
Choose wood types like oak or maple for your loom frame due to their durability and aesthetic appeal
Consider sustainable wood options and locally sourced materials to reduce your project’s environmental footprint
Remember, the wood you select is just as important as the yarn you weave with, so take your time and pick a type that resonates with your creative vision
The Heart of the Loom
The wood you choose for your weaving loom is more than just a material – it’s the backbone of your craft, the rhythm that your shuttle dances to, and the legacy that your creations will carry.
Finnian "Finn" Burke
Wrapping Up: Choosing the Perfect Wood for Your Weaving Loom
As we’ve explored the world of woodworking for weaving looms, it’s clear that selecting the right wood is a crucial step in creating a beautiful, functional piece. From the durability of oak and maple for the loom frame to the sustainability of reclaimed or locally sourced woods, each choice impacts the final product. By considering factors like durability, cost, and aesthetics, you can make an informed decision that suits your needs and preferences. Whether you’re a seasoned woodworker or a beginner, taking the time to choose the perfect wood will elevate your weaving experience and create a sense of pride in your handmade loom.
Now that you’re equipped with the knowledge to choose the perfect wood for your weaving loom, it’s time to get creative and bring your vision to life. Remember, the tool you use is just as important as the yarn, and the process of making is where the magic happens. As you work with the wood, sanding and shaping it into your unique loom, don’t forget to enjoy the journey and appreciate the beauty of the handmade process. With every cut and every joint, you’re not just building a loom – you’re crafting a piece of art that will inspire your weaving for years to come.
Frequently Asked Questions
What are the most durable types of wood for a weaving loom that can withstand frequent use?
For a weaving loom that’ll see frequent use, I swear by hardwoods like ash, beech, or hickory. They’re rock-solid, resistant to warping, and can handle the constant tension and motion. Trust me, I’ve made my fair share of looms, and these woods have never let me down.
How do I determine the best wood grain pattern for my loom to ensure a smooth weaving experience?
For a smooth weaving experience, I look for wood grain patterns with a straight or slightly wavy texture. Avoid woods with irregular or knotty patterns, as they can cause fabric to snag. Oak and maple are great options, with their subtle, linear grain that allows yarn to flow effortlessly.
Are there any specific wood species that are best suited for outdoor or indoor looms, considering factors like moisture and temperature?
For outdoor looms, I swear by cedar or cypress – they’re naturally resistant to moisture and insects. Indoors, you can’t go wrong with maple or cherry, they’re stable and less prone to warping with temperature changes.