I still remember the day my wife, a passionate weaver, asked me to build her a tapestry beater. I had no idea where to start, but I was determined to create something that would make her weaving process easier and more enjoyable. As I delved into the world of tapestry beaters, I realized that there’s a common misconception that building one is a daunting task that requires specialized skills. But the truth is, how to build a tapestry beater is a relatively simple process that can be accomplished with basic woodworking skills and the right guidance.
In this article, I’ll share my personal experience and provide you with a step-by-step guide on how to build a tapestry beater from scratch. You’ll learn how to select the right materials, design a functional and beautiful beater, and bring it all together with ease. My goal is to empower you with the knowledge and confidence to create your own tapestry beater, and to demystify the process of building a custom tool for your weaving needs. By the end of this guide, you’ll be equipped with the practical advice and hands-on expertise needed to build a tapestry beater that will take your weaving to the next level.
Table of Contents
Guide Overview: What You'll Need
Total Time: 2 hours 30 minutes
Estimated Cost: $20 – $40
Difficulty Level: Intermediate
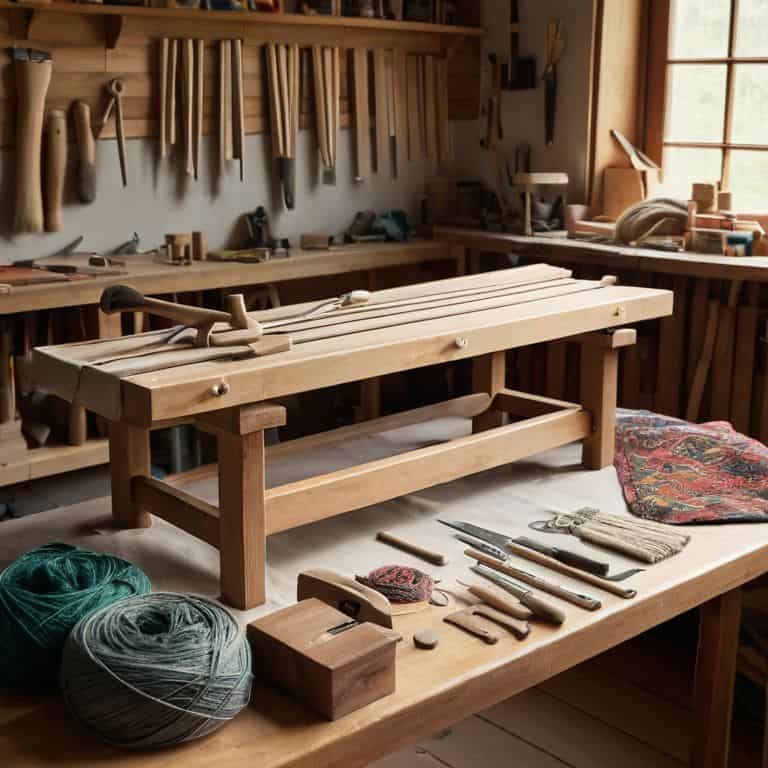
Tools Required
- Table Saw (for cutting lumber)
- Drill Press (for precise drilling)
- Hand Saw (or a coping saw for curved cuts)
- Sander (for smoothing out wood surfaces)
- Tape Measure (for accurate measurements)
- Clamp (for holding pieces together during assembly)
- Hammer (for tapping pieces into place)
- Pencil and Marker (for marking cut lines and assembly guides)
Supplies & Materials
- 2-in x 4-in lumber (for the frame)
- 1-in x 2-in lumber (for the beating surface supports)
- 3/4 inch plywood (for the beating surface)
- Wood Glue (for bonding wood pieces together)
- 2 1/4 inch wood screws (for assembling the frame)
- 1 1/4 inch wood screws (for attaching the beating surface supports)
- Sandpaper (for smoothing out the wood surfaces)
- Wood Finish (optional) (for protecting and enhancing the wood)
Step-by-Step Instructions
- 1. First, let’s start by gathering our materials, which will include a piece of hardwood (I prefer oak or maple for their density and durability), a drill press, a jigsaw or bandsaw, sandpaper, and a wood finish of your choice. Make sure you have a clear workspace, as we’ll be working with power tools and creating some sawdust.
- 2. Next, we need to create a design plan for our tapestry beater. This will depend on the size of your loom and the type of weaving you’ll be doing. I like to sketch out a few different designs before deciding on the one that will work best for my wife’s projects. Consider the length, width, and shape of the beater, as well as the type of handle you want to attach.
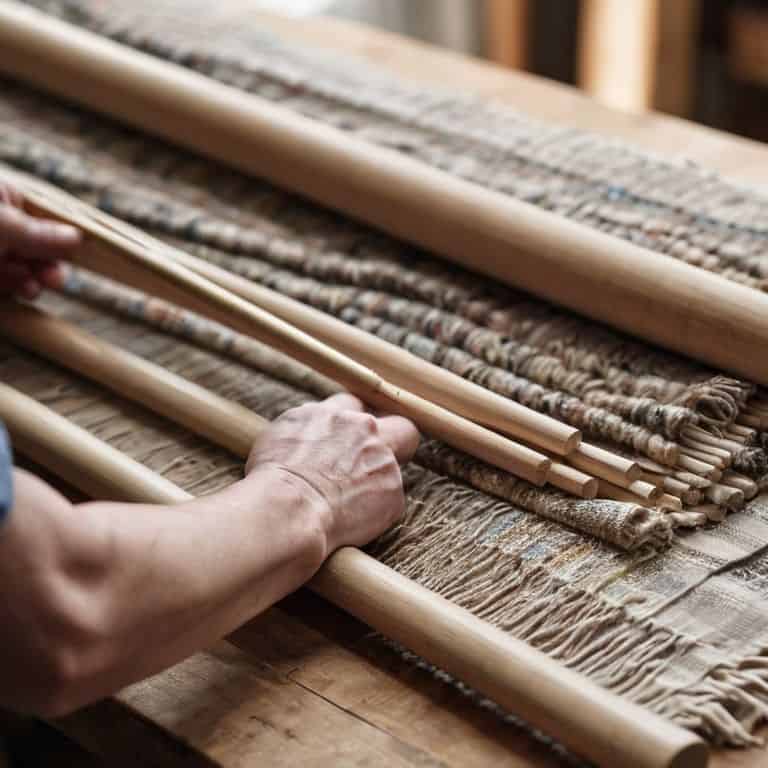
- 3. Now it’s time to cut out our wood pieces. Using your jigsaw or bandsaw, carefully cut along the lines you’ve drawn for your design. If you’re new to woodworking, don’t worry if your cuts aren’t perfect – we can sand down any rough edges later. For my tapestry beater, I cut out two main pieces: the beater head and the handle.
- 4. With our wood pieces cut, it’s time to assemble the beater head. This will involve drilling holes for the screws or nails that will hold everything together. I like to use a drill press for this step, as it gives me more control over the depth and accuracy of my holes. Make sure your holes are evenly spaced and not too close to the edges of the wood.
- 5. Next, we’ll attach the handle to the beater head. This is where your tapestry beater will start to take shape, and you’ll get a sense of how it will feel in your hands. I like to use a strong wood glue and screws for this step, as it provides a solid bond between the handle and the beater head. Apply a small amount of glue to the end of the handle and screw it into place.
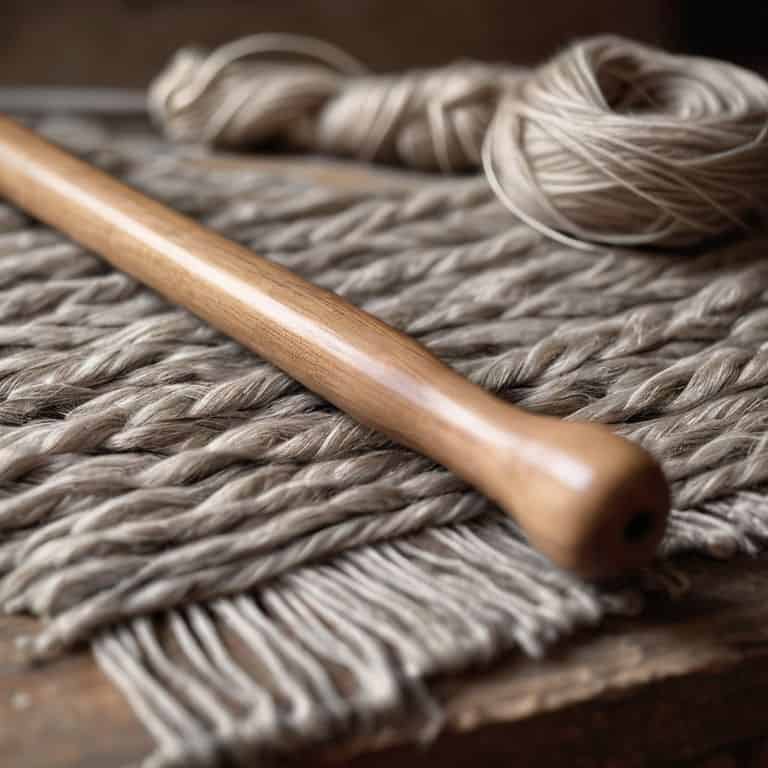
- 6. Now that our tapestry beater is taking shape, it’s time to add a finish. This will protect the wood from wear and tear, and give it a nice sheen. I like to use a natural oil finish, as it brings out the beauty of the wood without adding any harsh chemicals. Apply the finish according to the manufacturer’s instructions, and let it dry completely before moving on to the next step.
- 7. Finally, let’s add any final touches to our tapestry beater. This might include sanding down any rough edges, adding a coat of wax to protect the finish, or attaching a leather strap to the handle for extra grip. I like to take my time with this step, as it’s where the tapestry beater goes from being a functional tool to a beautiful, handmade object. Once you’re happy with your beater, it’s ready to use – and I promise you, the feeling of using a tool you’ve made yourself is unbeatable.
Building Magic With Wood
As I work on handmade weaving tools, I’m always excited to see how a simple piece of wood can become a vital part of the weaving process. When creating a tapestry beater, it’s essential to consider the type of wood you’re using, as it can affect the overall performance of the tool. I prefer using hardwoods like oak or maple, as they provide a nice balance of weight and durability.
When following wooden tapestry beater plans, it’s crucial to pay attention to the grain direction and texture of the wood. A smooth, even texture can make a big difference in how well the beater glides across the warp threads. I also like to add a personal touch to my DIY projects, such as a subtle curve or a decorative handle, to make them truly unique.
In the world of traditional tapestry making techniques, the tools used are just as important as the yarn or thread. By creating your own simple loom accessories, like a tapestry beater, you can add a personal touch to your weaving projects and make them even more special. Whether you’re a beginner looking for DIY weaving projects for beginners or an experienced weaver, building your own tools can be a fun and rewarding experience that enhances your overall weaving experience.
Handmade Weaving Tools for Beginners
As a beginner, it’s essential to start with the right tools. I always recommend handmade weaving tools, not just because I make them, but because they offer a unique connection to the craft. There’s something special about holding a wooden shuttle or a hand-carved spindle that just can’t be replicated with mass-produced tools. Plus, handmade tools often have a level of detail and character that makes them a joy to use. For those just starting out, I suggest starting with the basics: a simple spindle, a shuttle, and a pair of hand-carved weaving needles.
These tools will give you a solid foundation to begin your weaving journey, and who knows, you might just find yourself falling in love with the process of creating your own tools as well. I’ve seen many of my customers start with a simple project and soon find themselves hooked on the process of making their own tools from scratch. It’s a great way to slow down, appreciate the process, and truly connect with the craft of weaving.
Simple Wooden Tapestry Beater Plans Uncovered
Now that we’ve explored the world of handmade weaving tools, let’s dive into the specifics of creating a simple wooden tapestry beater. I’ve found that the key to a great beater lies in its balance and weight – you want it to be substantial enough to pack a punch, but light enough to swing with ease. My favorite designs feature a curved or angled head, which allows for a smooth, even strike.
To get started, you’ll need a few basic materials: a straight-grained wood like ash or oak, some sturdy leather strips, and a handful of brass screws. I like to use a simple mortise and tenon joint to attach the head to the handle, giving the beater a solid, reassuring feel in your hand. With these simple wooden tapestry beater plans, you’ll be well on your way to crafting a tool that will become your new best friend at the loom.
Hammering Out the Details: 5 Key Tips for Building a Tapestry Beater
- Choose the Right Wood: Select a hardwood like oak or maple for your tapestry beater, as they’re dense and can withstand the repeated tapping against the loom
- Measure Twice, Cut Once: Double-check your measurements before cutting any wood to ensure your tapestry beater is the correct size and fits comfortably in your hand
- Add a Personal Touch: Consider adding a handle made from a complementary wood or wrapping the handle in leather for a comfortable grip and a touch of personality
- Safety First: Always wear protective gear like safety glasses and a dust mask when working with power tools, and keep loose clothing tied back to avoid accidents
- Test and Refine: Once your tapestry beater is built, test it out on a scrap piece of fabric to ensure it’s working smoothly and make any necessary adjustments to the weight or balance
Key Takeaways for Your Tapestry Beater Project
By following the step-by-step guide and using the right materials, you can create a functional and beautiful tapestry beater that will elevate your weaving experience
Remember, the type of wood you choose can affect the overall performance and aesthetic of your tapestry beater, so consider the unique characteristics of different wood species when making your selection
With patience, practice, and the right tools, you can not only build a tapestry beater but also develop a deeper appreciation for the craftsmanship and tradition behind handmade weaving tools
Weaving a Legacy, One Tool at a Time

As we conclude this journey of building a tapestry beater from scratch, let’s reflect on the process and how it has empowered us to take our weaving to the next level. From selecting the perfect wood to assembling the final piece, every step has been a testament to the beauty of handmade craftsmanship. We’ve explored the importance of simple, yet effective design, and how it can make all the difference in our weaving experience. By following the steps outlined in this guide, you’ve not only created a functional tool but also gained a deeper understanding of the craftsmanship that goes into making these instruments of art.
Now, as you hold your newly crafted tapestry beater in your hands, remember that the true magic lies not in the tool itself, but in the creative possibilities it unlocks. With every swing of the beater, you’re not just weaving fabric, you’re weaving a story – one of passion, dedication, and the joy of creating something with your own hands. So, go ahead, get weaving, and let the rhythm of the loom be the soundtrack to your most magnificent creations yet.
Frequently Asked Questions
What type of wood is best suited for building a tapestry beater?
For a tapestry beater, I recommend using hardwoods like oak or maple – they’re sturdy and can withstand repeated use. I personally love working with ash, it’s got a nice balance of strength and shock resistance. The smell of freshly sanded ash is a bonus, it’s music to my nose!
How do I ensure that my homemade tapestry beater is properly balanced and weighted?
To ensure your homemade tapestry beater is balanced, pay attention to the weight distribution of the wood and any added components. I like to use a mix of dense hardwoods and carefully placed weights to get the perfect feel. A well-balanced beater will make all the difference in your weaving – trust me, I’ve seen it make a huge impact on my wife’s projects!
Can I customize the size and design of my tapestry beater to fit specific weaving projects or looms?
Absolutely, you can customize the size and design of your tapestry beater to fit your specific needs. I’ve made beaters in various shapes and sizes for my wife’s different looms, and it’s amazing how a tailored tool can enhance your weaving experience. Feel free to experiment with different woods, lengths, and head shapes to create the perfect beater for your project.