As I sit at my loom, surrounded by threads of every color and texture, I’m reminded of the common myth that weaving shapes and circles is a daunting task, reserved for experienced artisans. But I’m here to tell you that’s simply not true. With a few simple techniques and a willingness to experiment, anyone can learn how to weave shapes and circles that add depth and visual interest to their textiles. I still recall my early days as an architect, fascinated by the intersection of structure and texture, which eventually led me to trade my blueprints for a loom.
In this article, I’ll share my personal approach to weaving shapes and circles, one that emphasizes texture and form as the foundation of beautiful woven art. You’ll learn how to build intricate patterns and designs, using threads as your primary building blocks. I’ll guide you through the process, from initial design to finished piece, with practical tips and real-world examples to help you overcome common challenges. By the end of this journey, you’ll be equipped with the skills and confidence to create stunning woven shapes and circles that reflect your unique artistic vision.
Table of Contents
Guide Overview: What You'll Need
Total Time: 3 hours 15 minutes
Estimated Cost: $15 – $30
Difficulty Level: Intermediate
Tools Required
- Loom or a simple frame loom
- Shuttle for weaving
- Scissors for cutting yarn
- Tape measure for measuring 12 inches or 30 centimeters of yarn
- Ruler for drawing shapes with a length of 6 inches or 15 centimeters
Supplies & Materials
- Yarn various colors
- Thread for sewing
- Fabric for backing, cut to 12 inches by 12 inches or 30 centimeters by 30 centimeters
- Cardboard for making a circle template with a diameter of 4 inches or 10 centimeters
Step-by-Step Instructions
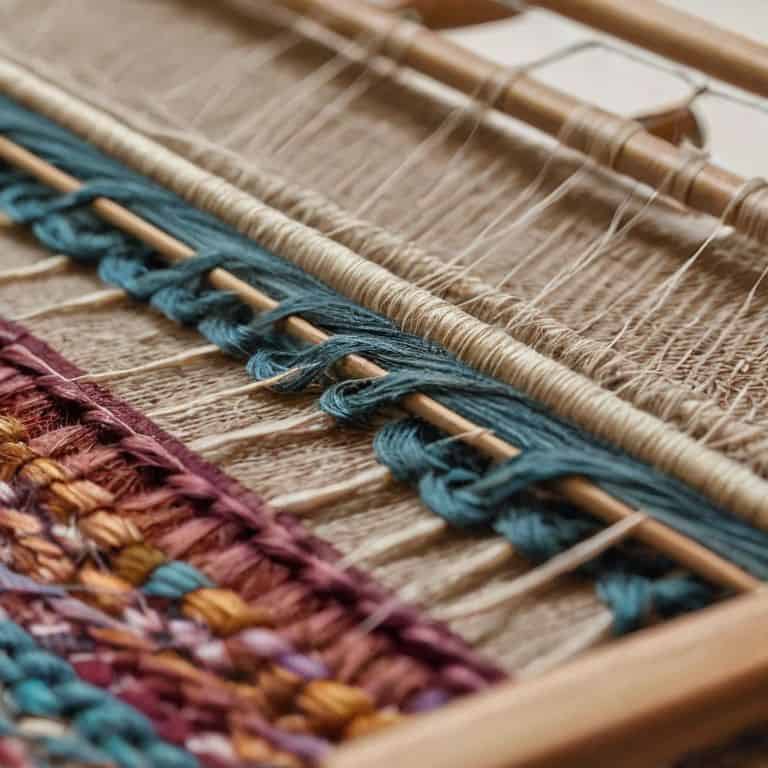
- 1. To begin weaving shapes and circles, start by preparing your loom. This involves setting up the warp threads, which will serve as the foundation for your entire piece. I like to think of this step as laying the groundwork for my miniature architectural wonder. Take your time to ensure the threads are evenly spaced and tightly secured, as this will affect the overall texture and stability of your weave.
- 2. Next, choose the yarns you want to work with, considering factors like color, texture, and weight. As someone who loves collecting natural fibers, I often opt for materials like linen or raw silk, which add a unique tactile quality to my pieces. Select a few complementary colors to create visual interest, and make sure to have a sufficient amount of each yarn to complete your design.
- 3. Now it’s time to create a pattern or design for your shapes and circles. I’m a firm believer in the importance of sketching out ideas on graph paper, much like an architect would plan a building. This helps me visualize the final product and make any necessary adjustments before starting to weave. Consider the scale, proportion, and negative space in your design, as these elements will greatly impact the overall aesthetic.
- 4. With your design in hand, begin weaving your shapes. Start by creating a simple rectangular shape, using a basic over-under pattern. As you become more comfortable, you can experiment with different techniques, such as pick-up sticks or tapestry weaving, to add more complexity to your design. Remember to maintain a consistent tension, as this will help you achieve a crisp, clean texture.
- 5. To weave circles, you’ll need to use a combination of increasing and decreasing stitches. This can be a bit tricky, but with practice, you’ll get the hang of it. I find it helpful to break down the circle into smaller sections, focusing on one area at a time. Use a tapestry needle to weave in ends and keep your work tidy, as you go along.
- 6. As you continue weaving, pay attention to the texture and dimensionality of your piece. You can add depth and interest by incorporating different yarn weights, colors, or weaving techniques. I love experimenting with mixed media elements, like incorporating found objects or natural materials, to give my work an extra layer of meaning.
- 7. Once you’ve completed your weaving, remove it from the loom and trim the edges. This is the moment of truth, when you get to see your creation in all its glory. Take a step back and admire your handiwork, noticing the way the light catches the interplay of textures and colors. You can choose to leave your piece as is, or add a finishing touch, like a simple frame or mounting, to enhance its display.
Mastering Shapes and Circles
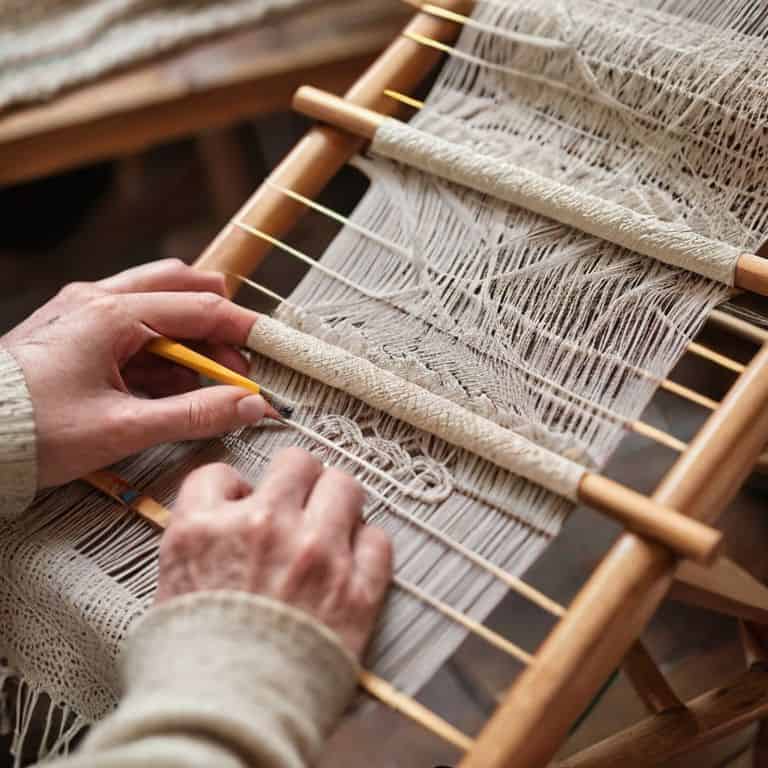
As I delve deeper into the world of weaving, I’ve come to realize that mastering geometric patterns is essential for creating intricate designs. Weaving geometric patterns for beginners can seem daunting, but with practice and patience, it can become second nature. I find that using graph paper to sketch out my designs helps me visualize the final product and make any necessary adjustments before I start weaving.
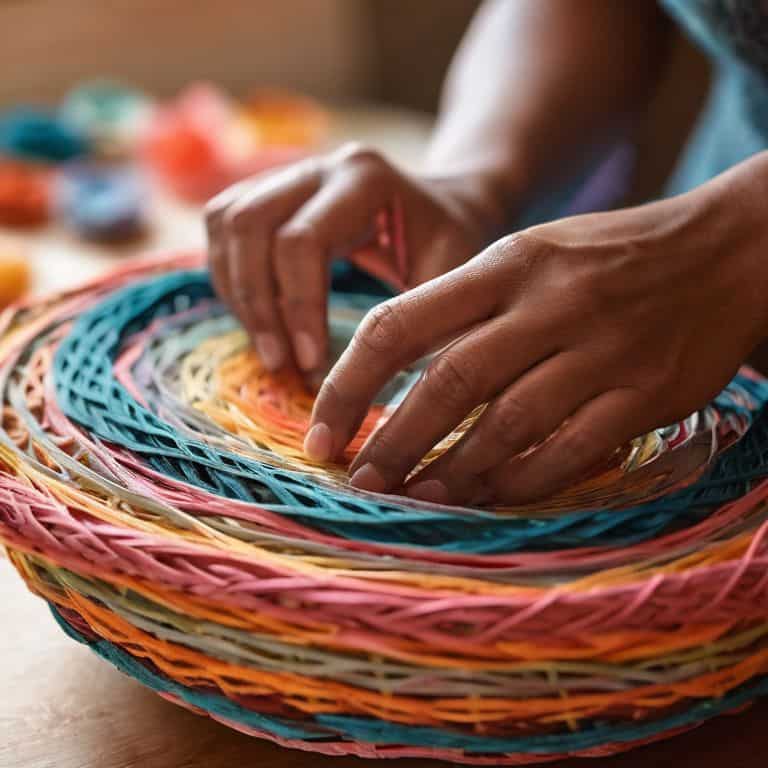
When it comes to circle weaving techniques, I’ve found that using a loom with a circular motion can help create smooth, consistent curves. To achieve this, I often experiment with different yarns and threads, combining various materials and textures to add depth and visual interest to my pieces. Creating curves in tapestry weaving can be a challenge, but with the right tools and techniques, it’s definitely possible to achieve professional-looking results.
As I continue to push the boundaries of what’s possible with weaving, I’ve started to explore advanced weaving methods for complex shapes. This involves experimenting with different loom settings, yarn weights, and weaving patterns to create unique, three-dimensional textures. By combining these techniques with my background in architecture, I’m able to create large-scale woven art installations that showcase the beauty of shape and form.
Circle Weaving Techniques for Beginners
As I delve into circle weaving, I’m reminded of the intricate curves found in modern architecture. To create these circular patterns, I recommend starting with a simple technique: the “pick-up” method. This involves picking up loops of yarn with your shuttle, then gently releasing them to form a circular shape. It’s essential to maintain a consistent tension to achieve a smooth, even curve.
For beginners, I suggest practicing with a small, tight circle to get a feel for the yarn and the shuttle. As you become more comfortable, you can experiment with varying sizes and textures, adding depth and visual interest to your woven piece. Remember, the key to successful circle weaving is patience and gentle manipulation of the yarn – with practice, you’ll be crafting beautiful, architectural circles in no time.
Weaving Geometric Patterns With Yarn
As I delve deeper into the world of geometric patterns, I find myself drawing inspiration from the clean lines and minimalist aesthetic of my architectural background. Weaving geometric patterns with yarn is akin to constructing a intricate blueprint, where each thread and color choice serves as a deliberate design decision. By combining shapes and circles, I can create complex, textured patterns that add depth and visual interest to my woven pieces.
To achieve this, I often experiment with varying yarn weights, colors, and textures, allowing me to build layered, dimensional designs that evoke a sense of movement and energy. The key is to balance simplicity with complexity, ensuring that each element works in harmony to create a cohesive, visually stunning whole.
5 Essential Tips for Architecting Shapes and Circles with Yarn
- Start with a strong foundation: Before you begin weaving shapes and circles, make sure you have a solid understanding of the basic weave structures, such as plain weave and twill, to provide a stable base for your design
- Choose the right yarn for the job: Select yarns with varying textures and weights to add depth and visual interest to your shapes and circles, just as an architect chooses materials for a building
- Play with scale and proportion: Experiment with different sizes and proportions of shapes and circles to create visually appealing compositions, considering the negative space between elements
- Experiment with tension and texture: Varying the tension of your weave and incorporating different textures can add an extra layer of complexity and beauty to your shapes and circles, much like the play of light on a building’s facade
- Don’t be afraid to break the rules: Weaving is an art form, and there’s no one ‘right’ way to create shapes and circles – feel free to push the boundaries of traditional techniques and try new, innovative approaches to create unique and captivating designs
Key Takeaways for Weaving Shapes and Circles
By embracing the architectural aspect of weaving, you can transform simple shapes and circles into intricate, textured designs that elevate your woven pieces to a new level of artistry
Mastering geometric patterns and circle weaving techniques requires patience, practice, and a keen eye for detail, but the results are well worth the effort, as they add a unique dimension to your work
Whether you’re a seasoned weaver or just starting out, experimenting with shapes, circles, and different yarn textures can help you develop your own distinctive style and voice in the world of textile art
The Architect's Perspective
Weaving shapes and circles is not just about threading yarn through a loom, it’s about crafting a tiny universe where every strand is a bridge, every texture a topography, and every pattern a testament to the beauty of intentional design.
Ethan Thorne
Weaving a New Perspective

As we’ve explored the world of weaving shapes and circles, I hope you’ve begun to see the intersection of art and architecture that I’m so passionate about. From mastering geometric patterns to experimenting with circle weaving techniques, the journey is just as important as the destination. Remember, the key to creating stunning woven pieces is to focus on texture and form, and to never be afraid to try new things and make mistakes. By embracing the process and trusting your creative instincts, you’ll be well on your way to crafting unique and beautiful works of art.
As you continue on your weaving journey, I encourage you to keep pushing the boundaries of what’s possible with yarn and thread. Imagine the possibilities when you combine traditional techniques with modern design principles, and don’t be surprised if you find yourself building bridges with thread that connect you to a whole new world of creative expression. Whether you’re a seasoned artist or just starting out, the art of weaving shapes and circles is a powerful tool for self-expression and innovation, and I’m excited to see where it takes you.
Frequently Asked Questions
What are some common mistakes to avoid when weaving shapes and circles to ensure a cohesive and balanced design?
When weaving shapes and circles, I’ve found that common mistakes include uneven tension, inconsistent yarn weight, and neglecting to balance visual elements. To avoid these pitfalls, take your time, and regularly step back to assess your work, making adjustments as needed to maintain harmony and balance in your design.
How can I incorporate different yarn weights and textures to add depth and visual interest to my geometric patterns?
To add depth and visual interest, I experiment with combining different yarn weights and textures. For example, pairing chunky wool with smooth linen or juxtaposing rough hemp with lustrous silk. This contrast creates a rich, layered look, much like the play of light and shadow on a building’s facade.
Are there any specific loom settings or techniques that can help me achieve crisp, sharp edges when weaving shapes and circles?
To achieve crisp edges, I recommend using a tight warp tension and a denser sett on your loom. For shapes, try using a simple over-under pattern, while for circles, experiment with a pick-up stick to maintain even tension. These techniques will help you build sharp, defined forms, much like a well-crafted architectural detail.