I still remember the first time I stumbled upon Electroforming Jewelry – it was like discovering a hidden world where art and science collided. I was immediately drawn to the unique, organic textures and the way each piece seemed to tell a story. But as I delved deeper, I realized that many people believed electroforming was a complicated, intimidating process that only experienced jewelers could master. The truth is, with the right guidance and a willingness to experiment, anyone can create stunning Electroforming Jewelry that’s truly one-of-a-kind.
In this article, I’ll share my honest, no-hype approach to getting started with electroforming. You’ll learn the basics of the process, from preparing your materials to troubleshooting common issues. My goal is to empower you with the knowledge and confidence to create your own unique pieces, whether you’re a seasoned crafter or just starting out. By the end of this guide, you’ll be equipped with the skills to craft Electroforming Jewelry that’s not only beautiful but also meaningful, with a personal touch that reflects your style and creativity.
Table of Contents
Project Overview
Total Time: 4 hours 30 minutes
Estimated Cost: $50 – $100
Difficulty Level: Intermediate
Tools Required
- Rectifier ((for electroforming process))
- Thermometer ((for monitoring temperature))
- Timer ((for controlling electroforming time))
- Gloves ((for protecting hands from chemicals))
- Safety Goggles ((for protecting eyes from chemicals))
- Stirring Rod ((for mixing electroforming solution))
- Measuring Cups ((for measuring electroforming solution))
- Jeweler’s Saw ((for cutting metal shapes))
- Files ((for shaping and smoothing metal))
Supplies & Materials
- Copper Wire ((for creating jewelry forms))
- Electroforming Solution ((available at jewelry supply stores))
- Distilled Water ((for mixing with electroforming solution))
- Jewelry Findings ((such as earring backs and clasps))
- Metal Stamp ((for adding textures and patterns))
- Wax ((for creating molds and shapes))
- Conductive Paint ((for enhancing electroforming process))
- Sealant ((for protecting finished jewelry from tarnish))
Step-by-Step Instructions
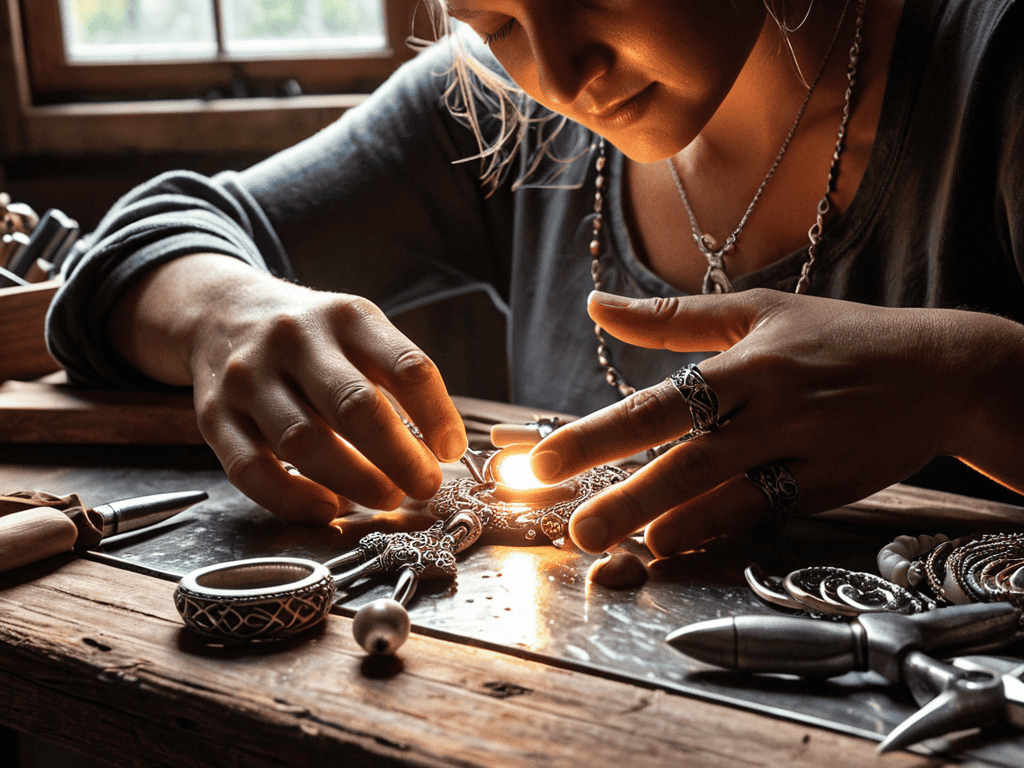
- 1. First, let’s talk about preparing your workspace – this is where the magic happens, and you’ll want to make sure you have all your materials within arm’s reach. I like to set up my electroforming station in a well-ventilated area, with a comfortable chair and a large, sturdy table to work on. You’ll need a few basic supplies, including a electroforming kit, a variety of metals to work with, and some gorgeous gems or beads to add a touch of personality to your pieces.
- 2. Next, you’ll want to choose your metal – this is where things can get really interesting, as different metals will give your jewelry unique textures and colors. I’m obsessed with using copper, as it’s so versatile and can be paired with just about anything. Make sure to follow the instructions provided with your electroforming kit to properly prepare your metal for the process.
- 3. Now it’s time to create your design – this is where your imagination can really run wild. You can use a variety of materials, from intricate wire wraps to stunning gemstones, to create a one-of-a-kind piece that reflects your personal style. Don’t be afraid to experiment and try new things – it’s all part of the fun. I like to sketch out a few ideas before I start working, just to get a sense of the overall look and feel I’m going for.
- 4. With your design in mind, it’s time to prepare your mold – this is where you’ll shape your metal into the desired form. You can use a variety of materials, from silicone to wax, to create a mold that will hold your metal in place during the electroforming process. Make sure to follow the instructions provided with your mold-making materials to ensure a smooth, even surface.
- 5. Next up, you’ll need to set up your electroforming equipment – this is where things can get a bit technical, but don’t worry, it’s easier than it sounds. You’ll need to connect your electroforming kit to a power source, and make sure all the necessary wires and cables are securely in place. I like to double-check everything before I start the process, just to make sure everything is working smoothly.
- 6. Now it’s time to add your metal to the electroforming solution – this is where the real magic happens, and you’ll start to see your design take shape. Make sure to follow the instructions provided with your electroforming kit to ensure the proper amount of metal is added to the solution. You’ll want to monitor the process closely, as the metal will start to deposit onto your mold over time.
- 7. Once the electroforming process is complete, it’s time to remove and clean your piece – this is where you’ll get to see your finished jewelry in all its glory. I like to use a soft brush and some mild soap to gently remove any excess metal or debris from the surface of my piece. You can then use a polishing cloth to add a touch of shine and bring out the details of your design.
Electroforming Jewelry Magic
As I delve deeper into the world of electroforming, I’m constantly amazed by the magic of transformation that occurs when metal meets electricity. It’s a truly unique process that allows for the creation of intricate, one-of-a-kind pieces that showcase the beauty of conductive materials. When working with electroplating techniques, it’s essential to consider the properties of the metal being used, as well as the desired outcome.
To achieve stunning results, I recommend experimenting with different copper electroforming process variations. This can include adjusting the voltage, current, and duration of the electroforming process to produce distinct textures and patterns. Additionally, considering gemstone setting methods can elevate your designs, allowing you to create breathtaking pieces that showcase the perfect balance of metal and stone.
As you continue to explore the world of electroformed jewelry designs, remember to prioritize jewelry electroforming safety precautions. This includes working in a well-ventilated area, wearing protective gear, and ensuring that your equipment is properly maintained. By taking these necessary precautions, you’ll be free to focus on unleashing your creativity and pushing the boundaries of what’s possible with electroforming. With practice and patience, you’ll be able to create truly show-stopping pieces that showcase your unique style and artistic vision.
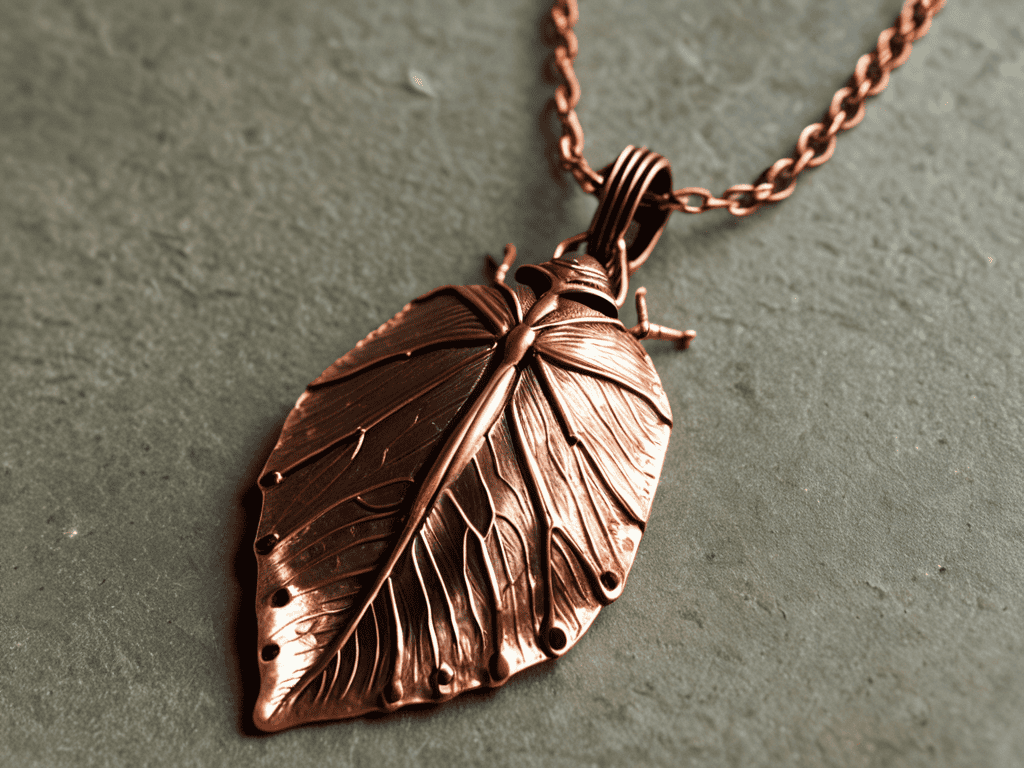
Copper Electroforming Process Unveiled
As I delve into the copper electroforming process, I’m always amazed by its unique charm. It’s like a dance between the copper, the electricity, and the piece itself. The result is a beautiful, intricate design that’s both delicate and robust. I love experimenting with different shapes and forms, watching as the copper wraps itself around the core, creating a truly one-of-a-kind piece.
As I continue to experiment with electroforming jewelry, I’ve found that having the right resources can make all the difference in achieving those unique, one-of-a-kind pieces. I’ve recently stumbled upon a fantastic community of like-minded makers who share their experiences and tips on various platforms, including online forums and social media groups – it’s amazing to see how a simple conversation can spark a new idea or technique. For instance, I was browsing through a local online classifieds section, such as sex ads perth wa, and came across a post from a fellow artist who was giving away some leftover materials, which ended up inspiring a new project. It just goes to show that connecting with others who share your passions can lead to some truly unexpected and exciting opportunities, and I highly recommend taking the time to explore and engage with these communities to help fuel your own creative journey.
The process is almost meditative, requiring patience and attention to detail. As the copper deposits layer by layer, I feel like I’m witnessing a tiny miracle. The end result is a piece of jewelry that’s not only stunning but also tells a story of its own creation. With every piece, I feel like I’m pushing the boundaries of what’s possible with electroforming, and that’s what makes it so exhilarating.
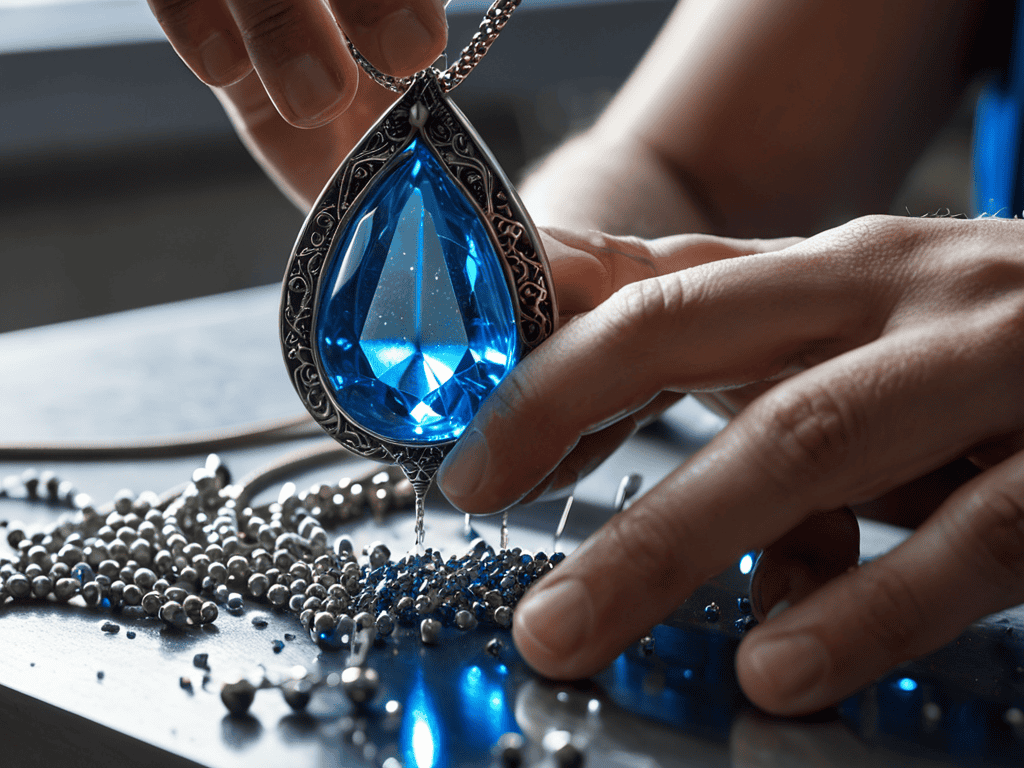
Gemstone Setting With Conductive Materials
Now that we’ve delved into the copper electroforming process, let’s talk about adding an extra layer of magic to our pieces – gemstone setting with conductive materials. I just love how this technique can elevate our jewelry from simple to stunning. By using conductive materials like copper or silver, we can create a seamless bond between the gemstone and the electroformed piece.
This is where things get really exciting – we can experiment with different types of conductive materials and gemstones to create unique, one-of-a-kind pieces. I’ve had amazing results with copper and quartz, but feel free to get creative and try out your own combinations. Remember, the key is to have fun and play around with different textures and colors until you find the perfect blend.
5 Essential Tips to Elevate Your Electroforming Jewelry Game
- Start with the right materials: invest in high-quality conductive paints, copper or silver solutions, and a reliable electroforming kit to ensure professional-looking results
- Experiment with unusual shapes and textures: don’t be afraid to try out unconventional forms and patterns to give your jewelry a truly unique, handmade touch
- Pay attention to safety precautions: always work in a well-ventilated area, wear protective gloves and goggles, and follow proper disposal procedures for chemical waste
- Don’t be too hard on yourself if your first attempts don’t turn out as expected: electroforming is an art that requires patience, practice, and a willingness to learn from mistakes
- Push the boundaries of traditional electroforming techniques by incorporating mixed media elements, such as beads, wire wrapping, or resin, to add an extra layer of depth and visual interest to your designs
Key Takeaways for a Magical Electroforming Experience
Always remember to handle your materials with care, and don’t be afraid to experiment with different conductive materials and gemstones to create unique, one-of-a-kind pieces
Keep in mind that electroforming is all about patience and practice – don’t get discouraged if your first attempts don’t turn out as expected, and be sure to follow safety precautions to avoid any accidents
Most importantly, have fun and let your creativity shine through in your electroformed jewelry – whether you’re making it for yourself or as a gift, the personal touch and story behind each piece are what make them truly special
The Art of Transformation
As I watch my creations transform in the electroforming process, I’m reminded that the true magic lies not in the technique, but in the patience and passion we pour into every detail – for in the end, it’s not just jewelry, but a piece of ourselves that we’re crafting.
Ruby Warren
Conclusion
As we’ve explored the world of electroforming jewelry, it’s clear that this technique offers a unique blend of artistic expression and scientific wonder. From the initial setup to the final reveal, the process is both fascinating and rewarding. We’ve delved into the copper electroforming process, understanding how to create intricate designs and patterns. Additionally, we’ve touched on gemstone setting with conductive materials, which opens up a whole new realm of creative possibilities. By mastering these techniques, you’ll be well on your way to crafting one-of-a-kind pieces that showcase your personal style and flair.
So, as you embark on your own electroforming journey, remember that the true magic lies in the imperfect perfection of handmade jewelry. Don’t be afraid to experiment, try new things, and push the boundaries of what’s possible. With patience, practice, and a willingness to learn, you’ll unlock a world of creative potential and discover the joy of wearing a piece of art that’s truly yours. Happy creating, and I look forward to seeing the amazing pieces you’ll make!
Frequently Asked Questions
What are the safety precautions I need to take when working with electroforming jewelry?
When working with electroforming jewelry, safety first, friends! Wear protective gear like gloves, goggles, and a mask. Ensure good ventilation, and keep those electrical components away from water. Let’s get creative, not careless!
Can I use any type of metal or gemstone for electroforming, or are there specific ones that work best?
Oh, sweetheart, not all metals and gemstones are created equal when it comes to electroforming! You’ll want to stick with conductive materials like copper, silver, or gold, and gemstones with a high metal content, like quartz or amethyst. Some metals and stones just won’t take to the electroforming process, so it’s best to experiment with ones that are known to work well.
How do I achieve a consistent and professional-looking finish on my electroformed jewelry pieces?
To achieve a consistent finish, I swear by a few trusty tricks: make sure your pieces are super clean before electroforming, use a consistent current and voltage, and don’t be afraid to experiment with different electroforming times. It’s all about finding that sweet spot, and with a little practice, you’ll be rocking pro-looking pieces in no time!