I still remember the first time I tried to estimate cord length for a macrame project – it was a disaster! I ended up with a tangled mess of cords and a lot of frustration. But, as I delved deeper into the world of macrame, I realized that estimating cord length is not as complicated as it seems. In fact, learning how to estimate cord length for macrame is a crucial step in creating beautiful, intricate pieces that reflect your personal style. I’ve found that it’s all about experimentation, patience, and a willingness to try new things.
As you read this article, I promise to share my honest, no-hype advice on how to estimate cord length for macrame. You’ll learn how to measure, cut, and adjust your cords to achieve the perfect length for your project. I’ll walk you through my favorite tips and tricks, from using a simple formula to eyeballing your cords like a pro. By the end of this guide, you’ll be confident in your ability to estimate cord length and create stunning macrame pieces that showcase your unique style. So, let’s get started and unlock the secrets of macrame together!
Table of Contents
Guide Overview: What You'll Need
Total Time: 30 minutes to 1 hour
Estimated Cost: $10 – $30
Difficulty Level: Easy
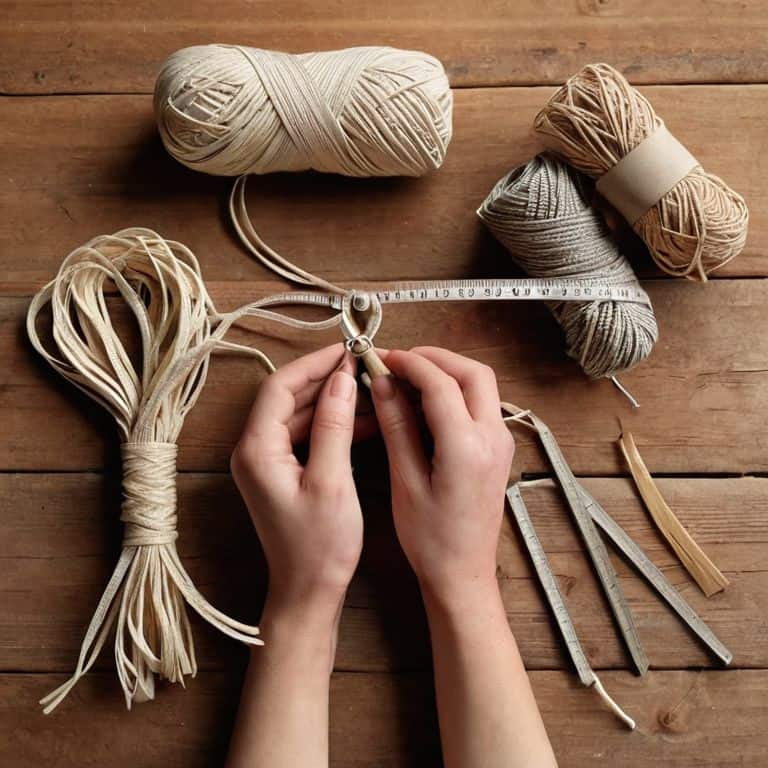
Tools Required
- Measuring Tape (for accurate measurements)
- Ruler (for calculating cord length)
- Pencil and Paper (for recording calculations)
Supplies & Materials
- Cord or Rope (various materials and sizes)
- Macrame Project Pattern (to determine design and complexity)
Step-by-Step Instructions
- 1. First, let’s talk about the importance of estimating cord length in macrame – it’s not just about guessing, it’s about creating a foundation for your entire project. To start, you’ll need to decide on the type of macrame pattern you want to create, as this will greatly impact the amount of cord you’ll need. Take some time to browse through your favorite macrame inspiration sources, and choose a pattern that speaks to you.
- 2. Next, you’ll need to consider the thickness of your cord – this will play a huge role in determining how much cord you’ll need. If you’re using a thicker cord, you’ll need less of it, but if you’re using a thinner cord, you’ll need more. Make a note of the cord thickness you’re using, as this will come in handy later when you’re calculating your cord length.
- 3. Now, let’s get into the nitty-gritty of estimating cord length – it’s all about experimentation and a little bit of math. Start by measuring the length of your project – if you’re making a wall hanging, measure the length of the wall where you want to hang it. If you’re making a plant hanger, measure the length from the ceiling to the top of the plant. Write down this measurement, as it will be your starting point.
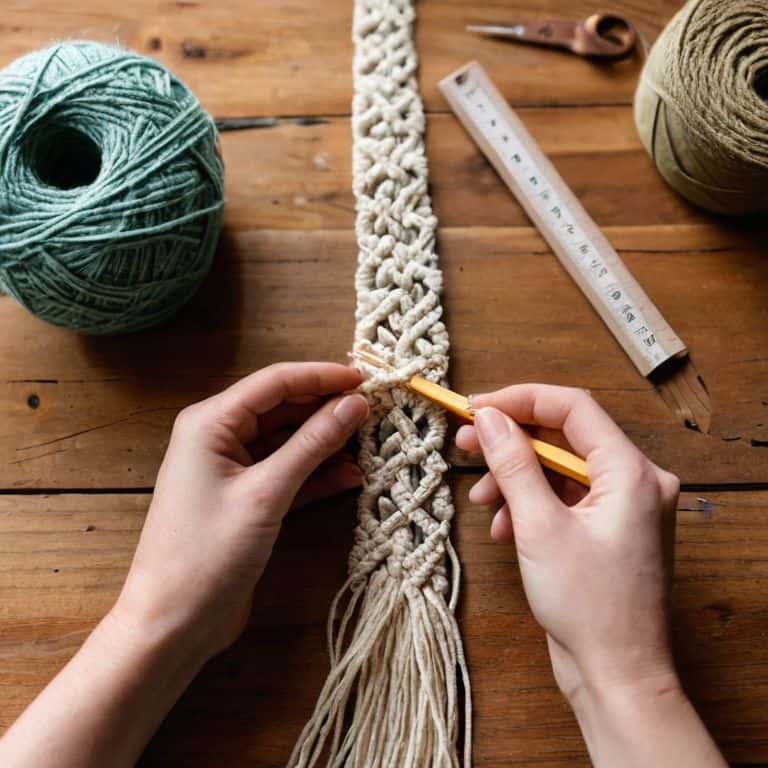
- 4. The next step is to determine the number of knots you’ll need for your project – this will greatly impact the amount of cord you’ll need. If you’re making a simple project with few knots, you’ll need less cord, but if you’re making a complex project with many knots, you’ll need more. Take some time to study your pattern, and make a rough estimate of the number of knots you’ll need.
- 5. Now, it’s time to do a little math – don’t worry, it’s not as painful as it sounds! To estimate your cord length, you’ll need to multiply the length of your project by a cord multiplier, which is usually between 2-4, depending on the complexity of your project. For example, if your project is 10 inches long, and you’re using a cord multiplier of 3, you’ll need 30 inches of cord. Write down this calculation, as it will give you a rough estimate of the cord length you’ll need.
- 6. The next step is to add a little extra cord to your estimate – trust me, you don’t want to run out of cord in the middle of your project! A good rule of thumb is to add 10-20% to your estimated cord length, just to be safe. This will give you some wiggle room in case your project ends up being a little more complex than you anticipated.
- 7. Finally, it’s time to cut your cord – this is the moment of truth! Take your estimated cord length, and add the extra 10-20% you calculated in the previous step. Cut your cord to this length, and you’re ready to start your project. Remember, it’s always better to have a little extra cord, rather than not enough, so don’t be afraid to cut a little extra, just in case.
How to Estimate Cord Length for Macrame
As I dive into the world of macrame, I’ve learned that macrame project planning is just as important as the actual knotting process. One crucial aspect of planning is considering the yarn weight and length. Thicker yarns or those with more texture will require more cord length, while thinner yarns will require less. It’s also essential to think about the desired fringe length calculation, as this can greatly impact the overall length of your project.
When it comes to designing your macrame pattern, it’s helpful to have a rough idea of the knot density calculation. This will give you an idea of how tightly or loosely your knots will be spaced, which in turn affects the overall cord length needed. I like to use a combination of intuition and math to get an estimate, but for those who prefer a more precise approach, there are cord length calculator tools available online.
In my experience, the key to successful macrame project planning is to be flexible and open to adjustments as you go. Don’t be afraid to add or subtract cord length as needed, and remember that it’s all about finding a balance between macrame pattern design and the natural flow of your yarn. By considering these factors and being willing to experiment, you’ll be well on your way to creating stunning macrame pieces that reflect your unique style and creativity.
Fringe Benefits Yarn Weight and Length Hacks
Now that we’ve got the basics of estimating cord length down, let’s talk about the fun stuff – like how yarn weight and length can make or break your macrame project. I like to think of yarn weight as the secret ingredient that can add some extra oomph to my designs. Thicker yarns, for example, can create a more dramatic, chunky look, while thinner yarns are perfect for more delicate pieces.
When it comes to length, I’ve learned that having a few extra feet of yarn on hand can be a total game-changer. Not only does it give me some wiggle room in case my measurements are off, but it also allows me to get creative with my fringe. And let’s be real – who doesn’t love a good fringe? By experimenting with different yarn weights and lengths, you can add some serious personality to your macrame pieces and take them from basic to blingin’ in no time.
Knot Your Average Calculator Macrame Project Planning
Knot Your Average Calculator: Macrame Project Planning
When I’m planning a new macrame project, I don’t just reach for my calculator – I think about the vibe I want to create. Is it a bohemian wall hanging or a delicate plant hanger? The type of knot, cord material, and desired texture all play a role in estimating cord length. I love experimenting with different combinations to see what works best. It’s all about finding that sweet spot where form meets function.
For me, planning a macrame project is like cooking a recipe – you need to consider all the ingredients and how they’ll come together. I take into account the size of the project, the type of knots I’ll be using, and the cord’s thickness. With a little practice, you’ll develop your own intuition for estimating cord length, and your macrame projects will become truly one-of-a-kind.
Macrame Magic: 5 Essential Tips for Estimating Cord Length
- Start with a swatch: Before diving into your macrame project, create a small swatch to test your knotting technique and get a sense of how much cord you’ll need
- Know your yarn weight: Different yarn weights and textures can greatly affect the amount of cord required, so make sure to choose a yarn that suits your project’s needs
- Measure, don’t guess: Take the time to measure your project’s dimensions and calculate your cord length accordingly – it’s better to have a little extra than not enough
- Consider the knots: Different knots and patterns require varying amounts of cord, so factor in the type of knots you’ll be using and adjust your cord length estimate accordingly
- Leave room for fringe: If you’re planning to add a fringe to your macrame project, be sure to add a little extra cord to your estimate to account for the extra length needed
Macrame Magic: 3 Key Takeaways
Experiment with different cord lengths and materials to find what works best for your project, and don’t be afraid to add your own twist to traditional patterns
Consider the weight and texture of your yarn or cord when estimating length, and use hacks like wrapping it around a object or measuring against a similar project to get a more accurate estimate
Remember, estimating cord length for macrame is all about flexibility and creativity, so don’t stress if your calculations aren’t exact – it’s all about the journey, not just the end result
The Macrame Mindset
Estimating cord length for macrame is not just about measuring threads, it’s about understanding the rhythm of your knots and the story you want your piece to tell – it’s where math meets magic!
Ruby Warren
Wrapping Up Your Macrame Masterpiece
As we’ve explored the world of estimating cord length for macrame, I hope you’ve picked up a few essential tips to make your project planning a breeze. From understanding the basics of yarn weight and length to using your intuition and experience to guide your calculations, it’s all about finding a rhythm that works for you. Don’t be afraid to experiment and adjust as you go – after all, that’s what makes handmade items so unique and special. Whether you’re a seasoned pro or just starting out, remember that practice makes perfect, and it’s okay to make mistakes along the way.
So, what’s next? Now that you’re equipped with the knowledge to tackle even the most complex macrame projects, I encourage you to let your creativity shine. Don’t be limited by patterns or tutorials – use them as a starting point and add your own personal touch to make your creations truly one-of-a-kind. Happy knotting, and I’ll see you in the next post, where we’ll dive into even more exciting fiber art adventures!
Frequently Asked Questions
What if I'm using a mix of different yarn weights and textures – how do I estimate cord length then?
Oh girl, that’s where things get really fun! When mixing yarn weights and textures, I like to think of it as a delicious recipe – a little bit of this, a little bit of that. To estimate cord length, try calculating the total yardage of each yarn, then adjust based on the texture and thickness. For example, if you’re combining a bulky yarn with a finer one, you may need to add a bit more length to account for the bulkier yarn’s thickness. It’s all about experimentation and trusting your instincts – don’t be afraid to add a little extra cord length to be safe, and then adjust as you go!
Can I use a standard formula to estimate cord length, or is it really all about experimentation?
Honestly, while there are some general guidelines, I’m a firm believer that estimating cord length is more art than science. You can use a formula as a rough starting point, but it’s really all about feeling the fiber and getting a sense of how it will behave in your project. Experimentation is key, and I always say, it’s better to have a little extra cord than not enough!
How do I account for the type of knot or stitch I'm using when estimating cord length – do some knots use more cord than others?
Ah, great question, friend! Different knots and stitches can totally impact cord length. For example, a lark’s head knot uses way less cord than a wrapped knot. And when it comes to stitches, something like a spiral stitch will use more cord than a simple knot. I like to add a little extra cord to my project, just in case – better safe than sorry, right?